12 easy fall crafts for toddlers with simple supplies

Easy Fall Crafts for Toddlers
Fall is such a lovely time to slow down and enjoy simple, creative activities with little ones. Between colorful leaves, cozy afternoons, and pumpkins everywhere, there are so many opportunities to turn everyday moments into something special.
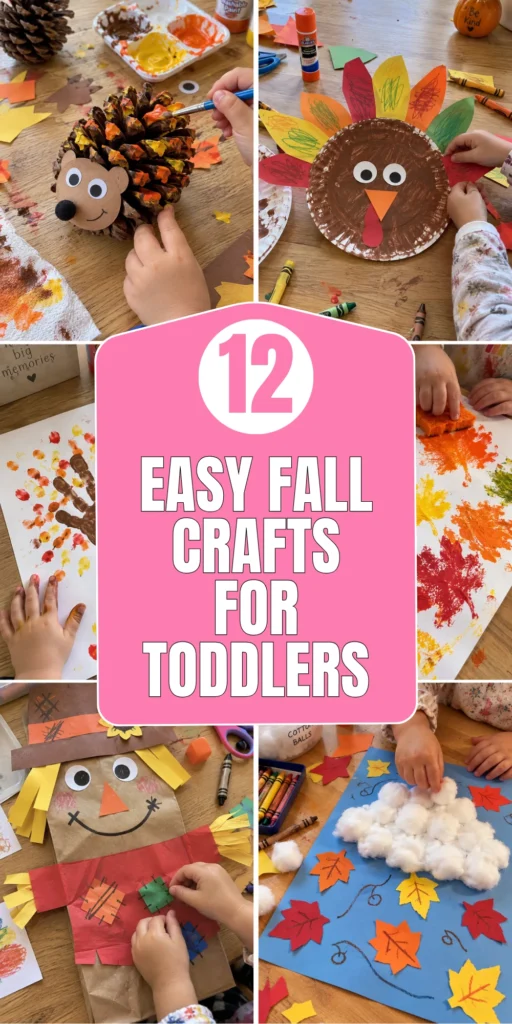
If you are looking for easy fall crafts for toddlers, these ideas are designed to make crafting enjoyable without needing expensive supplies or complicated instructions. From colorful leaf collages to adorable handprint trees, each project uses simple materials and gives toddlers plenty of opportunities to explore colors, textures, and shapes.
The best part? These crafts do not need to look perfect. A little extra paint, crooked paper leaves, and wonderfully messy fingerprints are all part of the fun. With a few practical adjustments, you can make each activity easier for little hands while creating sweet autumn keepsakes to display at home.
1. Colorful Paper Plate Turkey Craft
A cheerful Thanksgiving craft using inexpensive supplies.
Description
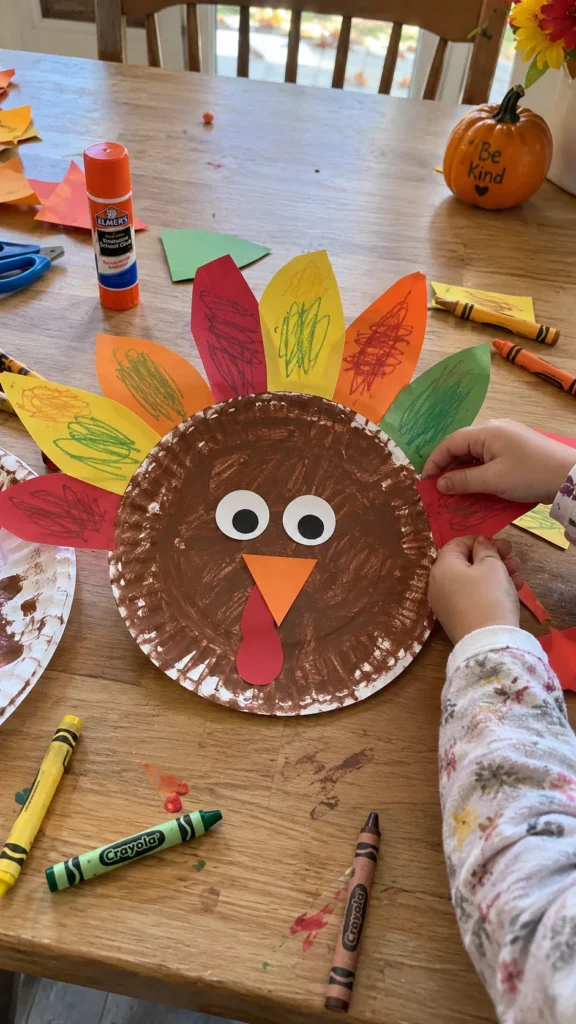
This colorful turkey craft is a fun way to introduce toddlers to fall colors and simple shapes. A paper plate becomes the turkey’s body, while bright paper feathers create a playful tail. It is an easy project for a cozy afternoon, and the finished turkey looks adorable displayed on a refrigerator or classroom wall.
What It Is
A paper plate turkey decorated with colorful feathers, a simple face, and a little orange beak.
Supplies and Budget
Paper plate, colored construction paper, washable paint or crayons, glue stick, child-safe scissors, and a black marker. Estimated cost: $3–$6 using basic supplies.
Tutorial how to make:
- Let your toddler color or paint the paper plate brown.
- Cut large feather shapes from red, orange, yellow, and green paper.
- Help your child glue the feathers around the back of the plate.
- Add large paper eyes, an orange beak, and a red wattle.
- Allow the glue to dry completely before displaying.
DIY Tip
Cut the feathers before inviting your toddler to the table. Large paper shapes are easier for little hands to handle, and a glue stick usually creates less mess than liquid glue.
2. Fall Leaf Sponge Painting
Description
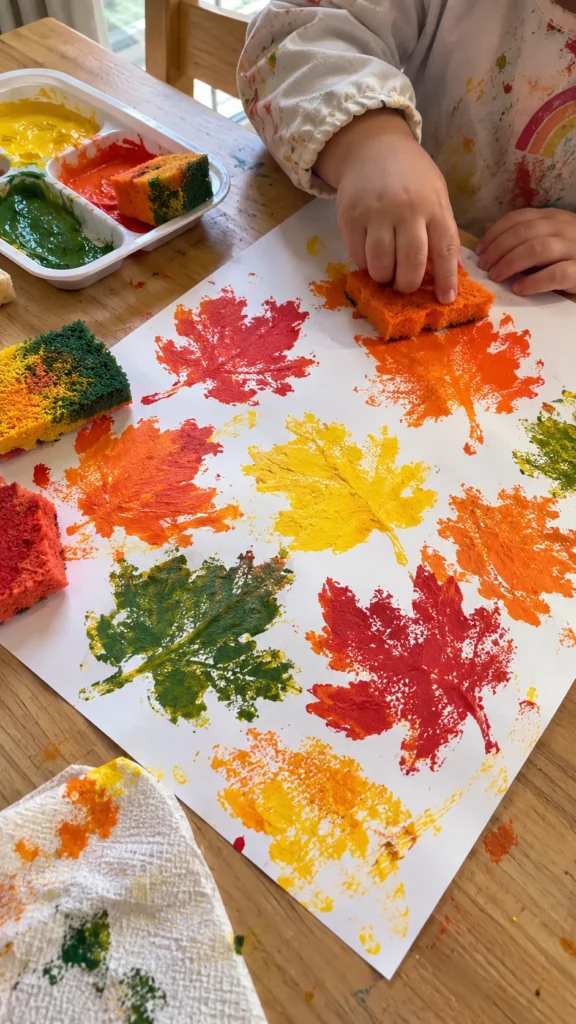
Turn ordinary kitchen sponges into colorful fall leaves with this easy painting activity. Toddlers can dab orange, red, and yellow paint onto paper, creating beautiful leaf-inspired patterns without needing to control a paintbrush. The overlapping colors give each print a lovely autumn appearance, even when the shapes are uneven.
What It Is
A simple painting activity that uses sponge shapes to create colorful autumn leaf prints.
Supplies and Budget
Washable tempera paint, clean kitchen sponges, white cardstock, a washable tray, and child-safe scissors. Estimated cost: $3–$7.
Tutorial how to make:
- Cut sponges into large leaf-like shapes with rounded edges.
- Pour small amounts of fall-colored paint onto a tray.
- Show your toddler how to press a sponge into the paint.
- Stamp the sponge onto cardstock, lifting it straight up.
- Repeat with different colors and let the artwork dry flat.
DIY Tip
Use one sponge for each paint color. This keeps the colors brighter and prevents the paint from turning into a muddy brown mixture.
3. Handprint Autumn Tree
Description
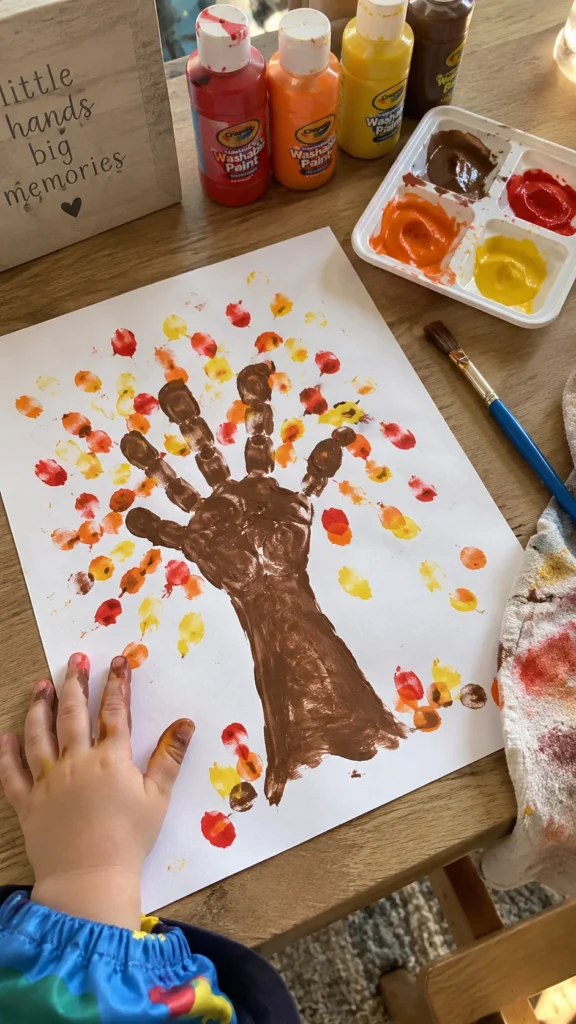
Create a sweet fall keepsake using your toddler’s handprint as the tree trunk and branches. Small fingerprints become colorful autumn leaves, making this craft both personal and playful. It is especially lovely to make every year because you can compare how your child’s little handprint changes as they grow.
What It Is
A handmade autumn tree picture featuring a handprint trunk and colorful fingerprint leaves.
Supplies and Budget
White cardstock, washable brown, red, yellow, and orange paint, a paintbrush, and a damp cloth. Estimated cost: $3–$6.
Tutorial how to make:
- Paint your toddler’s palm and fingers with brown paint.
- Press the hand onto cardstock with fingers spread apart.
- Lift carefully to create the tree trunk and branches.
- Let the brown paint dry before adding colorful fingerprints.
- Add fingerprints around the branches and scatter a few below.
DIY Tip
Use a lightly dampened sponge to apply paint to the hand. A thick layer can blur the fingers together, so a thin, even coat gives a clearer print.
4. Pumpkin Seed Mosaic
Description
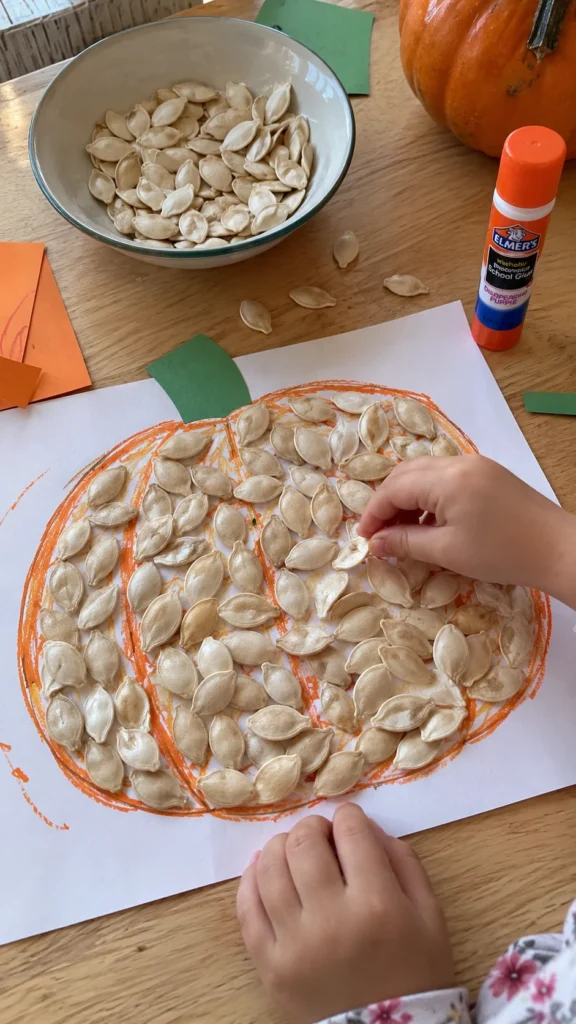
Give leftover pumpkin seeds a second life with this simple autumn mosaic. Toddlers can fill a large pumpkin outline with natural cream-colored seeds, exploring texture and practicing hand-eye coordination. The finished artwork has a lovely handmade look, with little gaps and uneven seed placement adding to its charm.
What It Is
A pumpkin-shaped collage made with dried pumpkin seeds attached to cardstock.
Supplies and Budget
White cardstock, dried pumpkin seeds, washable glue, orange construction paper, and a green paper stem. Estimated cost: $2–$5.
Tutorial how to make:
- Draw a large pumpkin outline on sturdy cardstock.
- Prepare clean, fully dried seeds in a shallow tray.
- Spread a thin layer of glue inside the pumpkin shape.
- Help your toddler place seeds over the glued area.
- Add a paper stem and let the mosaic dry flat.
DIY Tip
For younger toddlers, use large paper seed shapes instead of real seeds. Small seeds can be choking hazards, especially for children who still put objects in their mouths.
5. Paper Leaf Garland
Description
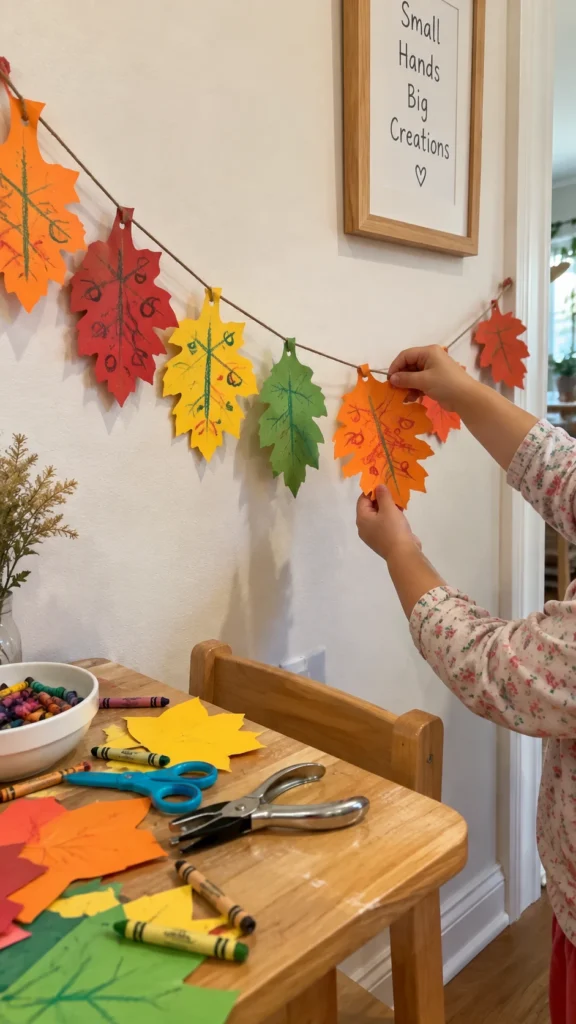
Bring a little autumn color into your home with a homemade paper leaf garland. Toddlers can decorate large paper leaves with crayons, stickers, and simple patterns before you help assemble them. It is an easy craft for practicing colors and making seasonal decorations that can be reused throughout the fall.
What It Is
A colorful string garland made from decorated construction-paper leaves.
Supplies and Budget
Construction paper, crayons, child-safe scissors, string, a hole punch, and stickers. Estimated cost: $3–$6.
Tutorial how to make:
- Draw several large leaf shapes on colorful construction paper.
- Cut out the leaves and let your toddler decorate them.
- Add crayon lines, dots, circles, or stickers.
- Punch a hole near the top of each leaf.
- Thread the leaves onto string and hang the garland.
DIY Tip
Choose thicker construction paper rather than thin printer paper. It holds its shape better, especially when toddlers use crayons or stickers with enthusiastic little hands.
6. Apple Printing Art
Description
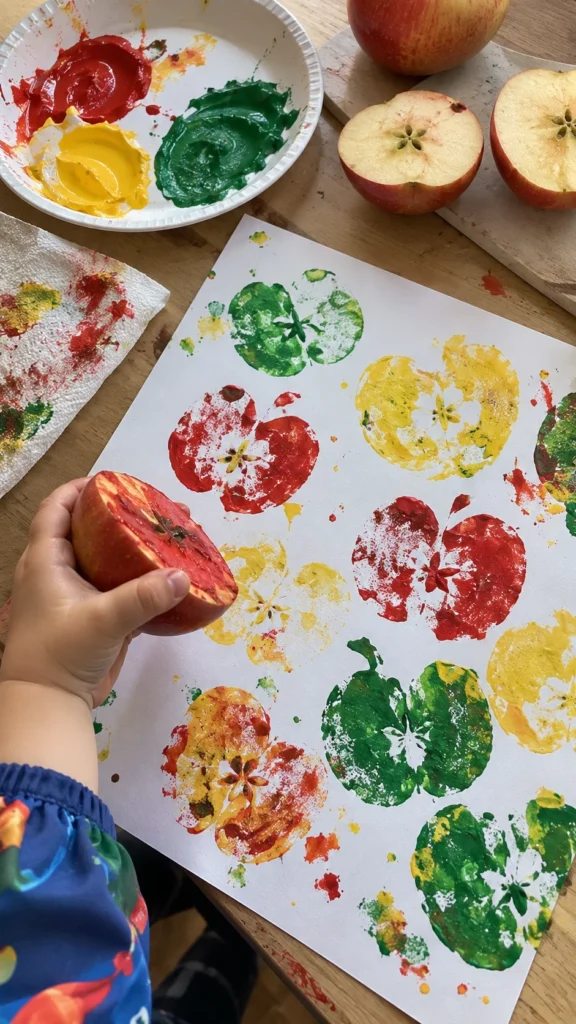
Apple printing is a lovely way to explore autumn colors through a familiar fruit. The cut surface creates interesting patterns, while red, green, and yellow paint gives each print a cheerful seasonal look. Toddlers can make a whole page of apples, turning a simple painting session into colorful refrigerator artwork.
What It Is
A fruit-printing activity that uses apple halves to stamp colorful shapes onto paper.
Supplies and Budget
Apples, washable tempera paint, white paper, a shallow tray, and a washable table covering. Estimated cost: $3–$7.
Tutorial how to make:
- Cut an apple in half across its middle to reveal the star-shaped seed pattern.
- Pat the cut surface dry with a paper towel.
- Pour a small amount of paint onto a tray.
- Help your toddler press the apple into the paint and stamp it onto paper.
- Repeat with different colors and leave the artwork to dry.
DIY Tip
Use firm apples and blot away excess juice before painting. Too much moisture can make the paint watery and cause the paper to wrinkle.
7. Tissue Paper Fall Tree
Description
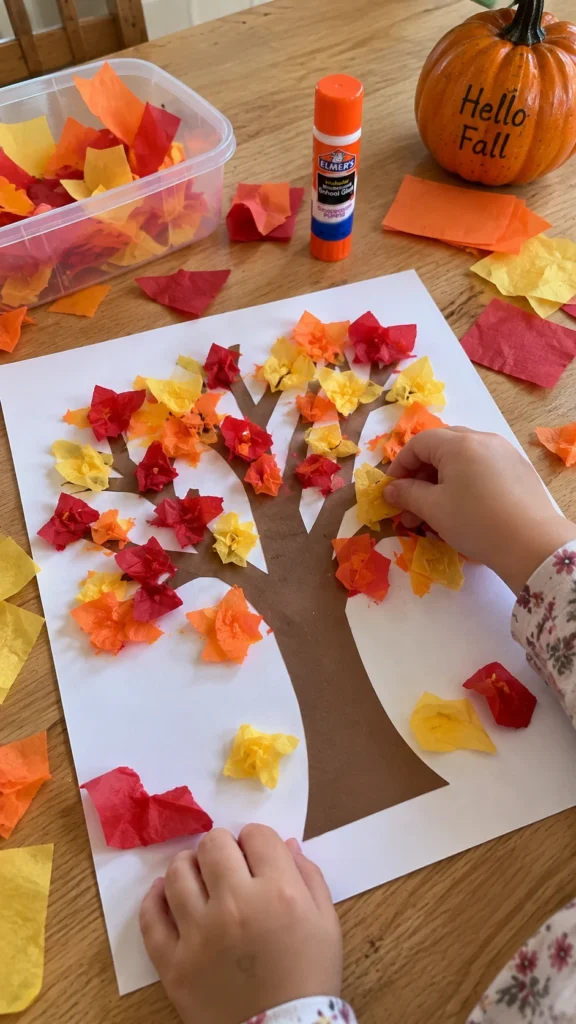
This colorful fall tree craft combines a simple paper trunk with little pieces of tissue paper. Toddlers can scrunch, tear, and stick the colorful pieces onto the branches, creating a textured tree filled with autumn leaves. It is a wonderful option for children who enjoy hands-on activities without needing precise painting skills.
What It Is
A textured autumn tree collage decorated with red, orange, and yellow tissue paper.
Supplies and Budget
White cardstock, brown construction paper, colored tissue paper, washable glue, and a glue brush. Estimated cost: $3–$6.
Tutorial how to make:
- Draw a simple tree trunk and branches on cardstock.
- Tear tissue paper into large pieces in autumn colors.
- Apply a thin layer of glue around the branches.
- Let your toddler scrunch or place tissue paper onto the glued areas.
- Add a few paper leaves beneath the tree and allow everything to dry.
DIY Tip
Prepare tissue paper pieces in advance and avoid tiny scraps. Larger pieces are easier to pick up, while a thin layer of glue prevents the paper from becoming overly wet.
8. Fall Nature Leaf Collage
Description
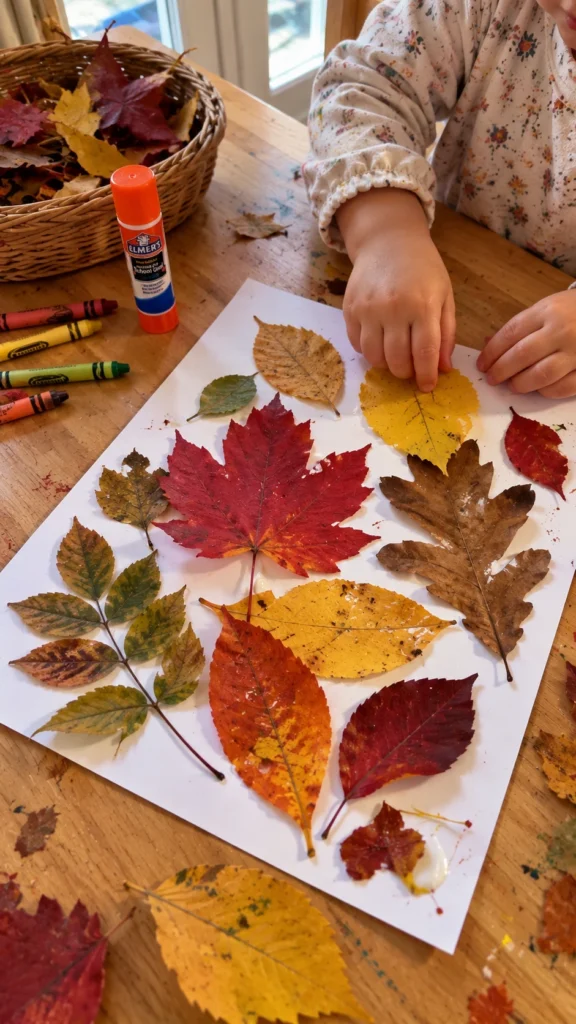
A little outdoor leaf hunt can become a wonderful autumn art activity. Toddlers can collect fallen leaves in different colors and sizes before arranging them into a simple collage. This craft brings nature into the home and encourages children to notice the changing shapes, colors, and textures of the season.
What It Is
A nature-inspired collage made with collected autumn leaves and sturdy paper.
Supplies and Budget
Fallen leaves, cardstock, washable glue, crayons, and a shallow collection basket. Estimated cost: $0–$4.
Tutorial how to make:
- Collect a few clean, fallen leaves during a short outdoor walk.
- Choose dry leaves that are not moldy or crumbling.
- Arrange the leaves on cardstock before adding glue.
- Help your toddler glue the leaves onto the paper.
- Add crayon drawings around the leaves and let the collage dry.
DIY Tip
Avoid soaking the leaves in glue because they may curl or become brittle as they dry. A few small glue dots beneath each leaf are usually enough to hold it in place.
9. Paper Bag Scarecrow
Description
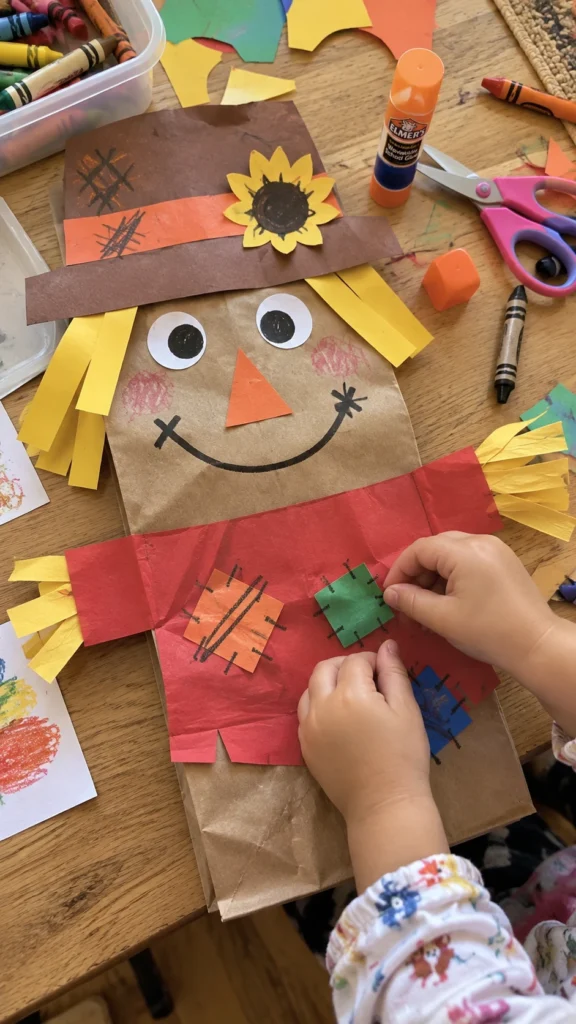
Turn a simple paper bag into a friendly fall scarecrow with colorful paper, crayons, and a little imagination. Toddlers can decorate the face, choose the hat color, and add a paper shirt. It is a playful craft that encourages creativity without requiring complicated cutting or detailed drawing.
What It Is
A handmade scarecrow puppet or decoration created from a paper lunch bag.
Supplies and Budget
Paper lunch bag, construction paper, crayons, washable glue, and child-safe scissors. Estimated cost: $3–$6.
Tutorial how to make:
- Place the paper bag with its folded bottom facing upward.
- Draw two large eyes, a simple nose, and a smiling mouth.
- Cut a large paper hat and glue it onto the folded bottom.
- Add paper hair, a shirt, and colorful patches.
- Let the decoration dry before using it as a puppet.
DIY Tip
Keep the decorations lightweight. Heavy paper pieces can make the bag awkward to hold, especially when your toddler wants to use the scarecrow as a puppet.
10. Fall Leaf Sun Catcher
Description
Make a bright autumn decoration with colorful tissue paper and a simple leaf-shaped frame. Toddlers can fill the open space with red, orange, and yellow pieces, creating a beautiful stained-glass effect when sunlight shines through. It is an easy craft that adds seasonal color to a sunny window.
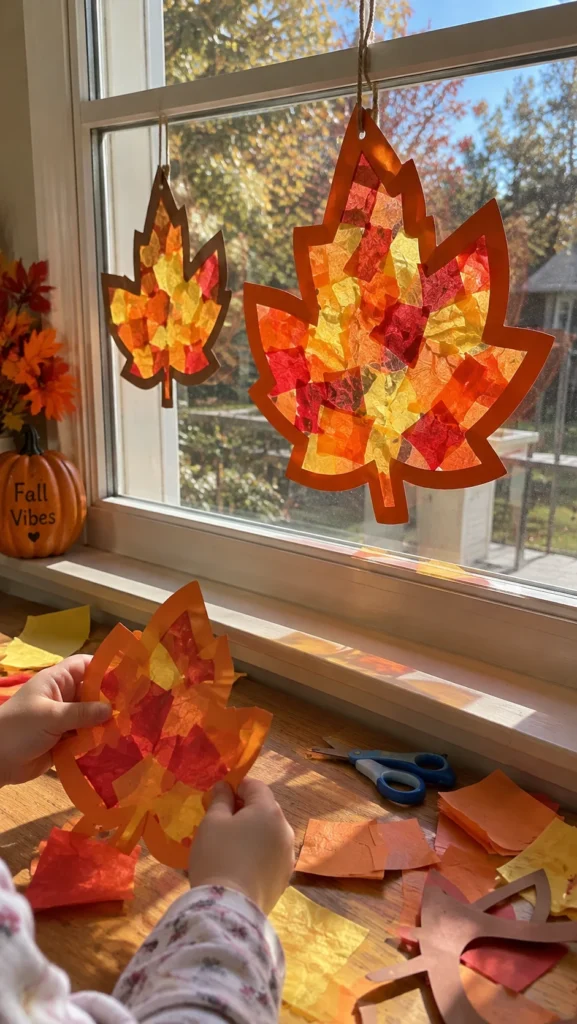
What It Is
A translucent paper leaf decoration that catches natural light.
Supplies and Budget
Clear contact paper, colored tissue paper, construction paper, child-safe scissors, and tape. Estimated cost: $4–$8.
Tutorial how to make:
- Cut two matching large leaf frames from construction paper.
- Place one frame onto a sheet of contact paper.
- Let your toddler stick tissue paper pieces inside the opening.
- Cover with the second frame and press gently.
- Trim the edges and hang the finished leaf in a sunny window.
DIY Tip
Prepare the leaf frame and contact paper before beginning. Keep the sticky surface covered until your toddler is ready, because exposed contact paper can quickly collect dust and stray scraps.
11. Cotton Ball Autumn Cloud
Description
This cozy fall craft combines soft cotton balls with a simple autumn sky. Toddlers can glue fluffy clouds onto blue cardstock and add paper leaves drifting through the air. It is a gentle, tactile activity that encourages children to explore different textures while creating a cheerful seasonal picture.
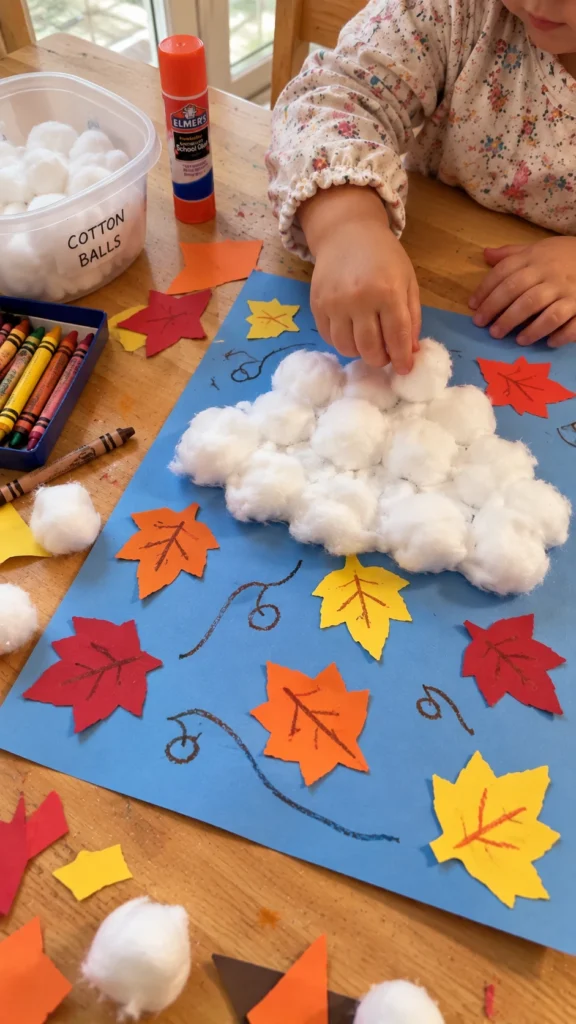
What It Is
A mixed-media autumn sky collage featuring cotton clouds and colorful paper leaves.
Supplies and Budget
Blue cardstock, cotton balls, washable glue, colored construction paper, and crayons. Estimated cost: $3–$6.
Tutorial how to make:
- Draw a simple cloud outline on blue cardstock.
- Spread a thin layer of glue inside the cloud.
- Help your toddler press cotton balls onto the glued area.
- Add large paper leaves in red, orange, and yellow.
- Draw a few curved lines to show the leaves floating through the sky.
DIY Tip
Pull the cotton balls apart slightly before using them. Fluffier pieces cover more space, and a small amount of glue is usually enough to hold them in place.
12. Painted Pinecone Hedgehog
Description
Create a cute autumn woodland decoration using a fallen pinecone and a simple paper face. Toddlers can paint the pinecone in warm fall colors before helping add the hedgehog’s eyes and nose. Its natural texture makes this craft especially interesting for little ones who enjoy exploring objects from outdoors.
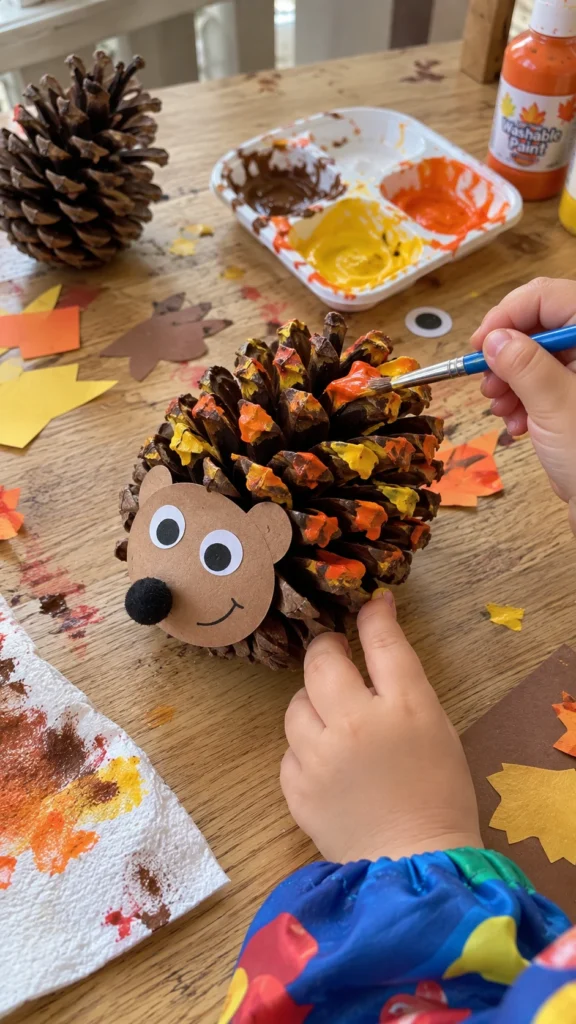
What It Is
A small woodland animal decoration made from a pinecone and a paper hedgehog face.
Supplies and Budget
A clean, dry pinecone, washable paint, cardstock, glue, and a paintbrush. Estimated cost: $2–$5.
Tutorial how to make:
- Choose a clean, dry pinecone without sharp or loose pieces.
- Let your toddler dab washable paint onto the scales.
- Draw a simple hedgehog face on cardstock.
- Cut out the face and attach it to the wider end of the pinecone.
- Add large paper eyes and a nose, then leave the craft to dry.
DIY Tip
Use a large pinecone with sturdy scales and supervise closely. For younger toddlers, a cardboard hedgehog with paper spikes is a safer alternative to small natural materials.
FAQ SECTION
What are the easiest fall crafts for toddlers?
Paper plate turkeys, sponge painting, and handprint trees are excellent choices. They use simple supplies, require little preparation, and allow toddlers to participate without needing precise cutting or drawing skills.
What age can toddlers start doing fall crafts?
Many children can begin exploring simple crafts around 18 months, with close adult supervision. Choose activities based on your child’s abilities rather than age alone, and avoid small materials for children who still put objects in their mouths.
How can I make fall crafts less messy?
Cover the table, use washable paint, prepare materials before inviting your toddler, and offer small amounts of glue and paint at a time. Keeping a damp cloth nearby makes cleanup much easier.
What supplies should I keep for toddler crafts?
Construction paper, cardstock, washable paint, crayons, glue sticks, child-safe scissors, cotton balls, and large stickers are useful basics. With these supplies, you can create many seasonal crafts without buying a new kit for every activity.
How do I preserve my toddler’s fall artwork?
Allow paint and glue to dry completely before storing the artwork. Keep flat paper crafts in protective sleeves or a folder, and photograph larger or fragile creations before the season ends.
RELATED CONTENT
CLOSING
I hope these 12 easy fall crafts for toddlers inspire you to spend a little more time creating, exploring, and enjoying the season with your little ones. You do not need a perfectly organized craft room or expensive supplies to make something memorable. Sometimes, a paper plate, a handful of colorful leaves, and a little washable paint are all you need.
My favorite part of crafting with toddlers is seeing how differently each child approaches the same activity. Every little fingerprint, crooked feather, and colorful scribble becomes part of a memory worth keeping.
Start with whichever craft catches your toddler’s attention, take your time, and enjoy the process together. I would love to hear which project your family tries first and how your little artist makes it their own.