
12 Animal Cell Project Ideas Models for Fun Science Projects

Animal Cell Project Ideas Models
Animal cell projects are a great way to turn a biology lesson into something students can actually see and touch. I especially like 3D models because building the nucleus, mitochondria, cell membrane, and other organelles makes it much easier to understand where everything belongs. The best models do not need to be expensive or professionally perfect. In fact, simple materials often work better because they are easier to shape, label, and adjust.

When making an animal cell model, the most important thing is accuracy before decoration. Every organelle should be clearly represented and labeled, and the model should have enough space between parts that someone looking at it can understand the structure quickly. The ideas below use materials such as cardboard, clay, foam, recycled containers, gelatin, and craft supplies, with practical tips for making the final model sturdy enough to transport to school.
1. Clay Animal Cell Model
Description
A clay animal cell model is one of the easiest ways to create clearly recognizable organelles because clay can be shaped into almost anything. I recommend using different colors for each structure rather than trying to make everything anatomically detailed. The biggest mistake is overcrowding the model, so leave visible space between organelles and keep the nucleus large enough to identify immediately.
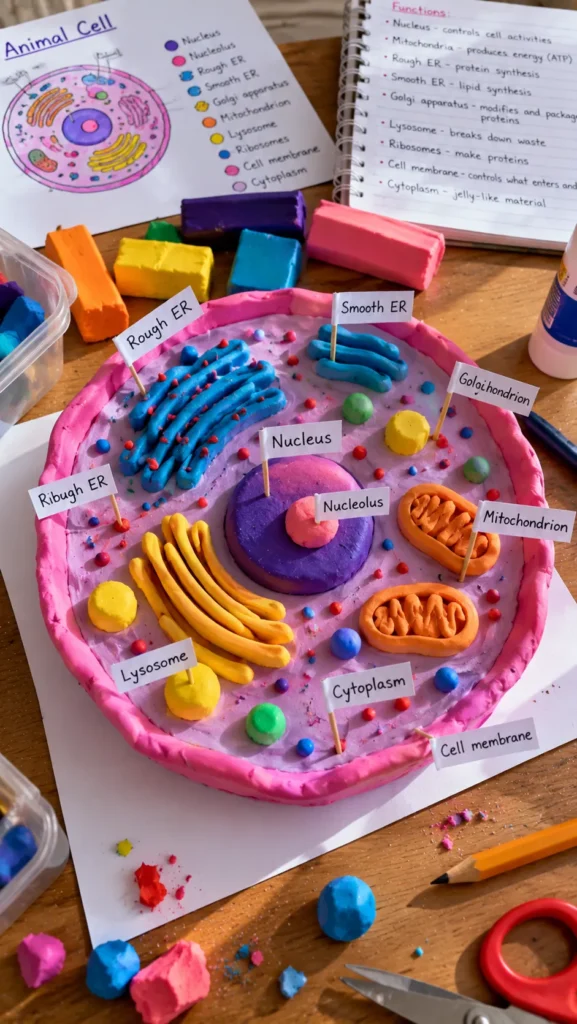
What It Is
A colorful three-dimensional animal cell made from modeling clay, with separate clay shapes representing the major organelles.
Supplies and Budget
- Modeling clay in several colors
- Cardboard or foam base
- Toothpicks
- Small paper labels
- Glue
Estimated budget: $8–$18.
Tutorial how to make:
Cover a round cardboard base with clay to represent the cytoplasm. Shape a larger sphere for the nucleus, then create smaller pieces for mitochondria, endoplasmic reticulum, Golgi apparatus, lysosomes, ribosomes, and centrioles. Arrange them carefully and add labels using toothpicks.
DIY Tip
Make the organelles slightly different in size and shape, but keep the nucleus noticeably larger. If everything is the same size, the model becomes difficult to understand.
2. Paper Plate Animal Cell
Description
A paper plate provides a simple, inexpensive base for a flat animal cell model. This option works particularly well when the project needs to fit inside a backpack or folder. I like using layered paper shapes and textured materials to give the model some dimension without making it too bulky.

What It Is
A flat or lightly layered animal cell model built on a paper plate.
Supplies and Budget
- Paper plate
- Colored construction paper
- Glue
- Scissors
- Markers
- Small craft materials
Estimated budget: $4–$10.
Tutorial how to make:
Use the plate as the cell boundary and add a large paper circle for the nucleus. Cut smaller shapes for mitochondria, Golgi apparatus, endoplasmic reticulum, and lysosomes. Glue each organelle into position and label them with small paper tags.
DIY Tip
Do not place all organelles around the outer edge. Leave some clear space between the nucleus and cell membrane so the model does not look like a crowded diagram.
3. Foam Ball Animal Cell
Description
A foam ball creates a strong three-dimensional animal cell that can be cut open to reveal the internal structures. It is especially useful when you want the model to resemble an actual cell rather than a flat diagram. A sharp cutting tool should always be handled by an adult, and the finished pieces should be secured carefully.
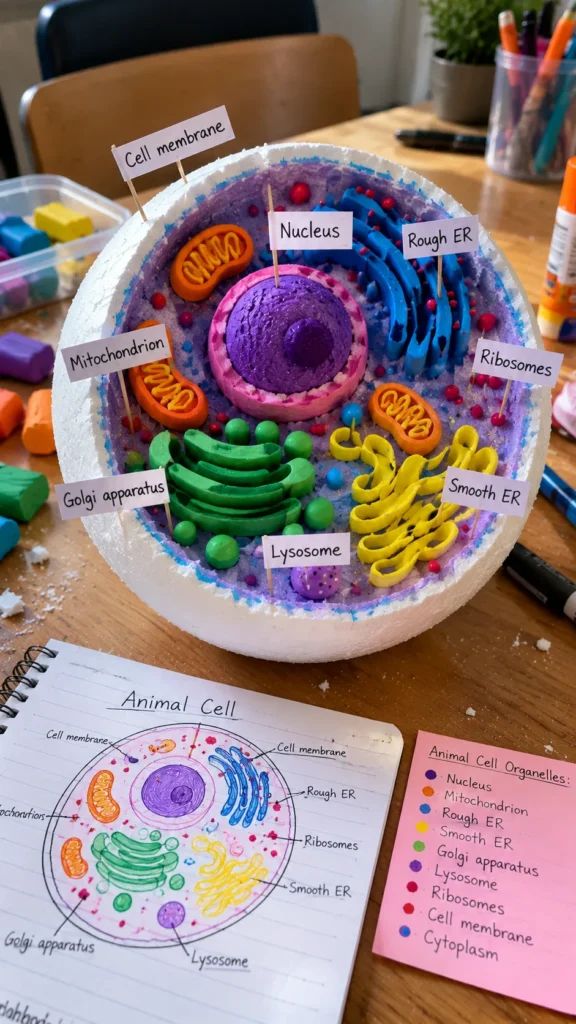
What It Is
A large spherical foam animal cell with the inside painted and filled with three-dimensional organelles.
Supplies and Budget
- Large foam ball
- Acrylic or craft paint
- Modeling clay
- Craft knife
- Toothpicks
- Labels
Estimated budget: $10–$25.
Tutorial how to make:
Have an adult cut a section from the foam ball to expose the interior. Paint the outside and inside different shades if desired. Add clay organelles to the exposed surface and secure them with small amounts of glue. Label each part using toothpicks and paper tags.
DIY Tip
Do not make the opening too small. A wider cut makes it much easier to place the organelles and allows the viewer to see the model clearly.
4. Edible Gelatin Animal Cell
Description
A gelatin cell model is a fun option when you want the project to feel different from traditional cardboard or clay models. The gelatin acts as the cytoplasm while colorful candies can represent organelles. It requires refrigeration and careful transportation, but the visual effect is memorable and makes the basic cell structure easy to discuss.
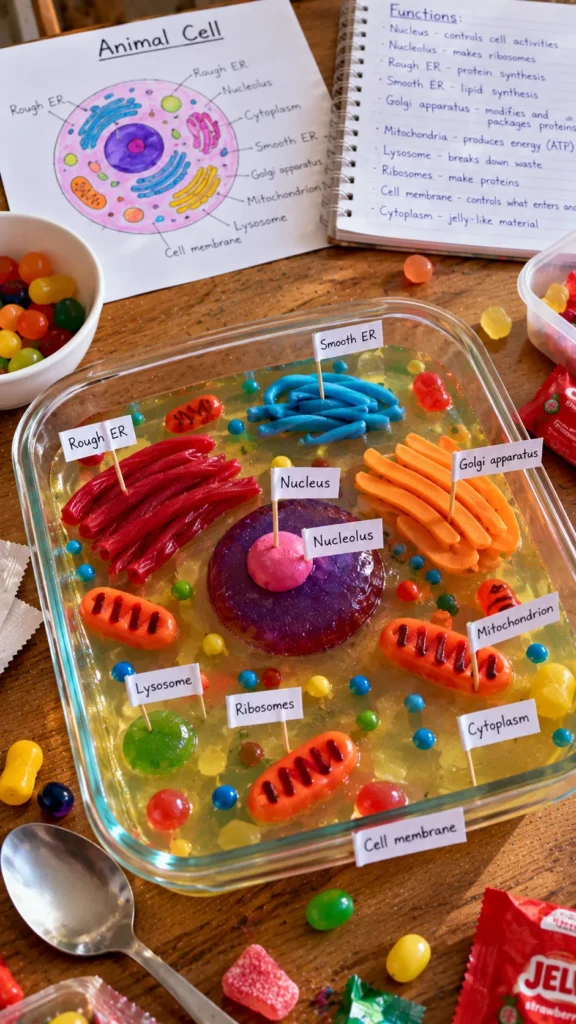
What It Is
An edible animal cell model made from gelatin, fruit, candy, or other food items representing organelles.
Supplies and Budget
- Clear or light-colored gelatin
- Round container
- Assorted candy or fruit
- Refrigerator
- Small labels if needed
Estimated budget: $8–$15.
Tutorial how to make:
Prepare gelatin according to the package directions and pour a thin layer into a round container. Let it partially set, then carefully add the edible organelles. Pour in the remaining gelatin and refrigerate until firm. Add labels after removing the model from the container if the project needs to be displayed.
DIY Tip
Do not add soft candy too early. If the gelatin is completely liquid, heavier pieces can sink to the bottom instead of staying where you placed them.
5. Cardboard Box Animal Cell
Description
A shallow cardboard box can become a practical display-style animal cell model with plenty of room for large organelles and labels. This is particularly useful for students who want to show their work from different angles. I recommend keeping the box relatively shallow so the interior remains visible from above.
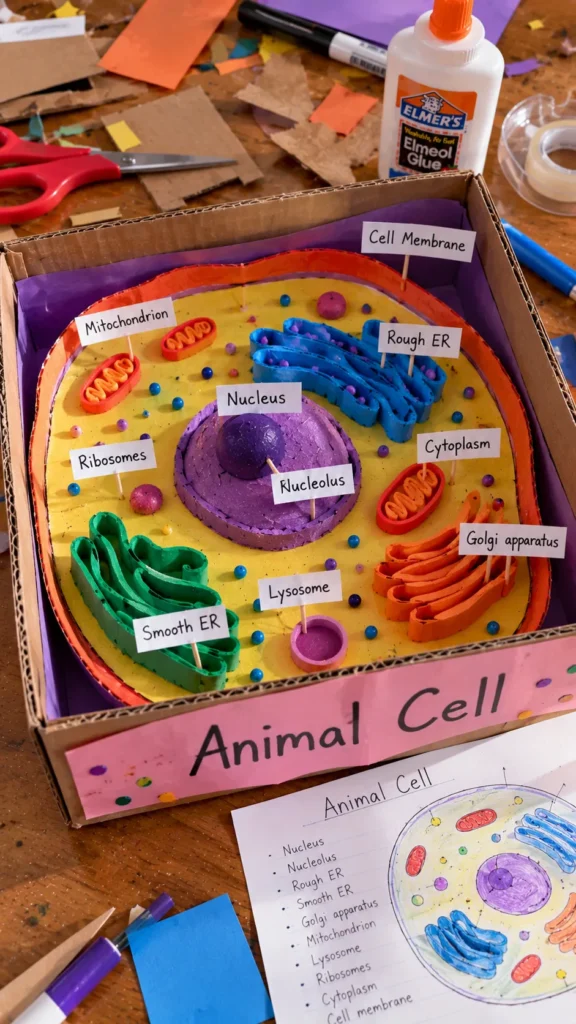
What It Is
A three-dimensional animal cell display built inside a shallow cardboard box.
Supplies and Budget
- Shallow cardboard box
- Colored paper
- Foam pieces
- Glue
- Scissors
- Markers
- Labels
Estimated budget: $5–$15.
Tutorial how to make:
Cover the inside of the box with colored paper to represent the cytoplasm. Create the nucleus from layered paper or foam. Add mitochondria, Golgi apparatus, endoplasmic reticulum, lysosomes, and ribosomes using different materials. Attach labels along the edges.
DIY Tip
Keep the cell boundary visible. If the box is completely covered with decorations, it becomes harder to explain where the cell begins and ends.
6. Play-Dough Animal Cell
Description
Play-dough is excellent for students who want a colorful model that can be shaped quickly without special tools. The material is especially useful for creating curved structures such as the endoplasmic reticulum. For a long-lasting school project, use modeling dough that dries hard rather than soft play-dough.
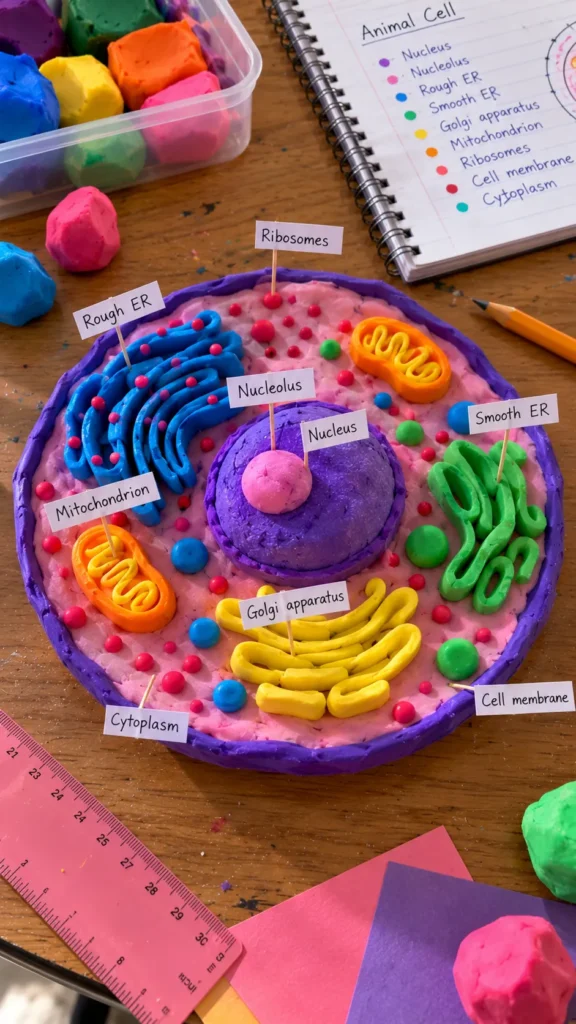
What It Is
A colorful three-dimensional animal cell built by shaping different colors of play-dough or modeling dough into organelles.
Supplies and Budget
- Modeling dough
- Cardboard base
- Toothpicks
- Small paper labels
- Glue
Estimated budget: $7–$15.
Tutorial how to make:
Flatten a large piece of dough to create the cell body. Add a large nucleus and smaller organelles in different colors. Roll thin pieces for the endoplasmic reticulum and tiny balls for ribosomes. Arrange everything on the base and add labels.
DIY Tip
Use contrasting colors for organelles that sit close together. Similar colors can make the endoplasmic reticulum and cytoplasm blend into one shape.
7. Recycled Materials Animal Cell
Description
A recycled animal cell model is a great way to build a biology project without buying many craft supplies. Bottle caps, cardboard scraps, buttons, yarn, egg cartons, and packaging materials can all represent different structures. The key is assigning each recycled object a clear purpose rather than adding materials simply because they are available.

What It Is
An animal cell model constructed mainly from recycled household and packaging materials.
Supplies and Budget
- Cardboard
- Bottle caps
- Buttons
- Yarn
- Small recycled containers
- Glue
- Paint
Estimated budget: $3–$10.
Tutorial how to make:
Create a large cell base from cardboard. Use different recycled pieces for each organelle, such as buttons for ribosomes, yarn for the endoplasmic reticulum, and larger recycled pieces for the nucleus. Paint or cover the materials to create a consistent color scheme.
DIY Tip
Plan the organelles before gluing anything down. Once recycled pieces are permanently attached, rearranging the model can be difficult.
8. Cupcake Liner Animal Cell
Description
Cupcake liners are surprisingly useful for creating layered organelles because they already have interesting shapes and textures. This method is inexpensive and works well for a smaller display model. I recommend using different liner sizes or flattening some pieces so the structures do not all look identical.

What It Is
A colorful animal cell model made with cupcake liners, paper, and simple craft materials.
Supplies and Budget
- Cupcake liners
- Cardboard
- Construction paper
- Glue
- Markers
- Small beads or buttons
Estimated budget: $4–$10.
Tutorial how to make:
Use a large cupcake liner or paper circle as part of the cell base. Cut and shape additional liners to represent organelles. Add beads or small buttons for ribosomes and use paper strips for the endoplasmic reticulum.
DIY Tip
Flatten some cupcake liners before gluing them. Leaving every liner fully open can make the model too bulky and hide the structures underneath.
9. Sponge Animal Cell Model
Description
Kitchen sponges can provide a soft, lightweight base for an animal cell model and are easy to cut into different shapes. They work particularly well when you want a textured model that is easy to transport. Use clean, unused sponges and avoid making the pieces too small, especially if younger students are helping.

What It Is
A lightweight animal cell model using colorful sponge pieces for the cytoplasm and organelles.
Supplies and Budget
- Clean craft or kitchen sponges
- Cardboard
- Scissors
- Glue
- Markers
- Paper labels
Estimated budget: $5–$12.
Tutorial how to make:
Cut a large sponge or several sponge pieces into a rounded cell shape. Use smaller sponge pieces for organelles and attach them to the surface. Add paper labels with toothpicks or small folded tabs.
DIY Tip
Use contrasting sponge colors instead of relying on tiny labels alone. Clear visual differences make the model much easier to understand during a presentation.
10. Layered Paper Animal Cell
Description
Layering paper shapes creates a clean animal cell model without needing messy materials. This approach is particularly useful for classroom projects because everything stays lightweight and easy to transport. I prefer using foam tape beneath some organelles to raise them slightly and create a simple three-dimensional effect.

What It Is
A layered paper animal cell with raised organelles and clearly labeled structures.
Supplies and Budget
- Cardstock
- Colored construction paper
- Foam adhesive squares
- Scissors
- Glue
- Markers
Estimated budget: $5–$12.
Tutorial how to make:
Cut a large rounded cell shape from cardstock. Add the nucleus and other organelles using different paper colors. Place small pieces of foam adhesive underneath selected organelles to raise them above the base. Add neat labels around the outside.
DIY Tip
Use thicker cardstock for the base. Thin printer paper can curl once several layers of glue and paper are added.
11. Bead and Button Animal Cell
Description
Buttons and beads make excellent small-scale organelles because they come in many colors, sizes, and textures. This approach works best for older children who can manage small craft pieces safely. The main goal is not to use as many materials as possible but to choose each piece intentionally so the organelle has a recognizable shape.
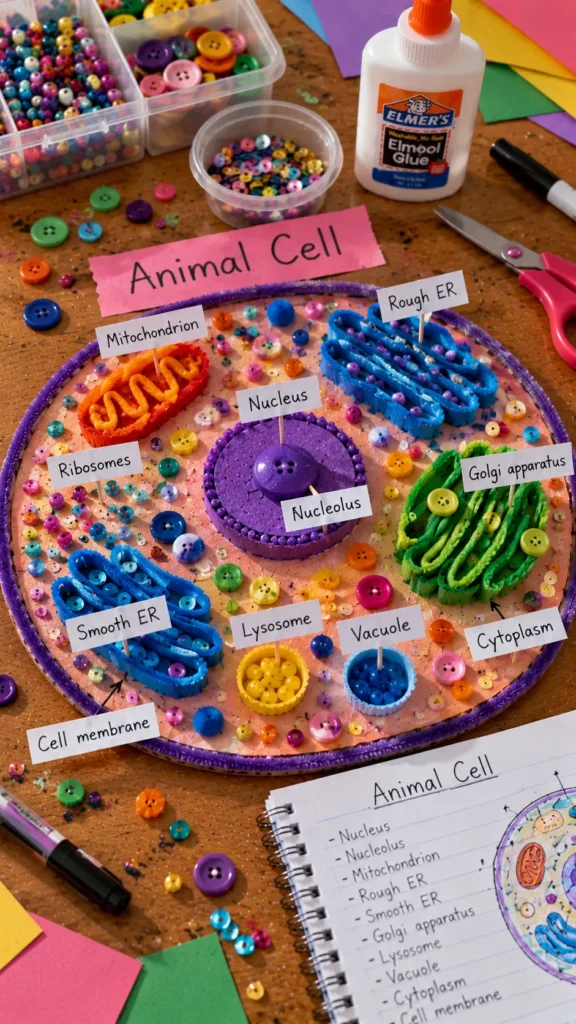
What It Is
A colorful animal cell model using buttons, beads, yarn, and other small craft materials.
Supplies and Budget
- Buttons
- Craft beads
- Yarn
- Cardboard
- Modeling clay
- Glue
- Labels
Estimated budget: $6–$15.
Tutorial how to make:
Create a rounded cardboard cell base. Use a larger button or clay shape for the nucleus, yarn for the endoplasmic reticulum, and small beads or buttons for ribosomes and lysosomes. Arrange the materials carefully and label every major structure.
DIY Tip
Sort your beads and buttons before starting. A small tray with separate sections makes it much easier to find the right size while building.
12. Shoebox Animal Cell Display
Description
A shoebox model gives you enough space to create a detailed animal cell that can be viewed like a small classroom exhibit. It is especially helpful when the assignment requires many labeled organelles. I recommend keeping the display open from the top and using raised materials so every structure can be seen without picking up the box.
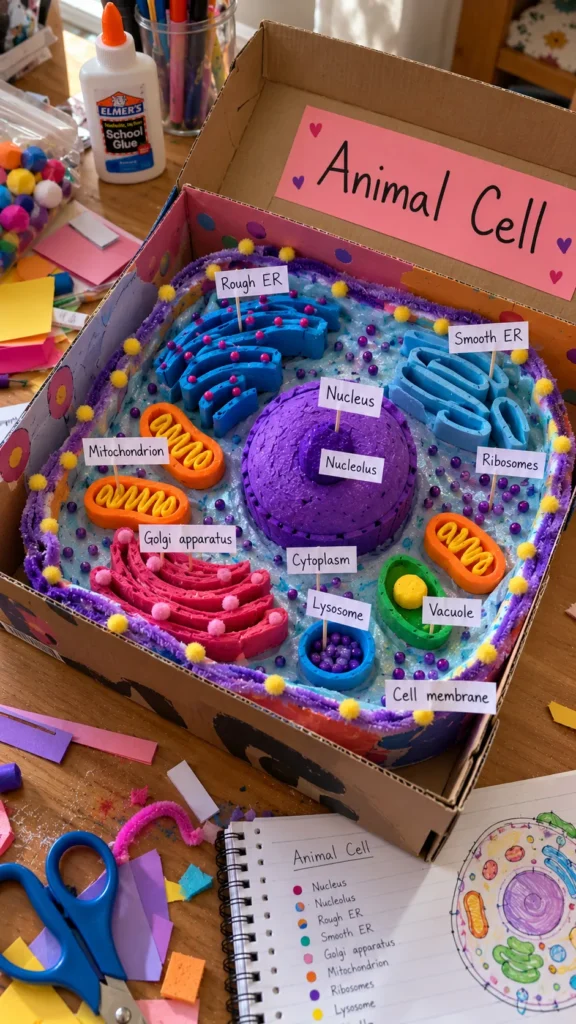
What It Is
A large animal cell display built inside a shoebox using layered and three-dimensional craft materials.
Supplies and Budget
- Shoebox
- Colored paper
- Modeling clay
- Foam sheets
- Yarn
- Glue
- Labels
- Markers
Estimated budget: $8–$20.
Tutorial how to make:
Remove or open the shoebox lid and cover the inside with a cytoplasm-colored paper. Build the nucleus first, then arrange the remaining organelles around it. Use clay, foam, yarn, and paper to create different textures. Add labels along the sides or attach them to toothpicks.
DIY Tip
Take a photo of the planned layout before gluing. It is much easier to correct the arrangement while the pieces are still movable.
FAQ SECTION
What organelles should an animal cell model include?
The exact requirements depend on the assignment, but common structures include the cell membrane, cytoplasm, nucleus, mitochondria, ribosomes, endoplasmic reticulum, Golgi apparatus, lysosomes, and centrioles.
Does an animal cell have a cell wall?
No. Animal cells have a cell membrane but do not have a rigid cell wall like plant cells.
What is the easiest animal cell model to make?
A clay model, paper plate model, or layered paper model is usually easiest for beginners. These materials are simple to shape and allow organelles to be clearly separated.
How do I make the model look three-dimensional?
Use materials with different heights and textures. Foam pieces, modeling clay, buttons, beads, yarn, and folded paper can all create a simple 3D effect.
How can I make the organelles easy to identify?
Use different colors, shapes, and sizes for each organelle and add clear labels. Avoid placing several structures directly on top of one another.
How much should an animal cell project cost?
A basic project can cost less than $10 if you use recycled materials. More detailed foam, clay, or specialty-craft versions may cost around $15–$25.
What should I use for the cytoplasm?
Clay, paper, foam, sponge, cardboard, or gelatin can all represent cytoplasm. Choose based on whether you want a flat, three-dimensional, edible, or lightweight model.
How do I transport a 3D animal cell model?
Choose a sturdy base and secure fragile organelles with small amounts of glue. A shallow box or large reusable container can protect the project during transportation.
RELATED CONTENT
CLOSING
Building an animal cell model is much more than a craft project. When you physically shape and place each organelle, it becomes easier to understand how the different parts of a cell fit together. That is why I prefer models that balance scientific accuracy with simple, accessible materials.
You do not need an expensive kit to create an impressive project. Clay, cardboard, recycled materials, paper, buttons, and even gelatin can all become useful modeling materials when you plan the structure first. Choose the idea that fits the available time and materials, focus on accurate labeling, and let the creative part make the biology lesson more memorable.
I hope these animal cell project ideas models give you a fun starting point for your next school project. Pick your favorite approach, make it your own, and enjoy seeing the cell come together piece by piece.

2 Comments