12 Creative Pony Bead Tapestry Patterns Free for Craft Lovers
Pony Bead Tapestry Patterns Free
Pony bead tapestries are a fun way to turn simple plastic beads into colorful wall art, decorative hangings, and personalized handmade gifts. Because pony beads are larger than many traditional seed beads, they are easier to handle, making them a great choice for beginners, teens, and anyone who enjoys creative DIY projects.
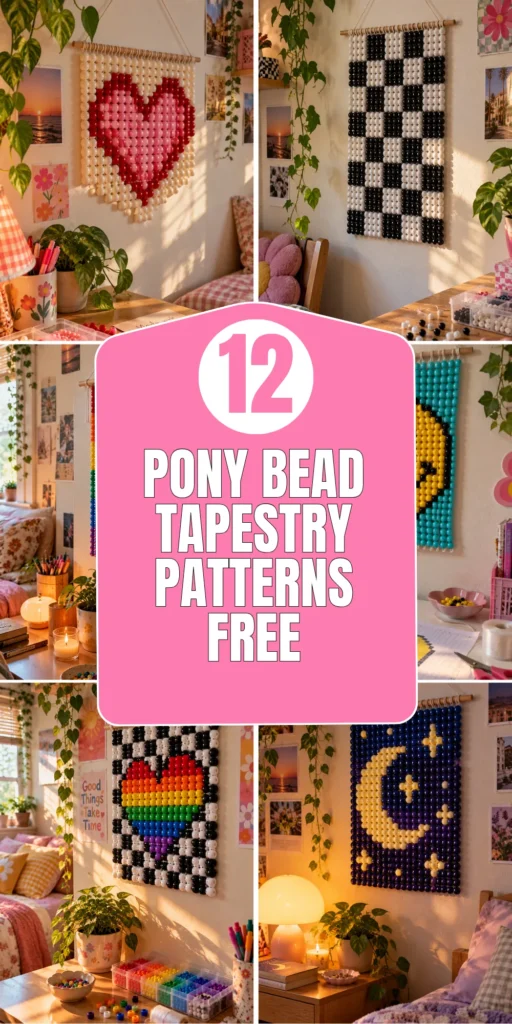
The secret to a successful tapestry is choosing a manageable pattern, keeping the bead colors organized, and checking the design regularly as you work. These 12 free-inspired pattern ideas offer a variety of styles, from playful rainbows and flowers to geometric designs and personalized artwork, so you can create something that fits your room, craft space, or gifting plans.
1. Rainbow Stripe Pony Bead Tapestry
Description
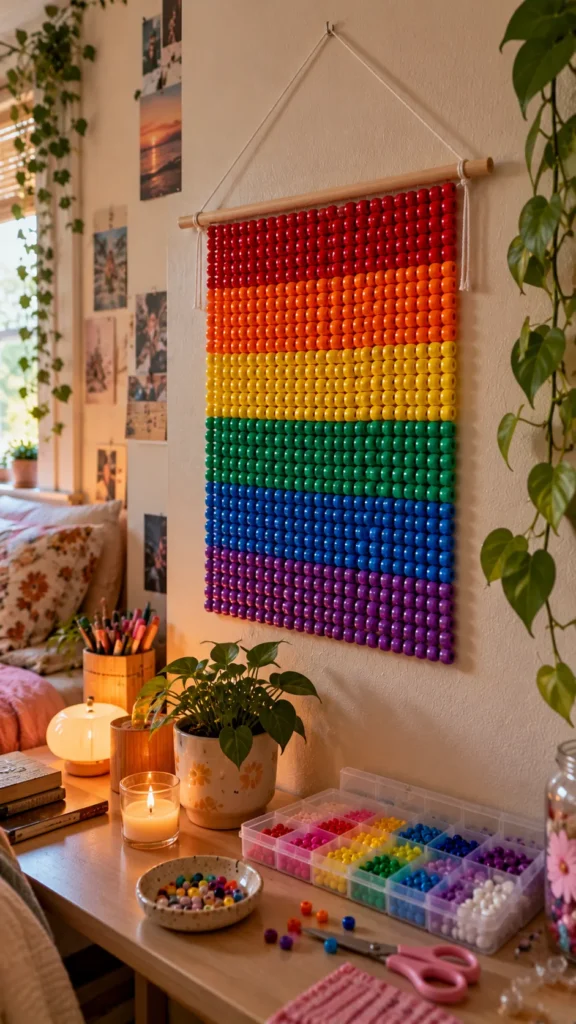
A rainbow stripe tapestry is an easy beginner project that creates a bright, cheerful wall hanging. Arrange red, orange, yellow, green, blue, and purple beads in repeating horizontal rows. The main challenge is keeping each stripe consistent, so use a simple color chart before starting and count every row to prevent uneven bands.
What You’ll Need
- Pony beads in rainbow colors
- Beading cord or sturdy thread
- Bead loom or grid pattern
- Scissors
- Wooden dowel for hanging
Quick How-To
Plan the width and height of the tapestry on graph paper, assigning one square to each bead. Thread the beads row by row, following the color sequence, and secure the finished piece to a wooden dowel.
Styling Tip
Use a white or pale wood background to make the rainbow colors stand out in a bedroom or craft room.
2. Checkerboard Pony Bead Tapestry
Description
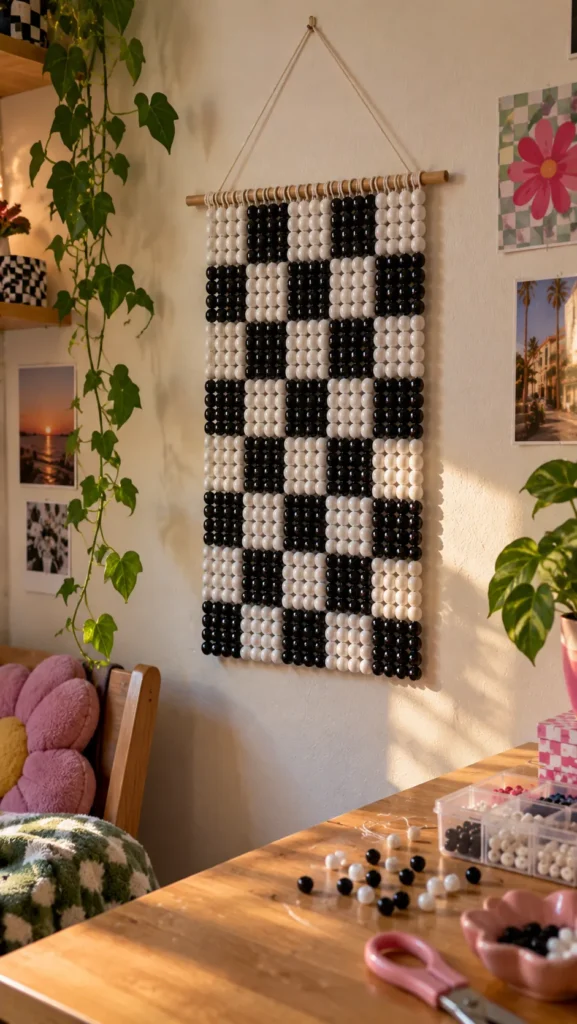
A checkerboard tapestry gives a clean geometric look using only two or three bead colors. Black and white create a classic design, while pink and orange or blue and yellow make it more playful. The key is consistent spacing: even a single misplaced bead can interrupt the pattern, so check each row against your chart before moving on.
What You’ll Need
- Two contrasting pony bead colors
- Beading cord
- Bead loom or tapestry grid
- Scissors
- Measuring tape
Quick How-To
Draw a grid and alternate the two colors across each row. Reverse the starting color in every following row to form the checkerboard, then secure the edges once the desired size is complete.
Styling Tip
Frame the tapestry with a simple wooden dowel and use it as colorful wall decor above a desk.
3. Smiley Face Pony Bead Tapestry
Description
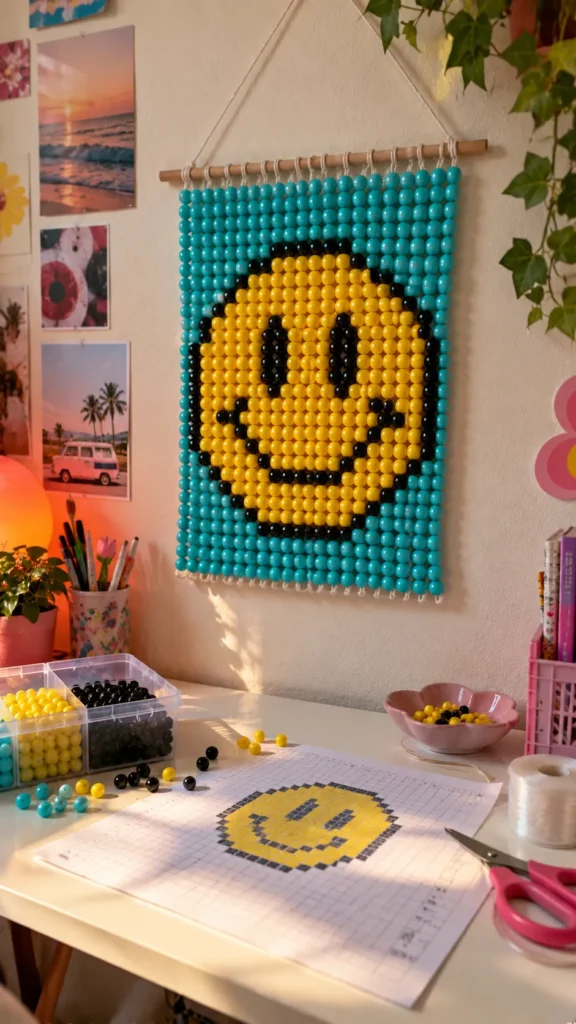
A smiley face tapestry adds a cheerful, playful touch to a bedroom, dorm room, or craft corner. Use yellow beads for the face and black beads for the eyes and curved smile. Since facial features can look uneven in a small grid, sketch the face first and make sure the eyes are positioned symmetrically before adding the surrounding rows.
What You’ll Need
- Yellow pony beads
- Black pony beads
- Background-color beads
- Beading cord
- Graph paper
- Scissors
Quick How-To
Create a circular or rounded outline on graph paper, then mark the eyes and smile. Fill the design row by row, checking the face from a distance to make sure the expression looks balanced.
Styling Tip
Choose a blue, pink, or white background to give the yellow face a bright contrast.
4. Daisy Flower Pony Bead Tapestry
Description
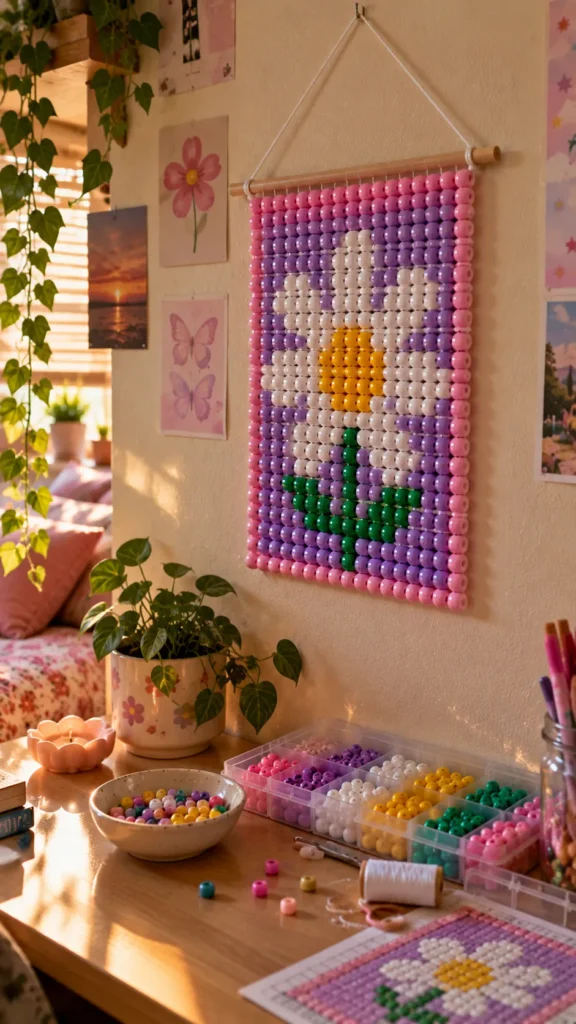
A daisy tapestry brings a soft, cheerful floral look to handmade decor. Use white beads for the petals, yellow for the center, and green for a small stem or surrounding leaves. The petals should be spaced evenly around the center, so plan the flower on a grid before threading and keep the background simple enough for the flower to remain the focal point.
What You’ll Need
- White pony beads
- Yellow pony beads
- Green pony beads
- Background beads
- Beading cord
- Grid paper
Quick How-To
Map a yellow center and surround it with white petal shapes. Add a short green stem if desired, then fill the remaining area with a contrasting background color.
Styling Tip
Make several small daisies in different colors and arrange them together for a cheerful handmade gallery wall.
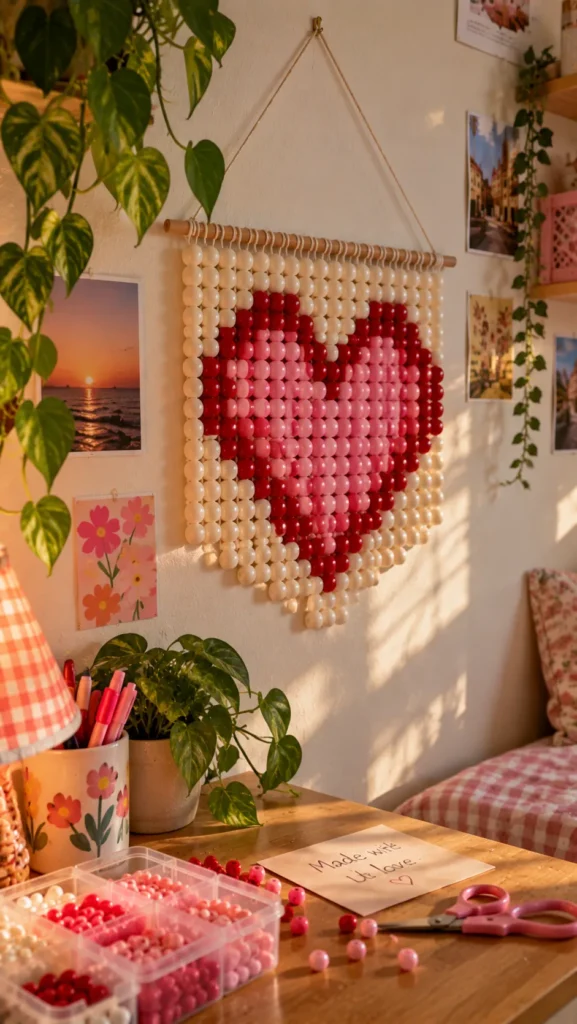
5. Heart-Shaped Pony Bead Tapestry
Description
A heart tapestry is a thoughtful handmade gift for a friend, family member, or partner. Choose a bold red or pink heart against a contrasting background, or use several shades for a pixel-style gradient. The heart can look lopsided if its upper curves are uneven, so mark the outline on graph paper and compare both sides before adding the final rows.
What You’ll Need
- Red, pink, or purple pony beads
- Background-color beads
- Beading cord
- Graph paper
- Scissors
- Hanging dowel
Quick How-To
Draw a symmetrical pixel heart and fill the outline with your chosen colors. Work from the top curves toward the lower point, checking the shape after every few rows.
Styling Tip
Add a small initial or date beneath the heart to personalize the finished tapestry.
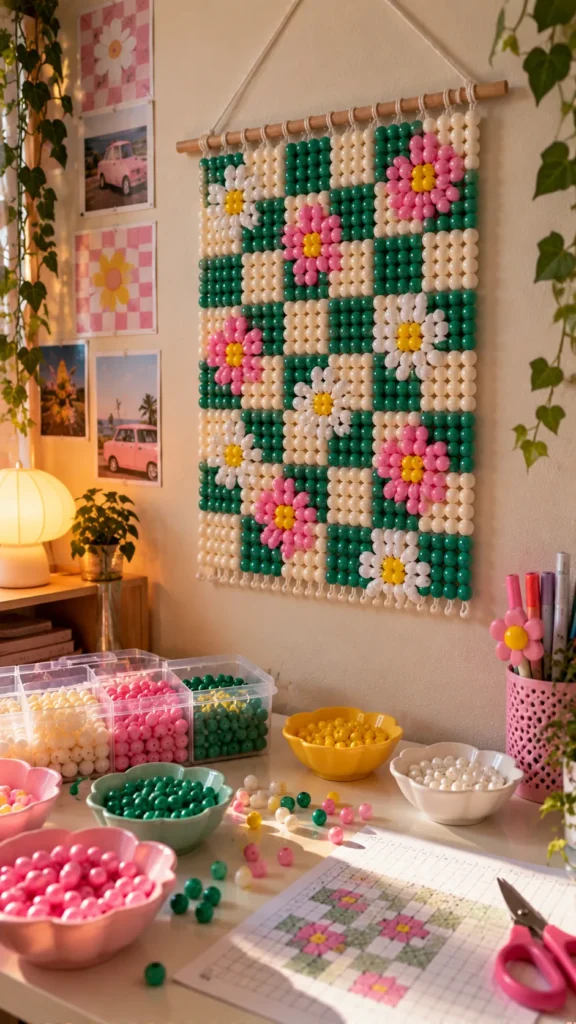
6. Checkerboard Flower Garden Tapestry
Description
Combine geometric structure with playful florals by placing small bead flowers over a checkerboard background. This design uses alternating background colors with simple flower motifs scattered across the grid. The trick is spacing each flower far enough apart that the petals remain recognizable without making the tapestry look crowded.
What You’ll Need
- Two background bead colors
- White or pink flower beads
- Yellow center beads
- Beading cord
- Graph paper
- Scissors
Quick How-To
Build a checkerboard pattern first, leaving planned spaces for the flowers. Add each flower motif according to the chart, then review the whole design before securing the edges.
Styling Tip
Choose soft pastel backgrounds for a playful look or bright contrasting colors for a bolder craft-room decoration.
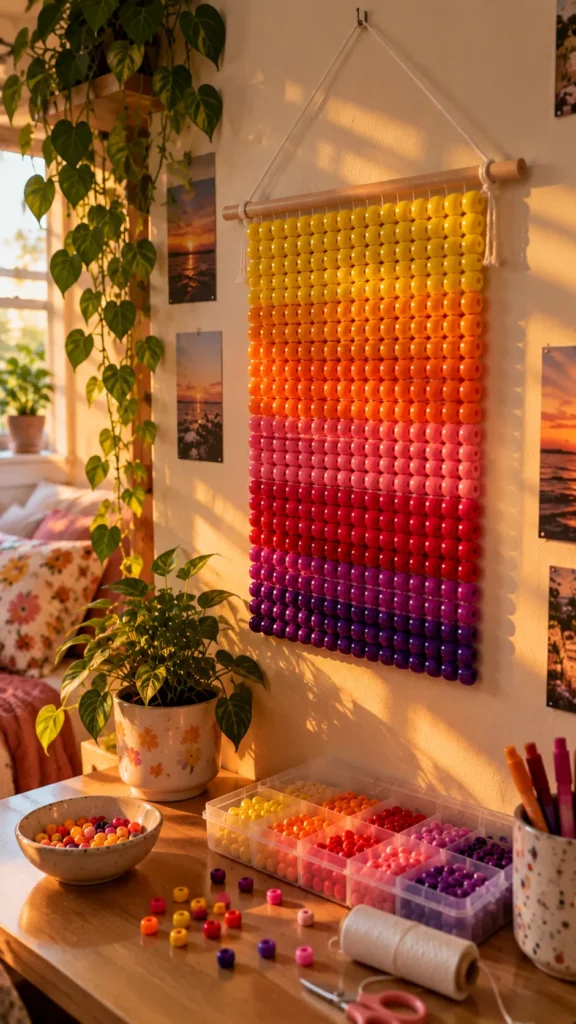
7. Sunset Gradient Pony Bead Tapestry
Description
A sunset gradient tapestry uses rows of warm colors to create a smooth transition from yellow and orange to pink, red, and purple. The effect depends on how the colors move into one another, so avoid switching abruptly between shades unless you want a striped appearance. Sorting the beads by color beforehand makes the project easier to manage.
What You’ll Need
- Yellow, orange, pink, red, and purple pony beads
- Beading cord
- Bead loom or grid
- Scissors
- Wooden dowel
Quick How-To
Plan horizontal color bands from light to dark, introducing intermediate shades where possible. Thread each row according to the chart and check the gradient from a distance as the tapestry grows.
Styling Tip
Hang the finished piece near a desk or reading nook where its warm colors can brighten the space.
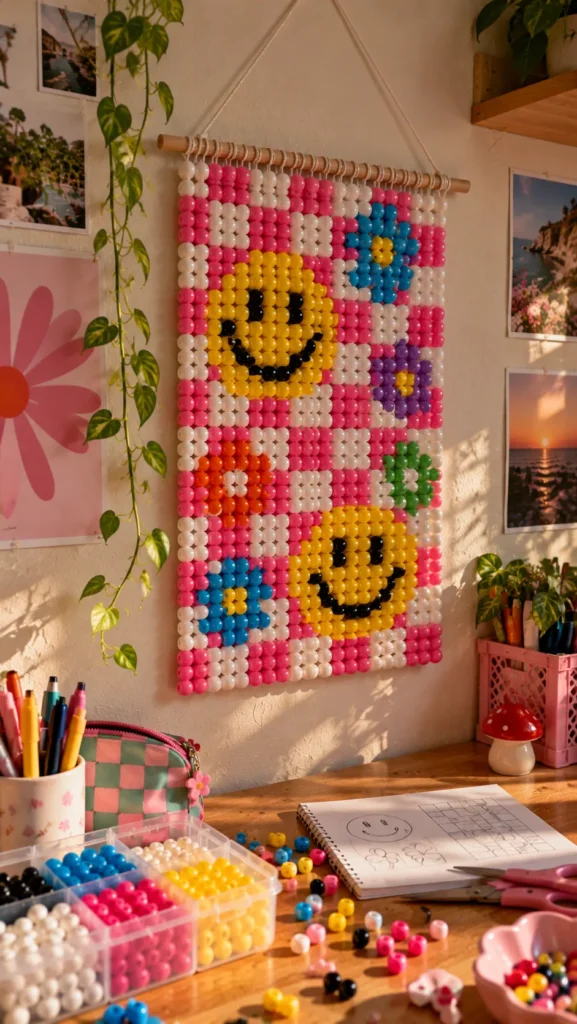
8. Checkerboard Smile and Flower Tapestry
Description
This design combines smiley faces and small flowers across a checkerboard background for a playful, nostalgic look. It works best when the motifs are repeated in a clear arrangement rather than scattered randomly. Create a full chart before starting, because the background and decorative shapes need to align correctly for the finished tapestry to look intentional.
What You’ll Need
- Two contrasting background colors
- Yellow and black pony beads
- White and colored flower beads
- Beading cord
- Graph paper
Quick How-To
Draw the checkerboard grid, then mark the positions of each smiley face and flower. Follow the chart row by row and double-check motif placement before continuing.
Styling Tip
Use a limited palette of three to five colors so the design stays cheerful without becoming visually overwhelming.
9. Butterfly Pony Bead Tapestry
Description
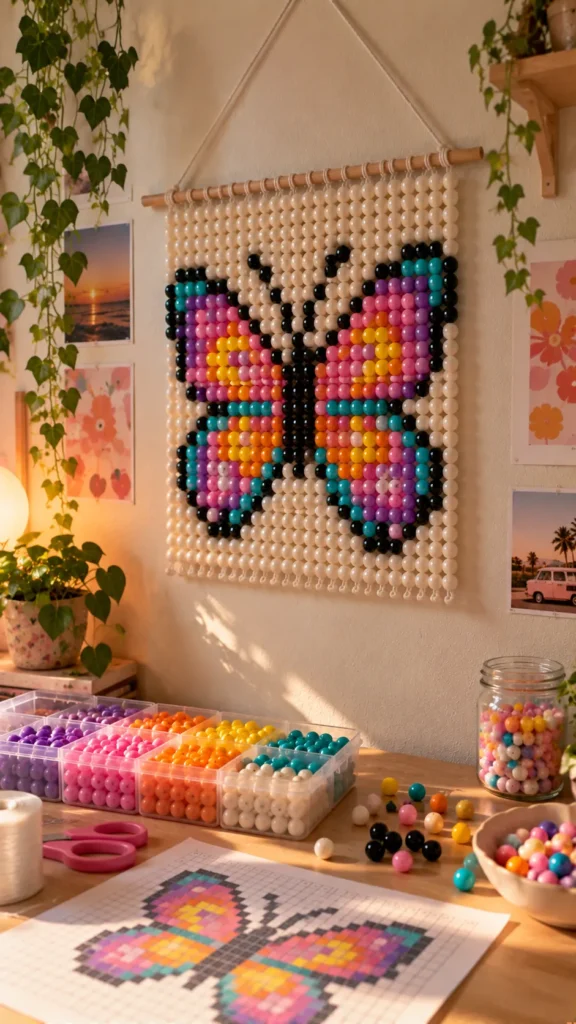
A butterfly tapestry adds a nature-inspired design with colorful wings and a simple central body. Use symmetrical wing shapes to make the butterfly easy to recognize, then add contrasting bead colors for decorative spots. Small details can disappear if the grid is too tiny, so begin with a larger outline and simplify the wing markings where necessary.
What You’ll Need
- Bright pony beads in two or more colors
- Black or dark brown beads
- Background beads
- Beading cord
- Graph paper
- Scissors
Quick How-To
Draw the butterfly with matching left and right wings on a grid. Fill the wings with color blocks, add the body, and work through the background while checking the overall symmetry.
Styling Tip
Choose turquoise, purple, pink, or orange wings against a light background for a bright handmade display.
10. Checkerboard Rainbow Heart Tapestry
Description
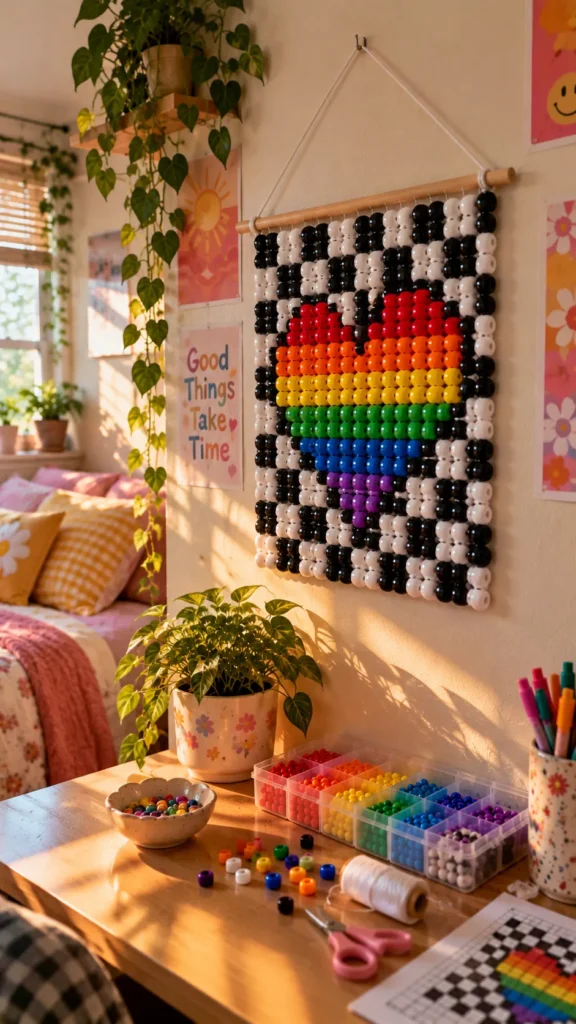
A rainbow heart combines a recognizable heart silhouette with colorful bead rows and a contrasting checkerboard background. This design is more detailed than a basic heart, so keep the heart shape large enough to stand out clearly. Plan the heart’s outline first, then decide how the rainbow colors will flow through the shape before filling the background.
What You’ll Need
- Rainbow-colored pony beads
- Black and white or two contrasting background colors
- Beading cord
- Graph paper
- Bead loom
- Scissors
Quick How-To
Chart the heart outline, divide it into rainbow color sections, and mark the checkerboard background around it. Thread carefully, checking the heart’s silhouette and the background pattern every few rows.
Styling Tip
Use this design as a colorful bedroom accent or a handmade gift for someone who loves cheerful decor.
11. Moon and Stars Pony Bead Tapestry
Description
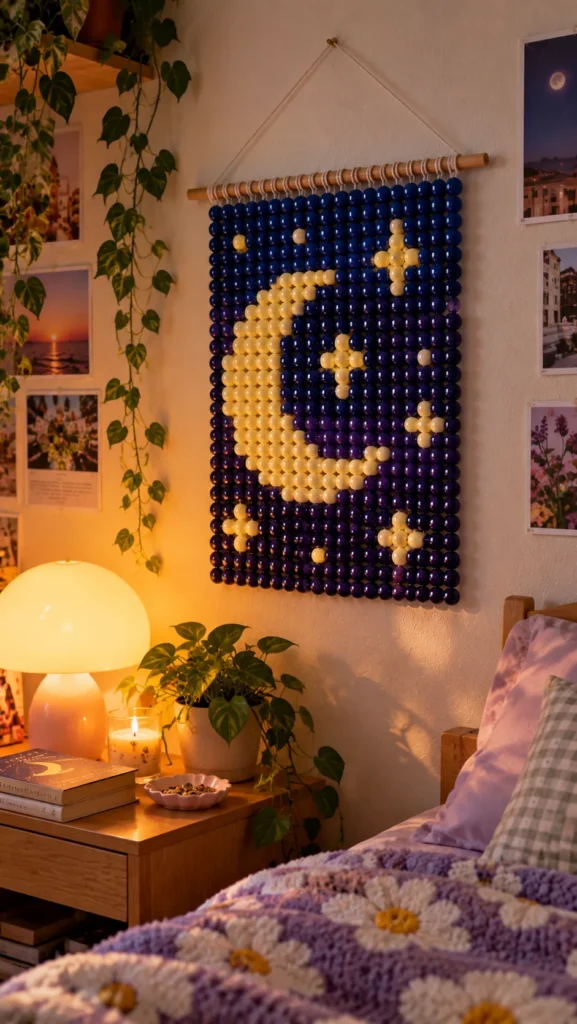
A moon-and-stars tapestry creates a dreamy night-sky design using dark background beads and bright celestial shapes. Navy or purple beads work well for the sky, while yellow, white, or pale blue can define the moon and stars. Keep the stars simple and spaced apart so they remain visible rather than blending into the background.
What You’ll Need
- Navy or purple pony beads
- Yellow or white pony beads
- Light blue beads
- Beading cord
- Graph paper
- Wooden dowel
Quick How-To
Sketch a crescent moon and several simple stars on a grid. Fill the sky with darker beads, then add the moon and stars according to the chart, checking their spacing as you work.
Styling Tip
Hang the tapestry above a bedside table or reading corner for a cozy, whimsical touch.
12. Personalized Initial Pony Bead Tapestry
Description
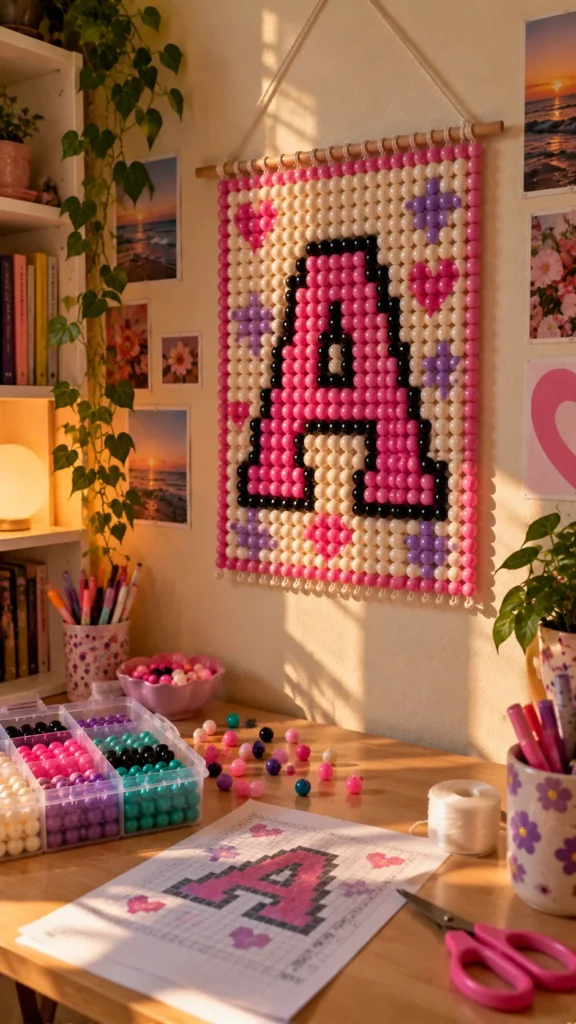
A personalized initial tapestry turns a simple letter into meaningful handmade decor. Choose one bold letter against a contrasting background, or surround it with small hearts, stars, or flowers. Block-style letters are easiest to read on a bead grid, so avoid thin script fonts and check the letter’s proportions before beginning the full piece.
What You’ll Need
- Pony beads in your chosen colors
- Background beads
- Beading cord
- Graph paper
- Scissors
- Hanging dowel
Quick How-To
Draw a large block letter on graph paper and fill it with your main color. Add a simple border or small motifs, then follow the chart row by row until the tapestry is complete.
Styling Tip
Use the recipient’s favorite colors and keep the surrounding decorations minimal so the initial remains easy to recognize.
FAQ SECTION
What are pony bead tapestries?
Pony bead tapestries are handmade designs created by arranging larger plastic pony beads into patterns, pictures, letters, or geometric shapes. Depending on the technique, they can be woven, threaded, or assembled into decorative hangings.
Are pony bead tapestry patterns suitable for beginners?
Yes. Simple stripes, checkerboards, hearts, and smiley faces are good starting points because they use basic shapes and a limited number of colors. More detailed designs become easier once you are comfortable following a grid.
How do I create a free pony bead tapestry pattern?
You can draw your own pattern on graph paper or use a digital grid, with each square representing one bead. Plan the colors before starting and count the beads in each row to keep the design consistent.
What kind of string should I use?
Choose cord or thread appropriate for your bead size and construction method. It should fit through the bead holes, hold knots securely, and resist stretching. If using a loom, follow the loom’s recommended thread and tension instructions.
How do I keep my tapestry from becoming uneven?
Count the beads in each row, maintain consistent tension, and compare the work against your chart regularly. Avoid pulling the cord too tightly, as excessive tension can distort the shape.
Can I hang a pony bead tapestry on a wall?
Yes. Attach the finished piece to a wooden dowel, sturdy hanging cord, or suitable backing depending on its weight and construction. Make sure the attachment points are secure so the tapestry does not sag.
How do I choose colors that work well together?
Start with two or three main colors and add one accent shade. Contrasting colors help shapes stand out, while gradients create softer transitions. Lay out a small sample before committing to a large pattern.
RELATED CONTENT
CLOSING
Pony bead tapestries are a wonderful way to experiment with color, practice patience, and make handmade decorations that reflect your personality. Start with a simple pattern if you are new to beadwork, then try more detailed designs as you become comfortable counting rows and managing color changes.
You can adapt any of these ideas to your favorite colors, room decor, or gift recipient. Sketch the pattern first, organize your beads, and take your time with each row. Small adjustments along the way can make a big difference in the finished result.
I hope these ideas inspire you to create a pony bead tapestry of your own. Pick a favorite pattern, make it personal, and enjoy the process of turning a handful of colorful beads into something special.