12 November Crafts for Adults to Make on Cozy Fall Days

November Crafts for Adults
November is one of my favorite months for slowing down, getting creative, and making something beautiful with my own hands. As the days become cooler and the holiday season approaches, simple DIY projects can bring warmth and personality into our homes without requiring expensive supplies.

Whether you enjoy decorating with autumn leaves, creating handmade gifts, or transforming everyday materials into something useful, these 12 November crafts for adults offer plenty of inspiration. Most projects use affordable supplies, and many can be completed in an afternoon. You can follow the instructions as written or adapt the colors and materials to match your personal style.
1. DIY Pressed Autumn Leaf Wall Art
Description
Preserve the beautiful colors of late-autumn leaves by turning them into simple framed artwork. This project works especially well with yellow, rust, burgundy, and brown leaves, creating natural decor that feels personal and seasonal.

What It Is
Pressed leaf art uses flattened, dried leaves arranged inside a frame. The finished piece can decorate a hallway, bedroom, or living room throughout November.
Supplies and Budget
- Fallen leaves in different colors: free
- Heavy books and absorbent paper: $0–$5
- Picture frame: $5–$12
- Acid-free paper or cardstock: $2–$5
Estimated total: $7–$22.
Tutorial how to make:
- Collect clean, dry leaves that are still colorful and not overly brittle.
- Place each leaf between sheets of absorbent paper inside a heavy book.
- Leave the leaves pressed for approximately one to two weeks, checking that they dry completely.
- Arrange the dried leaves on cardstock before attaching anything.
- Secure them with small amounts of suitable archival adhesive and place the arrangement inside a frame.
DIY Tip
Avoid using damp leaves or thick leaves that have not dried completely, as moisture can cause discoloration or mold. Keep the finished artwork away from direct sunlight to help preserve its colors.
2. Handmade Cinnamon Stick Candle Holders
Description
Create cozy November table decorations by decorating simple glass candle holders with cinnamon sticks and natural twine. The warm brown tones suit rustic autumn interiors, and the finished holders make lovely handmade gifts.

What It Is
These decorative candle holders combine glass containers with cinnamon sticks arranged around the outside. They add a natural seasonal accent without requiring complicated crafting skills.
Supplies and Budget
- Plain glass candle holders: $3–$8
- Cinnamon sticks: $3–$6
- Natural jute twine: $2–$4
- Battery-operated tea lights: $3–$6
Estimated total: $11–$24.
Tutorial how to make:
- Clean the outside of each glass holder and dry it thoroughly.
- Arrange cinnamon sticks vertically around the glass, keeping their tops approximately level.
- Secure the sticks with twine tied firmly around the middle and near the bottom.
- Trim the twine ends neatly and adjust any sticks that lean outward.
- Place a battery-operated tea light inside and arrange the holders on a tray.
DIY Tip
Use battery-operated candles rather than an exposed flame because cinnamon sticks and twine are combustible. Do not rely on the cinnamon to create a strong fragrance; use the holders mainly for their warm, natural appearance.
3. DIY November Gratitude Jar
Description
Make a simple gratitude jar that encourages you to notice the small things that make November meaningful. Decorate an ordinary glass jar with autumn-colored ribbon and handwritten labels, then fill it with short notes throughout the month.

What It Is
A gratitude jar is a container for small paper notes recording happy moments, personal achievements, kind gestures, or things you appreciate.
Supplies and Budget
- Clean glass jar: $0–$5
- Colored paper or cardstock: $2–$4
- Ribbon or twine: $2–$4
- Markers and stickers: $2–$5
Estimated total: $6–$18.
Tutorial how to make:
- Wash and dry the jar, removing any labels or sticky residue.
- Cut a small paper label and write “November Gratitude Jar” on it.
- Attach the label and tie a ribbon around the neck of the jar.
- Cut paper into small strips and place them beside the jar with a pen.
- Write one meaningful moment on a strip whenever you feel inspired, then fold it and place it inside.
DIY Tip
Keep the notes specific rather than writing only general statements. A short memory about a delicious meal, a helpful friend, or a peaceful walk will be more meaningful to read later.
4. Upcycled Sweater Pumpkin Decorations
Description
Give an old knitted sweater a second life by turning its soft fabric into decorative pumpkins. These cozy decorations look lovely on a mantel, bookshelf, or autumn table, especially when made in cream, rust, mustard, and muted green.

What It Is
Sweater pumpkins are soft fabric ornaments made by gathering knitted material around stuffing and adding a stem. They offer a reusable alternative to disposable seasonal decorations.
Supplies and Budget
- Old sweater or knitted fabric: free–$5
- Fiberfill or clean fabric scraps: $3–$6
- Strong thread and needle: $2–$4
- Small sticks or purchased craft stems: $0–$3
Estimated total: $5–$18.
Tutorial how to make:
- Cut a rectangle of knitted fabric large enough to create your desired pumpkin size.
- Sew or tie the short edges together to form a tube.
- Gather one open end tightly with strong thread and secure it.
- Fill the tube with fiberfill or clean fabric scraps until it looks rounded but not overly firm.
- Gather the remaining opening, pull the thread securely, and attach a small stem.
DIY Tip
Use fabric with a little stretch, but avoid very loose knits that unravel easily. If the pumpkin looks too cylindrical, adjust the stuffing and gather the fabric more evenly before attaching the stem.
5. Handmade Autumn Scent Sachets
Description
Create small fabric sachets filled with dried botanicals to add a gentle seasonal touch to drawers, closets, or gift baskets. Choose warm-toned cotton or linen scraps and simple ribbon for a handmade finish that feels thoughtful without being expensive.
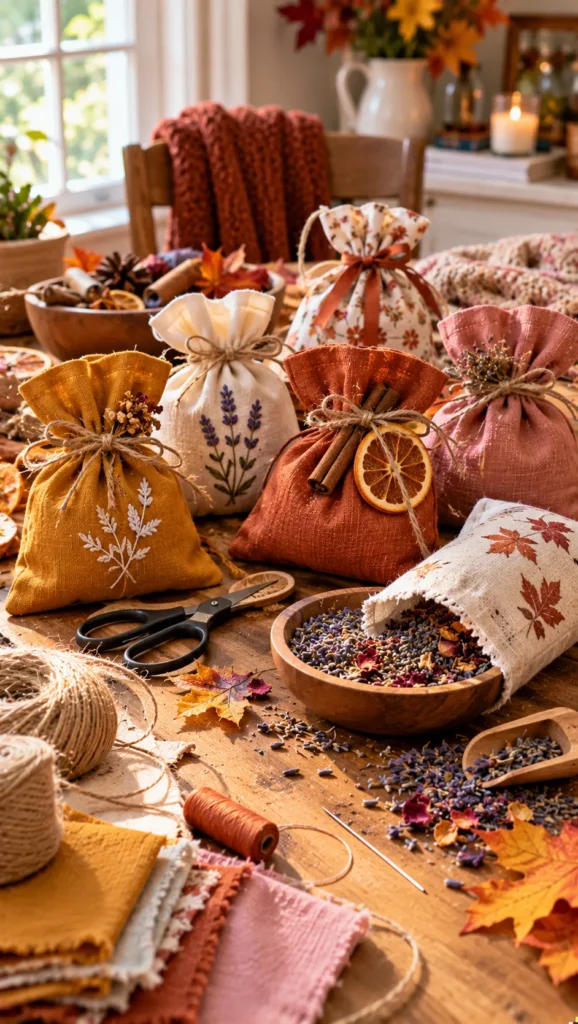
What It Is
A scent sachet is a small fabric pouch filled with dried aromatic materials. Depending on the ingredients, it can provide a subtle fragrance for enclosed storage spaces.
Supplies and Budget
- Cotton or linen fabric scraps: $0–$5
- Dried lavender or suitable potpourri: $3–$7
- Needle and thread: $2–$4
- Ribbon and scissors: $2–$4
Estimated total: $7–$20.
Tutorial how to make:
- Cut two equal fabric squares, approximately 4–5 inches wide.
- Place the squares together with their patterned sides facing inward.
- Sew around three sides and most of the fourth side, leaving a small opening.
- Turn the pouch right side out and fill it loosely with completely dry aromatic material.
- Sew the opening closed and add a ribbon if desired.
DIY Tip
Do not use fresh leaves or damp botanicals, because trapped moisture can encourage mold. Keep sachets away from pets and children, and avoid ingredients that may trigger allergies or irritate sensitive skin.
6. DIY Autumn Leaf Print Tea Towels
Description
Turn plain cotton tea towels into seasonal kitchen accessories using fallen leaves as natural printing tools. The result is an affordable craft with organic shapes and slightly irregular patterns that make each towel unique.
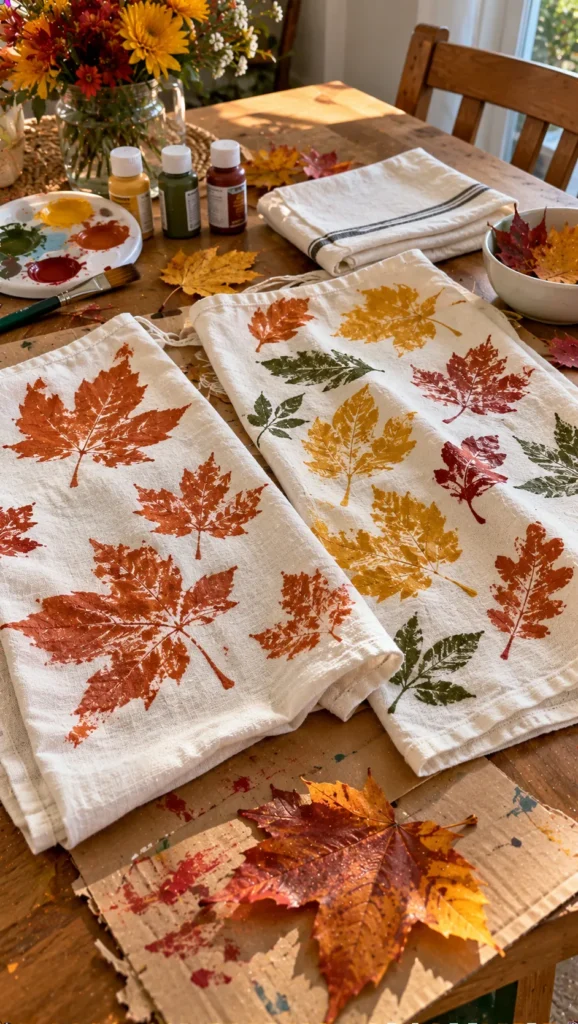
What It Is
Leaf printing transfers the shape and texture of leaves onto fabric using fabric paint. It is a simple way to customize kitchen linens or create a handmade housewarming gift.
Supplies and Budget
- Plain cotton tea towels: $4–$10
- Fabric paint: $4–$8
- Fresh, relatively flat leaves: free
- Scrap cardboard and a small paintbrush: $0–$4
Estimated total: $8–$22.
Tutorial how to make:
- Wash and dry the towel first to remove any finishes that could affect paint adhesion.
- Place cardboard beneath the printing area to prevent paint from transferring through the fabric.
- Apply a thin, even layer of fabric paint to the underside of a leaf.
- Press the leaf firmly onto the towel, using your fingers to make contact across the veins and edges.
- Lift the leaf carefully, allow the print to dry, and follow the paint manufacturer’s heat-setting instructions.
DIY Tip
Test the paint on a spare fabric scrap before decorating the final towel. Too much paint can blur the leaf details, so use a light coat and press evenly.
7. Rustic Pinecone and Twine Wreath
Description
Bring the outdoors inside with a handmade wreath featuring pinecones, twine, and small autumn accents. This project is ideal for a front door, entryway, or interior wall and can be customized using supplies collected during a seasonal walk.

What It Is
A rustic wreath is a decorative ring covered with natural materials. Pinecones provide texture, while twine and small branches create a simple, earthy appearance.
Supplies and Budget
- Plain wreath base: $5–$10
- Clean, fully dry pinecones: free–$5
- Natural twine: $2–$4
- Hot glue and small autumn accents: $4–$8
Estimated total: $11–$27.
Tutorial how to make:
- Clean collected pinecones and allow them to dry thoroughly before crafting.
- Arrange the pinecones around the wreath base before attaching them.
- Secure each pinecone with suitable adhesive, adding extra support where needed.
- Wrap selected sections with twine and fill small gaps with dry leaves or short branches.
- Allow all adhesive to set before adding a hanging loop.
DIY Tip
Natural pinecones can contain dirt, insects, or moisture, so inspect and dry them carefully. If you use a hot glue gun, work on a heat-resistant surface and keep fingers clear of the nozzle.
8. DIY Painted Terracotta Pots for November
Description
Refresh plain terracotta pots with warm autumn colors and simple hand-painted patterns. This easy project works well for indoor plant displays, small herb pots, or seasonal centerpieces and allows you to coordinate your planters with the rest of your home.
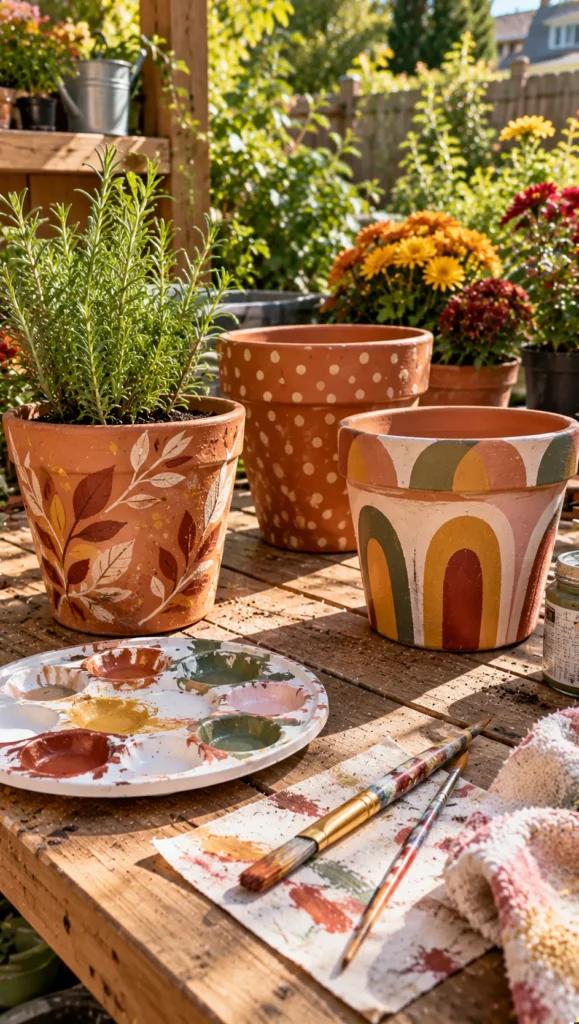
What It Is
Painted terracotta pots are customized clay planters decorated with patterns, color blocks, dots, or simple botanical designs. The natural clay texture keeps the result relaxed and handmade.
Supplies and Budget
- Terracotta pots: $3–$8
- Acrylic paint suitable for the intended use: $3–$7
- Paintbrushes and a palette: $2–$5
- Suitable clear sealer, if needed: $4–$7
Estimated total: $12–$27.
Tutorial how to make:
- Brush dust off the pots and allow them to dry completely.
- Plan a simple design using two or three colors, such as rust, cream, and olive green.
- Apply thin coats of paint, allowing each layer to dry before adding another.
- Add small dots, arches, leaves, or geometric patterns using a fine brush.
- If appropriate for the paint and planter, apply a compatible sealer according to the product instructions.
DIY Tip
Remember that terracotta absorbs water, and some finishes can affect drainage or moisture movement. Keep drainage holes clear and use coatings suitable for your intended planter use.
9. Handmade Fabric Scrap Coasters
Description
Use leftover cotton or linen fabric to make colorful coasters that protect tables while adding a handmade touch to your November decor. Choose a coordinated mix of autumn prints or combine small scraps for a patchwork style.
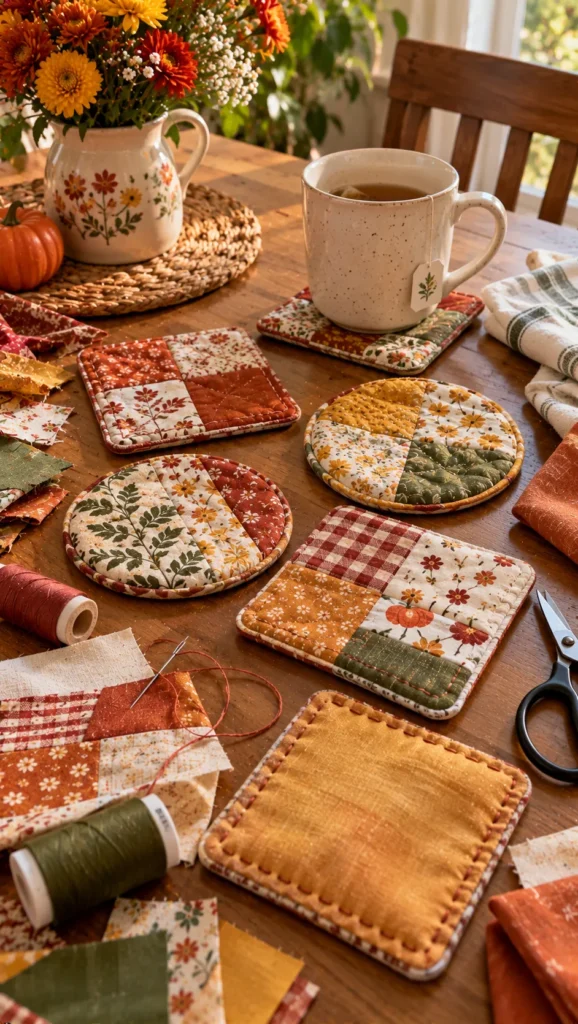
What It Is
Fabric coasters are small padded squares or circles sewn from fabric layers. They are useful for everyday mugs, seasonal gatherings, and simple handmade gifts.
Supplies and Budget
- Fabric scraps: free–$5
- Cotton batting or absorbent padding: $3–$6
- Needle and thread or a sewing machine
- Scissors and pins: $0–$5
Estimated total: $3–$16.
Tutorial how to make:
- Cut two fabric pieces and one padding piece to the same size, leaving a little extra space for seams.
- Place the fabric pieces with their patterned sides facing each other, with the padding underneath.
- Sew around the edges, leaving a small opening.
- Turn the coaster right side out and carefully push out the corners.
- Close the opening with a small stitch and add a simple line of stitching around the edge to help the layers stay flat.
DIY Tip
Choose absorbent, washable fabrics rather than slippery synthetic material. Keep the padding thin enough for cups to sit steadily, and test the coaster with a few drops of water before making a full set.
10. DIY Mini Autumn Memory Scrapbook
Description
Create a small scrapbook filled with November memories, including photos, handwritten notes, ticket stubs, and pressed leaves. This personal craft is a lovely way to preserve everyday moments and can become a meaningful gift for someone special.

What It Is
A memory scrapbook is a handmade collection of photographs and keepsakes arranged on decorated pages. It combines simple paper crafting with personal storytelling.
Supplies and Budget
- Small scrapbook or blank notebook: $4–$10
- Printed photos: $3–$8
- Glue sticks and pens: $2–$5
- Decorative paper and stickers: $2–$6
Estimated total: $11–$29.
Tutorial how to make:
- Choose a notebook with sturdy pages and decide which November memories you want to include.
- Arrange the photos and keepsakes on each page before gluing anything down.
- Add short captions describing where the memory happened and why it matters.
- Use decorative paper sparingly to create borders, headings, or small background panels.
- Leave a little empty space on some pages so you can add more memories later.
DIY Tip
Use a glue stick designed for paper or photo-safe adhesive, especially for important pictures. Avoid adding too many thick decorations, as bulky pages can strain the binding.
11. DIY Handmade November Gift Tags
Description
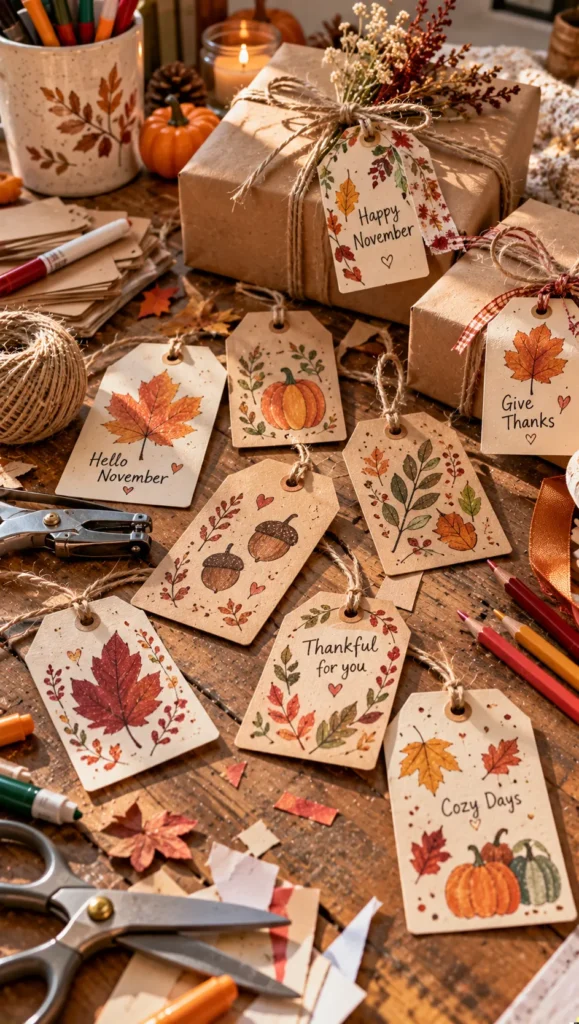
Make your own gift tags using kraft cardstock, twine, and simple hand-drawn autumn motifs. These tags are inexpensive, quick to prepare in batches, and perfect for homemade treats, candles, craft gifts, or early holiday presents.
What It Is
Handmade gift tags are small decorated cards attached to packages with ribbon or string. Seasonal designs can make even a simple gift feel thoughtful and personal.
Supplies and Budget
- Kraft cardstock: $2–$5
- Twine or ribbon: $2–$4
- Markers or colored pencils: $2–$5
- Hole punch and scissors: $2–$5
Estimated total: $8–$19.
Tutorial how to make:
- Cut cardstock into small rectangles, circles, or rounded-corner shapes.
- Punch a hole near one edge, leaving enough room so the paper will not tear.
- Draw small leaves, pumpkins, acorns, or simple decorative borders.
- Write a short message on each tag and allow any ink to dry.
- Thread twine through the hole and attach the tag to a gift or handmade package.
DIY Tip
Make a few extra blank tags while you have your supplies out. Keeping the designs simple and the writing readable makes the tags more versatile for different occasions.
12. DIY Cozy November Table Centerpiece
Description
Create a warm seasonal centerpiece using a tray, small pumpkins, dried foliage, and candles. This flexible project brings autumn color to a dining table or coffee table and can be refreshed with items you already own.

What It Is
A seasonal centerpiece is a decorative arrangement designed to create a focal point on a table. Natural textures and a restrained color palette help it feel cozy without taking up too much space.
Supplies and Budget
- Serving tray or shallow basket: $0–$10
- Mini pumpkins or gourds: $4–$10
- Dried foliage or branches: free–$5
- Battery-operated candles: $3–$8
Estimated total: $7–$33.
Tutorial how to make:
- Select a tray that leaves enough space around the table for plates, drinks, or everyday use.
- Place the largest pumpkin or decorative object slightly off-center.
- Add smaller gourds and dried foliage around it, varying the heights naturally.
- Position battery-operated candles between the objects without overcrowding the arrangement.
- Step back and remove anything that makes the display look too busy or blocks conversation across the table.
DIY Tip
Use battery-operated candles near dried foliage and other combustible materials. If you use fresh pumpkins, check them regularly and remove any that become soft or moldy.
FAQ SECTION
What are some easy November crafts for adults?
Pressed leaf art, handmade gift tags, gratitude jars, painted terracotta pots, and fabric coasters are beginner-friendly projects. Most require only a few inexpensive supplies and can be completed in an afternoon.
What materials are best for budget-friendly fall crafts?
Try fallen leaves, pinecones, old sweaters, fabric scraps, glass jars, cardboard, twine, and secondhand frames. Reusing materials you already own helps lower costs and gives each project a personal touch.
How can I make November crafts look more professional?
Choose a limited color palette, measure materials carefully, and take time with finishing details. Clean edges, securely attached decorations, and a balanced arrangement often make a bigger difference than expensive supplies.
Can I make November crafts to sell?
Yes. Gift tags, fabric coasters, framed leaf art, wreaths, and seasonal centerpieces can be suitable small handmade products. Calculate the cost of materials and labor, check local selling requirements, and test the durability of each item before listing it.
How do I store handmade autumn decorations?
Allow all paint, adhesive, and natural materials to dry completely. Store fragile pieces in individual containers, keep fabric items clean and dry, and use labeled boxes to make next year’s decorating easier.
How can I make these crafts more sustainable?
Reuse jars, fabric, cardboard, and old household items whenever possible. Collect only fallen natural materials where permitted, avoid unnecessary plastic decorations, and choose durable designs that can be reused or refreshed in future seasons.
RELATED CONTENT
CLOSING
I hope these November crafts for adults inspire you to make a little time for creativity this season. You don’t need a dedicated craft room or a cupboard full of expensive supplies to create something lovely. Sometimes, a few fallen leaves, leftover fabric, or an old glass jar are all you need to get started.
Choose the project that makes you excited to pick up your scissors, paintbrush, or needle, and don’t worry if your finished piece has a few imperfections. Those small details are often what make handmade creations feel special.
I’d love to hear which craft you try first and how you make it your own. Gather your favorite supplies, enjoy the process, and have fun creating something beautiful this November!