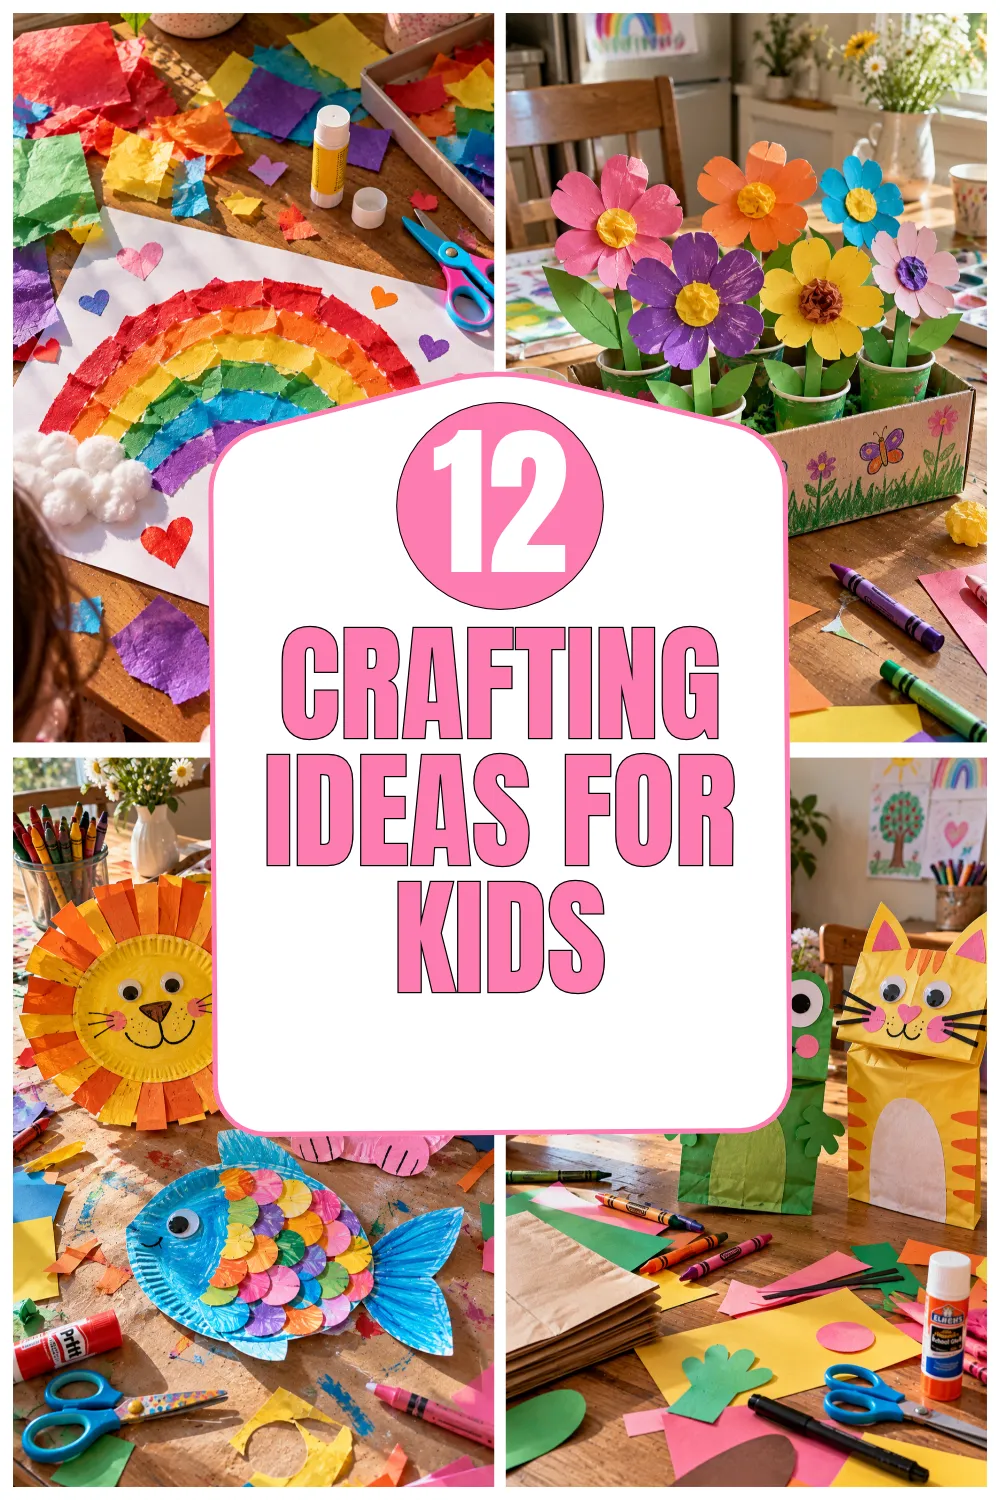
12 Easy Christmas Crafts for Kids to Make at Home

Easy Christmas Crafts for Kids to Make
Christmas is such a lovely time to slow down, bring out the craft supplies, and let little hands create something special. I love projects that turn ordinary materials into cheerful holiday decorations, especially when children can make most of the craft themselves. Paper scraps become snowflakes, pinecones turn into tiny Christmas trees, and simple cardboard tubes can become the cutest little reindeer. The finished pieces do not need to look perfect to make wonderful holiday memories.
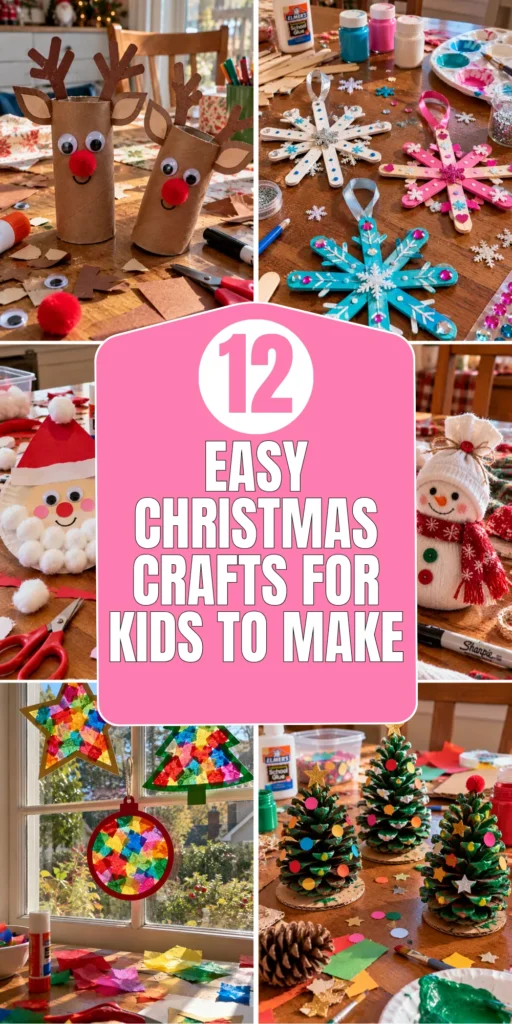
These 12 easy Christmas crafts for kids to make are designed for different ages, budgets, and skill levels. Most use affordable supplies you may already have at home, and the instructions are simple enough for a relaxed afternoon of crafting. I have included practical tips for handling messy glue, choosing the right materials, and helping children enjoy the process without taking over their projects.
1. Colorful Paper Christmas Tree Decorations
Description
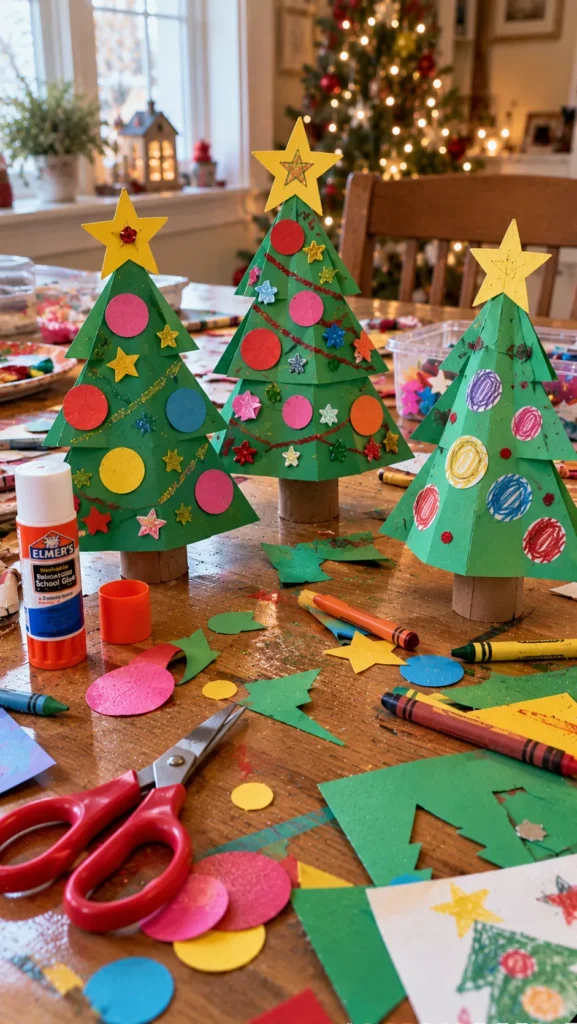
These colorful paper Christmas trees are easy for children to create using construction paper, stickers, and leftover craft supplies. Each tree can have its own pattern, making the finished decorations perfect for bedroom walls, classroom displays, or homemade holiday cards.
What It Is
A flat Christmas tree cut from colored paper and decorated with small paper ornaments, stickers, and a handmade star.
Supplies and Budget
- Green construction paper: $1–$3
- Colored paper scraps: $1–$2
- Glue stick and child-safe scissors: $2–$4
- Stickers, markers, or crayons: $1–$3
Estimated budget: $3–$10, depending on what you already own.
Tutorial how to make:
- Fold a piece of green paper in half and draw half a Christmas tree along the folded edge.
- Cut out the shape and unfold it to create a symmetrical tree.
- Let children decorate it with colorful paper circles, stickers, and marker drawings.
- Cut a small brown rectangle for the trunk and glue it underneath.
- Add a yellow paper star at the top.
- Attach a loop of ribbon if you want to hang the tree on a wall or another suitable display area.
DIY Tip
Prepare a few tree shapes for younger children who are still learning to use scissors. Older kids can draw their own shapes and experiment with layered paper decorations. Use a glue stick rather than runny liquid glue to reduce wrinkles in the paper.
2. Toilet Paper Roll Christmas Reindeer
Description
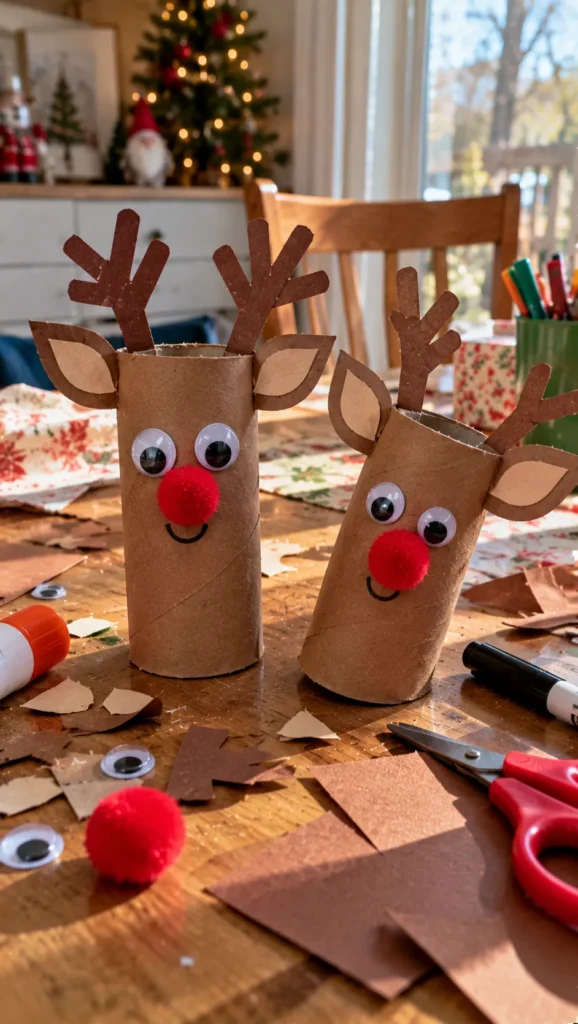
Turn empty cardboard tubes into adorable Christmas reindeer with brown paper, googly eyes, and little antlers. This inexpensive craft gives children plenty of room for creativity while reusing everyday materials that might otherwise be thrown away.
What It Is
A standing reindeer figure made from a cardboard tube, decorated with a face, antlers, and a bright red nose.
Supplies and Budget
- Clean cardboard tubes: free
- Brown paper or washable paint: $1–$3
- Googly eyes or a black marker: $1–$2
- Red paper or a large red pom-pom: $1–$3
- Craft glue and cardstock: $2–$4
Estimated budget: $3–$10.
Tutorial how to make:
- Cover the cardboard tube with brown paper or paint it brown, then allow it to dry.
- Cut two simple antler shapes from brown cardstock.
- Glue the antlers inside the top rim of the tube.
- Attach two eyes and a red nose to the front.
- Draw a smiling mouth and add small paper ears.
- Let the glue dry before standing the reindeer upright.
DIY Tip
Cut antlers from thicker cardstock so they do not bend easily. If younger children are involved, prepare the antler shapes beforehand. Skip small detachable decorations for children who may put craft materials in their mouths.
3. Handmade Popsicle Stick Snowflakes
Description
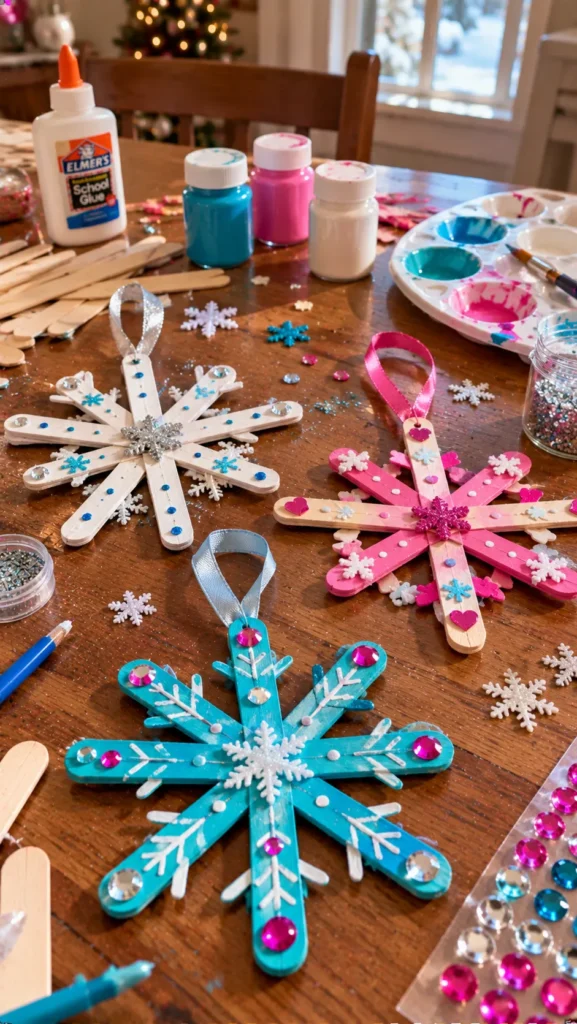
Popsicle stick snowflakes are a simple winter craft that combines painting, gluing, and decorating. Children can make colorful ornaments with glitter-free paint, sequins, or stickers, creating decorations that are lightweight enough for windows, walls, and Christmas trees.
What It Is
A snowflake shape made by crossing craft sticks and decorating the arms with paint and small embellishments.
Supplies and Budget
- Wooden craft sticks: $2–$4
- Washable or child-appropriate paint: $2–$5
- Craft glue: $2–$4
- Stickers or small craft decorations: $1–$3
- Ribbon: $1–$2
Estimated budget: $5–$12.
Tutorial how to make:
- Place three craft sticks across one another to create a six-armed snowflake.
- Ask an adult to glue the sticks together at the center, then let the glue dry.
- Paint the snowflake white, blue, silver, or any color the child likes.
- Decorate the arms with dots, small stickers, or painted lines.
- Leave the snowflake flat until every layer is dry.
- Attach a ribbon loop to one arm for hanging.
DIY Tip
Do not lift the snowflake while the glue is still wet, as the sticks can slide out of position. For a less messy activity, use stickers or washable paint instead of loose glitter. Always check that the finished ornament is completely dry before hanging it.
4. Paper Plate Christmas Santa Faces
Description
Paper plate Santas are a fun craft for younger children who enjoy painting, cutting, and sticking. A simple white beard, red hat, and cheerful face transform an ordinary paper plate into a festive decoration for a bedroom door or holiday activity table.
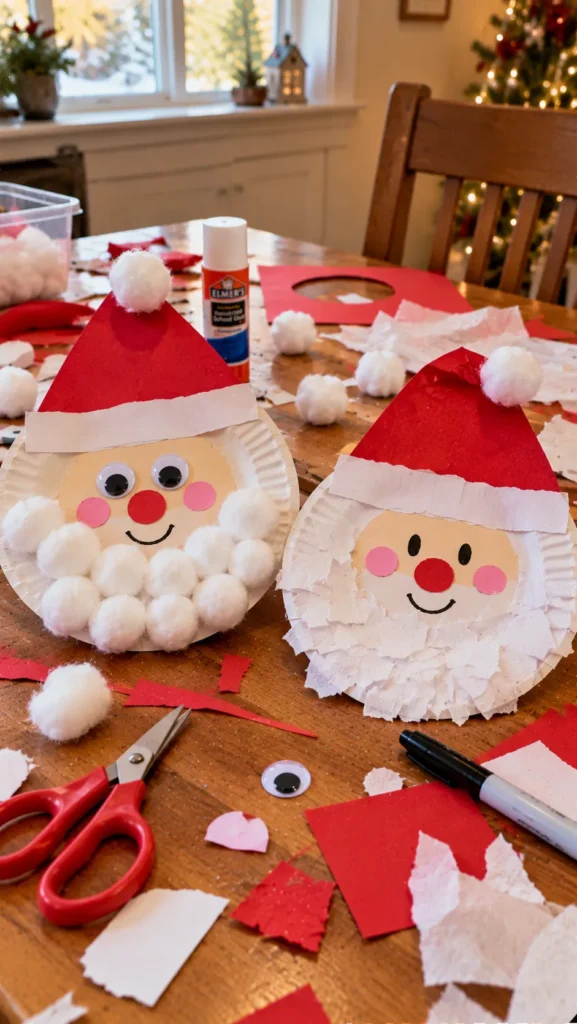
What It Is
A Santa face made from a paper plate, red paper, cotton balls or white paper, and simple facial details.
Supplies and Budget
- Paper plates: $2–$4
- Red and white construction paper: $2–$4
- Cotton balls or tissue paper: $1–$3
- Glue stick and markers: $2–$4
Estimated budget: $5–$12.
Tutorial how to make:
- Place a paper plate on the table and draw a simple face outline.
- Cut a red triangle or hat shape from construction paper.
- Glue the hat to the top edge of the plate.
- Add cotton balls or crumpled white tissue paper around the lower face to create a beard.
- Draw the eyes and mouth, then add a small pink or red nose.
- Leave the decoration flat until the glue dries completely.
DIY Tip
Use small pieces of tissue paper if cotton balls are difficult to glue evenly. A thin layer of glue is enough; too much can soak through the paper plate. For children who dislike sticky textures, let them use pre-cut paper beard pieces instead.
5. Easy Paper Chain Christmas Garland
Description
A paper chain garland is a classic Christmas activity that helps children practice cutting, folding, and connecting shapes. Traditional red and green strips look festive, while rainbow colors make the decoration playful and personal.
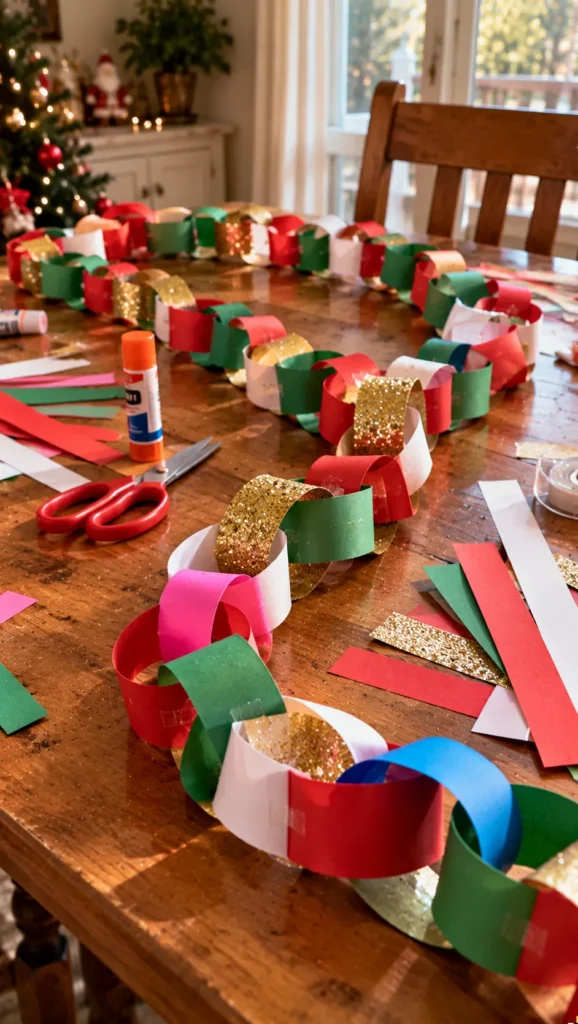
What It Is
A long chain of connected paper loops that can decorate a wall, doorway, or child’s room.
Supplies and Budget
- Colored construction paper: $2–$4
- Ruler and pencil: use what you have
- Child-safe scissors: $1–$3
- Glue stick or tape: $1–$3
Estimated budget: $3–$8.
Tutorial how to make:
- Cut the paper into strips of similar width and length.
- Form the first strip into a loop and secure the ends with glue or tape.
- Thread a second strip through the first loop before joining its ends.
- Continue adding strips until the garland reaches the desired length.
- Alternate red, green, gold, and white strips or let children choose their own pattern.
- Allow glued sections to dry before hanging the chain.
DIY Tip
Keep the strips wide enough for little hands to manage easily. Tape is often faster than glue for younger children, especially when making a long chain. Hang the garland securely and away from candles, heaters, and other heat sources.
6. Pinecone Christmas Trees
Description
Pinecones make wonderful miniature Christmas trees because their natural scales already resemble branches. With a little paint and a few colorful decorations, children can turn them into rustic ornaments for a windowsill, shelf, or homemade holiday centerpiece.
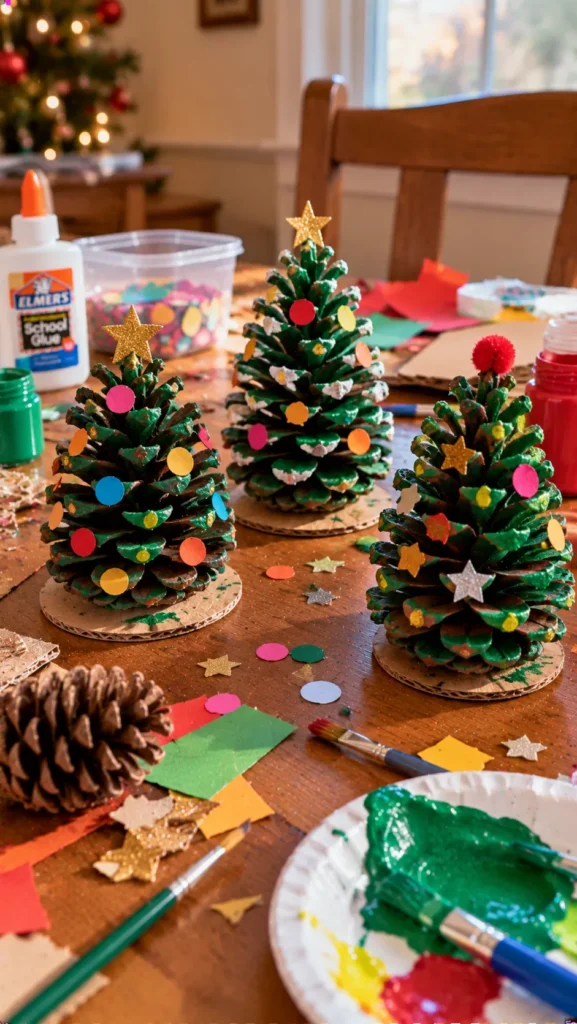
What It Is
A real pinecone decorated to resemble a tiny evergreen tree, with painted tips and small craft ornaments.
Supplies and Budget
- Clean, dry pinecones: free if collected responsibly
- Green washable or craft paint: $2–$4
- Small stickers or paper decorations: $1–$3
- Craft glue and a paintbrush: $2–$4
- Optional small cardboard base: free
Estimated budget: $3–$10.
Tutorial how to make:
- Choose a pinecone that can stand upright or attach it to a small cardboard base.
- Brush away loose dirt and inspect it before bringing it indoors.
- Paint the tips of the scales green, leaving some natural brown visible.
- Add small paper dots or stickers to represent ornaments.
- Cut a tiny star from yellow paper and attach it to the top if the pinecone shape allows.
- Leave the craft in a safe place until all paint and glue are completely dry.
DIY Tip
Pinecones vary naturally, so choose one with a stable base instead of trying to make every tree identical. Supervise children during collection and preparation, and avoid pinecones that are moldy or damaged. Use washable paint for younger children and keep loose decorations away from children who may swallow them.
7. DIY Christmas Card with Fingerprint Lights
Description
Fingerprint Christmas lights turn a simple homemade card into a colorful keepsake. Children use their fingertips to create the light bulbs, then draw a connecting string, making this project especially suitable for family cards, grandparents, and classroom exchanges.
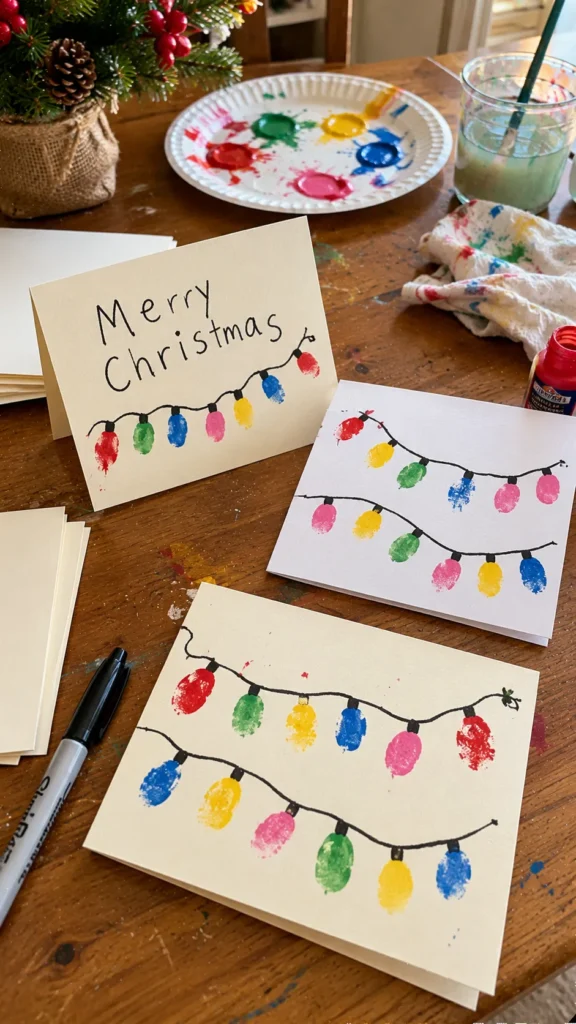
What It Is
A folded paper greeting card decorated with colorful fingerprint marks arranged like Christmas lights.
Supplies and Budget
- Blank cards or cardstock: $2–$5
- Washable, child-safe paint: $3–$5
- Black marker: $1–$2
- Paper towel and water for cleanup: use what you have
Estimated budget: $4–$10.
Tutorial how to make:
- Fold a piece of cardstock in half to create a card.
- Pour small amounts of washable paint onto a paper plate.
- Let children press a fingertip lightly into the paint and make colorful marks across the front.
- Allow the paint to dry completely.
- Draw a loose black line connecting the marks, then add small light-socket details if desired.
- Write a Christmas greeting inside the card.
DIY Tip
Test the paint on scrap paper first. Too much paint can create large blobs rather than clear fingerprints. Keep a damp cloth nearby and use only child-safe paint; children should wash their hands after the activity.
8. Felt Christmas Tree Decorating Board
Description
A felt Christmas tree board gives children a reusable way to decorate their own tree without fragile ornaments. Soft felt shapes stick to the tree through the texture of the fabric, making this a colorful activity that can be changed again and again.
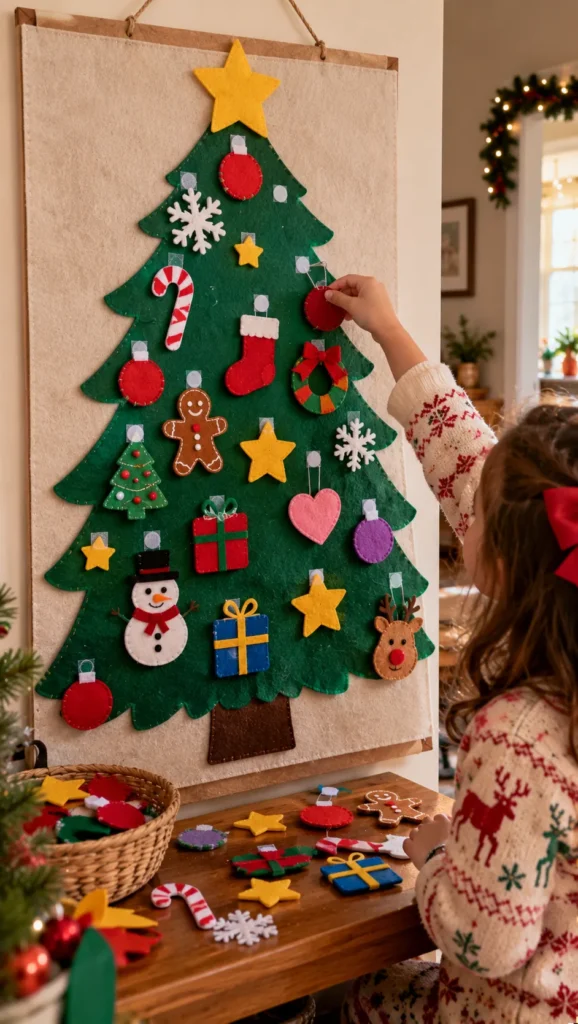
What It Is
A large felt Christmas tree attached to a backing board or wall, with removable felt ornaments.
Supplies and Budget
- Green felt sheet: $3–$6
- Assorted felt scraps: $2–$5
- Scissors: use what you have
- Felt-safe adhesive or suitable backing: $2–$5
Estimated budget: $7–$15.
Tutorial how to make:
- Draw a large triangular Christmas tree on green felt.
- Cut out the tree and attach it to a sturdy felt backing or suitable board.
- Cut simple ornament shapes from colorful felt, including stars, circles, candy canes, and gifts.
- Add details with additional felt pieces rather than small detachable parts.
- Place the tree at a child-friendly height on a secure, flat surface.
- Show children how to place, remove, and rearrange the felt ornaments.
DIY Tip
Test the felt pieces together before mounting the tree, because some felt types cling better than others. Avoid tiny pieces for toddlers, and secure the backing properly so it cannot fall. This is particularly useful for children who enjoy rearranging decorations repeatedly.
9. DIY Christmas Sock Snowmen
Description
Sock snowmen turn clean spare socks into soft, cheerful holiday characters. With a little fabric, ribbon, and a simple face, children can help create their own snowman family for a bedroom shelf or festive display.
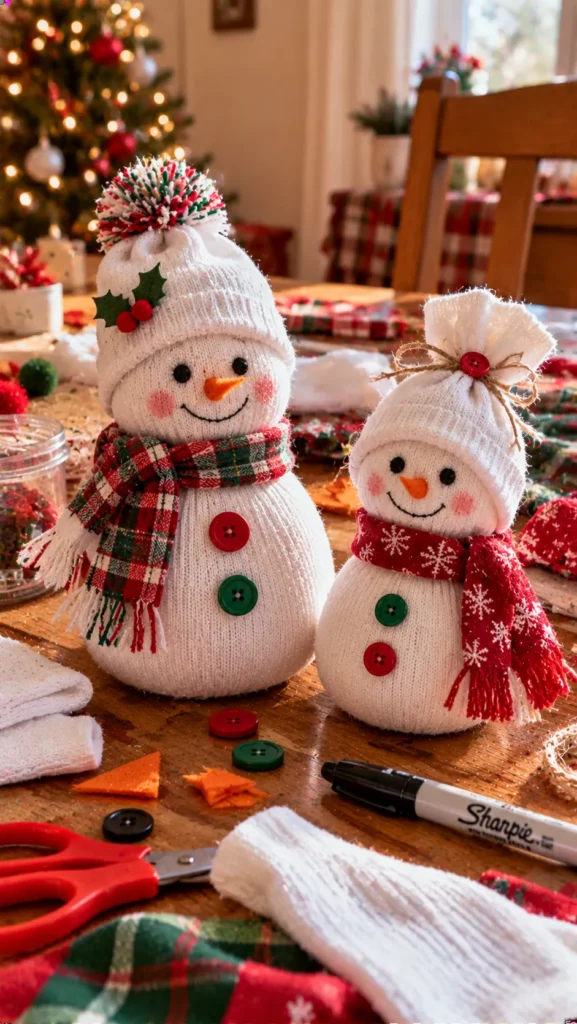
What It Is
A soft snowman figure made from a sock filled with suitable stuffing or fabric scraps and tied to create a rounded body.
Supplies and Budget
- Clean white socks: $0–$4
- Clean fabric scraps or suitable stuffing: $0–$4
- Ribbon or fabric strips: $1–$3
- Markers or felt facial details: $2–$4
- Adult help for securing the top: no extra cost
Estimated budget: $3–$10.
Tutorial how to make:
- Fill a clean white sock with fabric scraps or suitable stuffing until it forms a rounded body.
- Tie the top securely or have an adult close it with a few stitches.
- Tie a ribbon or fabric strip around the middle to create a scarf.
- Draw a simple face with a suitable fabric marker, or attach larger felt features securely.
- Add a small fabric hat made from a colored sock cuff if desired.
- Place the snowman on a flat surface and adjust the stuffing so it stands as steadily as possible.
DIY Tip
Fabric scraps can make the snowman lumpy, so fill it gradually and shape the body as you go. Avoid rice or other food-based fillers if you want to store the craft for years. For young children, avoid loose buttons and other small parts that could become choking hazards.
10. Colorful Christmas Window Suncatchers
Description
Christmas window suncatchers brighten a room with colorful paper shapes that glow when daylight passes through them. Children can make stars, trees, and baubles using translucent paper, creating simple decorations that look cheerful without needing paint or glitter.
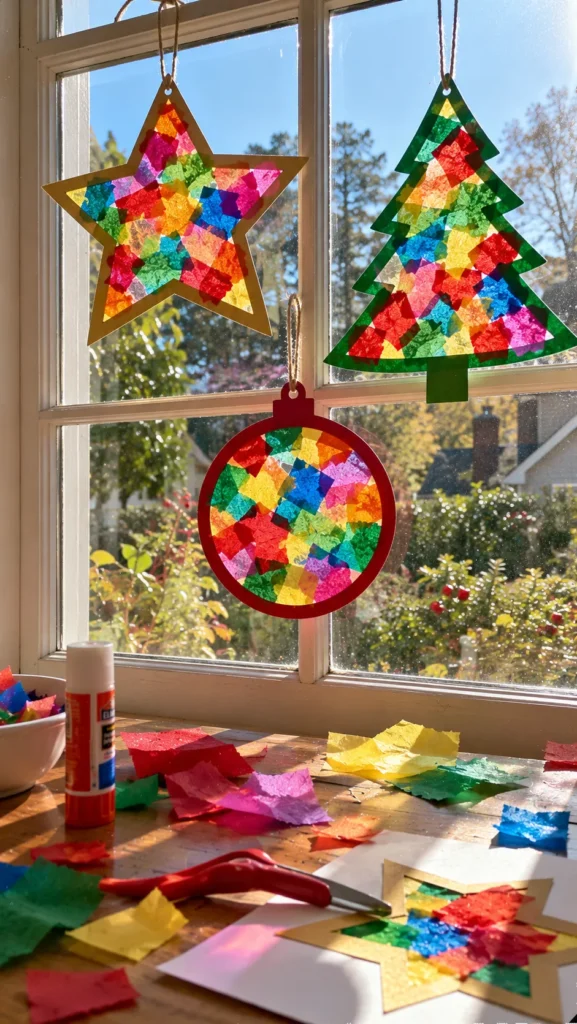
What It Is
A lightweight paper decoration made from a frame and translucent colored tissue paper.
Supplies and Budget
- Black or colored cardstock: $2–$4
- Translucent tissue paper: $2–$4
- Child-safe scissors: use what you have
- Glue stick: $1–$3
- Removable window-safe tape: $1–$3
Estimated budget: $4–$10.
Tutorial how to make:
- Draw a large star, tree, or bauble on cardstock.
- Cut out the shape, then carefully cut out the center to create a frame.
- Cut tissue paper into small pieces in red, green, yellow, and blue.
- Apply glue around the back of the frame and place tissue paper over the opening.
- Overlap the tissue pieces slightly to create colorful sections.
- Let the decoration dry fully, then attach it to a clean window with suitable removable tape.
DIY Tip
Thin tissue paper tears easily, so encourage children to press it gently rather than rub it into the glue. Test the tape on an inconspicuous window area first. Place decorations where they do not interfere with window handles or block an emergency exit.
11. DIY Christmas Gift Tags with Hand-Drawn Designs
Description
Homemade gift tags add a personal touch to Christmas presents and let children contribute to wrapping day. Simple cardstock shapes decorated with stars, trees, snowmen, and colorful patterns are inexpensive to make and can be customized for every family member.
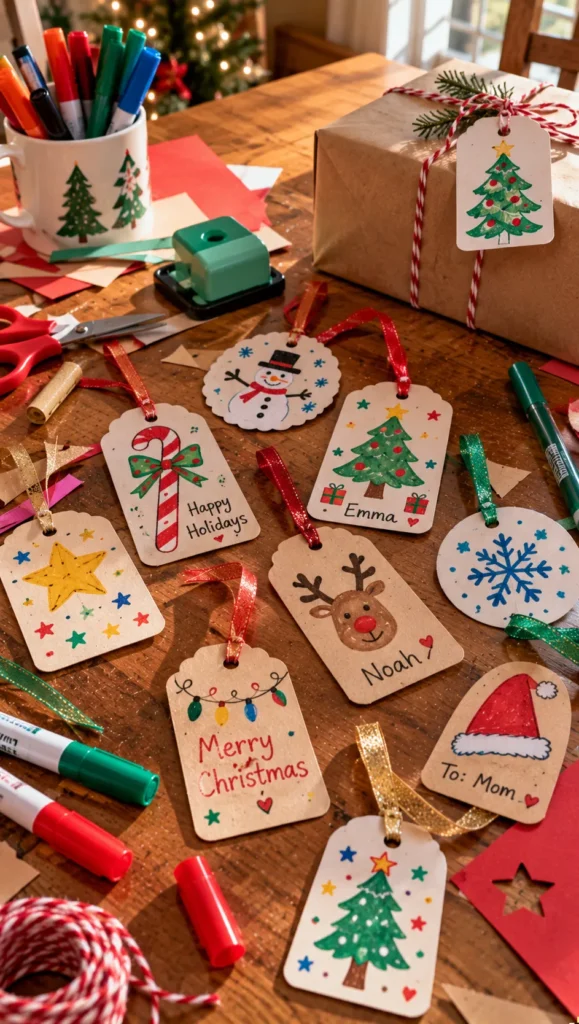
What It Is
Small paper labels attached to wrapped gifts, featuring handwritten names and children’s drawings.
Supplies and Budget
- Cardstock or recycled greeting cards: $1–$4
- Markers or colored pencils: $2–$5
- Hole punch: $1–$3
- Ribbon or twine: $1–$3
- Optional stickers: $1–$3
Estimated budget: $3–$10.
Tutorial how to make:
- Cut cardstock into rectangles, circles, or simple tag shapes.
- Punch a small hole near one end.
- Let children draw Christmas trees, stars, snowmen, or other festive pictures.
- Write each recipient’s name clearly on the opposite side.
- Thread a short piece of ribbon or twine through the hole.
- Attach the tag to a wrapped present and secure it with a simple knot.
DIY Tip
Make the tags slightly larger for younger children so they have enough space to draw. Recycled greeting cards can provide sturdy material and interesting printed patterns. Keep the string short and supervise younger children around ribbons and small craft supplies.
12. Easy Christmas Paper Plate Wreaths
Description
Paper plate wreaths are an easy way for children to practice cutting, gluing, and arranging colors. A simple circular base becomes a festive decoration with green paper leaves, red berries, and a handmade bow that can be displayed on a bedroom door or wall.
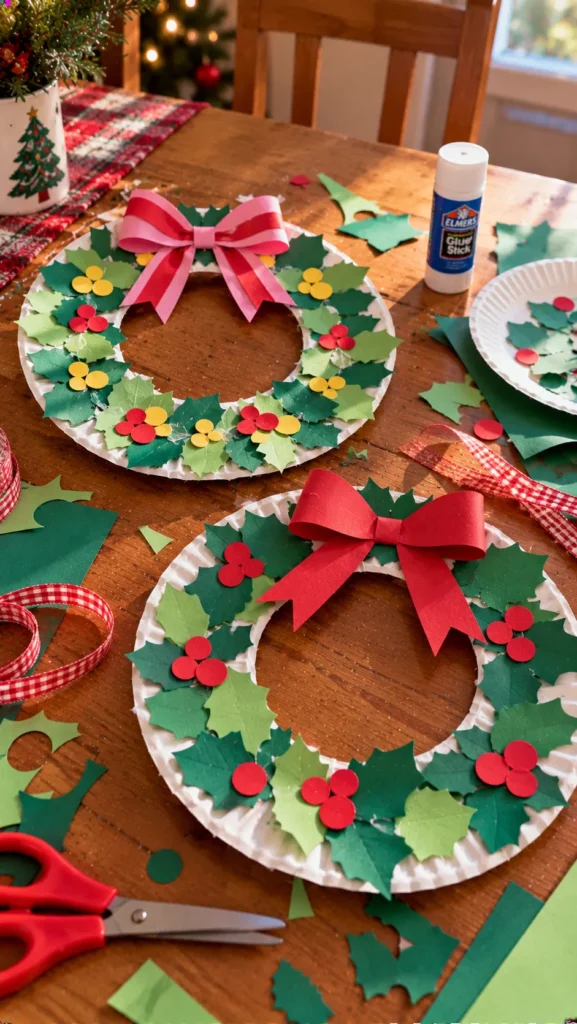
What It Is
A lightweight wreath made from a paper plate with its center cut out and decorated with paper foliage.
Supplies and Budget
- Paper plates: $1–$3
- Green construction paper: $1–$3
- Red paper or stickers: $1–$2
- Glue stick and scissors: $2–$4
- Ribbon: $1–$3
Estimated budget: $4–$10.
Tutorial how to make:
- Ask an adult to cut out the center of a paper plate, leaving a circular rim.
- Cut green paper into small leaf shapes.
- Glue the leaves around the plate, overlapping them slightly.
- Add red paper circles or stickers to represent berries.
- Make a bow from ribbon or folded paper and attach it to the bottom.
- Let the wreath dry flat before adding a hanging loop.
DIY Tip
Use small paper leaves instead of long strips, which can make the wreath look bulky and difficult to hang. Younger children can tear the paper into pieces rather than cut detailed shapes. If the plate bends, reinforce the back with a second plate or a strip of lightweight cardboard.
FAQ SECTION
What are the easiest Christmas crafts for young children?
Paper Christmas trees, fingerprint-light cards, paper plate Santas, and simple paper chains are excellent choices. They use inexpensive materials and involve straightforward steps. For preschoolers, prepare cutting tasks in advance and let them focus on decorating and choosing colors.
How can I make Christmas crafts less messy?
Cover the table with scrap paper or a washable tablecloth, place glue and paint in small containers, and keep wipes nearby. Prepare the materials before children sit down, and work on one project at a time. Glue sticks and washable markers are often easier to manage than liquid glue and glitter.
What Christmas crafts can children make with recycled materials?
Cardboard-tube reindeer, pinecone trees, paper chains made from scrap paper, and decorations made from old greeting cards are all good options. Check recycled materials for sharp edges, staples, dirt, or damage before using them.
How do I choose age-appropriate Christmas crafts?
Younger children usually enjoy large shapes, stickers, washable paint, and simple gluing activities. Older children can try more detailed cutting, drawing, sewing with supervision, and multi-step projects. Always supervise children when using scissors, small parts, or materials that are not suitable for their age.
How can I preserve children’s Christmas crafts?
Allow paint and glue to dry completely before storing anything. Place flat paper crafts in folders, wrap delicate decorations individually, and store fabric crafts in clean, dry containers. Label the boxes with the year or child’s name to make the decorations more meaningful in future seasons.
How can I display children’s Christmas crafts at home?
Create a dedicated shelf, hang lightweight paper decorations on a wall, or display handmade ornaments on a small tree. Grouping the crafts together gives them a special place without making every room feel crowded. Use secure hanging methods and keep decorations away from candles, heaters, and walkways.
RELATED CONTENT
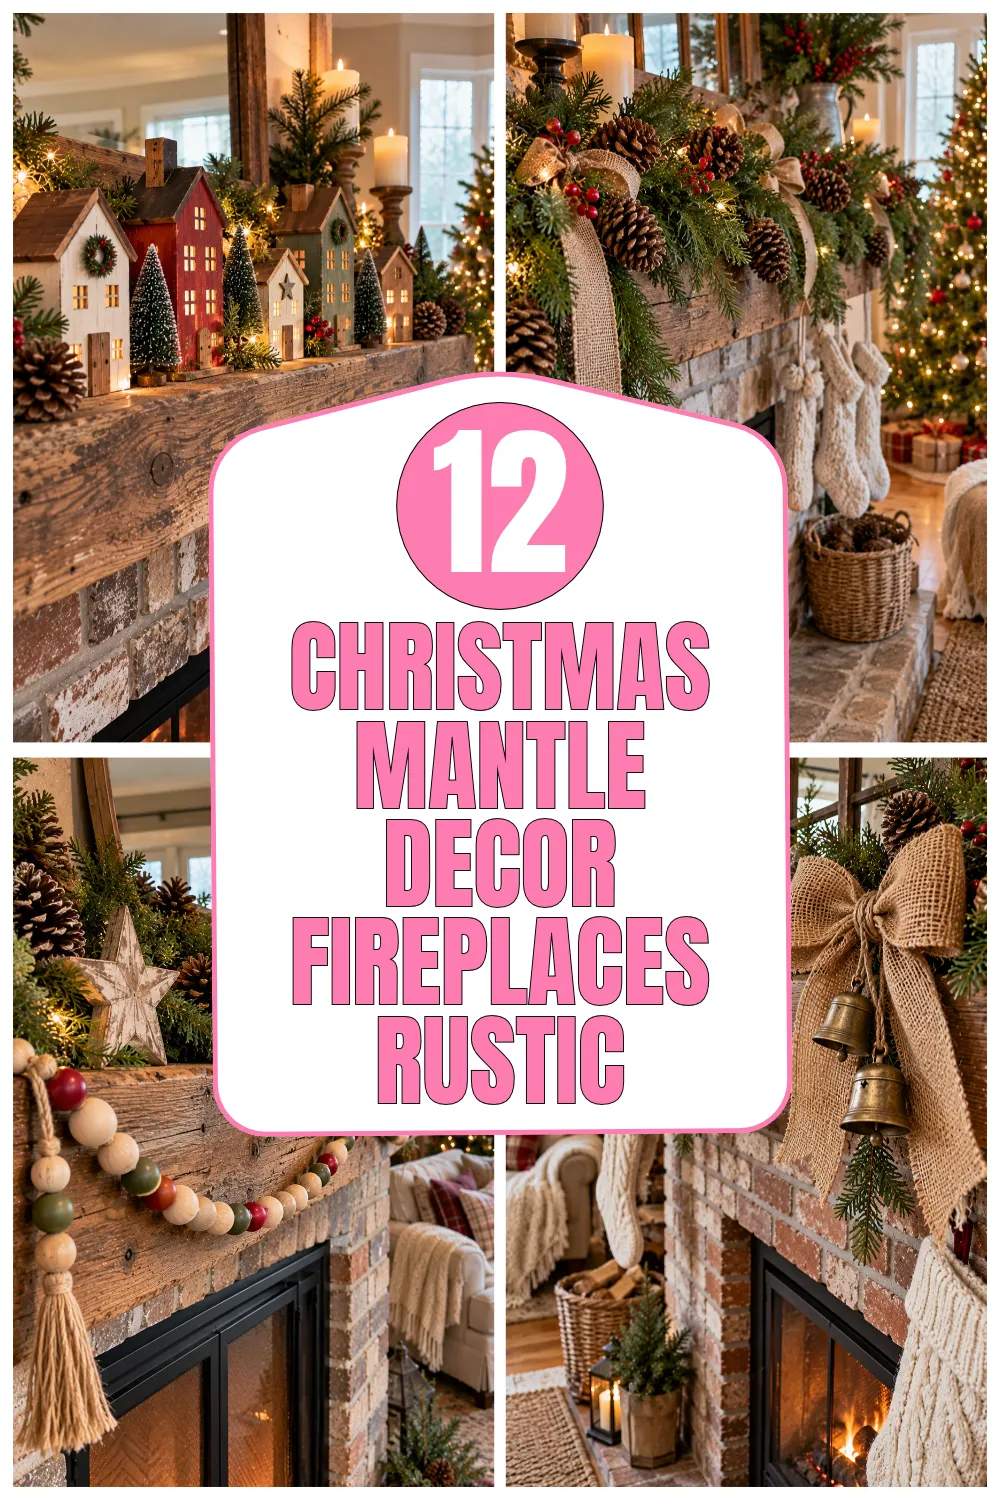
- Christmas Mantle Decor Fireplaces Rustic for a Cozy Holiday Home
- DIY Christmas Ornaments Kids Can Make at Home
CLOSING
Making Christmas crafts with children is about much more than the finished decorations. It is a chance to spend time together, encourage creativity, and build little holiday traditions that children may remember for years. A crooked paper tree or a reindeer with mismatched eyes can become a favorite decoration simply because a child made it with love.
Choose one or two projects that fit your children’s ages and interests, gather the supplies you already have, and let them make their own creative choices. There is no need for every craft to look perfect; the fun is in the process and the memories you create along the way. I hope these ideas inspire a happy afternoon of crafting in your home. Have fun, and I would love to hear which Christmas craft your little ones enjoy making most!