
12 Creative Crafting Ideas for Kids to Inspire Imagination

Crafting Ideas for Kids
Crafting with kids is a wonderful way to turn an ordinary afternoon into something creative, colorful, and memorable. You do not need expensive supplies or complicated instructions to get started. With paper, cardboard, paint, glue, and a few recycled materials, children can explore their imagination while practicing important skills such as cutting, sorting, problem-solving, and following simple steps. As a mom-friendly activity, I especially love projects that are easy to set up, forgiving when little hands make mistakes, and fun enough that children want to display their creations afterward.
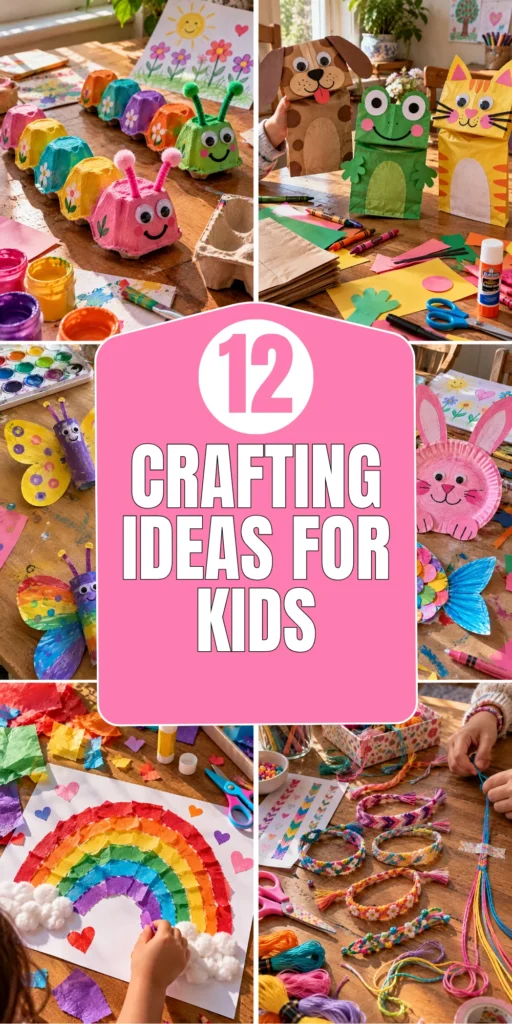
These 12 crafting ideas for kids include colorful projects for different ages and abilities, with practical instructions, budget-friendly supplies, and tips for keeping the mess manageable. Always choose age-appropriate materials and supervise children when using scissors, small decorations, or other craft supplies.
1. Colorful Paper Plate Animals
Description
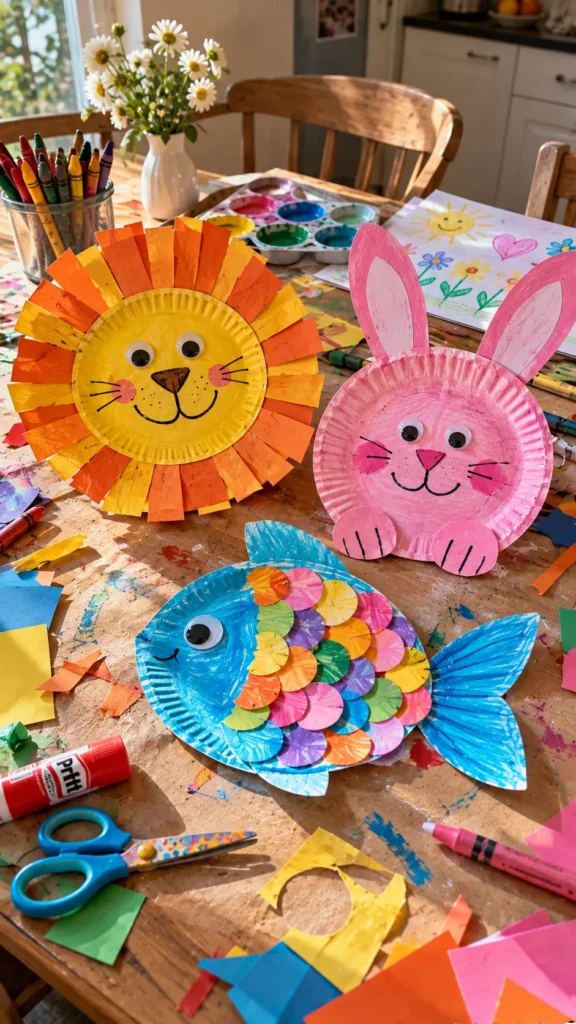
Paper plate animals are a simple way for kids to turn an everyday household item into a playful creation. Children can make lions, butterflies, fish, or rabbits using paint, paper, and a little imagination, making this project easy to adapt for different ages.
What It Is
A creative animal craft made from paper plates decorated with colorful paper shapes, paint, and child-friendly embellishments.
Supplies and Budget
You will need paper plates, washable paint or crayons, colored paper, child-safe glue, safety scissors, and markers. The approximate cost is $3–$8, especially if you already have basic supplies.
Tutorial how to make:
- Choose an animal and look at a simple picture for inspiration.
- Paint or color the paper plate and allow it to dry completely.
- Cut ears, fins, wings, or a mane from colored paper.
- Glue the pieces onto the plate and draw the eyes, nose, and other details.
- Let the finished animals dry before displaying them or using them for pretend play.
DIY Tip
Prepare larger paper shapes for younger children so they can focus on arranging and gluing. For toddlers, avoid small loose decorations that could become choking hazards.
2. Toilet Paper Roll Butterflies
Description
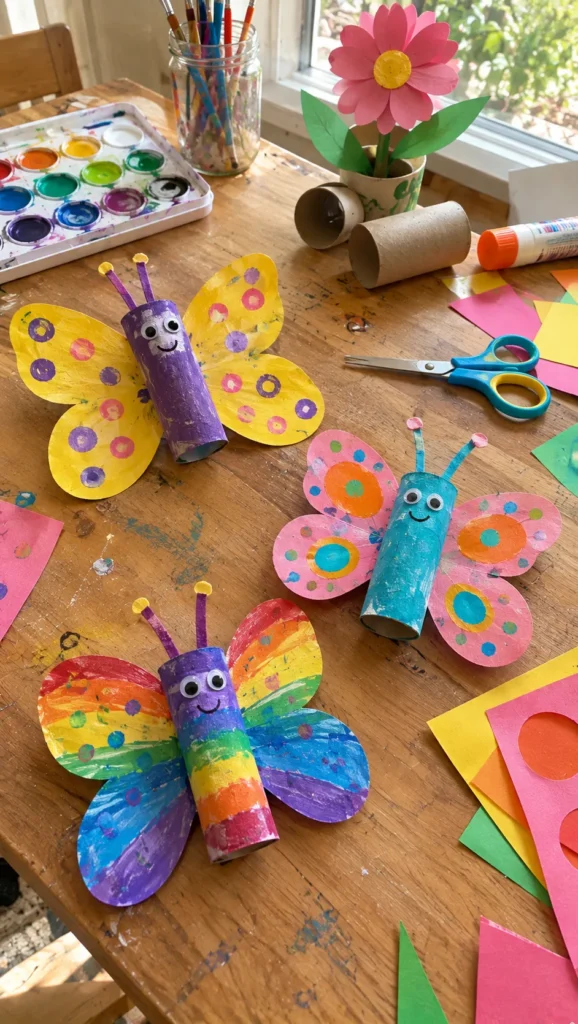
Empty cardboard tubes become colorful butterflies with a little paint and paper. This project encourages children to experiment with patterns and symmetry while reusing household materials that would otherwise be thrown away.
What It Is
A small butterfly figure made from a cardboard tube body, paper wings, and simple drawn or glued details.
Supplies and Budget
Gather clean cardboard tubes, colored paper, washable paint, glue, child-safe scissors, and markers. Expect to spend approximately $3–$7.
Tutorial how to make:
- Paint the cardboard tube and leave it to dry.
- Draw two large butterfly wings on colored paper and cut them out.
- Decorate the wings with dots, stripes, circles, or simple flower shapes.
- Glue the wings to the back of the tube.
- Add a face and paper antennae, then allow the butterfly to dry.
DIY Tip
Use a little glue rather than covering the entire wing. Too much liquid glue can wrinkle paper, so let children press each piece gently and wait for it to set.
3. Homemade Rainbow Collage
Description
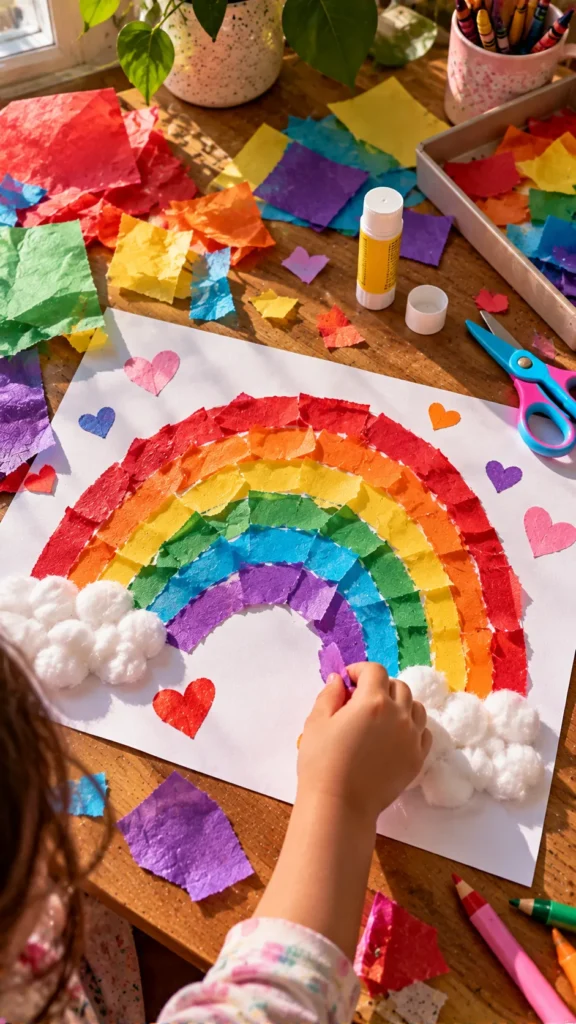
A rainbow collage is an easy, colorful activity for practicing color recognition and arranging shapes. Children can use paper scraps, tissue paper, or magazine cutouts to create a rainbow that looks different every time.
What It Is
A paper artwork featuring rainbow-colored strips or small pieces arranged in curved rows on a background.
Supplies and Budget
You will need white cardstock, colored paper or tissue paper, child-safe glue, safety scissors, and optional cotton balls. The estimated cost is $3–$8.
Tutorial how to make:
- Draw a large rainbow outline on cardstock.
- Sort paper scraps into red, orange, yellow, green, blue, and purple piles.
- Cut or tear the pieces into manageable shapes.
- Fill each rainbow band with the matching color, overlapping pieces slightly if necessary.
- Add paper clouds or cotton balls at the ends and leave the collage flat to dry.
DIY Tip
Torn paper is often easier for younger children than cutting curved strips. Provide a few pre-cut pieces if the goal is to focus on color sorting rather than scissor practice.
4. Painted Rock Garden Creatures
Description
Smooth stones can become ladybugs, bees, turtles, or funny little monsters with a few coats of paint. This craft combines outdoor collecting with creative play and gives children small decorations they can place in a garden or on a windowsill.
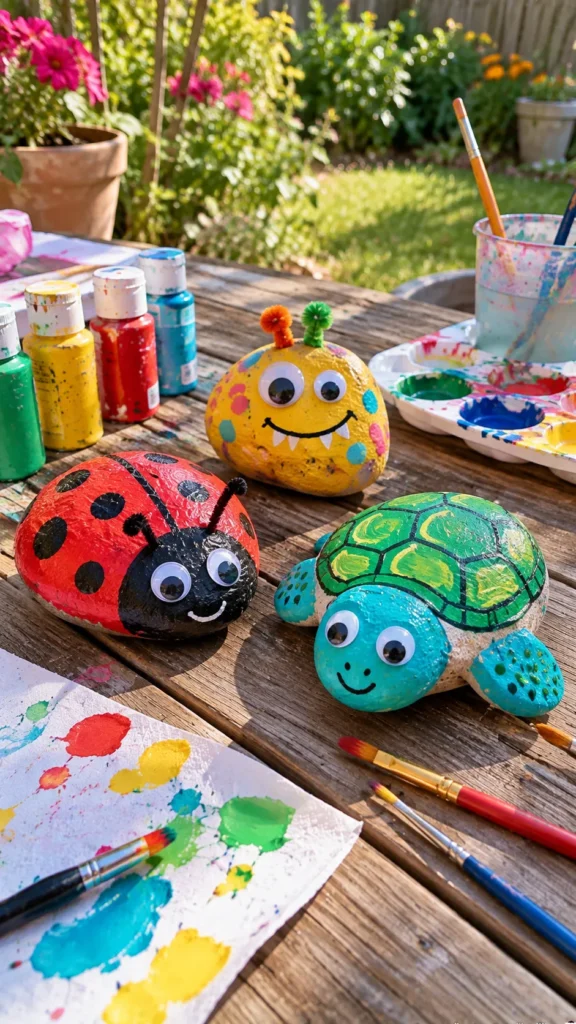
What It Is
A painted stone decorated with simple animal features and colorful patterns.
Supplies and Budget
Use clean, smooth stones, washable or suitable craft paint, paintbrushes, a water container, and a protective table covering. The budget is around $4–$10.
Tutorial how to make:
- Choose smooth stones that are large enough to handle safely.
- Wash them and let them dry completely.
- Paint a base color and wait until it is dry.
- Add eyes, spots, stripes, or a smiling face using smaller brushes.
- Let the paint dry fully before moving the stones outdoors or displaying them.
DIY Tip
Test the paint on one stone first because some surfaces absorb color differently. Young children should use large stones under supervision, and painted rocks should not be left where toddlers or pets might swallow them.
5. DIY Paper Cup Flower Garden
Description
Paper cup flowers bring bright colors to a craft table, especially during spring. Kids can turn paper cups, green paper stems, and colorful petals into a small flower arrangement that makes cheerful room decor or a handmade gift.
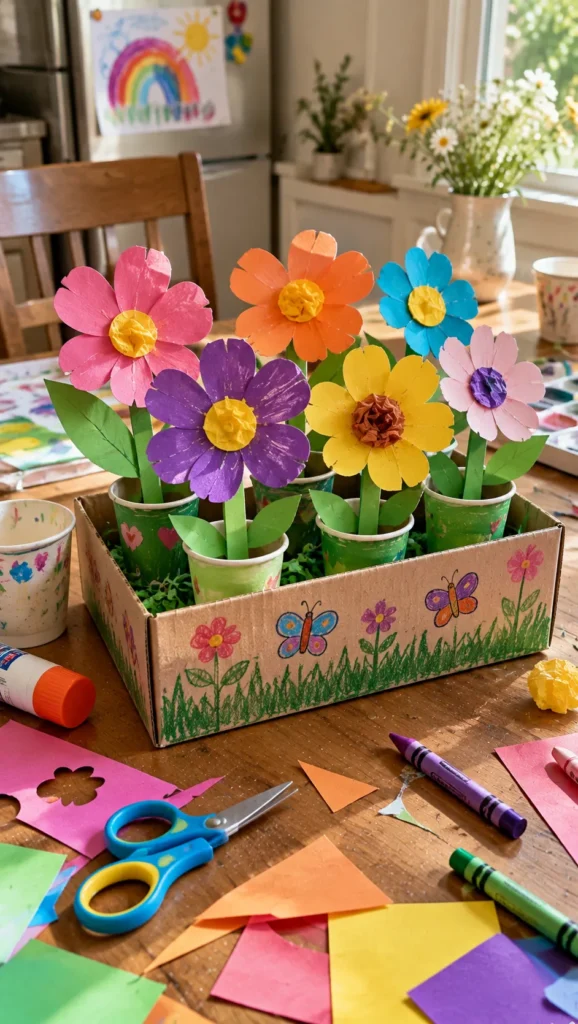
What It Is
A collection of handmade flowers assembled from paper cups, colored paper, and simple stems.
Supplies and Budget
You will need paper cups, colored cardstock, green paper straws or paper stems, child-safe glue, safety scissors, and crayons or markers. Expect to spend approximately $4–$9.
Tutorial how to make:
- Cut petal shapes from colored paper and arrange them in a circle.
- Glue the petals around the top edge of a paper cup or onto a flat flower center.
- Add a yellow or contrasting center to each flower.
- Attach a paper stem and green leaves.
- Place the flowers in an empty cup or small recycled box to create a garden display.
DIY Tip
Let children choose their own color combinations instead of expecting every flower to look alike. For younger kids, prepare the petal shapes in advance and let them handle the decorating and assembly.
6. Egg Carton Caterpillars
Description
An empty egg carton can become a cheerful caterpillar with paint, paper details, and a little imagination. The repeated sections make this project useful for practicing patterns, counting, and color sequencing while introducing children to creative reuse.
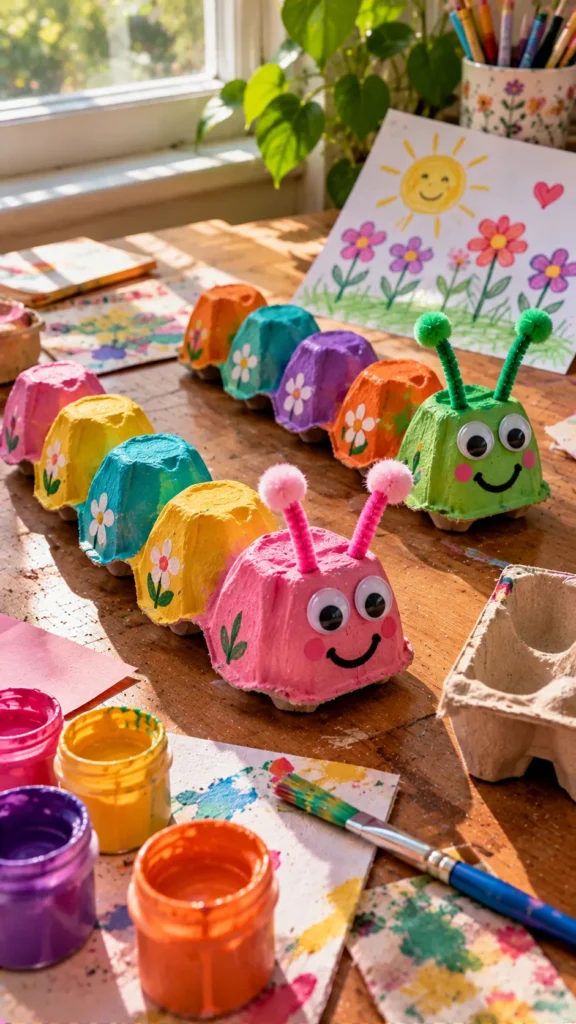
What It Is
A caterpillar made from a strip of cardboard egg carton, painted in bright colors and decorated with a face.
Supplies and Budget
Gather a clean cardboard egg carton, washable paint, paintbrushes, child-safe scissors, glue, and paper for facial details. The approximate cost is $3–$7.
Tutorial how to make:
- An adult should cut a strip of connected egg carton cups.
- Let children paint each section in different colors or a repeating pattern.
- Allow the paint to dry completely.
- Add a face to the front section using paper shapes or markers.
- Create paper antennae and attach them securely, then let the caterpillar dry before playing.
DIY Tip
Avoid using real wire or sharp toothpicks for antennae. Paper strips are easier for children to handle and reduce the risk of pokes or scratches.
7. Homemade Friendship Bracelets
Description
Friendship bracelets are a fun craft for children who enjoy choosing colors and making small gifts for friends or family members. Simple braided designs are easier for beginners than complicated knot patterns and can be completed with just a few strands of yarn.
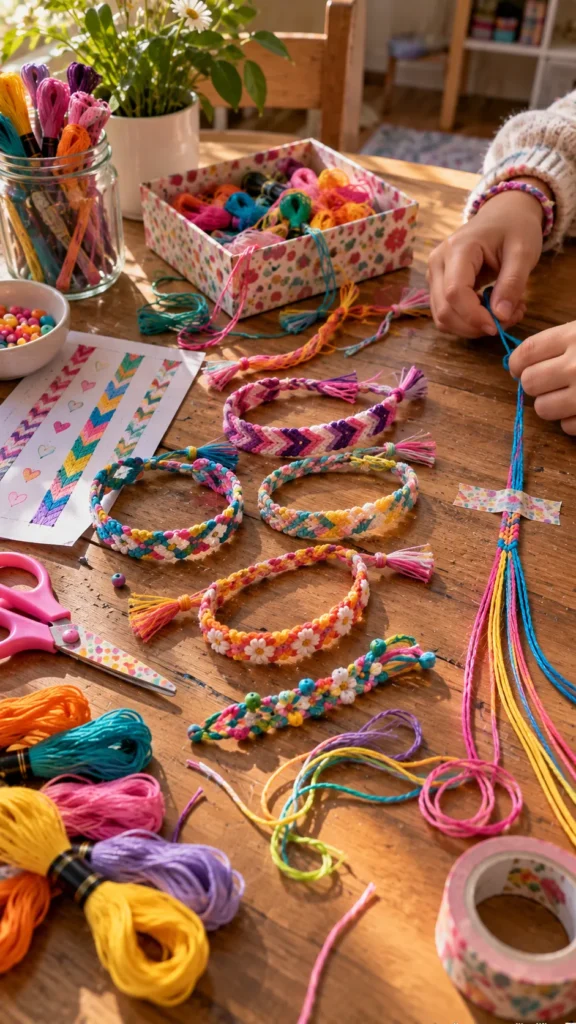
What It Is
A handmade bracelet made by braiding or knotting colorful yarn or embroidery thread.
Supplies and Budget
Choose soft yarn or embroidery thread, child-safe scissors, and tape to secure the starting end. The estimated cost is $3–$10 for materials that can make several bracelets.
Tutorial how to make:
- Cut three strands of yarn that are long enough to fit around the wrist with extra length for tying.
- Tie the strands together at one end and secure them to a table with tape.
- Braid the strands slowly, keeping the tension even without pulling too tightly.
- Tie a secure knot at the end and trim the excess.
- Tie the bracelet comfortably around the wrist, making sure it is not too tight.
DIY Tip
Choose thicker yarn for younger children because it is easier to hold and braid. Supervise children with long threads, and avoid leaving loose cords around very young kids.
8. DIY Tissue Paper Suncatchers
Description
Tissue paper suncatchers create a beautiful window decoration when daylight passes through their colorful layers. Kids can arrange translucent paper into hearts, flowers, or abstract patterns and watch the colors glow in natural sunlight.
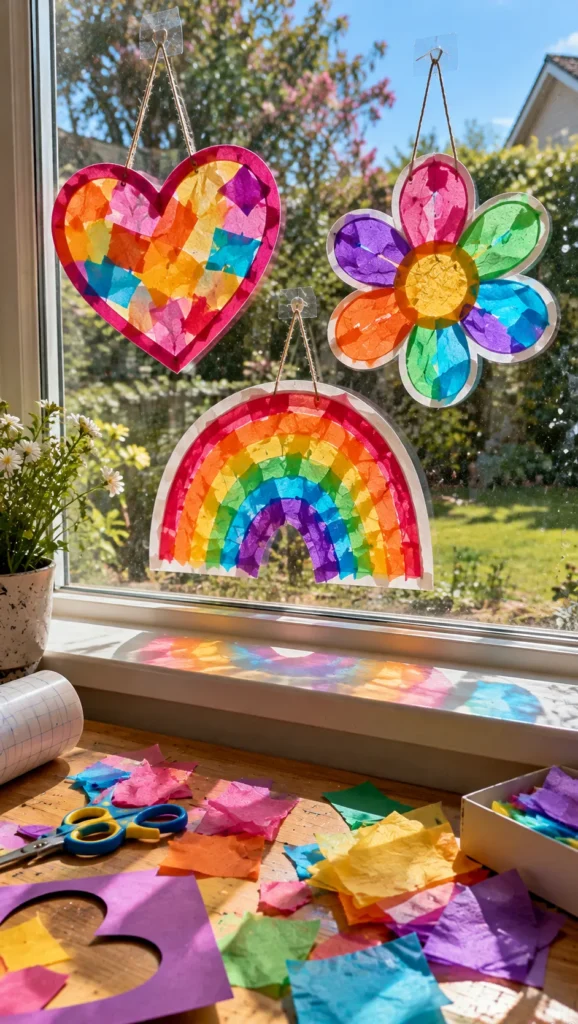
What It Is
A translucent paper decoration made with colored tissue paper and a clear adhesive backing or suitable transparent craft material.
Supplies and Budget
You will need colored tissue paper, clear contact paper or a child-safe transparent craft sheet, cardstock for the frame, safety scissors, and optional string. Budget around $4–$10.
Tutorial how to make:
- Cut a simple frame shape from cardstock, such as a heart or circle.
- Place clear contact paper behind the frame with the sticky side facing up, following the product instructions.
- Tear or cut tissue paper into small pieces and arrange them inside the frame.
- Cover the design with another clear sheet if the product allows it.
- Trim the edges and display the suncatcher near a window without blocking the view.
DIY Tip
Tissue paper can bleed color when wet, so avoid using liquid glue directly on delicate pieces. Test materials first and use a clear adhesive surface for a cleaner result.
9. Cardboard Tube Pencil Holder
Description
A homemade pencil holder helps children organize their art supplies while decorating their desk with something they created themselves. Cardboard tubes and a recycled base make this a practical project that can be customized with paint, paper, stickers, and patterns.
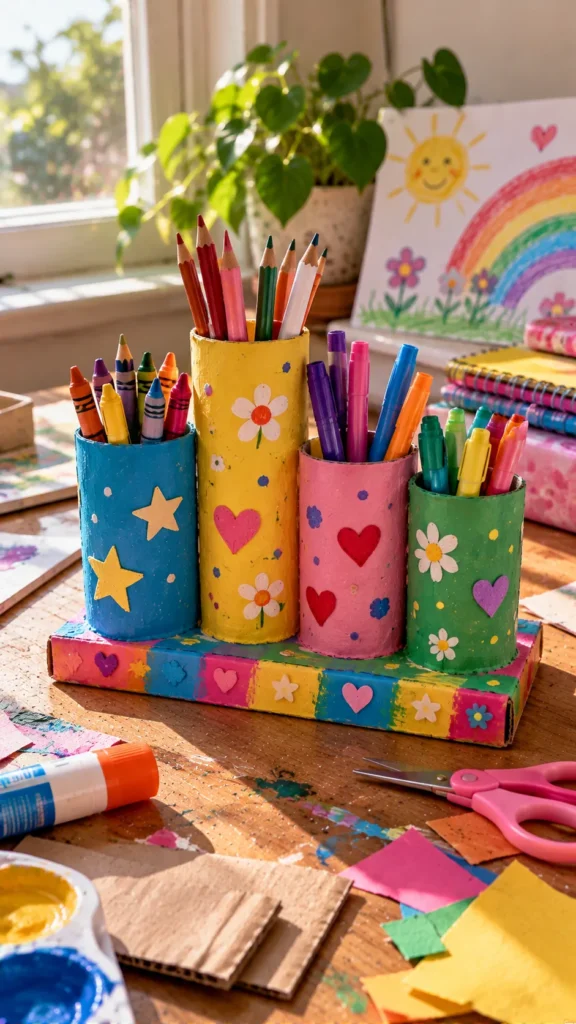
What It Is
A desk organizer made from cardboard tubes attached to a sturdy cardboard base.
Supplies and Budget
Gather clean cardboard tubes, thick cardboard, washable paint, colored paper, glue, safety scissors, and markers. The estimated cost is $3–$8.
Tutorial how to make:
- Cut the tubes to different heights, with adult help if necessary.
- Decorate each tube using paint, paper, or drawn patterns.
- Cut a sturdy cardboard base large enough to support the tubes.
- Glue the tubes upright onto the base and leave the organizer undisturbed until dry.
- Fill the holder with crayons, pencils, and markers once the structure is secure.
DIY Tip
Use fewer tubes if the base is lightweight. A wide, sturdy base helps prevent the organizer from tipping over when children reach for their supplies.
10. Paper Bag Animal Puppets
Description
Paper bag puppets turn a simple lunch bag into a character for storytelling and pretend play. Children can create dogs, frogs, cats, or imaginary creatures, then use their puppets to perform a little show for family members.
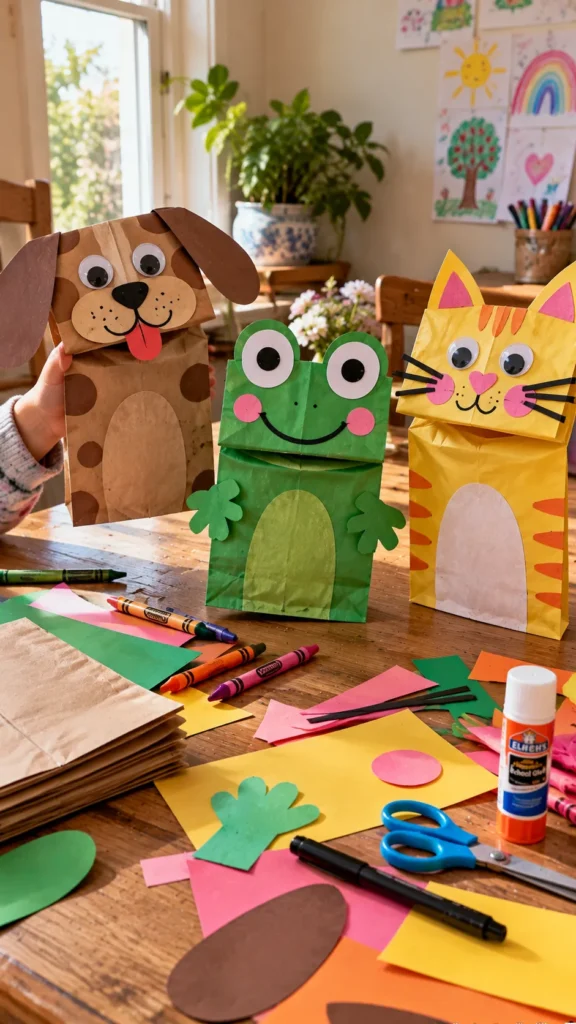
What It Is
A character made by decorating a paper lunch bag so the folded bottom becomes the puppet’s moving mouth.
Supplies and Budget
You will need paper lunch bags, colored paper, child-safe glue, safety scissors, crayons, and markers. Expect to spend approximately $3–$8.
Tutorial how to make:
- Place the paper bag with its folded bottom facing upward.
- Draw or glue eyes onto the folded section to establish the character’s face.
- Add ears, hair, spots, a nose, and other features using paper shapes.
- Decorate the front of the bag with clothing or body details.
- Let the glue dry and slide a hand into the bag to move the puppet’s mouth during play.
DIY Tip
Keep heavier decorations away from the moving fold so the mouth can open and close easily. Paper shapes usually work better than thick objects for this kind of puppet.
11. Nature-Inspired Leaf Printing
Description
Leaf printing lets children explore shapes and textures found outdoors. By brushing paint onto leaves and pressing them onto paper, they can create colorful patterns, greeting cards, or nature-inspired artwork with very little preparation.
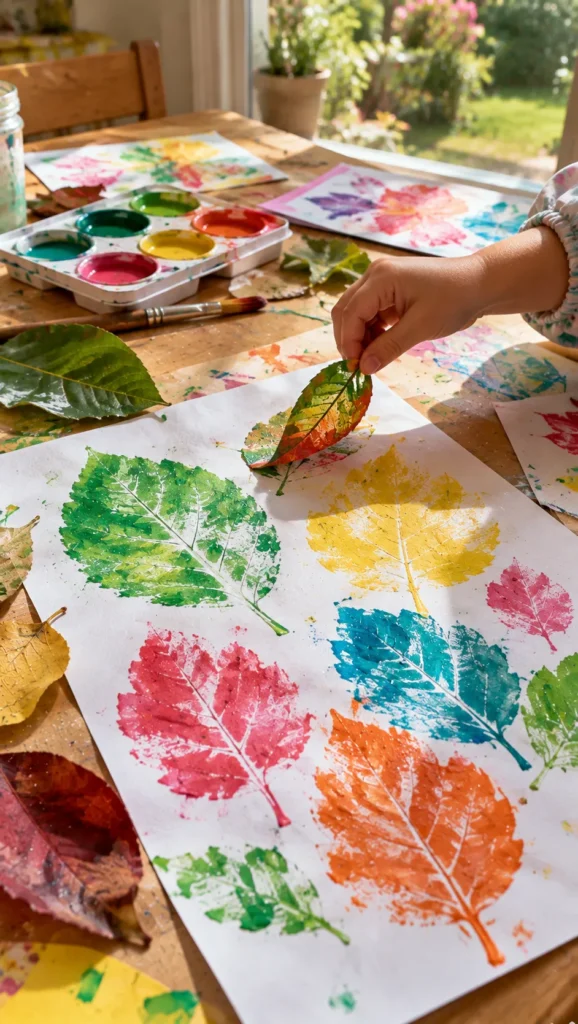
What It Is
A printmaking activity that uses real leaves to transfer their shapes and vein patterns onto paper.
Supplies and Budget
Collect clean fallen leaves, washable paint, paper, paintbrushes, a paint tray, and a protective table covering. The estimated cost is $3–$8.
Tutorial how to make:
- Collect several different leaves and gently wipe away dirt.
- Place a leaf vein-side up on scrap paper.
- Brush a thin layer of paint over the leaf’s surface.
- Turn the leaf carefully onto clean paper and press gently without sliding it.
- Lift the leaf to reveal the print, then repeat with other shapes and colors.
DIY Tip
Use a thin layer of paint; too much can hide the veins and create a solid blob. Leaves with clearly defined veins and relatively flat surfaces usually give the best results.
12. DIY Cardboard Rainbow Wall Art
Description
Cardboard rainbow wall art is a colorful project that gives recycled packaging a second life. Kids can paint the rainbow in their favorite colors, add paper clouds, and create a lightweight decoration for a bedroom, playroom, or craft corner.
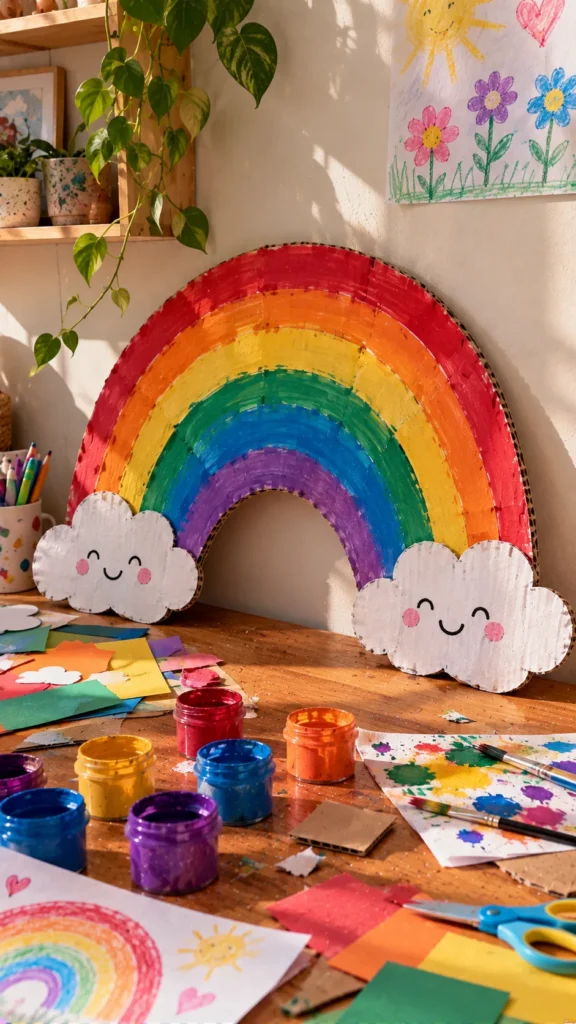
What It Is
A rainbow-shaped cardboard decoration painted or covered with colored paper and simple embellishments.
Supplies and Budget
You will need clean corrugated cardboard, washable paint, brushes, a pencil, safety scissors, glue, and optional cotton balls. Expect to spend approximately $3–$8.
Tutorial how to make:
- Draw a large rainbow shape on the cardboard and have an adult help cut it out.
- Mark separate curved bands across the shape.
- Paint each band a different color or cover it with strips of colored paper.
- Add paper clouds or a few cotton balls at the ends.
- Allow the decoration to dry completely before displaying it with an appropriate removable wall attachment.
DIY Tip
Keep the cardboard thick enough to hold its shape but easy for an adult to cut. If the paint causes the cardboard to curl, use less water and dry the piece flat under light, even pressure when appropriate.
FAQ SECTION
What are the best crafting ideas for young kids?
Paper plate animals, paper bag puppets, rainbow collages, and leaf printing are good choices because they use simple steps and offer plenty of room for creativity. Choose activities according to each child’s abilities and supervise any cutting or gluing.
How can I make crafts with kids on a small budget?
Use clean cardboard boxes, paper tubes, egg cartons, paper scraps, and other safe recycled materials. Buy basic supplies such as washable paint, glue sticks, and colored paper in multipacks, and prepare materials before starting to reduce waste.
How do I keep crafting with kids from becoming too messy?
Cover the table with a washable cloth or recycled paper, use small paint portions, and keep a container nearby for scraps. Introduce one material at a time and leave a little space for drying finished projects.
What crafts help children develop useful skills?
Cutting and gluing support hand coordination, while sorting colors and arranging patterns encourage early problem-solving. Projects involving simple sequences, counting, and storytelling can also support language and early math skills.
How do I choose crafts for different ages?
Younger children often enjoy tearing paper, painting large surfaces, and placing pre-cut shapes. Older children may be ready for more detailed cutting, braiding, and multi-step projects. Always follow age guidance on supplies and provide appropriate supervision.
How can kids display their finished crafts?
Create a rotating gallery using a string and clips, frame favorite paper projects, or dedicate a shelf to three-dimensional creations. Keep especially delicate items in a folder or box so they can be saved without cluttering the home.
RELATED CONTENT
- Simple Embroidery Ideas Design for Handmade Gifts
- Recycled Crafts for Kids Using Household Materials
CLOSING
The best crafts for kids are not necessarily the ones that look perfect when they are finished. They are the projects that let little hands experiment, make choices, learn from small mistakes, and feel proud of what they have created. I love how a few ordinary supplies can become a colorful butterfly, a silly puppet, or a handmade gift that a child cannot wait to share. Choose an idea that suits your child’s age and interests, prepare a simple workspace, and enjoy the process together. Keep the finished creations somewhere special, take a photo of the favorites, and do not worry if every detail looks a little different. Those handmade imperfections are part of what makes each project memorable. Have fun crafting, and share your favorite creations with family and friends!
One Comment