12 Thanksgiving Craft Ideas for a Creative Holiday Celebration

Thanksgiving Craft Ideas
Thanksgiving is one of my favorite times to slow down, get creative, and add handmade touches around the home. There is something special about decorating with pieces you made yourself, whether it is a little paper turkey on the mantel, a colorful fall wreath on the front door, or handmade place cards that make everyone feel welcome at the dinner table. You do not need expensive supplies or advanced crafting skills to create something beautiful.
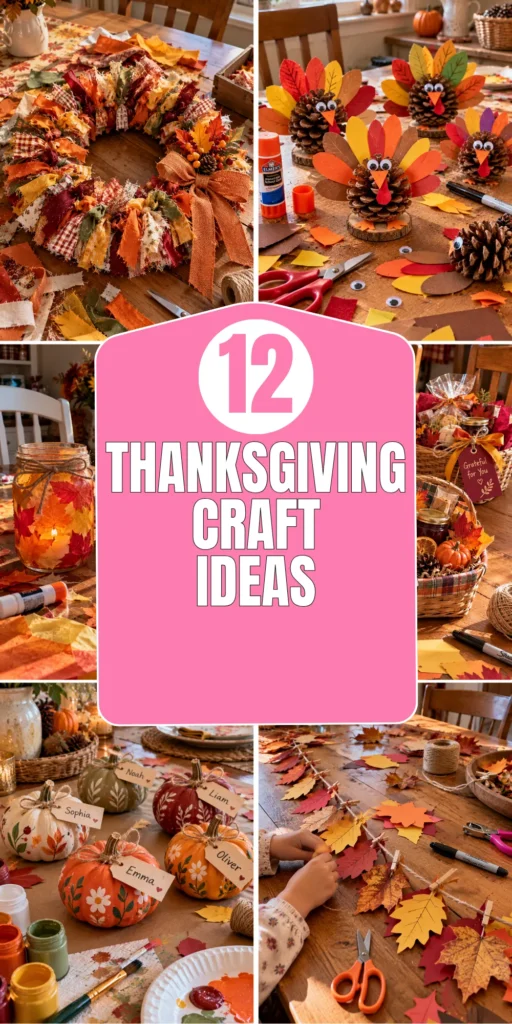
In this collection, I am sharing 12 Thanksgiving craft ideas that combine autumn colors, natural textures, and simple techniques you can enjoy at home. Many projects use affordable materials you may already have, such as cardboard, fallen leaves, fabric scraps, mason jars, and leftover ribbon. I have also included practical instructions, realistic budget estimates, and helpful tips to make each project easier, especially if you are crafting with children or preparing decorations before the holiday.
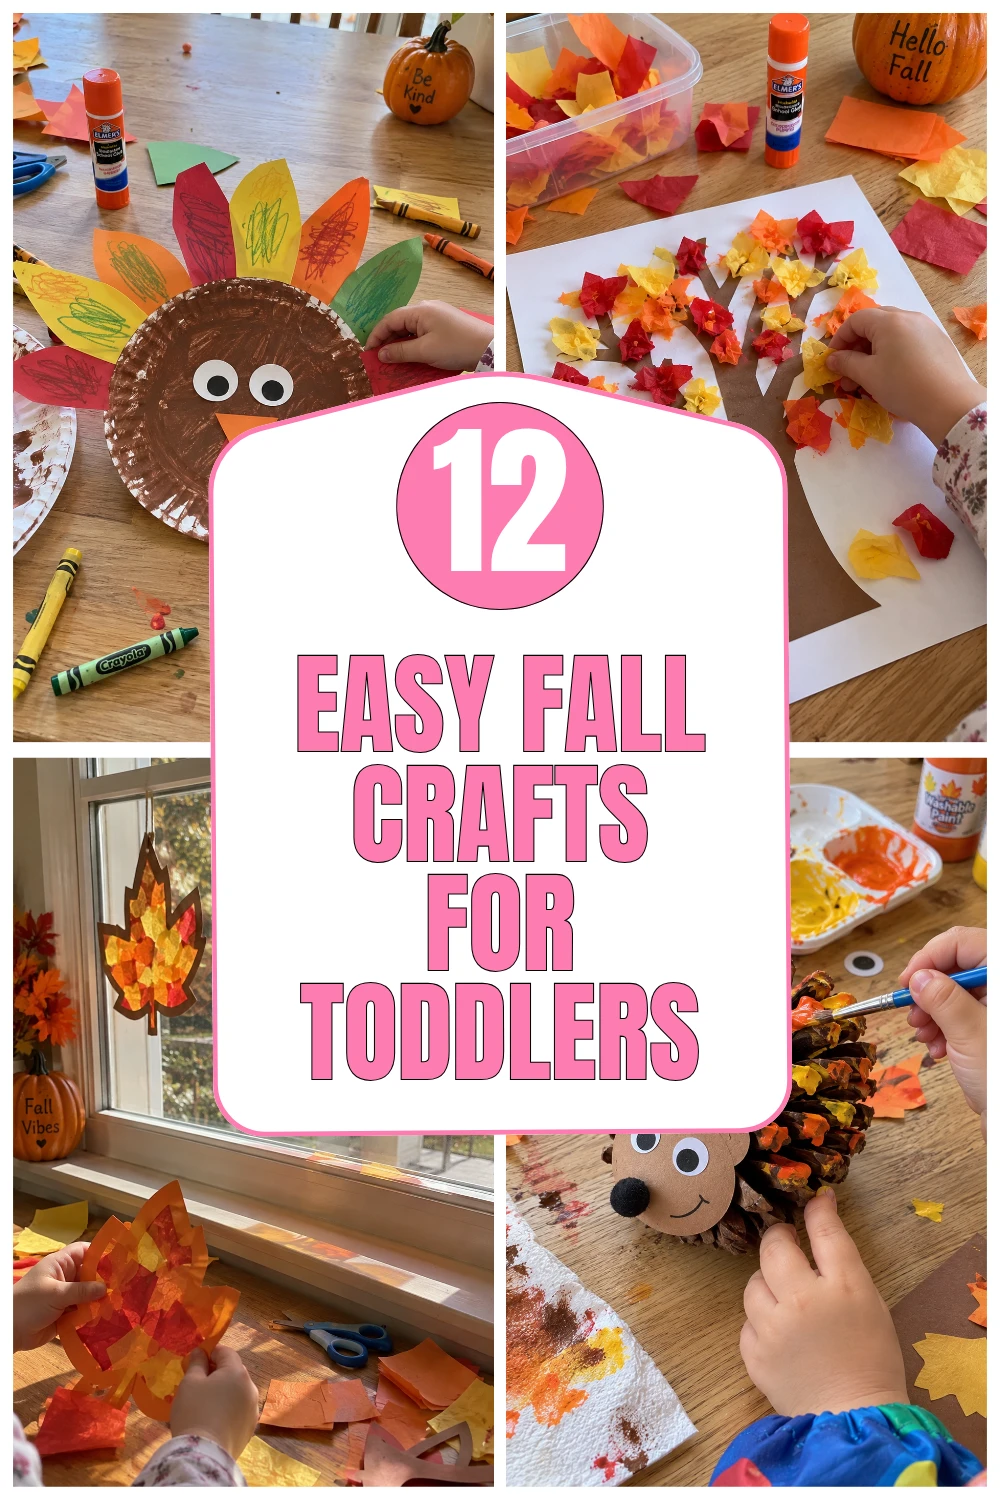
1. DIY Colorful Paper Turkey Decorations
Description
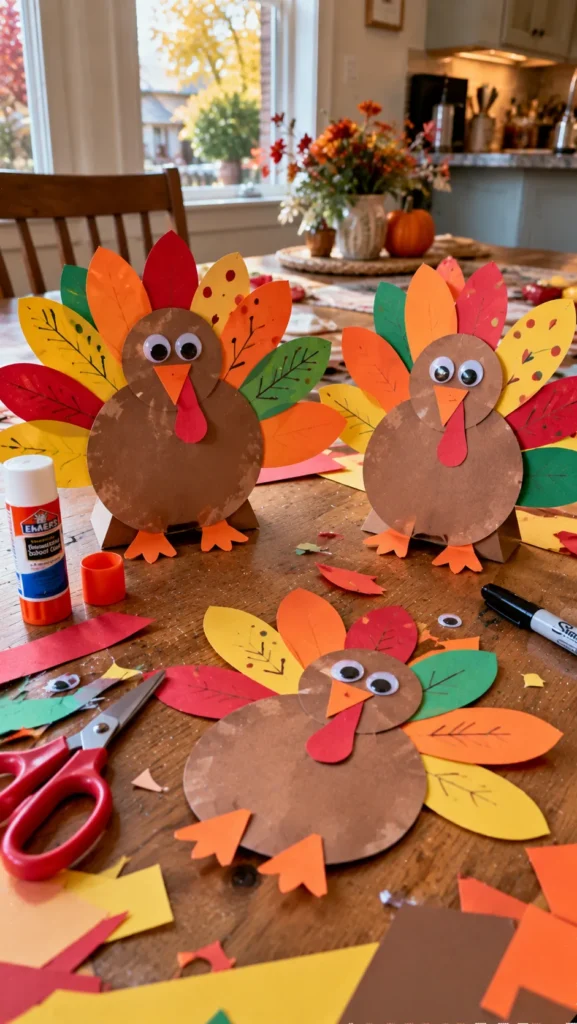
These cheerful paper turkeys are an easy way to bring Thanksgiving colors to shelves, children’s tables, and classroom displays. Layered paper feathers create a playful handmade look, and the project is simple to customize using leftover cardstock and craft supplies.
What It Is
A standing turkey decoration made from colored paper, a folded paper body, and layered feathers. Each turkey can have its own expression and color combination.
Supplies and Budget
- Brown, orange, red, and yellow cardstock: $2–$4
- Child-safe scissors and craft glue: $2–$4
- Googly eyes or a black marker: $1–$2
- Optional small cardboard scraps for support
Estimated budget: $5–$10 for several decorations, depending on what you already own.
Tutorial how to make:
- Cut a rounded body and a smaller head from brown cardstock.
- Cut five to seven feather shapes in different autumn colors.
- Arrange the feathers in a fan behind the body before gluing anything down.
- Attach the body over the lower part of the feather fan.
- Add eyes, a small orange beak, and a red paper wattle.
- Fold a small strip of cardboard into a support and attach it to the back so the turkey can stand upright.
DIY Tip
Arrange the feathers before applying glue. I find that dry-fitting the pieces first prevents uneven spacing and saves paper. For younger children, prepare the basic shapes in advance and let them decorate the faces independently.
2. Handmade Thanksgiving Mason Jar Candle Holders
Description
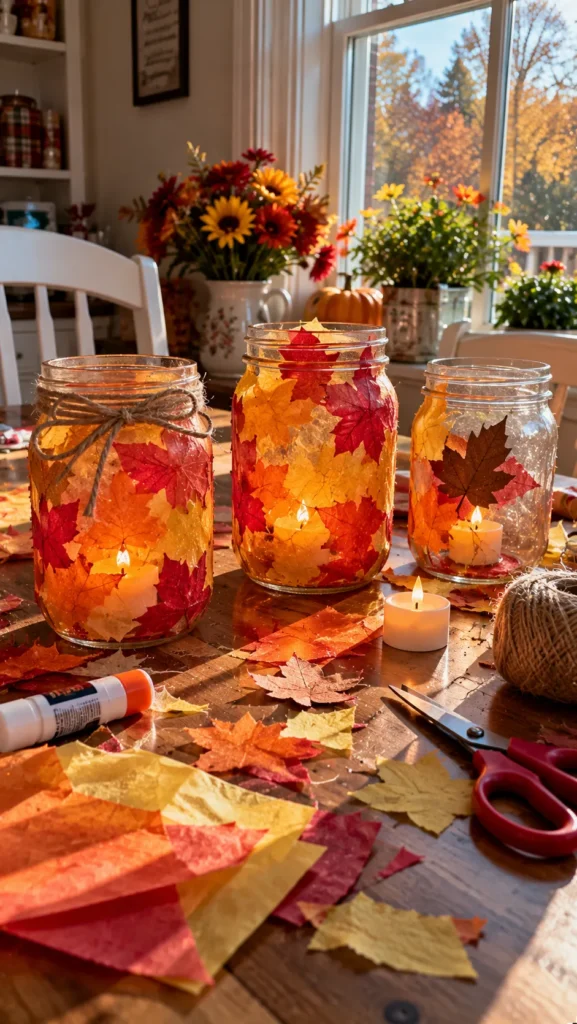
Mason jar candle holders create a warm autumn glow for dining tables, entryways, and cozy corners. With translucent fall-colored accents and simple twine details, ordinary jars become affordable decorations that work beautifully throughout the Thanksgiving season.
What It Is
A decorated glass jar used as a seasonal centerpiece or accent. The finished jar can hold a battery-operated candle and be reused for other holidays.
Supplies and Budget
- Clean mason jars or recycled glass jars: $0–$5
- Autumn-colored tissue paper or translucent craft paper: $2–$4
- Craft glue suitable for the paper: $2–$4
- Twine or ribbon: $1–$3
- Battery-operated tea lights: $3–$6
Estimated budget: $5–$15, depending on the number of jars and lights.
Tutorial how to make:
- Wash the jars and remove any labels or sticky residue.
- Cut tissue paper into small leaves or irregular autumn-colored pieces.
- Apply a thin layer of suitable craft glue to the outside of the jar.
- Press the paper onto the glass, overlapping the edges slightly.
- Allow the decoration to dry completely according to the glue instructions.
- Tie twine around the rim and place a battery-operated tea light inside.
DIY Tip
Avoid applying thick layers of glue, which can dry cloudy or leave visible lumps. Always use battery-operated lights with paper-covered jars. Real flames can heat the glass and ignite nearby decorations, so they are not a safe substitute for this craft.
3. DIY Autumn Leaf Garland
Description
An autumn leaf garland adds natural color to a mantel, window, or dining room without requiring complicated materials. Using real pressed leaves or handmade paper leaves gives the finished decoration an organic appearance that feels personal and seasonal.
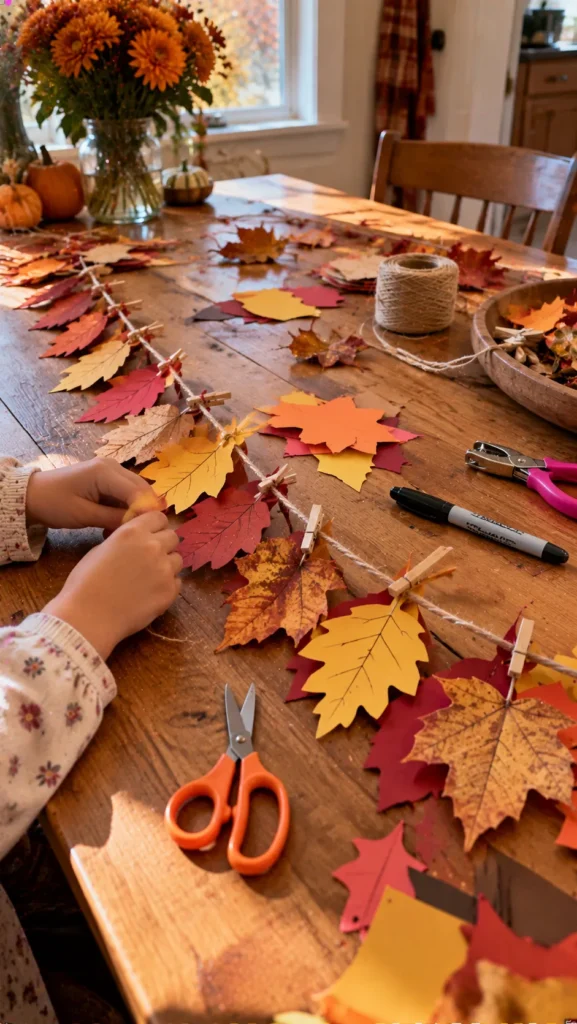
What It Is
A decorative strand of autumn leaves attached to twine or ribbon. You can make it short for a small shelf or longer for a fireplace mantel.
Supplies and Budget
- Fallen leaves or colored cardstock: $0–$4
- Twine or ribbon: $2–$4
- Hole punch or scissors: $1–$3
- Small clips or craft glue: $1–$3
Estimated budget: $3–$10.
Tutorial how to make:
- Collect clean, dry leaves that are not moldy or damaged, or cut leaf shapes from cardstock.
- If using real leaves, press them between sheets of paper inside a heavy book until dry.
- Cut a length of twine to fit the display area.
- Attach the leaves with small clips or a small amount of suitable glue.
- Alternate leaf sizes and colors to avoid creating repetitive sections.
- Hang the garland from removable hooks or another suitable support.
DIY Tip
Real leaves are beautiful but can become brittle and crumble indoors. Paper leaves are a better choice if you want to reuse the garland next year. Keep the finished decoration away from candles, fireplaces, and other heat sources.
4. Painted Mini Pumpkin Place Cards
Description
Painted mini pumpkin place cards combine Thanksgiving table decor with a useful way to welcome guests. Small pumpkins become colorful accents when decorated with names, simple patterns, or metallic details, making each place setting feel thoughtful without adding clutter.
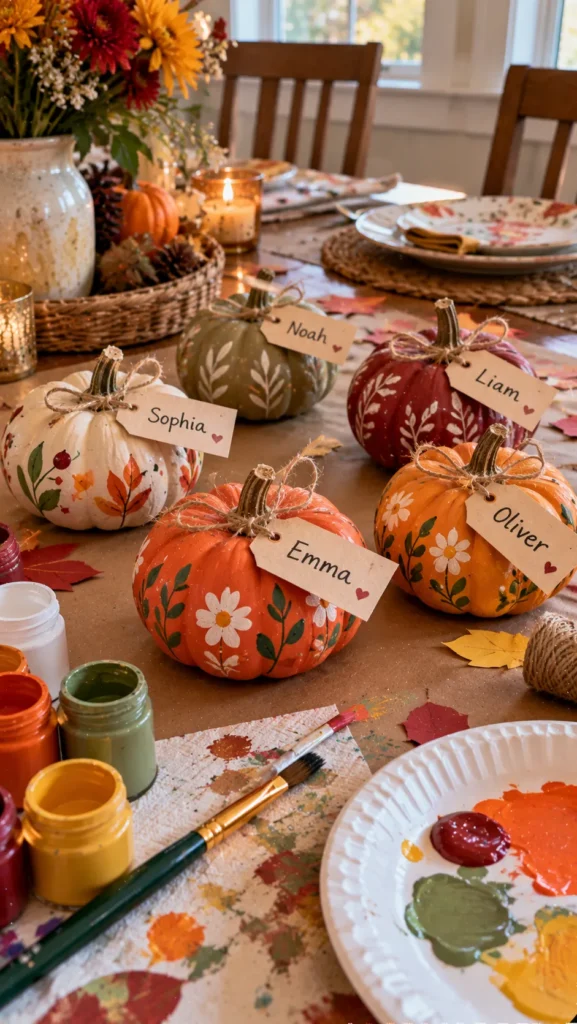
What It Is
A personalized pumpkin decoration placed beside each guest’s plate. Small faux pumpkins are particularly practical because they last longer and can be reused.
Supplies and Budget
- Mini real or faux pumpkins: $4–$10
- Acrylic craft paint: $3–$6
- Fine paintbrush or paint marker: $2–$4
- Optional ribbon or small decorative leaves: $1–$3
Estimated budget: $8–$18 for a small group of place cards.
Tutorial how to make:
- Wipe each pumpkin clean and let it dry.
- If using faux pumpkins, apply a thin coat of paint if you want a different base color.
- Allow the base coat to dry fully before adding names or patterns.
- Write each guest’s name using a fine paintbrush or paint marker.
- Add small dots, leaves, or simple lines if desired.
- Place each pumpkin beside a plate, ensuring the name faces the guest.
DIY Tip
Practice the lettering on paper before writing on the pumpkin. Pumpkins have curved surfaces, so shorter names are easier to position neatly. If you are using real pumpkins, avoid painting them too far in advance if you want them to remain fresh for the holiday.
5. Handmade Thanksgiving Wreath with Fabric Scraps
Description
A fabric-scrap wreath is a colorful way to reuse leftover ribbon, old cotton fabric, and autumn-colored textiles. The different textures give it a cozy handmade appearance, while the simple construction makes it easy to personalize for a front door or interior wall.
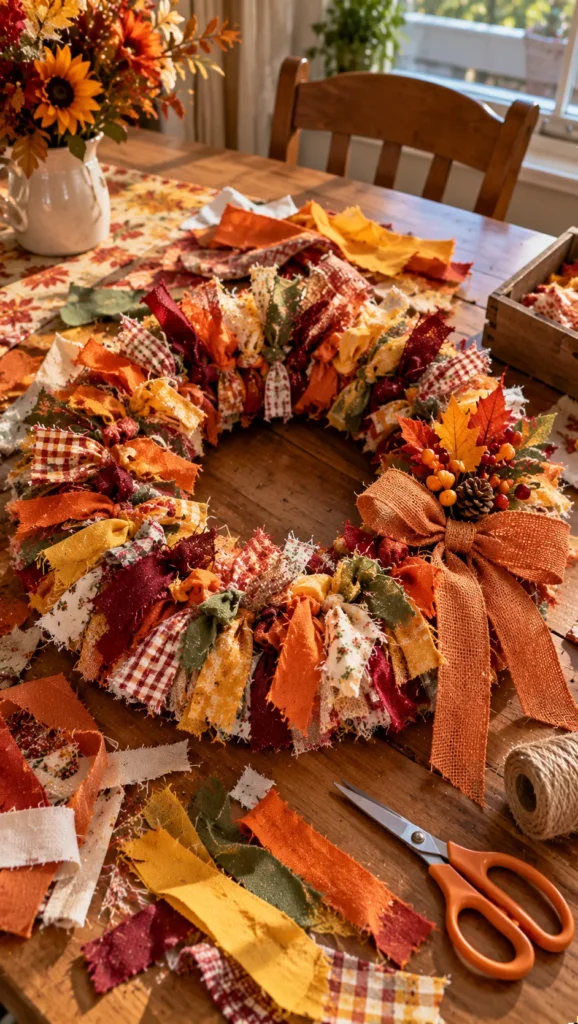
What It Is
A wreath made by tying small fabric strips around a circular base until the surface looks full and textured.
Supplies and Budget
- Wire wreath frame or sturdy cardboard ring: $2–$5
- Fabric scraps in orange, rust, cream, and burgundy: $0–$6
- Scissors: use what you have
- Optional ribbon or a small decorative sign: $1–$4
Estimated budget: $3–$12.
Tutorial how to make:
- Cut the fabric into strips of roughly equal width, varying the lengths slightly for texture.
- If using cardboard, cut a sturdy ring and reinforce it with an extra layer if needed.
- Tie each fabric strip around the frame with a simple knot.
- Continue adding strips close together until the base is mostly covered.
- Mix colors throughout the wreath instead of placing all of one color in a single section.
- Add a ribbon or small sign, then attach a secure hanging loop.
DIY Tip
Cotton and lightweight woven fabric are easier to knot than thick upholstery material. Before cutting old clothing, check for usable buttons or trim you might want to keep. For an outdoor door, choose a protected location because fabric can fade or become damp in bad weather.
6. DIY Thankful Tree with Paper Leaves
Description
A thankful tree turns gratitude into a simple family activity. Bare branches and colorful paper leaves create a seasonal display where everyone can write something they appreciate, making the decoration meaningful as well as attractive.
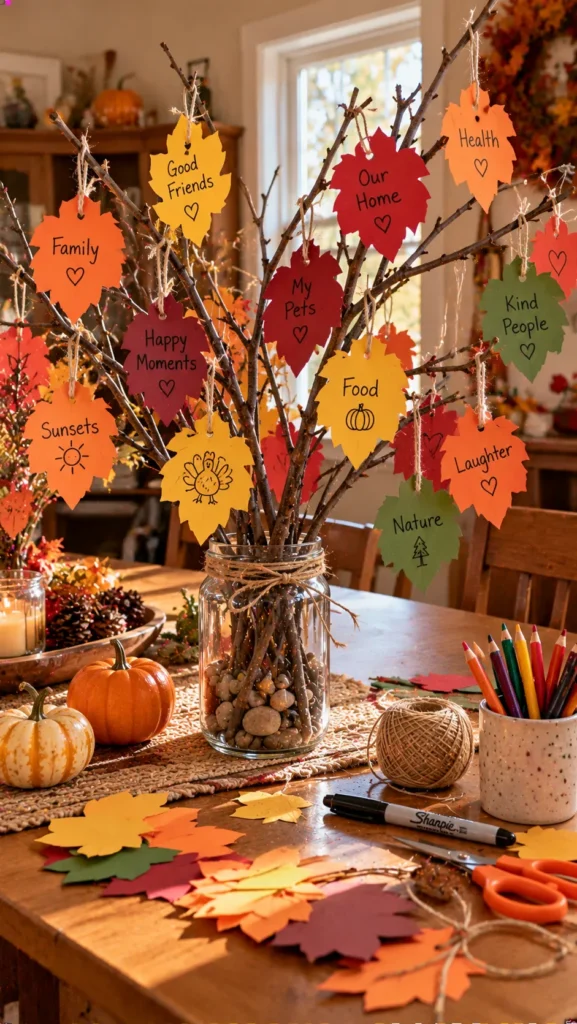
What It Is
A tabletop arrangement of branches decorated with paper leaves containing handwritten messages of gratitude.
Supplies and Budget
- Clean, dry branches: free if responsibly collected
- Colored cardstock: $2–$4
- Twine or ribbon: $2–$4
- A sturdy vase or jar: $0–$5
- Marker or pen: use what you have
Estimated budget: $2–$12.
Tutorial how to make:
- Choose a few sturdy branches and remove loose debris.
- Place them in a heavy vase with stones or another stable filler.
- Cut leaf shapes from orange, yellow, red, and brown cardstock.
- Punch a small hole near the top of each leaf.
- Thread twine through the holes to create hanging loops.
- Invite family members to write a gratitude message on each leaf and hang it on a branch.
DIY Tip
Keep the branches short enough that the arrangement will not tip over easily. I like leaving extra blank leaves beside the vase so guests can add messages throughout the day. If children are participating, offer stickers or drawings as an alternative to writing.
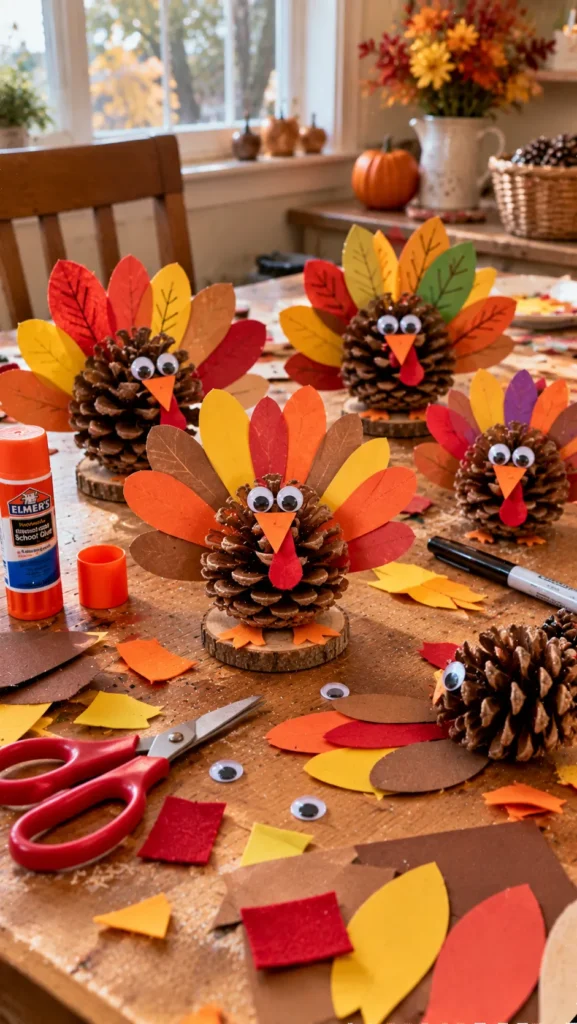
7. Rustic Pinecone Turkey Decorations
Description
Pinecone turkeys bring natural texture and playful character to Thanksgiving shelves, children’s tables, and seasonal centerpieces. Their layered scales work like ready-made feathers, so you can create a charming decoration with just a few extra materials.
What It Is
A small turkey figure made from a pinecone, a paper or felt face, and colorful feather accents.
Supplies and Budget
- Clean, dry pinecones: free if collected responsibly
- Felt or cardstock scraps: $2–$4
- Craft glue: $2–$4
- Googly eyes or a marker: $1–$2
- Optional small wooden discs for bases: $2–$4
Estimated budget: $3–$10 for several turkeys.
Tutorial how to make:
- Select a pinecone that sits securely on its side or base.
- Cut a small rounded head, triangular beak, and red wattle from felt or cardstock.
- Glue the face pieces together and allow them to dry.
- Attach the head to the narrow end of the pinecone.
- Add colorful paper or felt feathers between the pinecone scales if you want a brighter design.
- Glue the pinecone to a wooden disc if it needs extra stability.
DIY Tip
Brush off dirt and inspect collected pinecones for insects before bringing them indoors. Choose a pinecone with a stable shape rather than one that rolls easily. For crafts with young children, an adult should handle hot glue if it is needed; regular craft glue is safer but requires more drying time.
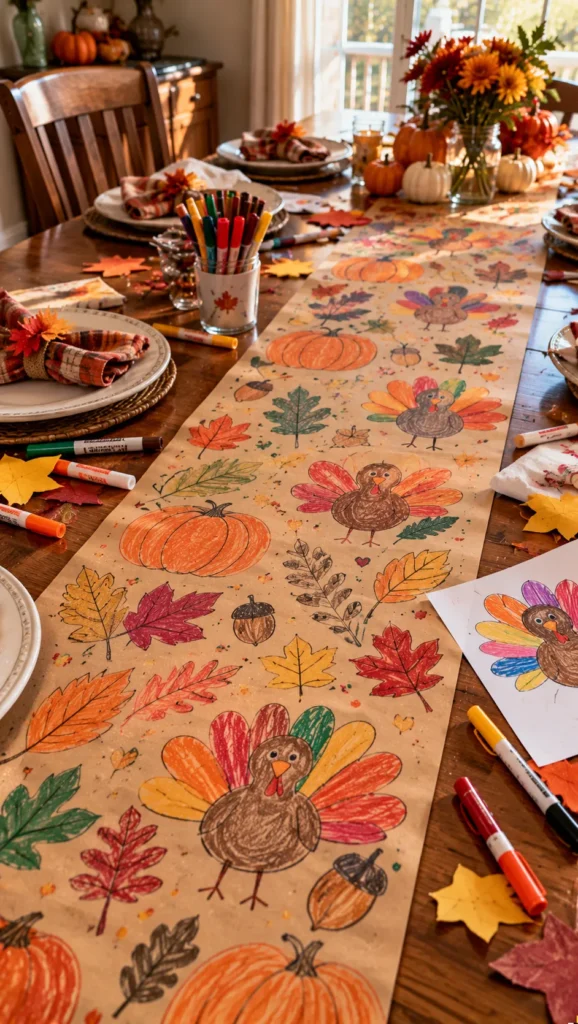
8. DIY Thanksgiving Paper Table Runner
Description
A handmade paper table runner adds color to a Thanksgiving meal while giving guests a place to draw, write messages, or decorate their own section. It is inexpensive, easy to customize, and especially useful when you want a festive table without worrying about washable fabric.
What It Is
A long strip of kraft paper or drawing paper used as a disposable table covering or creative centerpiece.
Supplies and Budget
- Kraft paper or a roll of drawing paper: $3–$6
- Washable markers or colored pencils: $2–$5
- Stencils or leaf templates: $1–$3
- Optional stickers: $1–$3
Estimated budget: $5–$12.
Tutorial how to make:
- Measure the table and cut the paper to the desired length.
- Roll it out flat and place small, removable pieces of tape underneath if necessary.
- Draw a simple border of leaves, pumpkins, or acorns along both sides.
- Add a few larger shapes in the center, leaving room for serving dishes.
- Write a short Thanksgiving message at each end if desired.
- Let any wet marker ink dry before placing dishes or decorations on the paper.
DIY Tip
Test your markers on a scrap of the same paper first because some inks bleed through thin kraft paper. Keep the design around the edges so plates and serving bowls do not hide all the artwork. Use the paper as a craft activity before dinner, then recycle it if it is clean and accepted by your local recycling service.
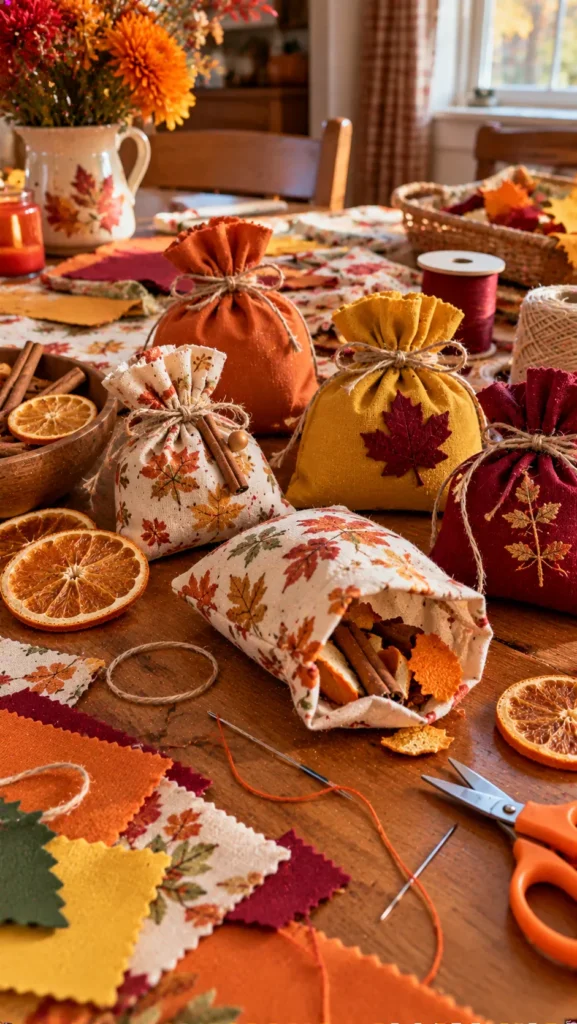
9. Handmade Autumn Scent Sachets
Description
Autumn scent sachets add a cozy seasonal touch to entryway baskets, drawers, and guest rooms. Small fabric pouches filled with suitable dried botanicals can look charming and make thoughtful handmade gifts when tied with simple ribbon.
What It Is
A small sewn or tied fabric pouch containing dry aromatic materials such as cinnamon sticks, dried orange peel, or suitable dried herbs.
Supplies and Budget
- Cotton fabric scraps or ready-made small pouches: $2–$6
- Dried orange peel or suitable dried botanicals: $2–$5
- Ribbon or twine: $1–$3
- Needle and thread, or fabric-safe adhesive suitable for the project: $2–$4
Estimated budget: $5–$15.
Tutorial how to make:
- Cut two small fabric rectangles and place them with the patterned sides facing inward.
- Stitch around three sides, leaving the top open.
- Turn the pouch right-side out and fill it lightly with completely dry aromatic materials.
- Fold the raw edges inward and stitch the opening closed.
- Tie a ribbon around the top if you are using a ready-made pouch or fabric that can be gathered.
- Label the sachet if you plan to give it as a gift.
DIY Tip
Make sure all filling materials are completely dry to reduce the risk of mold. Avoid adding essential oils directly to fabric or filling unless the materials are specifically suitable, and keep sachets away from children and pets who might chew or swallow the contents. These sachets are for gentle fragrance, not food use.
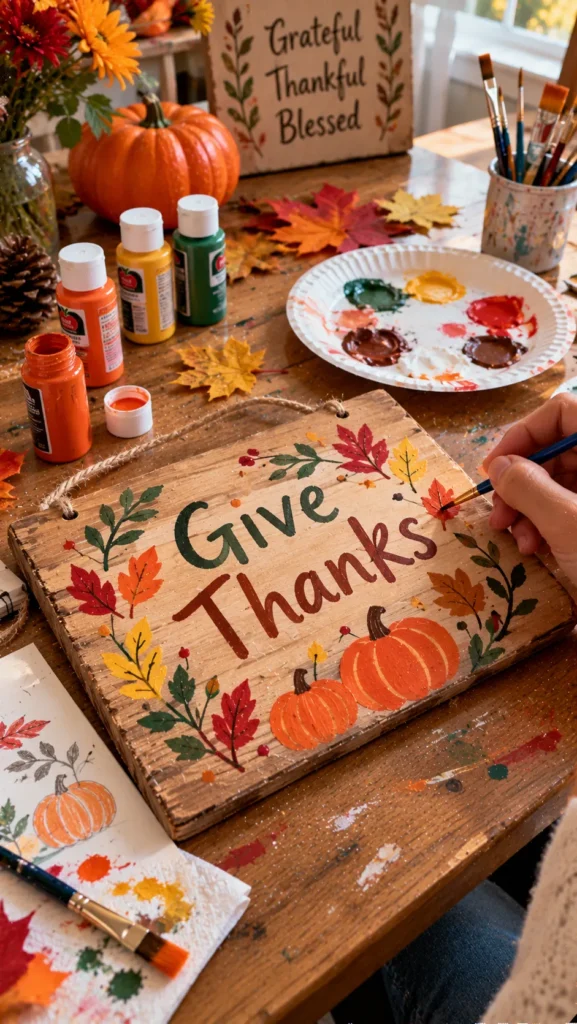
10. Painted Wooden Thanksgiving Signs
Description
A painted wooden Thanksgiving sign adds a personal message to a mantel, shelf, or entryway. Using reclaimed wood or an inexpensive craft board gives the project character, while simple lettering and a few autumn motifs keep the design achievable for beginners.
What It Is
A small decorative sign painted with a Thanksgiving message such as “Give Thanks” or “Gather Together.”
Supplies and Budget
- Small wooden board or reclaimed wood: $3–$8
- Acrylic craft paint: $3–$6
- Fine brush or paint markers: $2–$4
- Sandpaper: $1–$3
- Optional hanging hardware: $2–$4
Estimated budget: $7–$18.
Tutorial how to make:
- Sand any rough edges and remove the dust with a dry cloth.
- Apply a thin base coat and allow it to dry completely.
- Lightly sketch your lettering in pencil before painting.
- Paint the words slowly, using a fine brush or paint marker for better control.
- Add a simple border, tiny leaves, or small pumpkin illustrations.
- Let the sign dry thoroughly before adding hanging hardware or placing it on a shelf.
DIY Tip
Short messages are easier to paint neatly than long phrases. If you prefer clean lettering, use a stencil or transfer the design lightly before painting. For reclaimed wood, check for splinters, protruding nails, or old finishes that may be unsafe to sand without proper precautions.
11. DIY Leaf-Printed Thanksgiving Napkins
Description
Leaf-printed napkins bring handmade detail to a Thanksgiving table without requiring complicated sewing or painting skills. Real leaves create naturally varied patterns, making each napkin slightly different and giving the table a soft, organic autumn look.
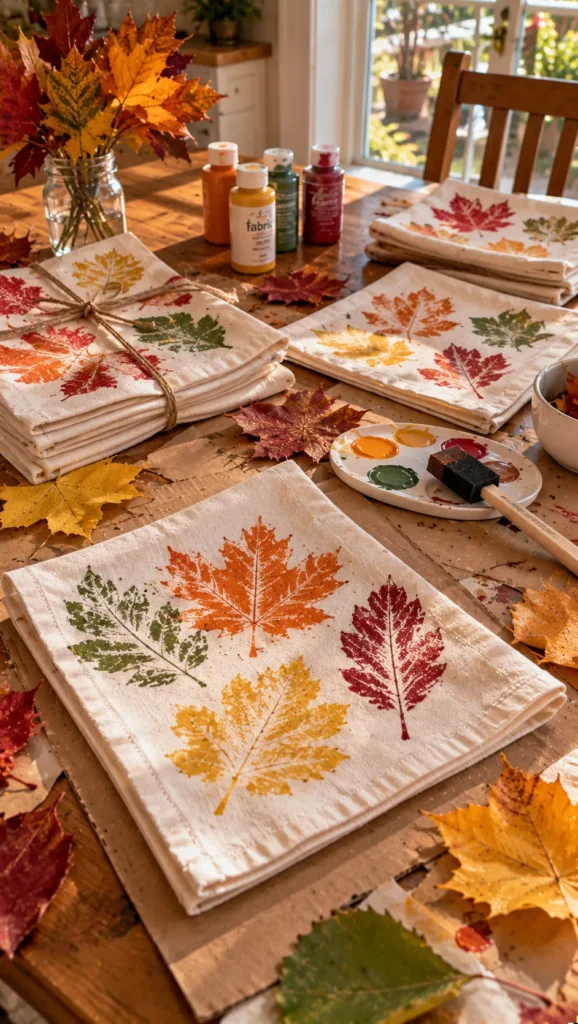
What It Is
Plain cloth napkins decorated with leaf shapes using fabric paint or a suitable fabric-printing medium.
Supplies and Budget
- Plain cotton napkins or fabric squares: $4–$10
- Fabric paint: $3–$6
- Flat autumn leaves: free
- Small sponge or soft brush: $1–$3
- Scrap paper or cardboard: use what you have
Estimated budget: $7–$18.
Tutorial how to make:
- Wash and dry the napkins to remove any finishes that might affect paint adhesion.
- Place cardboard inside each napkin to prevent paint from transferring through the fabric.
- Choose flat leaves with clear veins and relatively sturdy edges.
- Apply a thin, even layer of fabric paint to the underside of a leaf.
- Press the leaf gently onto the napkin without sliding it.
- Lift the leaf carefully and allow the print to dry, then follow the paint manufacturer’s instructions for setting and washing.
DIY Tip
Too much paint can blur the leaf veins and create a solid patch. Test the technique on a scrap of matching fabric before decorating the napkins. Use fabric paint designed for washable textiles and allow the full recommended curing time before the napkins are used.
12. Mini Thanksgiving Gift Baskets with Handmade Tags
Description
Mini Thanksgiving gift baskets are a thoughtful way to thank hosts, welcome guests, or send family members home with a little seasonal treat. Simple baskets, autumn-colored tissue paper, and handwritten tags create a polished handmade gift without requiring expensive packaging.
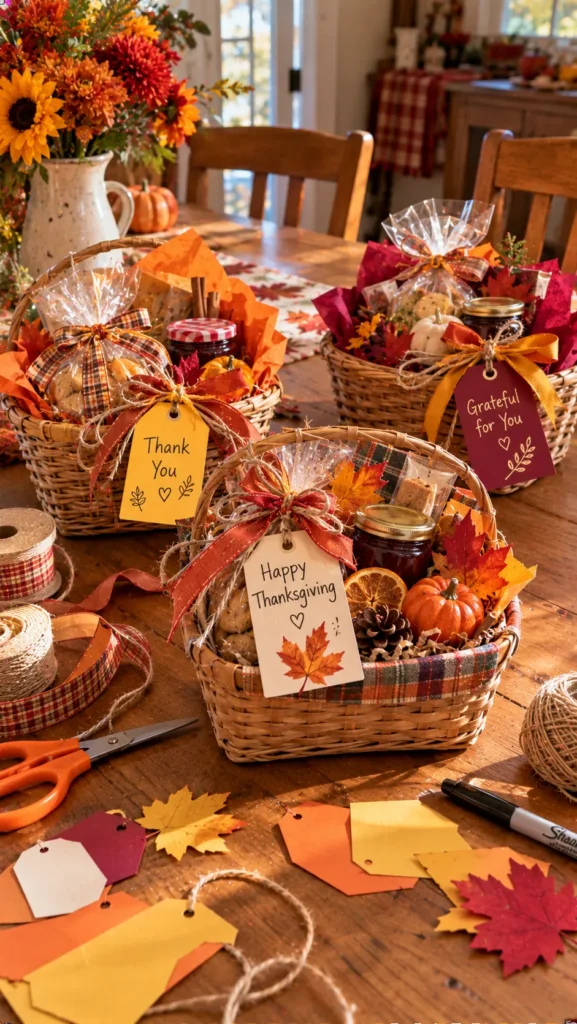
What It Is
A small basket filled with shelf-stable treats or useful seasonal items, finished with a personalized paper tag.
Supplies and Budget
- Small baskets, paper gift boxes, or reusable containers: $2–$6 each
- Tissue paper or shredded paper: $2–$4
- Shelf-stable treats or small gifts: $4–$10 per basket
- Cardstock and ribbon for tags: $2–$4
Estimated budget: approximately $8–$20 per basket, depending on the contents.
Tutorial how to make:
- Choose a basket or box that fits the items without forcing them together.
- Add tissue paper or clean shredded paper as a base.
- Arrange the treats or small gifts so the taller items sit toward the back.
- Cut a tag from cardstock and write a short thank-you message.
- Punch a hole in the tag and attach it with ribbon or twine.
- Check that food packaging is intact and label any homemade food or potential allergens clearly.
DIY Tip
A few useful, well-chosen items look better than a basket packed with unrelated fillers. If you are preparing several gifts, assemble all the tags and packaging first to make the process faster. Keep perishable items properly stored and consider recipients’ dietary restrictions before including food.
FAQ SECTION
What are the easiest Thanksgiving crafts for beginners?
Paper turkeys, autumn leaf garlands, thankful trees, and simple painted pumpkin place cards are excellent beginner projects. They require few materials, involve straightforward steps, and can be adapted to different skill levels.
How can I make Thanksgiving crafts on a small budget?
Start with supplies you already own, including cardboard, fabric scraps, jars, twine, and fallen leaves. Choose projects that reuse materials, and buy only the items needed to finish them. You can also make several decorations from one pack of cardstock or one roll of ribbon.
What Thanksgiving crafts can I make with children?
Paper turkeys, paper table runners, thankful trees, and pinecone turkeys are fun options. Prepare cutting or assembly steps in advance when necessary, and use age-appropriate scissors, suitable glue, and adult supervision for small parts or hot tools.
When should I start making Thanksgiving decorations?
For reusable crafts, starting one to three weeks before Thanksgiving gives you time to gather supplies and let paint or glue dry properly. Fresh or delicate natural decorations are best prepared closer to the celebration so they remain attractive.
How can I make homemade Thanksgiving crafts look more polished?
Choose a consistent autumn color palette, measure materials before cutting, and allow paint and glue to dry completely between steps. Test unfamiliar materials on scraps first, and avoid adding too many embellishments to a small project.
How should I store Thanksgiving crafts for next year?
Make sure decorations are completely dry before storing them. Wrap fragile pieces individually, place paper crafts in flat folders or sturdy boxes, and keep fabric items clean and dry. Label each container so you can find your favorite decorations easily next autumn.
RELATED CONTENT
- Simple Embroidery Ideas Design for Handmade Gifts
- DIY Thanksgiving Table Decorations for a Cozy Gathering
CLOSING
The best Thanksgiving crafts are not necessarily the most complicated ones. Sometimes, a paper turkey made with the kids, a handmade garland, or a little painted pumpkin can bring more personality to your home than an expensive store-bought decoration. What matters most is choosing projects you enjoy making and giving yourself enough time to have fun with the process.
I hope these ideas inspire you to gather your favorite craft supplies, experiment with autumn colors, and create something special for your home or the people you love. Do not worry if your finished pieces are not perfectly symmetrical; those little handmade details are part of their charm. Happy crafting, and I would love to hear which Thanksgiving project you try first!