12 Outdoor Kitchen Ideas on a Budget That Look Expensive

Outdoor Kitchen Ideas on a Budget
Creating an outdoor kitchen doesn’t have to mean investing in expensive appliances, custom cabinets, or a complete backyard renovation. With a little planning, affordable materials, and a few clever design choices, you can build a practical cooking space that feels welcoming and looks beautiful.
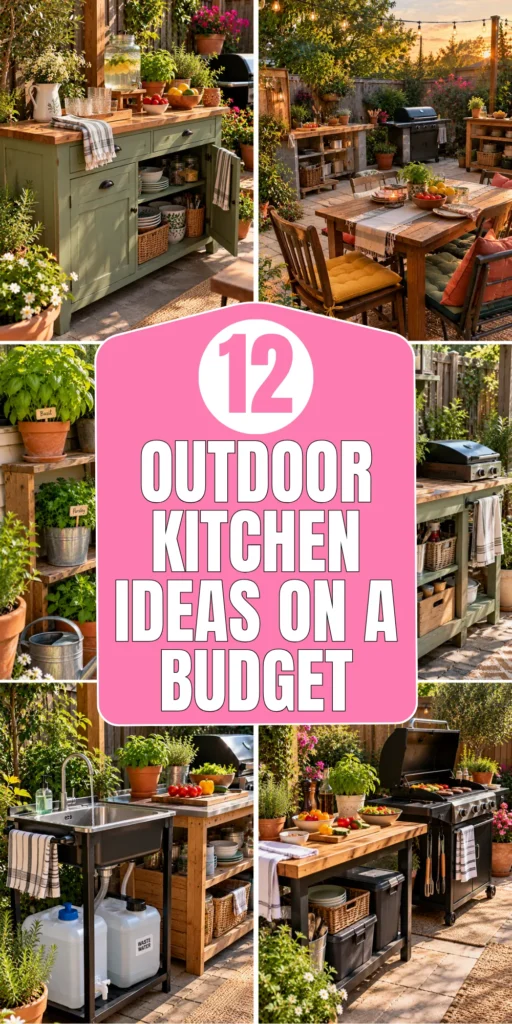
Whether you have a small patio, a narrow garden, or a spacious backyard, the right setup can make outdoor meals easier and more enjoyable. These 12 outdoor kitchen ideas on a budget focus on realistic improvements, useful storage, weather-resistant materials, and creative ways to make the most of what you already have.
1. Build a Simple Outdoor Kitchen with Pallet Wood
Description
Reclaimed pallet wood can help you create an affordable outdoor kitchen counter with a rustic, handmade appearance. It works particularly well for casual patios and garden corners where you need a little workspace without paying for custom cabinetry. The key is choosing suitable wood, building a stable frame, and protecting the finished structure from moisture.

What You’ll Need
- Heat-treated, clean reclaimed pallets or suitable outdoor lumber
- Exterior-rated screws and brackets
- A level, drill, and saw
- Exterior wood stain or sealant
- A weather-resistant countertop surface
Quick How-To
Start by measuring the available space and deciding how much counter area you need for food preparation. Build a sturdy frame using sound timber, then secure the boards evenly to create the sides and lower storage shelf. Add a countertop made from a suitable outdoor-rated material, such as sealed exterior plywood designed for the intended use or a durable worktop. Sand rough edges and apply an appropriate exterior finish. Keep the structure level and avoid using questionable reclaimed wood, especially timber with unknown chemical treatments. Never place combustible wood close to a grill or open flame.
Styling Tip
Use terracotta pots, simple metal containers, and a few herbs to soften the rustic look. Keep the countertop relatively clear so the kitchen remains practical rather than cluttered.
2. Turn an Old Potting Bench into an Outdoor Kitchen Station
Description
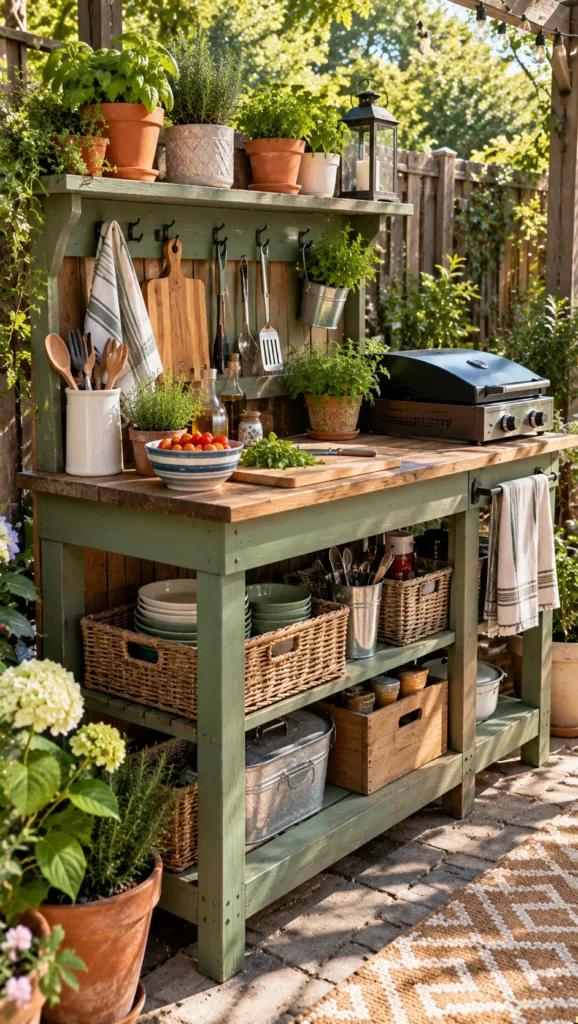
An old potting bench can become a useful outdoor kitchen station with very little modification. Its existing work surface and shelves provide space for serving dishes, utensils, herbs, and cooking accessories. This idea is especially helpful for renters or homeowners who want a flexible setup without constructing permanent cabinets.
What You’ll Need
- A sturdy potting bench or worktable
- Exterior wood finish or rust-resistant paint
- A removable, washable work surface
- Storage baskets or containers
- Hooks and weather-resistant hardware
Quick How-To
Inspect the bench for loose joints, rot, rust, and wobbling before using it for food-related tasks. Repair or reinforce weak areas, then clean the entire surface thoroughly. Apply a suitable protective finish and allow it to cure according to the manufacturer’s instructions. Add a washable, food-safe surface where ingredients will be prepared, and use the shelves for dry, covered storage. Keep food away from gardening chemicals, fertilizers, and dirty tools. Position the bench near the cooking area without placing it in a dangerous heat zone.
Styling Tip
Paint the frame a soft sage green, charcoal, or warm cream. Add a small herb planter at one end and matching baskets underneath for a coordinated garden-inspired look.
3. Create a Budget Outdoor Kitchen with Concrete Blocks
Description
Concrete blocks provide an affordable foundation for a simple outdoor kitchen base. They can support a countertop and create open storage for cookware or firewood when arranged on a stable, level surface. This approach suits homeowners who prefer a sturdy, straightforward structure and want to avoid the cost of built-in cabinetry.

What You’ll Need
- Concrete blocks suitable for the intended structure
- A compacted, level base or suitable patio surface
- An outdoor-rated countertop
- A level and measuring tape
- Appropriate masonry materials if required by the design
Quick How-To
Plan the layout before buying materials, including the height of the worktop and any space needed for appliances. Prepare a firm, level base that can support the finished weight. Stack or secure the blocks according to the design and local building requirements, checking alignment as you work. Add a countertop rated for outdoor use and the expected load. If the structure will support a grill, sink, or heavy appliance, confirm that the materials and construction are suitable for that specific purpose. Avoid building an unstable tall stack or blocking ventilation around cooking equipment.
Styling Tip
Keep the blocks in a natural finish for an industrial garden look, or apply a compatible exterior coating. Place matching storage baskets in open sections to make the structure look tidy.
4. Use a Rolling Cart for a Small Outdoor Kitchen
Description
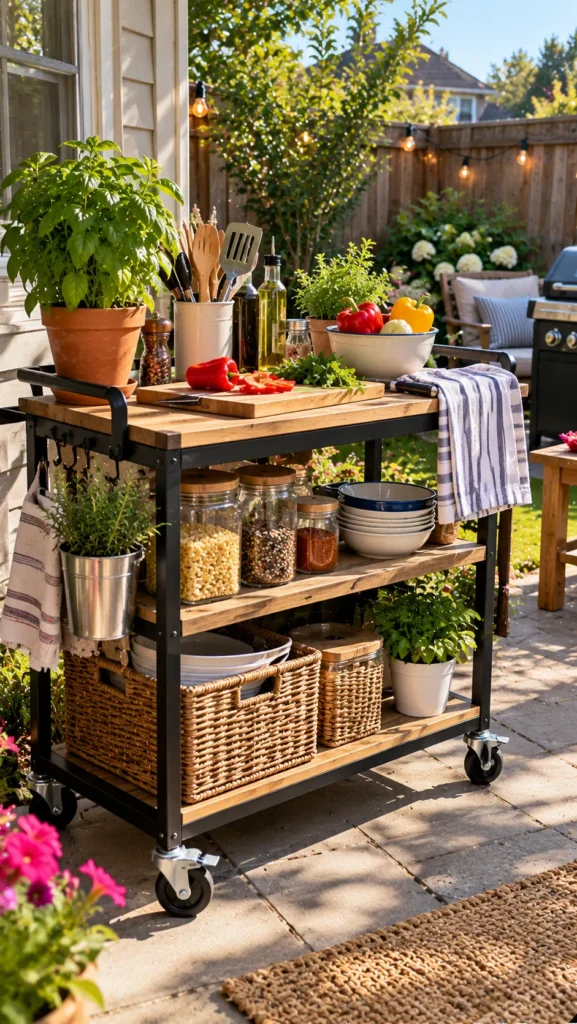
A rolling cart offers an inexpensive way to add flexible counter space to a small patio or balcony. It can hold serving essentials, lightweight cookware, and herbs, then move out of the way when the space is needed for seating. Choose a model with a stable frame, suitable wheels, and materials designed for outdoor conditions.
What You’ll Need
- A sturdy outdoor utility cart
- Locking wheels, if not already included
- Weather-resistant storage containers
- A removable washable tray or work surface
- Outdoor-safe hooks or organizers
Quick How-To
Choose a cart that fits comfortably through your garden or patio access points. Check its weight capacity and make sure the wheels lock securely. Organize the top shelf for frequently used items and the lower shelf for lightweight accessories stored in covered containers. Keep the cart away from grill heat, uneven paving, and windy areas where loose objects could fall. Bring it indoors or cover it when the weather is poor. Do not use an ordinary utility cart as a hot cooking surface unless it is specifically designed for that purpose.
Styling Tip
Use a small collection of matching containers and one compact herb planter. A simple color palette makes the cart feel like part of the outdoor kitchen instead of an unrelated storage trolley.
5. Make a DIY Outdoor Kitchen Counter from an Old Table
Description
Repurposing a sturdy old table is one of the easiest ways to create an affordable outdoor kitchen workspace. A secondhand dining table, worktable, or solid outdoor table can provide room for chopping, plating, and serving without requiring a complicated build. The most important considerations are stability, surface hygiene, and weather protection.

What You’ll Need
- A strong table in good condition
- Sandpaper and suitable exterior finish
- A washable, food-safe preparation board
- Weather-resistant storage bins
- A cover or sheltered location
Quick How-To
Check the table legs, joints, and tabletop for cracks, rust, or rot. Tighten loose connections and repair any damaged areas before use. If the table is wooden, sand rough sections and apply an exterior finish appropriate for the material. Use a separate washable cutting board rather than preparing food directly on an old or porous surface. Store utensils and ingredients in covered containers, and avoid leaving the table exposed to prolonged rain. Position it close enough to the grill for convenience while maintaining a safe distance from heat.
Styling Tip
Choose a table with a natural wood finish and add a simple outdoor runner when serving meals. Keep decorative accessories removable so the surface is always ready for food preparation.
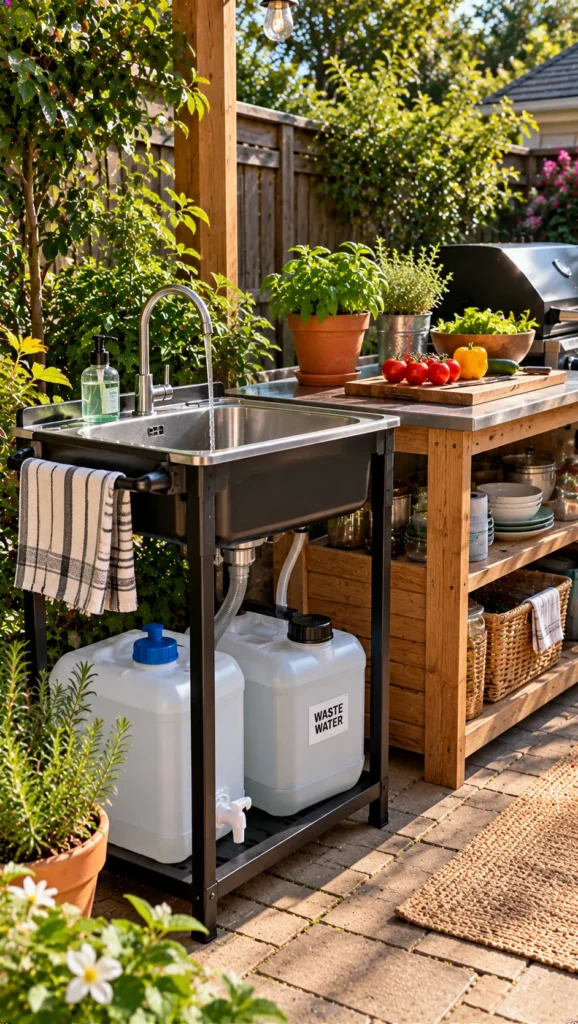
6. Add an Affordable Outdoor Sink Using a Portable Setup
Description
A portable handwashing or utility station can make outdoor cooking more convenient without the expense of installing permanent plumbing. Depending on the design, it may use a refillable water container and a separate wastewater collection tank. This is useful for garden kitchens where a fixed water connection is unavailable.
What You’ll Need
- A purpose-built portable sink or handwashing station
- A clean-water container
- A suitable wastewater collection tank
- A stable stand or table
- Food-safe soap and a clean hand towel
Quick How-To
Select a portable system designed for handwashing or the intended kitchen task. Place it on a stable surface near the cooking area but away from direct heat and electrical hazards. Fill the clean-water container with potable water and ensure wastewater drains into an appropriate collection tank rather than onto the ground. Empty and clean both containers regularly according to the manufacturer’s instructions. For food preparation, use only a setup suitable for that purpose and follow local sanitation requirements. Never assume that an improvised bucket-and-hose arrangement is hygienic or safe for dishwashing.
Styling Tip
Place the sink beside a small towel hook and a covered soap dispenser. A compact planter nearby can soften the station without crowding the washing area.
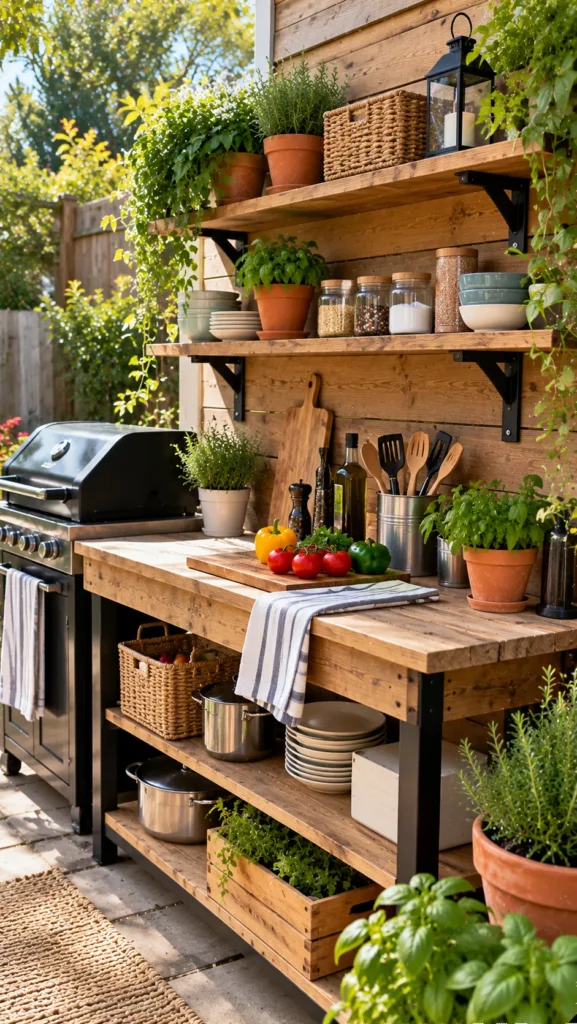
7. Create Open Storage with Weather-Resistant Shelves
Description
Open shelving can add useful storage to an outdoor kitchen at a fraction of the cost of enclosed cabinets. It keeps frequently used plates, serving trays, and durable cookware within reach while making a compact cooking area feel less crowded. Good materials and thoughtful placement are essential because outdoor shelves face moisture, dust, and temperature changes.
What You’ll Need
- Exterior-rated shelving or treated lumber
- Suitable brackets and fasteners
- A level and measuring tape
- Covered storage bins
- Weather-resistant protective finish, if needed
Quick How-To
Choose a wall or freestanding structure that can safely support the intended load. Install shelves using fixings appropriate for the wall material and outdoor exposure. Keep heavier items on lower shelves and leave enough clearance for easy access. Store food, paper products, and clean utensils in sealed containers rather than leaving them exposed. Avoid placing shelves above an open flame or where grease and smoke will collect. Check fasteners and protective finishes regularly, especially after wet or windy weather.
Styling Tip
Mix practical storage with a few attractive but useful items, such as matching serving bowls or herb pots. Leaving some open space between objects creates a calmer, more organized appearance.
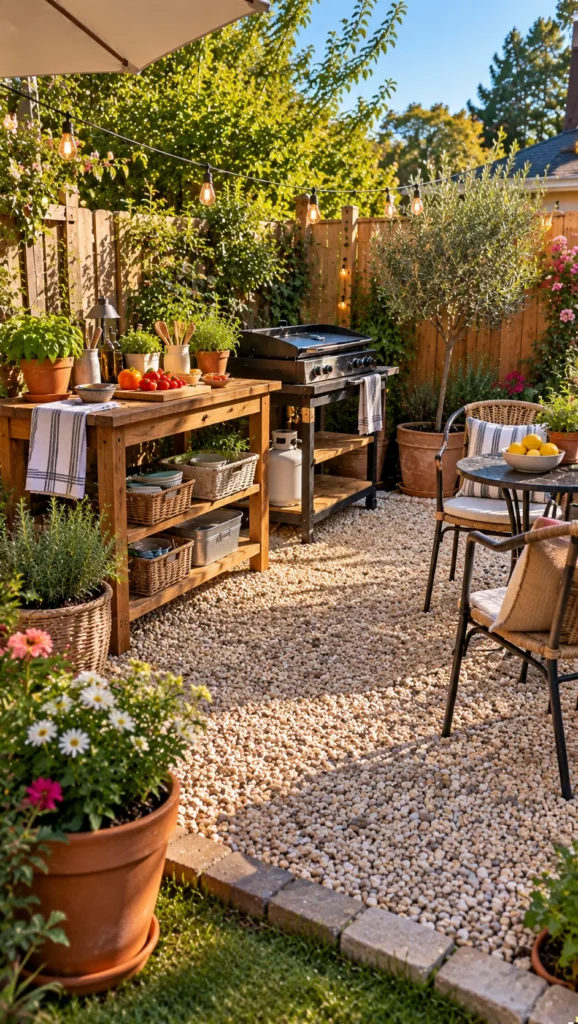
8. Use Gravel to Create a Low-Cost Outdoor Kitchen Zone
Description
A gravel base can help define an outdoor kitchen area without the expense of installing a large paved patio. It works well in gardens where a natural, informal look fits the landscape. The success of this idea depends on preparing the ground properly and choosing a location with suitable drainage and safe access.
What You’ll Need
- Suitable gravel for the intended surface
- Ground preparation tools
- Landscape edging
- Appropriate ground-stabilizing material, if needed
- Outdoor furniture feet or stable base pads
Quick How-To
Mark out the proposed kitchen area and check how water moves through the garden after rain. Remove vegetation and prepare the ground according to the chosen gravel system. Install suitable edging to keep the stones contained, then spread and level the gravel to the recommended depth. Compact or stabilize the surface where appropriate, and test that tables and appliances sit securely. Keep gravel away from door thresholds and drainage openings. Do not place a grill on an unstable surface or use gravel as a substitute for a required fire-resistant base.
Styling Tip
Combine neutral gravel with timber furniture, large planters, and a simple outdoor rug designed for the conditions. Repeating two or three materials helps the space feel intentional.
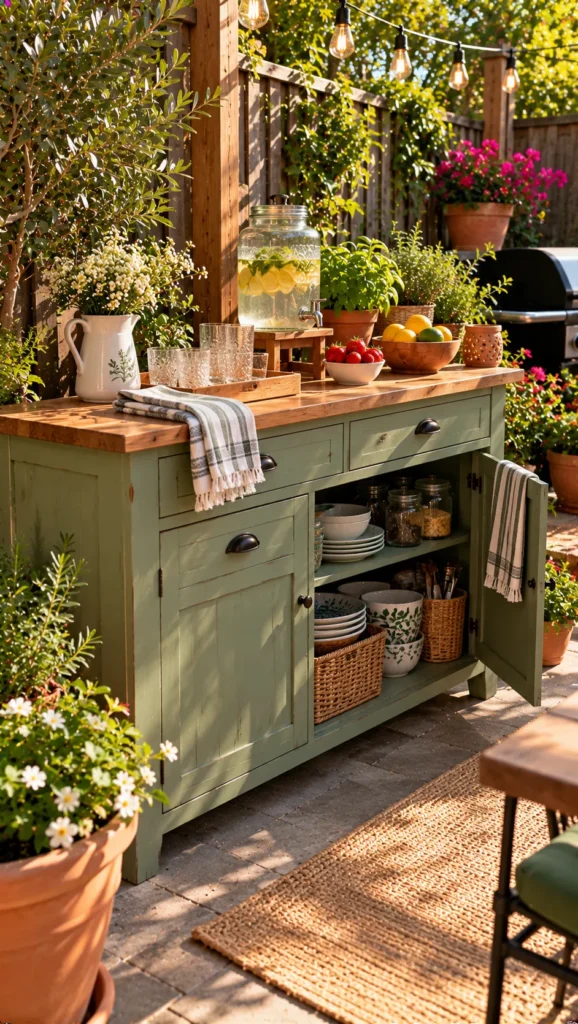
9. Build a Simple Serving Bar from a Repurposed Cabinet
Description
A secondhand cabinet can provide an affordable serving bar with useful storage for plates, cups, and outdoor dining accessories. This is a good option when the main cooking equipment is already in place and the missing piece is a dedicated area for serving drinks or arranging food. Choose a cabinet that can withstand the intended exposure.
What You’ll Need
- A sturdy secondhand cabinet or sideboard
- Exterior-rated paint or protective finish
- Weather-resistant handles and hardware
- Washable trays and storage containers
- A suitable outdoor cover or sheltered position
Quick How-To
Inspect the cabinet for water damage, loose panels, pests, and unstable legs. Repair it before applying any finish suitable for its material and outdoor location. Replace corroded hardware and keep the cabinet under a roof or in a sheltered area if it is not designed for full weather exposure. Use the top as a serving surface and store clean accessories in covered containers. Avoid placing drinks, food, or fragile items where they could be contaminated by gardening supplies or exposed to excessive heat.
Styling Tip
Paint the cabinet a muted green, navy, or warm neutral, then add a wooden serving tray and a small lantern. Keep the decorations minimal so there is still plenty of room for food and drinks.
10. Add a DIY Herb Corner Beside the Cooking Area
Description
A small herb corner is an inexpensive way to make an outdoor kitchen feel fresh while keeping useful ingredients close at hand. Basil, parsley, mint, rosemary, and thyme can grow in containers when their individual light, water, and soil needs are met. Even a few pots can make everyday outdoor meals more convenient.

What You’ll Need
- Pots with drainage holes
- Suitable potting mix
- Herb seedlings or seeds
- A watering can
- Plant labels and a small tray, if needed
Quick How-To
Choose herbs according to the sunlight available in your garden. Place sun-loving varieties such as rosemary and thyme in a brighter spot, while mint may prefer a little more moisture and should generally be grown in its own pot because it spreads readily. Use containers with drainage holes and avoid leaving roots sitting in water. Water according to each plant’s needs, and harvest small amounts regularly without removing too much foliage at once. Keep herbs away from cooking smoke, excessive heat, and areas where they may be splashed with cleaning products.
Styling Tip
Use pots in similar shapes but slightly different heights. Group them on a small shelf or bench near the preparation area while keeping enough room to reach each plant easily.
11. Make a Budget Outdoor Kitchen with a Portable Grill Station
Description
A portable grill can be the centerpiece of a budget outdoor kitchen, especially when paired with a separate preparation table and organized storage. Instead of building everything at once, start with a suitable grill and add practical work surfaces over time. Safety, ventilation, and the manufacturer’s installation requirements should determine the layout.

What You’ll Need
- A portable grill suitable for your cooking needs
- A stable, level, noncombustible placement area
- A separate preparation table
- Long-handled cooking tools
- A grill cover approved for the equipment
Quick How-To
Choose a grill that fits your available space and local outdoor cooking rules. Follow the manufacturer’s instructions for clearance from walls, fences, overhead structures, and combustible furniture. Place the grill on a stable surface where it cannot tip over, and keep children and pets away from the hot zone. Position the preparation table nearby but outside the required heat-clearance area. Store fuel safely and never use a charcoal or gas grill indoors or in an enclosed space. Clean the grill regularly and allow it to cool completely before covering it.
Styling Tip
Use a simple side table for plates and tools, with a separate covered bin for accessories. Matching the table finish to nearby garden furniture helps the cooking area feel coordinated without expensive built-ins.
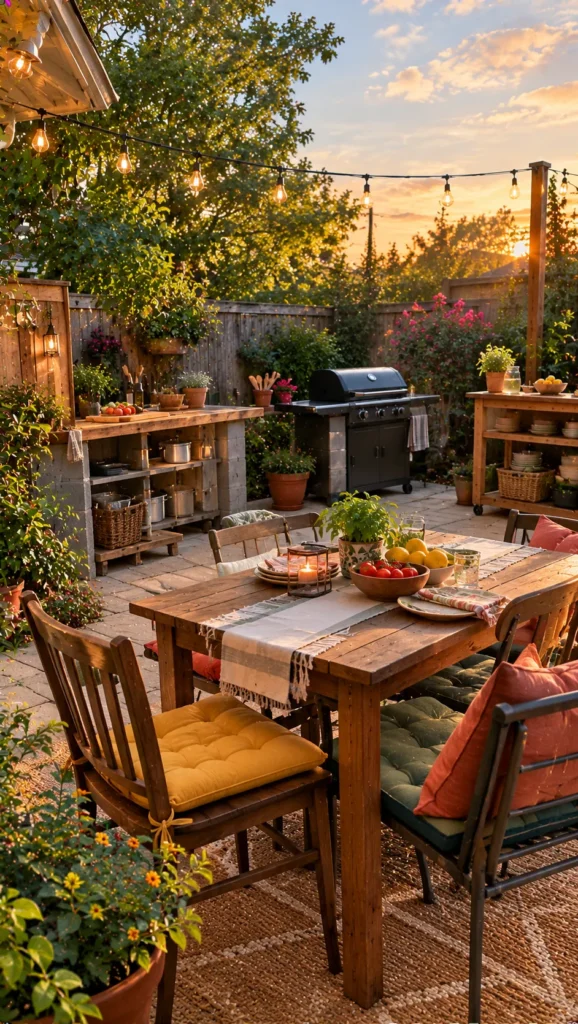
12. Create a Cozy Outdoor Kitchen with String Lights and Simple Seating
Description
Comfortable seating and thoughtful lighting can make even a basic outdoor cooking setup feel like a complete backyard destination. You do not need a large dining set: a small table, a few durable chairs, and warm outdoor lighting can create a welcoming place to eat after cooking. Choose weather-appropriate pieces and keep walkways clear.
What You’ll Need
- A compact outdoor table and chairs
- Outdoor-rated string lights
- Suitable mounting hooks or supports
- Weather-resistant cushions
- A storage box or cover for accessories
Quick How-To
Arrange seating near the kitchen but outside the cooking and heat-clearance zone. Leave enough room to carry dishes and move safely between the grill, preparation table, and dining area. Install lights rated for outdoor use according to the manufacturer’s instructions, keeping electrical connections protected from moisture. Use cushions designed for outdoor conditions and store them when rain is expected. If space is limited, choose folding chairs or stackable seating that can be moved when the area is used for food preparation.
Styling Tip
Choose warm-white lighting and a few cushions in coordinating colors. Add one or two potted plants around the seating area, but avoid overcrowding the space or obstructing safe movement.
FAQ SECTION
How can I build an outdoor kitchen on a very small budget?
Start with the essentials: a safe cooking appliance, a sturdy preparation surface, and covered storage. Repurpose suitable furniture, use containers you already own, and add upgrades gradually. Spending money on stability, weather protection, and safety is more valuable than buying decorative accessories first.
What is the cheapest material for an outdoor kitchen?
The lowest-cost option depends on what you already have and local material prices. Reclaimed timber, concrete blocks, secondhand tables, and repurposed shelving can all reduce costs. However, materials must be structurally sound and suitable for outdoor exposure and the intended use.
Can an outdoor kitchen stay outside all year?
Some outdoor kitchens can remain outside year-round if their materials and appliances are designed for local weather conditions. Cover suitable equipment, protect wood and metal, secure loose items before storms, and store cushions or portable accessories indoors. Follow each appliance manufacturer’s maintenance and storage instructions.
Do I need plumbing for an outdoor kitchen?
No. A basic outdoor kitchen can work with a portable grill, preparation table, and covered storage. A purpose-built portable handwashing station can add convenience where suitable. If you want a permanent sink or connected water supply, check local plumbing and drainage requirements before installation.
How do I make a budget outdoor kitchen look more expensive?
Use a consistent color palette, repeat a few materials, and keep the workspace organized. Matching containers, coordinated planters, simple lighting, and a well-maintained countertop can make a modest setup look thoughtfully designed without costly renovations.
Where should I place an outdoor kitchen?
Choose a level, well-drained area with convenient access to the house and enough space for safe cooking and movement. Consider wind direction, shade, nearby doors and windows, and the location of combustible structures. Follow appliance clearances and local requirements before finalizing the layout.
RELATED CONTENT
- Winter Flowers Garden Ideas for a Charming Seasonal Display
- Small Patio Decorating Ideas for Cozy Outdoor Spaces
CLOSING
A beautiful outdoor kitchen is less about how much money you spend and more about creating a setup that works for your space and the way you cook. Start with one practical improvement, such as a sturdy worktable, a portable grill station, or a small herb corner. Then build on it as your needs and budget allow.
Remember to prioritize stable surfaces, weather-resistant materials, clean food-preparation areas, and safe distances around cooking equipment. These details make a bigger difference than expensive decorations.
I hope these outdoor kitchen ideas on a budget inspire you to make the most of your backyard, patio, or garden. Choose the idea that fits your space, put your own creative touch on it, and enjoy making more meals outdoors. I’d love to hear which idea you try and how your outdoor kitchen turns out!