
12 Beaded Christmas Ornaments Patterns Free for Beginners

Beaded Christmas Ornaments Patterns Free
There is something so special about decorating a Christmas tree with ornaments you have made yourself. Beaded Christmas ornaments are one of my favorite DIY projects because they can be colorful, elegant, rustic, or wonderfully playful depending on the beads and patterns you choose. You do not need expensive supplies or professional crafting skills to make beautiful decorations. A small collection of beads, some wire or thread, and a little patience can create ornaments that look lovely on your tree or make thoughtful handmade gifts.
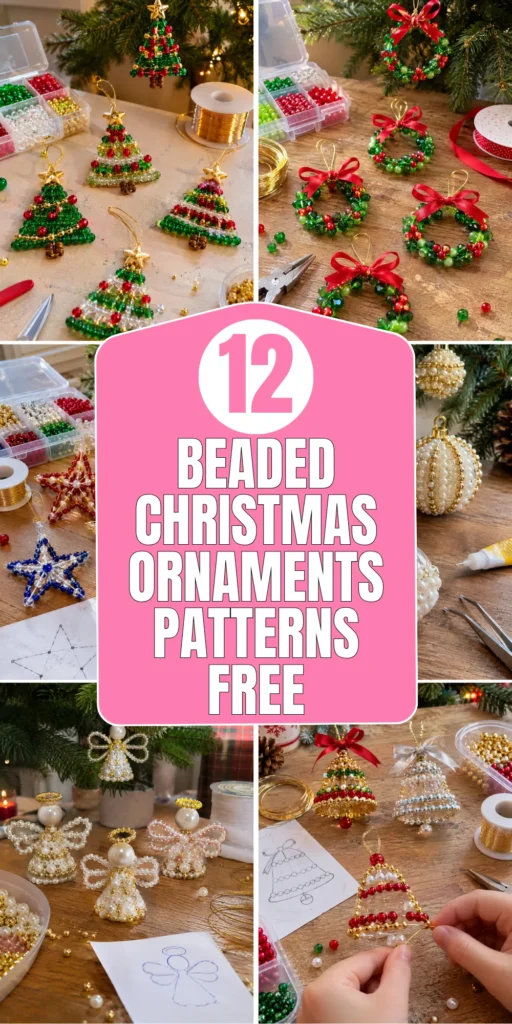
In this roundup, I’m sharing 12 free beaded Christmas ornament patterns that are fun to make and easy to customize. Some are simple enough for beginners, while others let you experiment with shapes, colors, and more detailed designs. I’ll also share practical tips about choosing beads, keeping your patterns secure, and avoiding common mistakes so your finished ornaments look beautiful and last for many Christmas seasons.
1. Classic Beaded Christmas Tree Ornaments
Description
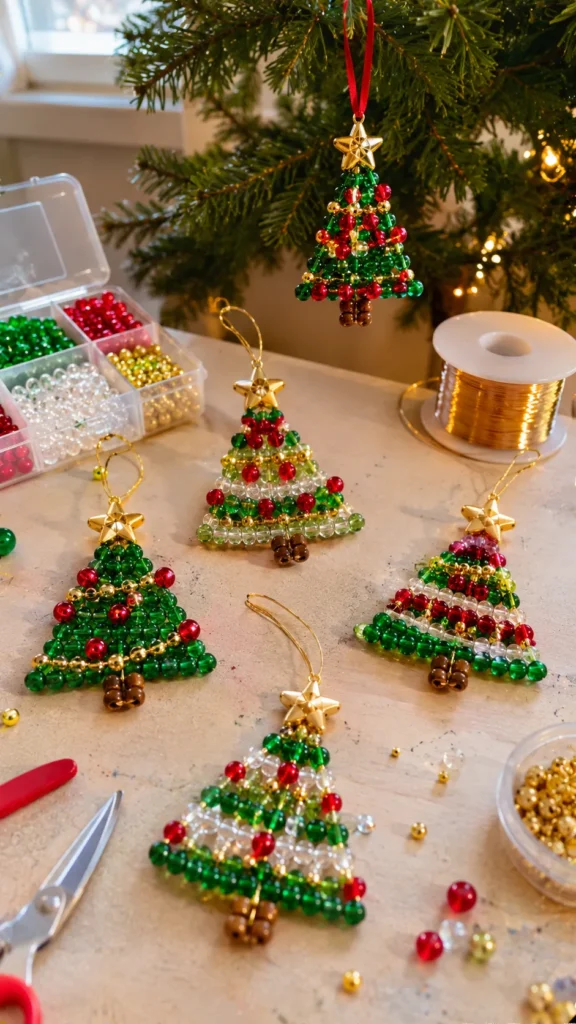
Create miniature Christmas trees using colorful beads arranged in triangular patterns. These little ornaments are easy to personalize with traditional red and green, elegant gold and white, or cheerful rainbow colors. They look especially charming when several are hung together.
What It Is
This ornament uses a simple triangular arrangement of beads to represent a decorated Christmas tree. You can make it flat with wire or thread, or create a slightly dimensional version using a flexible beading frame.
Supplies and Budget
- Green, red, gold, and clear beads: $3–$6
- Craft wire or strong beading thread: $2–$4
- Small star-shaped bead: $1–$2
- Jewelry pliers and scissors: use what you already have
Estimated budget: $6–$12 for several ornaments.
Tutorial how to make:
- Cut a length of craft wire or strong beading thread, leaving extra material at both ends.
- Create the tree’s central shape by arranging green beads in gradually wider rows.
- Add a few red and gold beads between the green ones to resemble Christmas decorations.
- Place a small star bead at the top.
- Secure the ends by twisting the wire or tying strong knots, depending on your material.
- Add a hanging loop and gently adjust the shape so the rows look balanced.
DIY Tip
Lay out your bead pattern on a flat surface before threading. This makes it much easier to keep the tree symmetrical and avoid running out of a particular color halfway through.
2. Handmade Beaded Snowflake Ornaments
Description
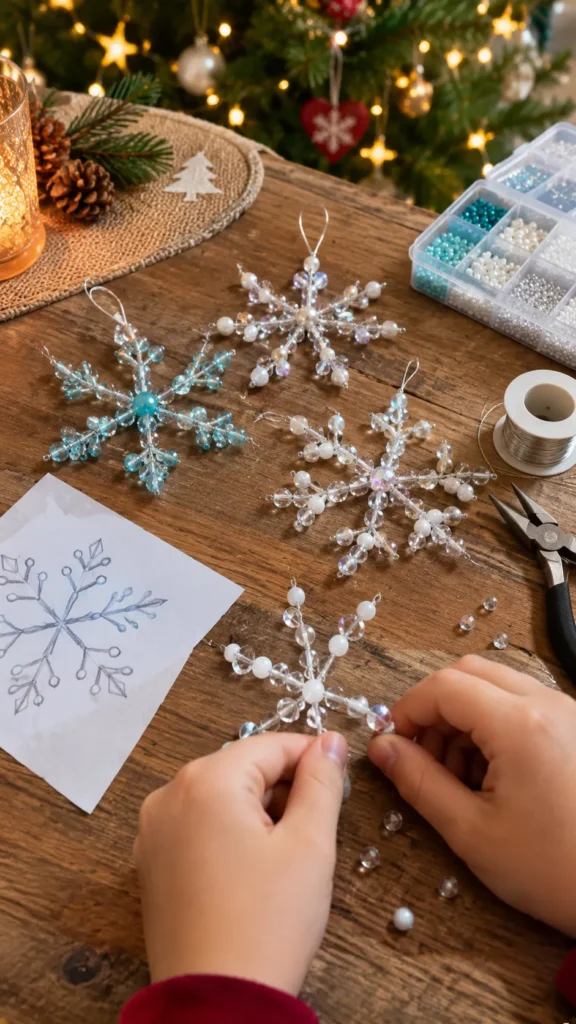
Beaded snowflakes add a delicate winter touch to Christmas decorations. Their sparkling beads catch the light beautifully, especially when made with clear, silver, and white materials. You can experiment with different sizes to create a lovely collection for your tree.
What It Is
A snowflake ornament made by arranging beads along six wire branches that extend from a central point. The design can be simple or detailed depending on the bead sizes and branch patterns.
Supplies and Budget
- Silver or white craft wire: $2–$4
- Clear, white, and silver beads: $3–$6
- Small crystal-style beads: $2–$3
- Jewelry pliers and wire cutters
Estimated budget: $7–$13 for several snowflakes.
Tutorial how to make:
- Cut six equal lengths of wire for the snowflake branches.
- Arrange the wires around a central point, spacing them evenly.
- Twist the center securely so all six branches stay connected.
- Thread beads onto each branch, using the same sequence for a balanced pattern.
- Add smaller beads at the ends to create a delicate snowflake effect.
- Twist or loop the wire ends carefully to prevent beads from slipping off.
- Attach a hanging loop to one branch.
DIY Tip
Use a simple paper snowflake drawing as your guide. Matching the bead pattern on opposite branches helps the finished ornament look balanced without requiring complicated measurements.
3. Colorful Beaded Candy Cane Ornaments
Description
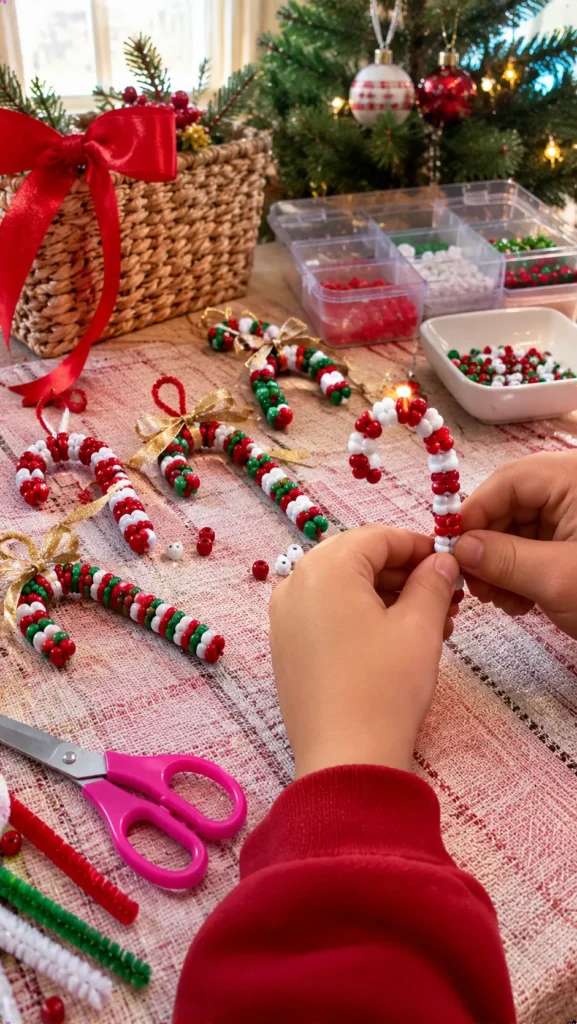
These cheerful candy cane ornaments bring a playful pop of Christmas color to your tree. Alternating red and white beads create the familiar striped look, while small green or gold accents can make the design feel even more festive.
What It Is
A miniature candy cane shape made by threading beads onto flexible wire or a pipe cleaner and bending it into a curved hook.
Supplies and Budget
- Red beads: $2–$3
- White beads: $2–$3
- Flexible craft wire or pipe cleaners: $2–$3
- Ribbon for hanging: $1–$2
Estimated budget: $5–$10 for a small set.
Tutorial how to make:
- Cut a piece of flexible wire or choose a pipe cleaner long enough for your desired candy cane.
- Thread red and white beads in alternating groups to create stripes.
- Leave a little space at the end so the beads do not bunch up when you bend the shape.
- Secure the ends by twisting the wire or folding the pipe cleaner inward.
- Gently curve the top into a candy cane hook.
- Attach a small ribbon loop if you want to hang it directly from a branch.
DIY Tip
Avoid forcing the curve after adding very large beads. Smaller beads or flexible pipe cleaners are easier to shape and less likely to create unwanted gaps.
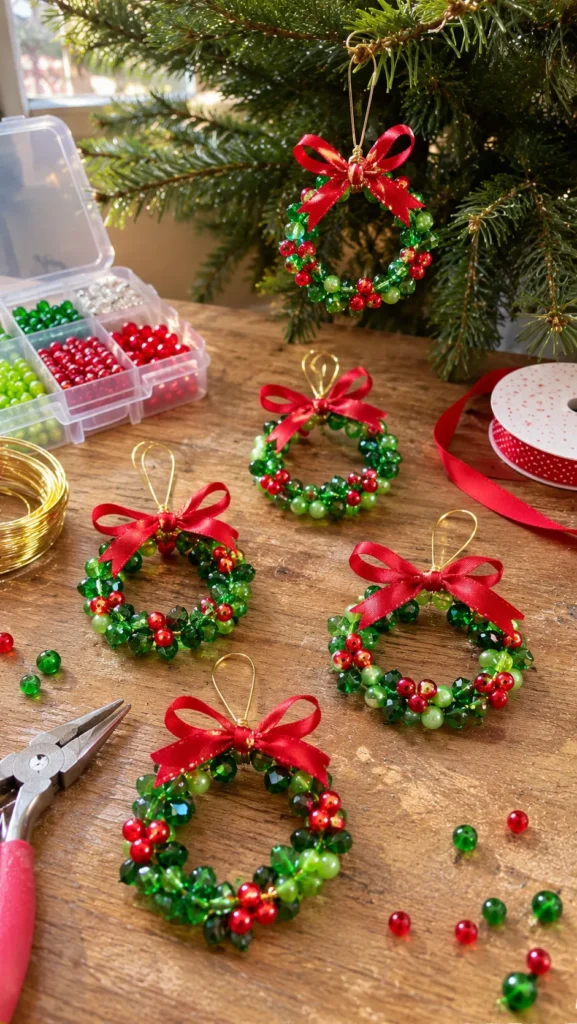
4. Beaded Christmas Wreath Mini Ornaments
Description
Miniature beaded wreaths are a lovely way to bring a traditional Christmas decoration into a small handmade ornament. Use green beads for the base and add tiny red accents to resemble berries. They look especially pretty when tied with a little ribbon.
What It Is
A circular ornament made by threading beads onto wire and joining the ends to form a wreath. Small decorative beads create the appearance of greenery and festive berries.
Supplies and Budget
- Green beads in two shades: $3–$5
- Small red beads: $1–$2
- Flexible craft wire: $2–$3
- Thin red ribbon: $1–$2
Estimated budget: $6–$12 for several mini wreaths.
Tutorial how to make:
- Cut a length of wire long enough to create a small circle.
- Thread green beads onto the wire, alternating shades if desired.
- Curve the beaded wire into a circular shape.
- Twist the ends together securely and hide the connection behind a few beads.
- Add small red beads in groups of two or three to represent berries.
- Tie a small ribbon bow at the top and make a hanging loop.
DIY Tip
Choose beads that are similar in size so the wreath forms a neat circle. If the beads are too different in diameter, the finished shape may look uneven.
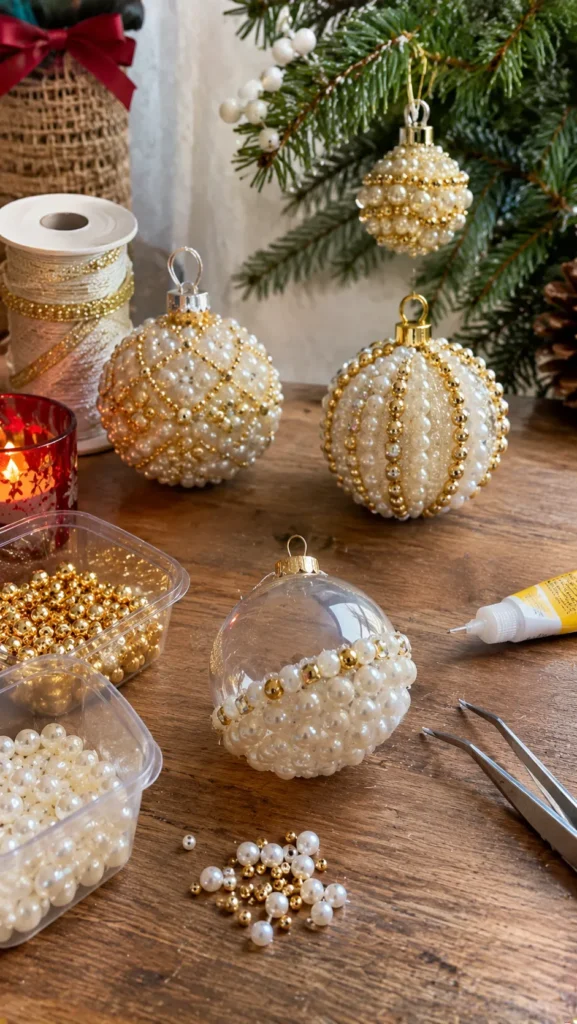
5. Elegant Gold and Pearl Beaded Ball Ornaments
Description
For a more classic Christmas look, create beautiful bead-covered ball ornaments using gold and pearl-style beads. Their soft shine adds a sophisticated touch to the tree, and they pair wonderfully with traditional red decorations or neutral holiday themes.
What It Is
A decorative bauble made by attaching small beads to a lightweight ornament base. You can cover the entire surface or create a simple patterned design with pearl and gold accents.
Supplies and Budget
- Plain lightweight ornament balls: $3–$5
- Pearl-style beads: $3–$5
- Small gold beads: $2–$3
- Craft glue suitable for the ornament material: $2–$4
- Tweezers for positioning beads
Estimated budget: $10–$17 for a small set.
Tutorial how to make:
- Start with a clean, dry ornament base.
- Plan a simple pattern, such as alternating rows of pearls and gold beads.
- Apply a small amount of suitable craft glue to one section.
- Place the beads carefully using tweezers, working in small areas.
- Allow each section to set before turning the ornament.
- Continue until the desired coverage is complete.
- Leave the ornament to dry fully according to the glue instructions.
DIY Tip
Do not apply glue over the entire bauble at once. Working in small sections prevents the beads from sliding and helps you keep the pattern neat.
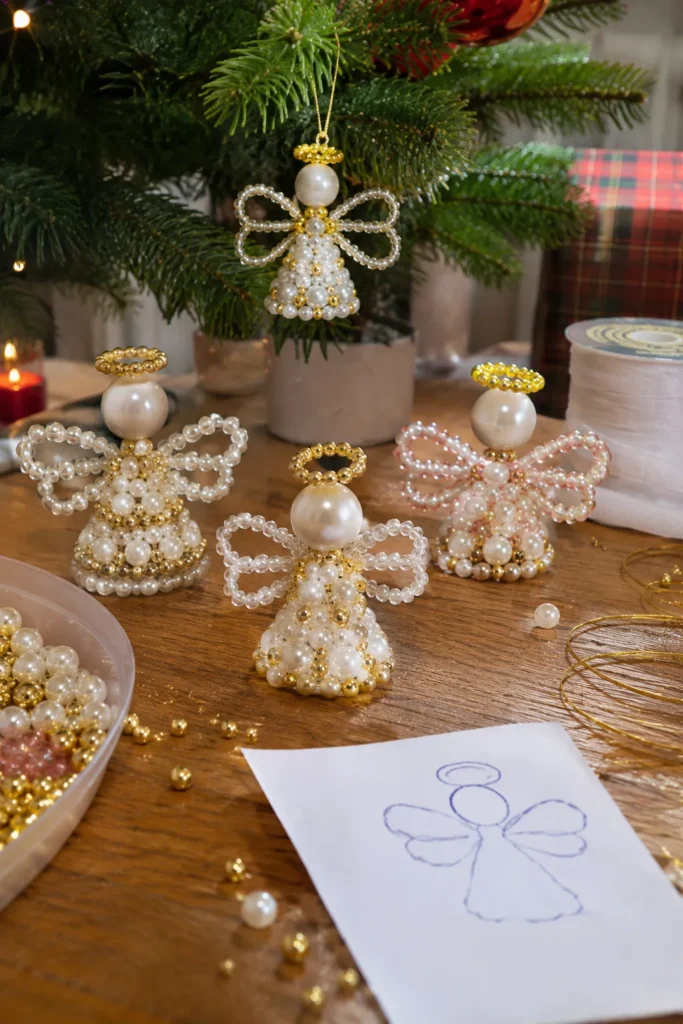
6. Handmade Beaded Angel Christmas Ornaments
Description
A small beaded angel makes a sweet handmade decoration for a Christmas tree or holiday gift. With a larger bead for the head, smaller beads for the body, and delicate wings, this design can be customized in soft white, gold, silver, or colorful combinations.
What It Is
A miniature angel assembled from beads and wire, using a larger round bead for the head and smaller beads to form the body and decorative wings.
Supplies and Budget
- Large round beads: $2–$3
- Small white or gold beads: $3–$5
- Thin craft wire: $2–$3
- Small decorative wing beads or lightweight charms: $2–$3
- Ribbon or hanging cord: $1
Estimated budget: $7–$14 for several ornaments.
Tutorial how to make:
- Cut a piece of wire long enough to create the angel’s body and hanging loop.
- Thread the larger bead onto the wire for the head.
- Add smaller beads underneath to form the body.
- Create two small side loops using the wire or attach lightweight wing-shaped beads.
- Secure the wire at the bottom so the beads cannot slide off.
- Add a small halo using a thin wire loop above the head.
- Finish with a hanging loop.
DIY Tip
Keep the wings lightweight. Heavy decorative pieces can pull the angel out of shape, especially when the ornament hangs from a thin branch.
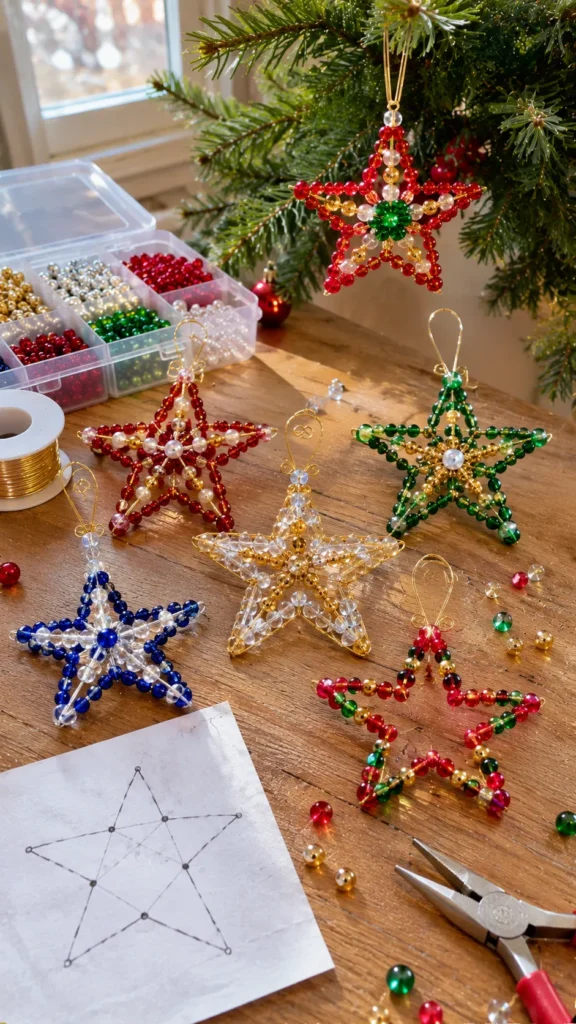
7. Beaded Christmas Star Ornaments
Description
Beaded stars are simple, sparkling decorations that work with almost any Christmas color scheme. Use gold and silver for a classic look, or mix bright red, green, and blue beads for a more playful handmade style.
What It Is
A five-point star shape created with flexible craft wire and beads. The beads follow the outline of the star, making the ornament colorful and decorative.
Supplies and Budget
- Flexible craft wire: $2–$4
- Small gold, silver, or colorful beads: $3–$5
- Star template: free, drawn on paper
- Jewelry pliers and wire cutters
Estimated budget: $5–$10 for several stars.
Tutorial how to make:
- Draw a five-point star on paper in your preferred size.
- Cut a length of wire long enough to follow the outline.
- Thread beads onto the wire, leaving enough room at the ends to secure the shape.
- Bend the wire carefully around the paper template to create five clear points.
- Twist the ends together at the top or back of the star.
- Add a small hanging loop and adjust the points gently.
DIY Tip
Use the paper template throughout the bending process. It helps keep the star shape recognizable and prevents the points from becoming too rounded.
8. Mini Beaded Christmas Bell Ornaments
Description
These little beaded bells bring a traditional Christmas touch to handmade decorations. Combine gold beads with red or green details for a classic look, or use silver and clear beads for something more delicate and wintry.
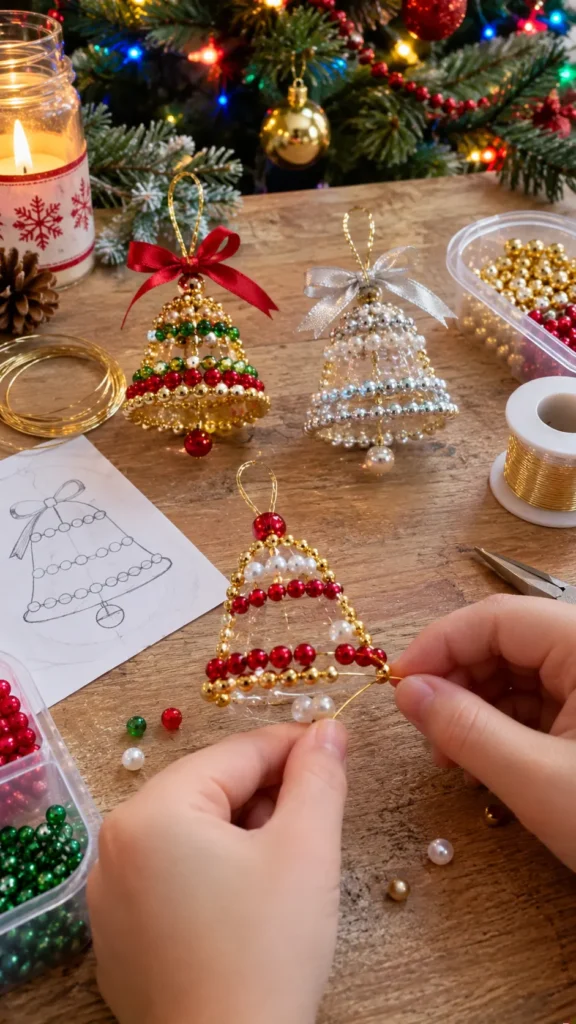
What It Is
A bell-shaped ornament made by threading beads onto wire or a beading frame. A small bead or charm underneath creates the appearance of a bell clapper.
Supplies and Budget
- Gold or silver beads: $3–$5
- Red or green accent beads: $2–$3
- Craft wire: $2–$3
- Small decorative bead for the clapper: $1–$2
- Jewelry pliers
Estimated budget: $6–$12 for several bells.
Tutorial how to make:
- Cut several lengths of wire for the bell’s sides and base.
- Create the outline of a bell using a simple rounded shape that widens toward the bottom.
- Thread beads along the wire, keeping the color pattern consistent.
- Connect the wire sections securely at the top.
- Add a small bead underneath to represent the clapper.
- Attach a hanging loop and gently adjust the shape.
DIY Tip
Do not make the lower edge too narrow. A slightly wider base helps the bell shape remain recognizable and gives the ornament a more balanced appearance.
9. Beaded Gingerbread Man Christmas Ornaments
Description
Add a little handmade charm to your tree with adorable gingerbread man ornaments. Brown beads create the familiar cookie-inspired shape, while small white, red, and green beads add buttons, icing details, and festive personality.
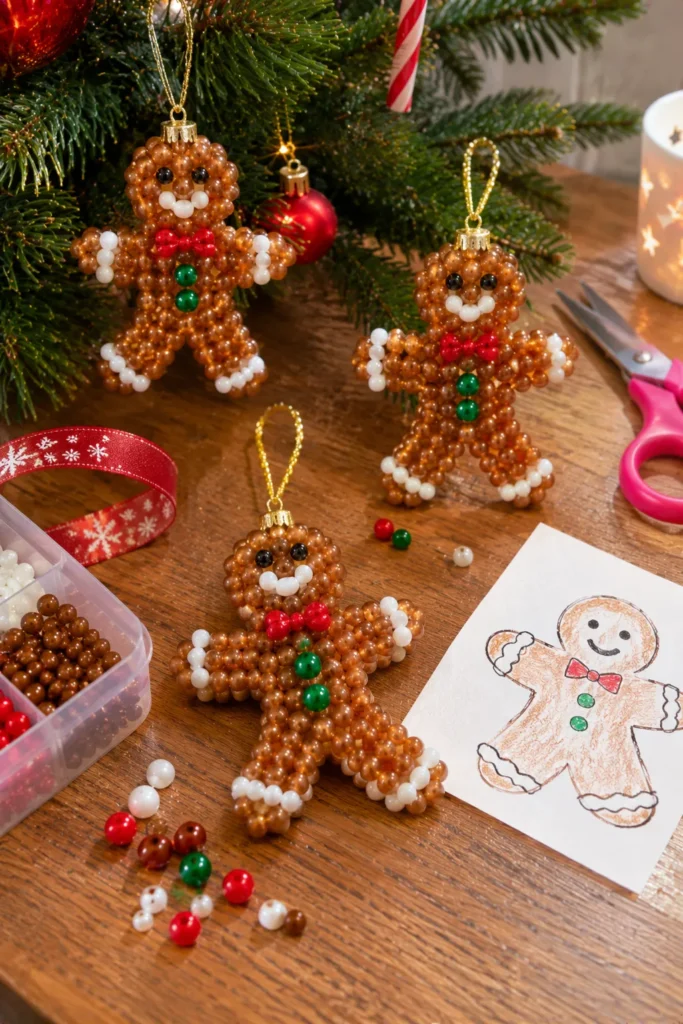
What It Is
A gingerbread-shaped ornament made by threading brown beads onto flexible wire or using a simple beaded outline. Small contrasting beads create the face and decorative details.
Supplies and Budget
- Brown or caramel beads: $3–$5
- Small white, red, and green beads: $2–$4
- Flexible craft wire: $2–$3
- Small ribbon for hanging: $1
Estimated budget: $6–$12 for several ornaments.
Tutorial how to make:
- Draw a simple gingerbread man outline on paper.
- Cut a piece of wire long enough to follow the outline.
- Thread brown beads onto the wire, leaving enough flexibility to shape the arms and legs.
- Bend the wire around your drawing to form the head, arms, body, and legs.
- Add small white beads along the body for icing-inspired details.
- Use red or green beads for buttons.
- Secure the ends and add a hanging loop.
DIY Tip
Choose small beads for the arms and legs. Oversized beads can make the shape bulky and difficult to recognize, especially on a small ornament.
10. Colorful Beaded Christmas Heart Ornaments
Description
Beaded hearts are lovely decorations for anyone who enjoys a softer, more personal Christmas style. Use red and pink for a cheerful look, or combine white, gold, and pearl beads for a delicate ornament that also makes a thoughtful handmade gift.
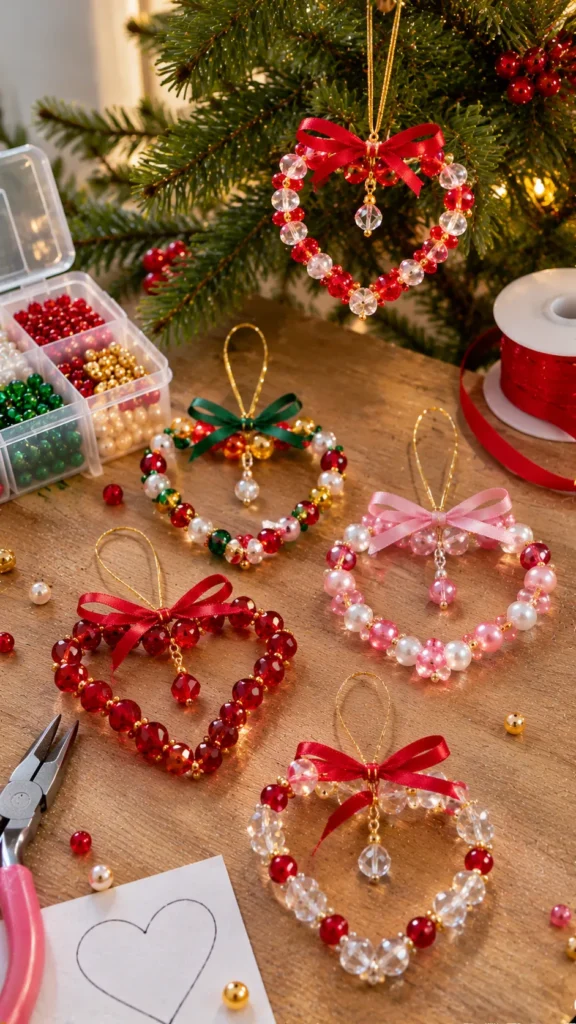
What It Is
A heart-shaped ornament made with flexible wire or a beading frame. Beads follow the outline of the heart, with optional smaller beads arranged inside for extra detail.
Supplies and Budget
- Red, pink, white, or gold beads: $3–$5
- Flexible craft wire: $2–$3
- Small decorative beads: $1–$3
- Jewelry pliers and ribbon
Estimated budget: $6–$11 for several hearts.
Tutorial how to make:
- Draw a heart shape on paper to use as a guide.
- Cut a length of wire and thread the beads onto it.
- Bend the wire around the template, creating two rounded top sections and a pointed bottom.
- Twist the wire ends together securely.
- Add a second small beaded section across the middle if you want a more detailed design.
- Attach a ribbon loop and gently adjust the curves.
DIY Tip
Shape the two top curves separately before tightening the wire. This helps create a clear heart shape instead of a simple rounded oval.
11. Beaded Icicle Christmas Tree Ornaments
Description
Beaded icicles add a delicate, sparkling effect to Christmas trees, especially when placed near warm lights. Clear, silver, and pale blue beads create a frosty appearance, while different lengths make the decorations look more natural.
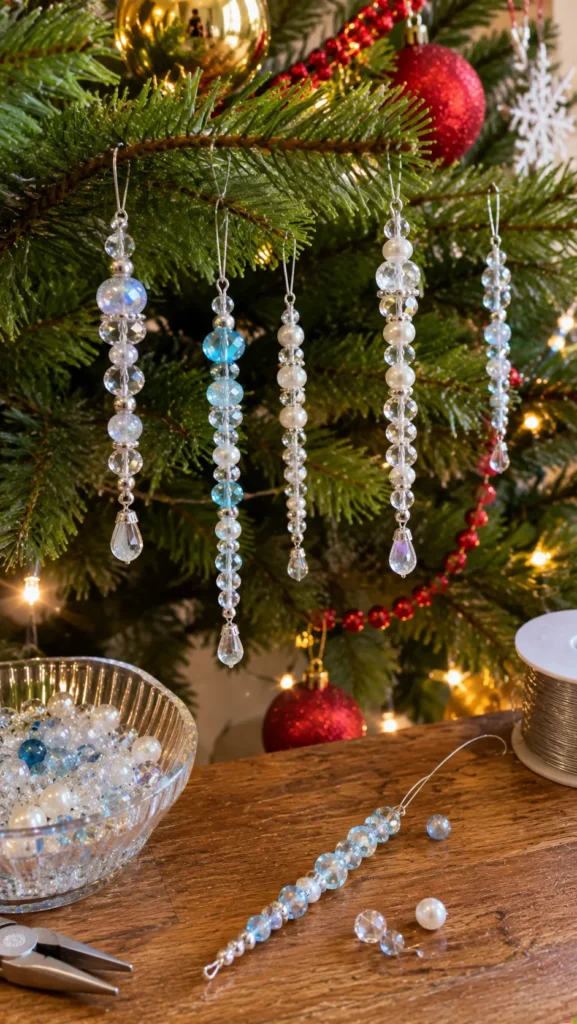
What It Is
A long, narrow ornament made by threading beads onto wire in a tapered pattern. The top is wider or decorated with a small crystal bead, while the bottom finishes in a pointed drop.
Supplies and Budget
- Clear or silver beads: $3–$5
- Pale blue accent beads: $2–$3
- Thin craft wire: $2–$3
- Small teardrop beads: $2–$3
Estimated budget: $6–$12 for a small set.
Tutorial how to make:
- Cut a length of thin wire suitable for your desired icicle size.
- Start with a small decorative bead at the bottom.
- Thread beads upward, using a gradual pattern that creates a narrow, elongated shape.
- Add a few larger clear beads near the top for sparkle.
- Secure the wire at the top and form a small hanging loop.
- Make several icicles in different lengths for a more natural display.
DIY Tip
Mix bead sizes carefully rather than using large beads throughout. Smaller beads near the bottom help create a delicate tapered finish.
12. Personalized Beaded Initial Christmas Ornaments
Description
Make your Christmas tree more personal with ornaments featuring initials or simple letter designs. These are especially lovely for family trees, handmade gifts, or decorations for a child’s room. Choose colorful beads or a more traditional combination to match your holiday style.
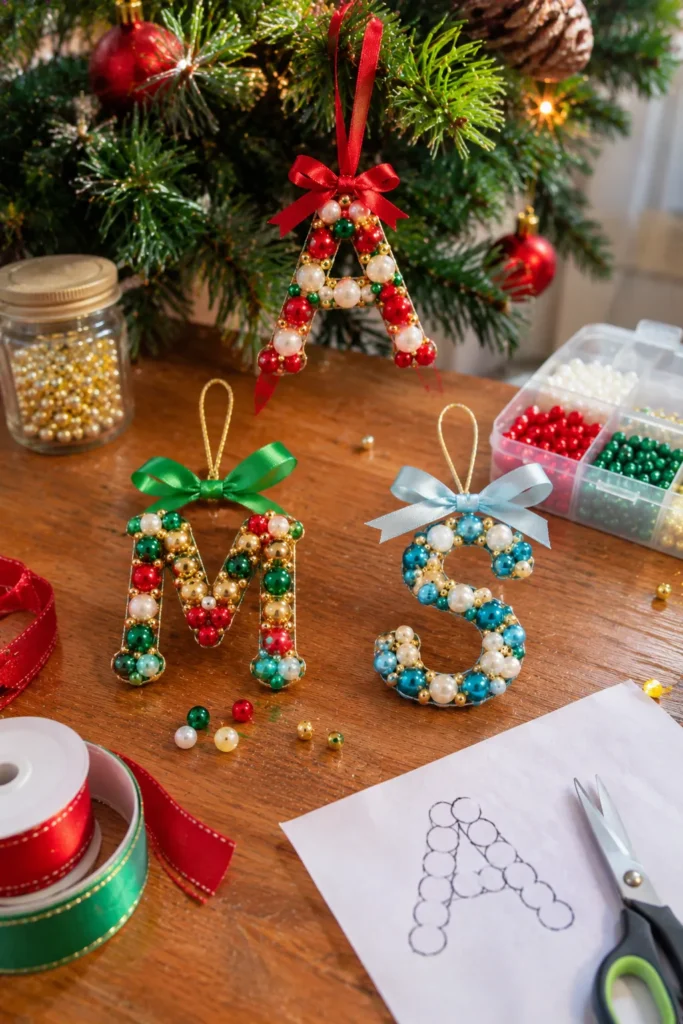
What It Is
A letter-shaped ornament made by arranging beads along a wire outline or attaching beads to a lightweight letter-shaped base. Each ornament can represent a family member, friend, or special holiday memory.
Supplies and Budget
- Small colorful beads: $3–$5
- Flexible craft wire or lightweight letter base: $2–$4
- Strong craft glue if using a base: $2–$3
- Ribbon for hanging: $1–$2
Estimated budget: $6–$12 for several initials.
Tutorial how to make:
- Choose a simple letter with a clear shape and print or draw it as a template.
- If using wire, thread the beads first and bend the wire around the letter outline.
- If using a lightweight base, apply suitable craft glue in small sections and place the beads carefully.
- Use a contrasting bead color for a border or small decorative details.
- Secure all wire ends or allow the glue to cure fully.
- Add a ribbon loop and write the person’s name on a small gift tag if giving it as a present.
DIY Tip
Choose letters with simple shapes when making your first ornaments. Very detailed letters can be difficult to form neatly with beads, especially when working on a small scale.
FAQ SECTION
What beads are best for making Christmas ornaments?
Glass beads, acrylic beads, wooden beads, and pearl-style beads are all useful. Acrylic beads are lightweight and budget-friendly, while glass beads offer beautiful sparkle. Wooden beads work particularly well for rustic or farmhouse-style ornaments. Choose beads with holes large enough for your thread or wire.
Can beginners make beaded Christmas ornaments?
Absolutely. Start with simple designs such as candy canes, hearts, stars, and beaded Christmas trees. These patterns use basic threading and shaping techniques. Once you feel comfortable working with wire and keeping your beads secure, you can try more detailed snowflakes and angels.
What is the best wire for beaded Christmas ornaments?
Thin, flexible craft wire or jewelry wire is suitable for many beaded ornaments. Choose a gauge that is easy to bend but strong enough to hold its shape. For designs that need to remain flexible, strong beading thread or pipe cleaners may be easier to use.
How do I stop beads from falling off?
Secure the ends of your wire with tight twists or small loops. If you are using thread, choose strong beading thread and use secure knots. Check the ornament before hanging it, especially around the top loop and any wire connections.
How can I make beaded ornaments look more expensive?
Use a limited color palette, combine different bead textures, and keep the pattern consistent. Pearl-style beads, clear glass beads, and small metallic accents can create an elegant look without requiring expensive materials. Neat finishing also makes a big difference.
How much does it cost to make beaded Christmas ornaments?
Most simple designs cost approximately $5–$12 to make a small collection, depending on the beads and tools you already own. Buying beads in larger mixed packs can reduce the cost per ornament, especially if you plan to make several different patterns.
How should I store handmade beaded Christmas ornaments?
Store delicate ornaments in small individual compartments or wrap them in tissue paper. Keep heavier decorations separate from lightweight wire designs to prevent bending. A divided storage box works particularly well for small ornaments.
Are beaded Christmas ornaments suitable for children?
Some simple designs can be suitable for older children with adult supervision. However, small beads are choking hazards, and wire ends or jewelry tools can cause injuries. Choose larger materials and child-safe supplies for younger crafters, and keep small beads away from toddlers and pets.
RELATED CONTENT
- Button Crafts to Sell at Craft Fairs and Online
- Christmas Crafts for Adults to Try This Holiday Season
CLOSING
Making your own beaded Christmas ornaments is a lovely way to slow down, enjoy a little creative time, and add something personal to your holiday decorations. You can start with one simple pattern, use the beads you already have, and gradually build a collection that reflects your favorite Christmas colors and style.
My suggestion is to try the beaded candy canes or Christmas trees first if you are new to this craft. Once you get comfortable threading beads and securing the ends, experiment with snowflakes, angels, and personalized initials. Do not worry if your first ornaments are not perfectly symmetrical. Those little handmade details are part of what makes them special.
I hope these free beaded Christmas ornament patterns inspire you to create something beautiful this season. Have fun crafting, enjoy the process, and share your favorite finished ornament with friends and family. Happy crafting!





One Comment