12 Cute Hairstyles Bun That Look Effortlessly Stylish
12 Cute Hairstyles Bun Ideas
A cute bun can make an everyday hairstyle feel polished in minutes, whether you want something relaxed for errands, neat for work, or romantic for a special occasion. These 12 cute hairstyles bun ideas cover smooth, braided, curly, playful, and accessorized looks for different lengths and textures.
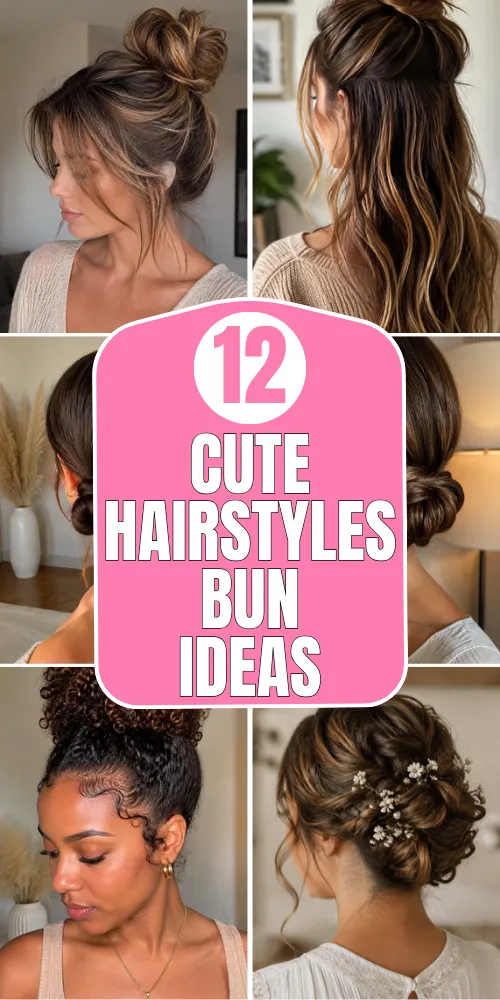
Start with gently detangled hair, choose pins that match your density, and keep the tension soft around the hairline. Each style below includes practical steps, useful tips, and the basic tools you need for a secure, comfortable result.
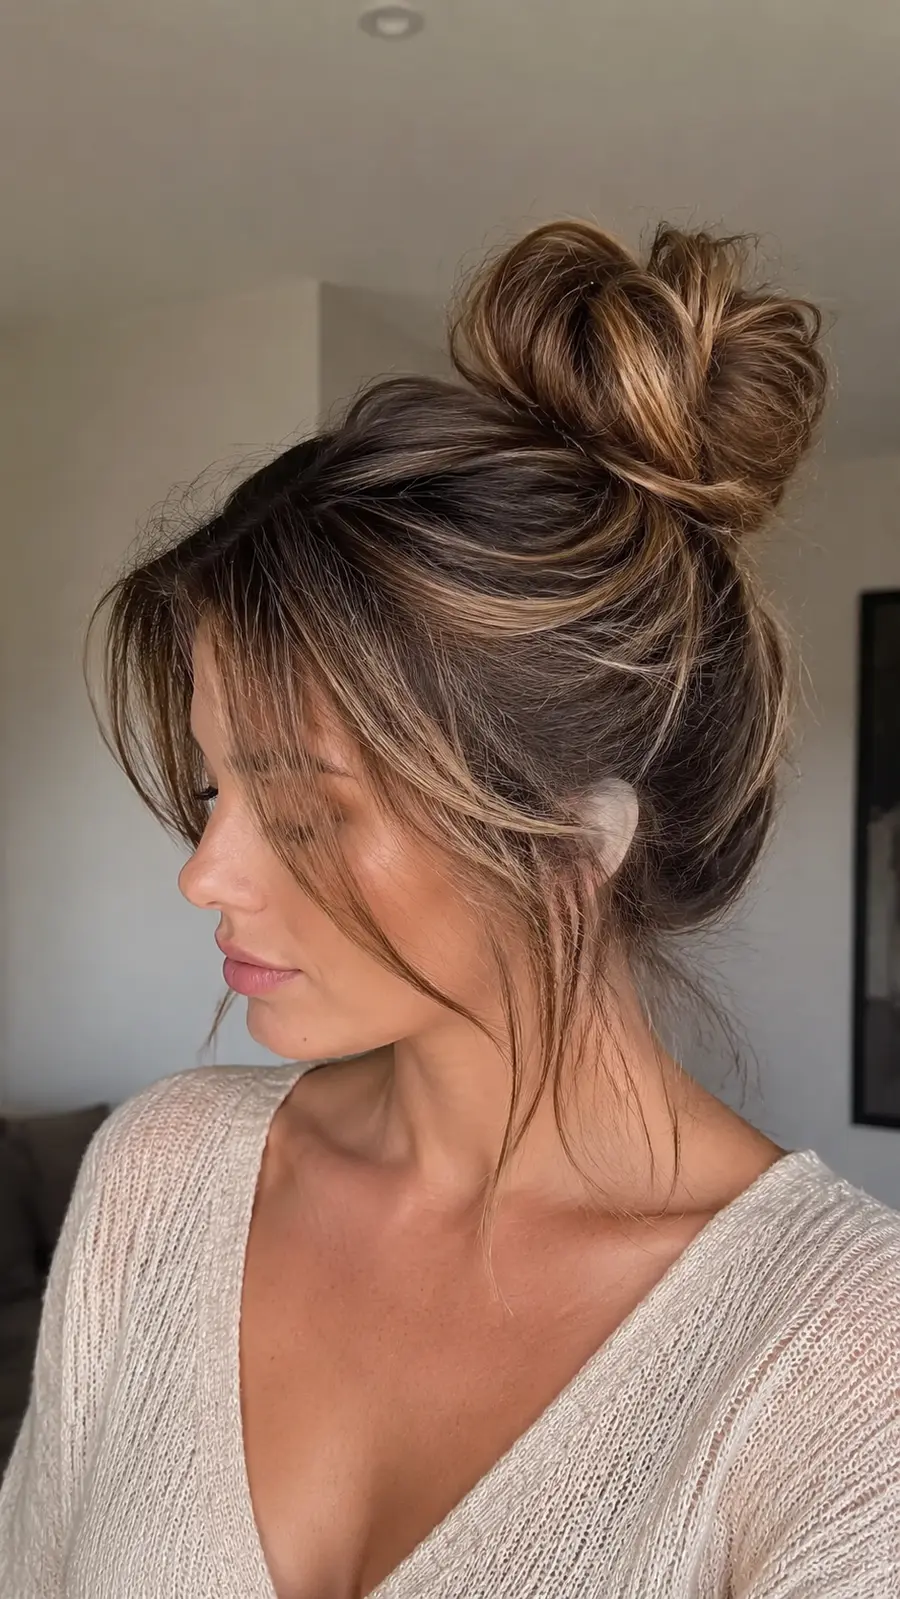
1. Soft Messy High Bun
This airy high bun has loose texture, face-framing pieces, and a softly rounded shape. A little imperfection makes it look intentional, relaxed, and flattering for casual days.
How-To
Gather a high ponytail without brushing away all the texture. Twist it loosely around the base, tuck the ends underneath, pin securely, then pull gently at the crown and bun.
Tips
Second-day hair or texture spray gives better grip. Release only a few fine pieces near the face and avoid overtightening the elastic.
Items Used
- Hair elastic
- Bobby pins
- Texture spray
- Tail comb
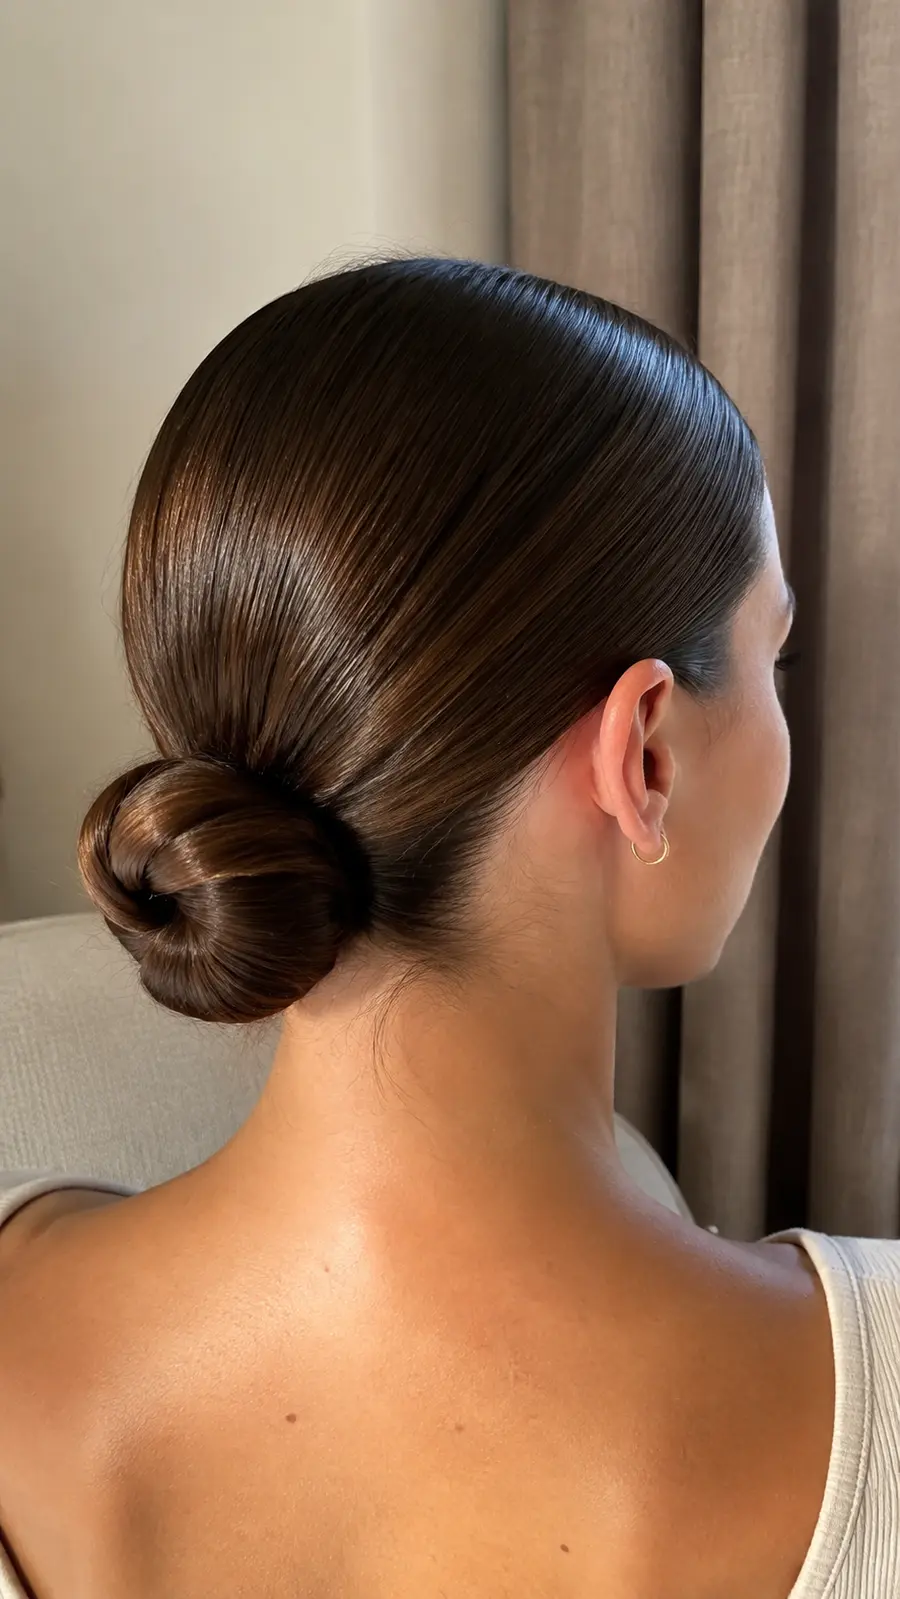
2. Sleek Low Bun
A glossy low bun and precise center part create an elegant silhouette for work, dinner, or formal events. Its compact placement also feels comfortable for hours.
How-To
Make a center part, smooth the hair into a low ponytail, twist the length into a tight coil, and pin it flat at the nape. Finish by smoothing short hairs.
Tips
Apply gel in thin layers and use a soft edge brush. Cross two bobby pins inside the bun when you need stronger hold without extra bulk.
Items Used
- Fine-tooth comb
- Strong elastic
- Bobby pins
- Styling gel
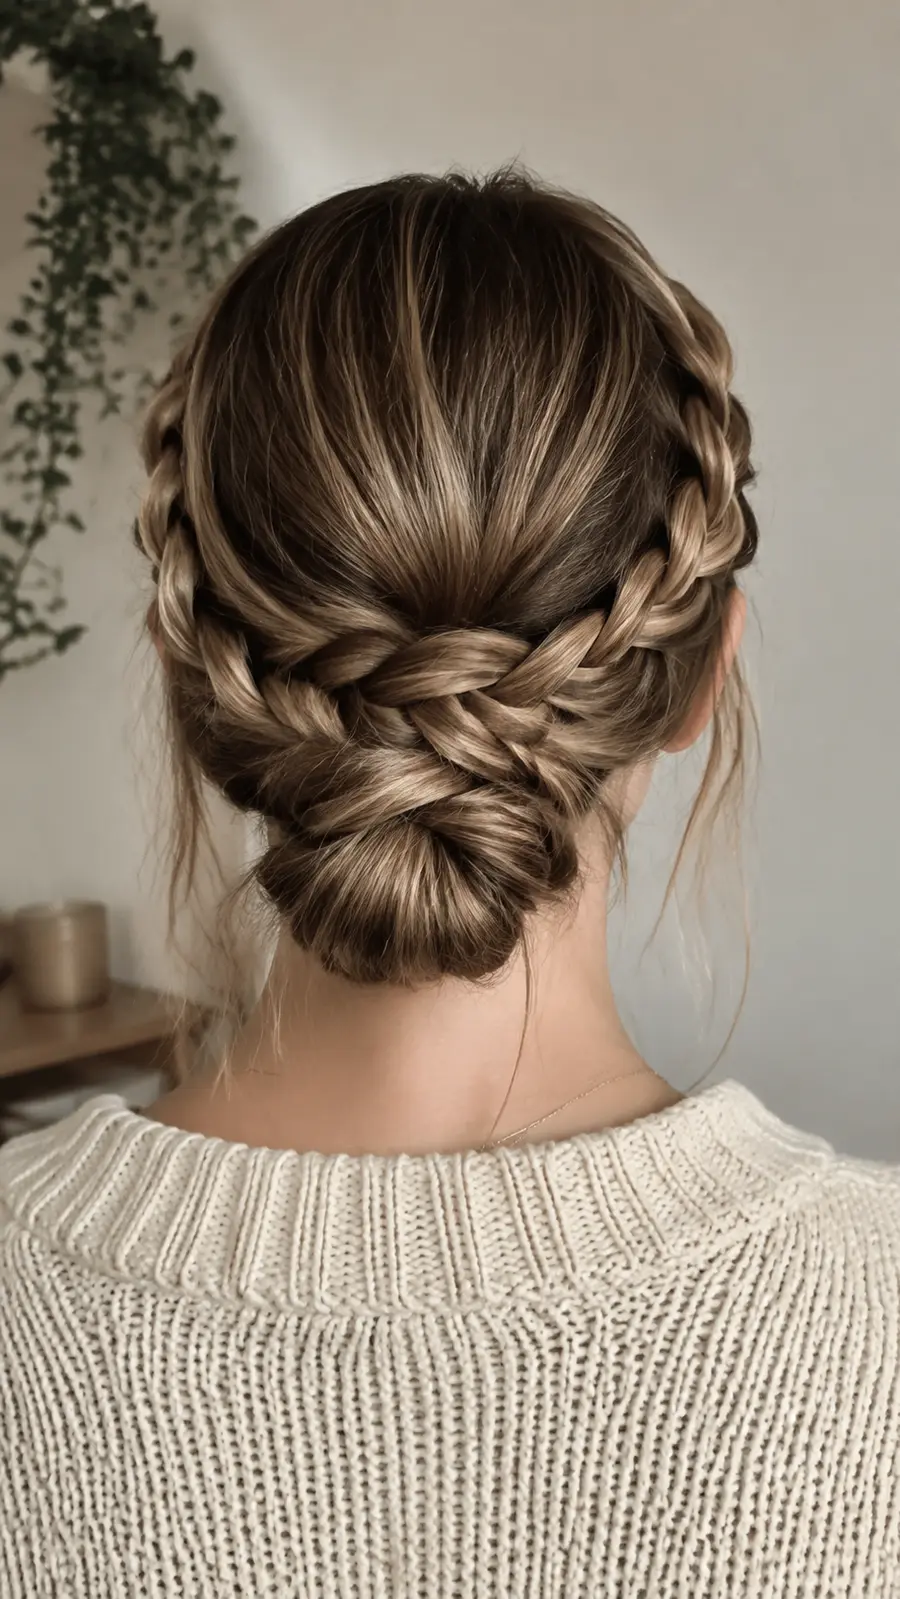
3. Braided Crown Bun
A wrapped braid and low bun add romantic detail from every angle. The style looks intricate but only requires simple three-strand braids.
How-To
Reserve a section near each temple and form the rest into a low bun. Braid the loose sections, soften their edges, cross them above the bun, and hide the ends underneath.
Tips
Pancake each braid before pinning so it looks fuller. Keep accessories small so the braided crown remains the main feature.
Items Used
- Clear elastics
- Bobby pins
- Sectioning clips
- Hairspray
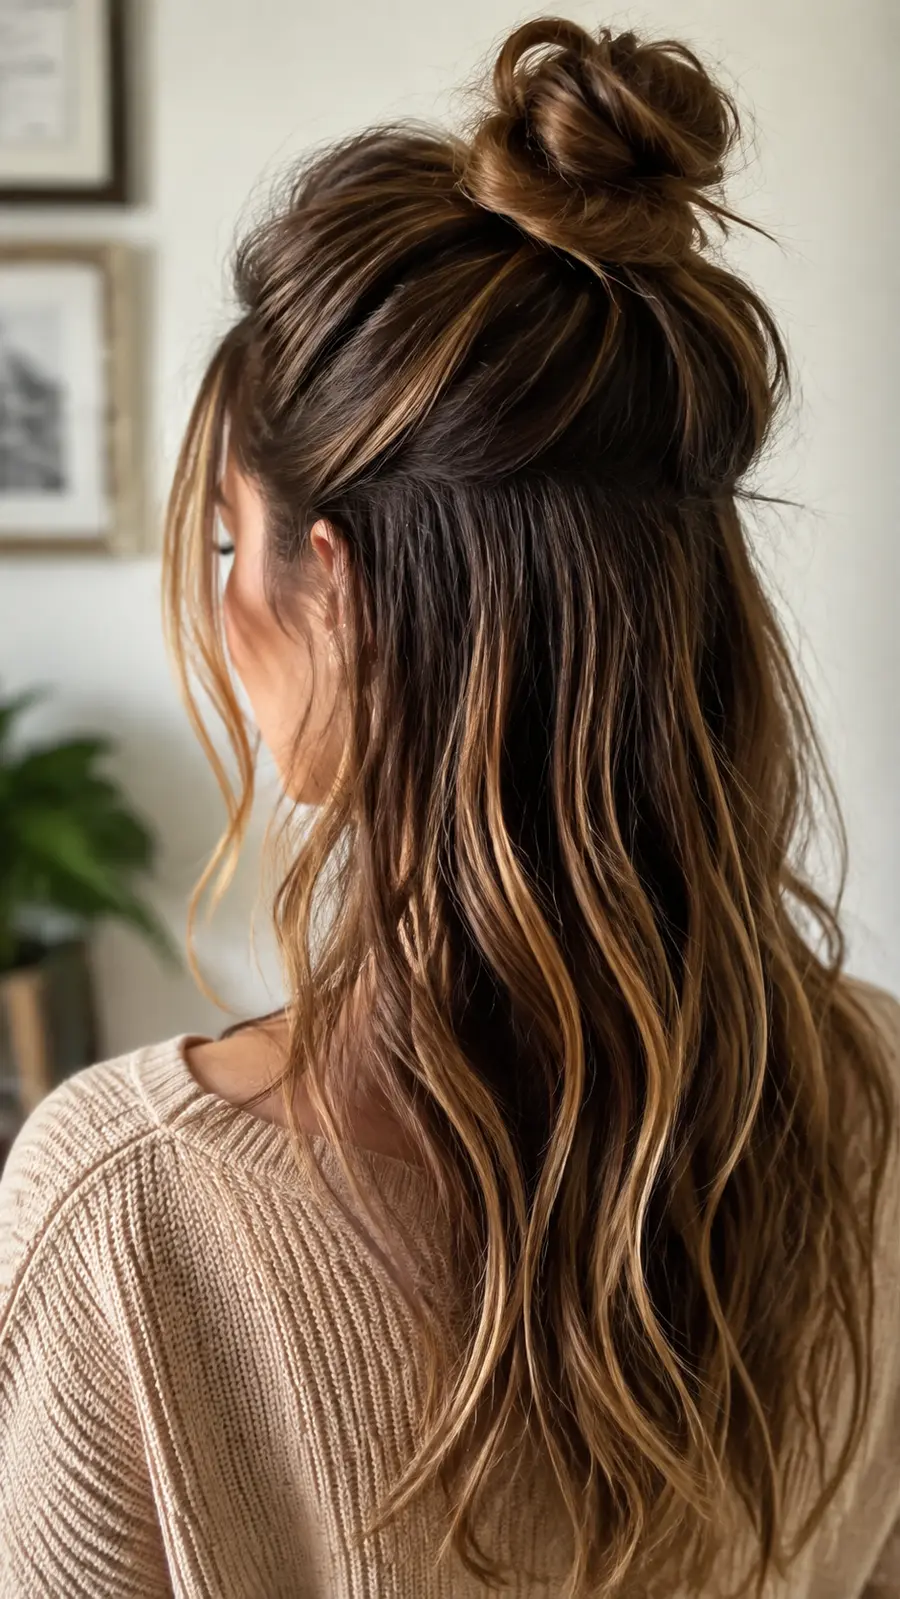
4. Half-Up Mini Bun
This mini bun keeps hair away from the face while leaving the length loose and touchable. Soft waves make it especially cute on medium or long hair.
How-To
Separate the hair from the temples to the crown, secure a small ponytail, twist it into a compact bun, and pin the ends. Add loose bends to the remaining length.
Tips
Place the bun just below the highest point of the head. Keep the lower hair polished with a tiny amount of serum.
Items Used
- Small elastic
- Bobby pins
- Curling wand
- Heat protectant
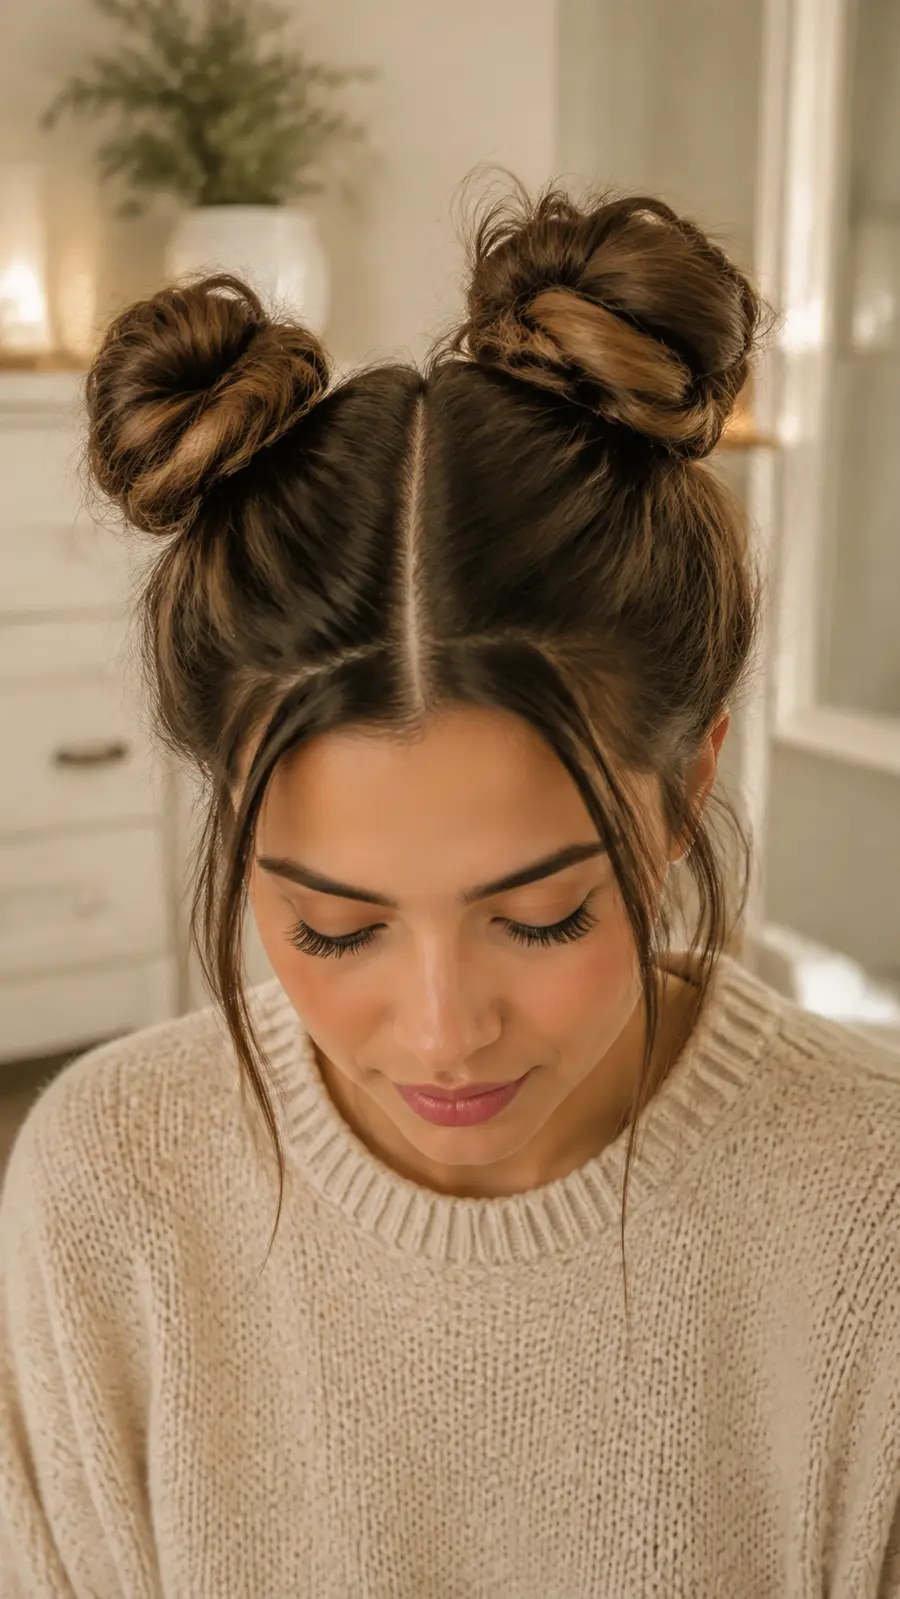
5. Playful Space Buns
Two high buns create a playful look for festivals, weekends, and creative outfits. A neat middle part and matching sizes keep the style polished.
How-To
Part the hair evenly and make two high ponytails. Twist both in the same direction, wrap them around their bases, pin, and adjust until the height matches.
Tips
Check the style from the front and back. Light teasing adds volume, while gel creates a smoother and sharper finish.
Items Used
- Two elastics
- Bobby pins
- Parting comb
- Edge brush
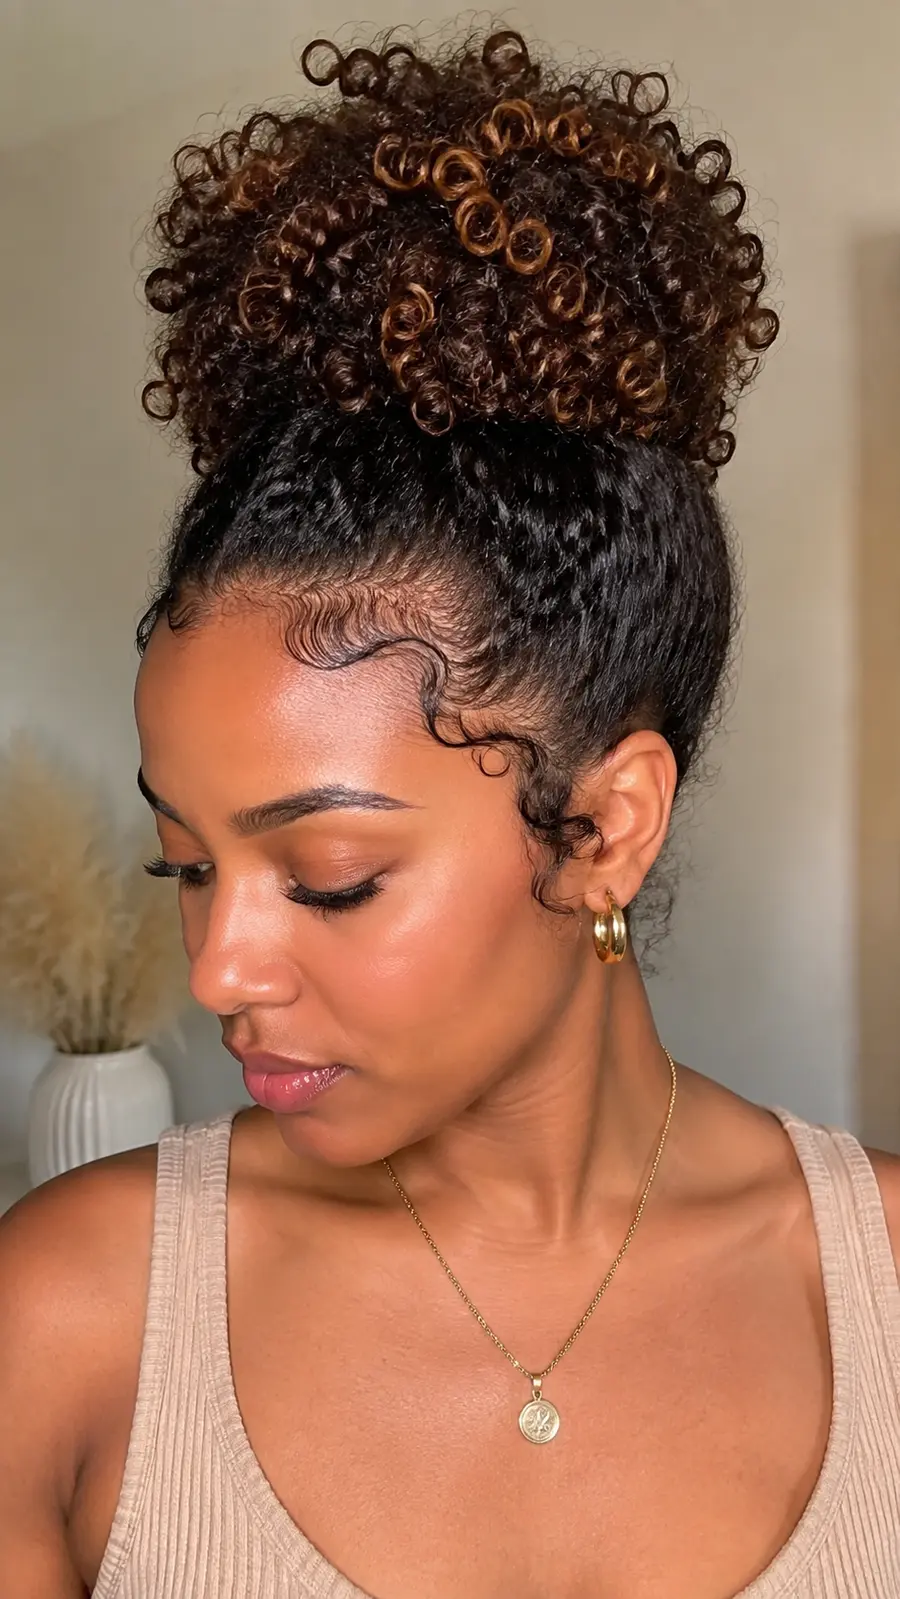
6. Curly Pineapple Bun
A pineapple bun celebrates natural curl definition while lifting the shape high on the head. The visible curls keep the finish soft, springy, and full.
How-To
Refresh dry sections with water and leave-in conditioner. Gather the curls loosely at the crown with a satin scrunchie, then arrange the shape with your fingers.
Tips
Do not brush through defined curls. Pin only the sections that need support so the curl pattern stays natural.
Items Used
- Satin scrunchie
- Leave-in conditioner
- Water mister
- Hair pins
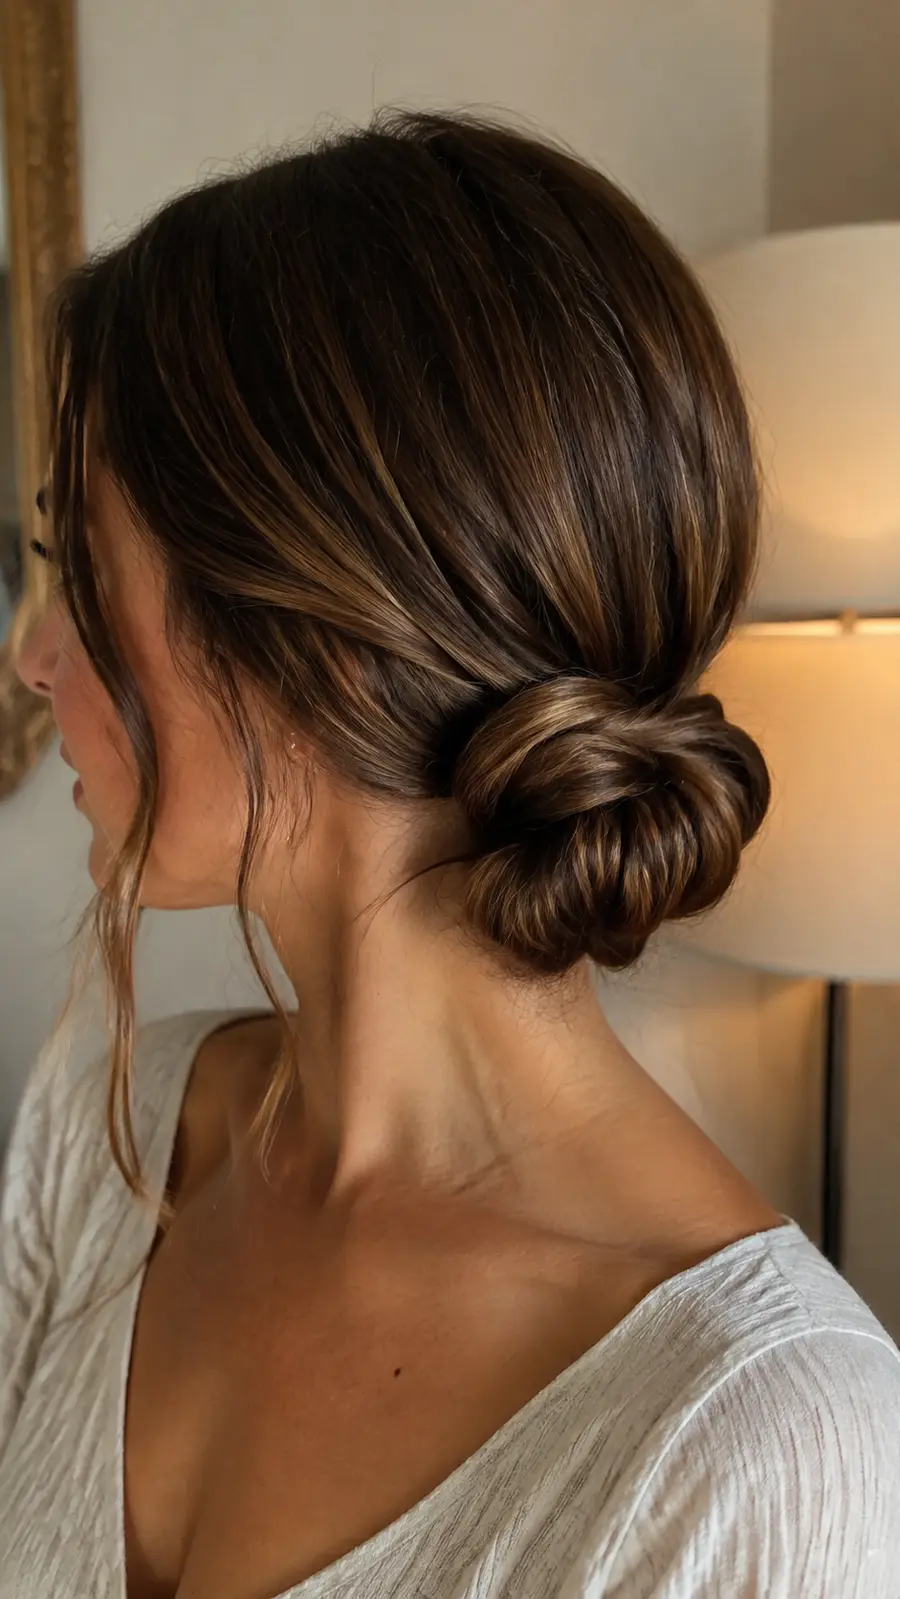
7. Twisted Side Bun
A low side bun has elegant asymmetry and photographs beautifully. Soft twists provide dimension without requiring advanced braiding.
How-To
Sweep the hair to one side, secure a low ponytail behind the ear, divide it into two twists, and wrap them together before pinning the outer edge.
Tips
Choose your most flattering side and keep the opposite side smooth. Add a little crown volume before forming the ponytail if the hair is fine.
Items Used
- Elastic
- Bobby pins
- Texture spray
- Decorative pin
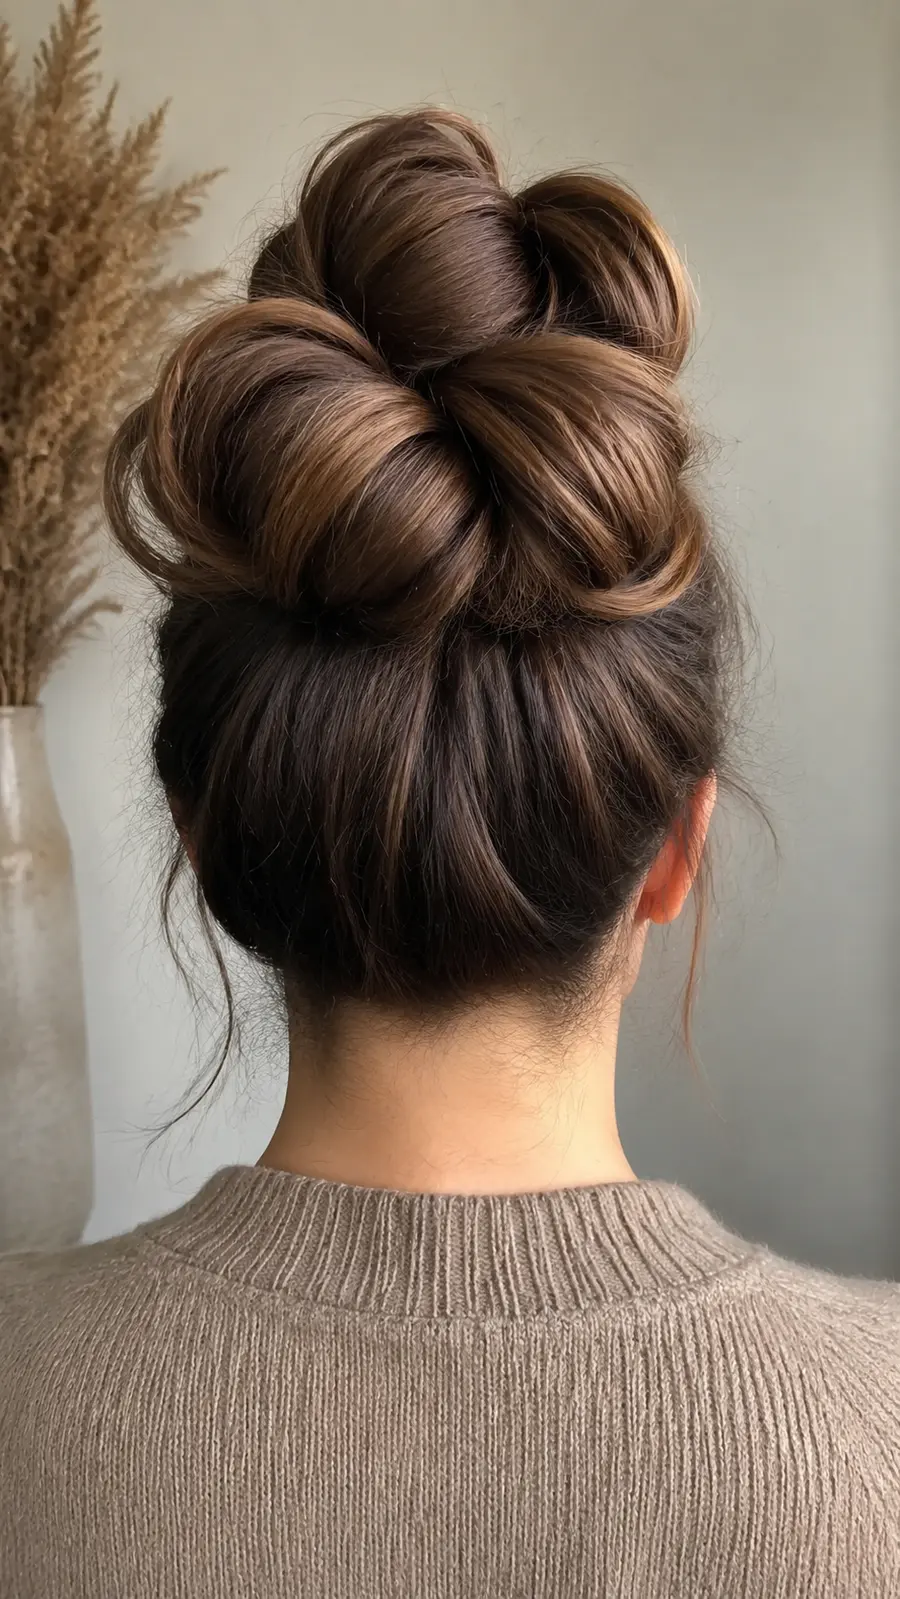
8. Textured Bubble Bun
Rounded loops give this bun a modern sculpted appearance and create the illusion of fullness when a classic twist feels too simple.
How-To
Make a ponytail, add small clear elastics down its length, pull each section outward into a bubble, then fold and pin the bubbles around the base.
Tips
Expand every bubble gradually so the size stays consistent. Fine hair benefits from texture powder and thick hair may need extra hidden pins.
Items Used
- Ponytail elastic
- Clear elastics
- Hair pins
- Texture powder
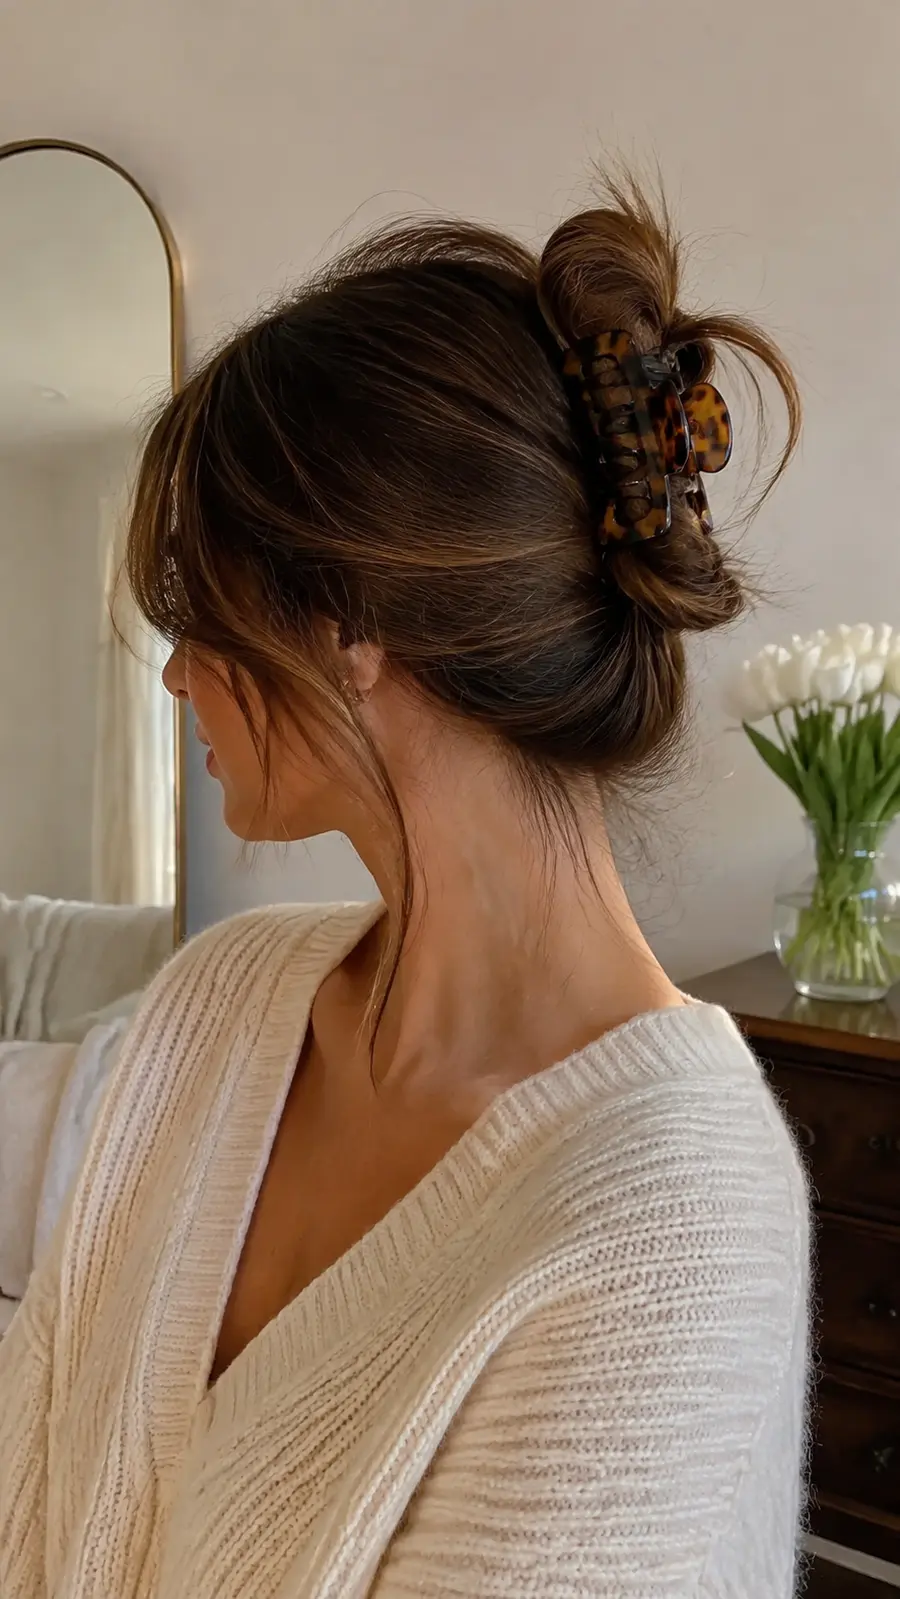
9. Effortless Claw-Clip Bun
The claw-clip bun is fast, comfortable, and effortlessly chic. It secures the ends while leaving a soft twist visible.
How-To
Gather the hair low, twist upward, fold the ends behind the twist, and clamp everything vertically with a strong claw clip.
Tips
Choose a clip that matches your hair density. Secure slipping layers with one hidden pin instead of adding uncomfortable tension.
Items Used
- Large claw clip
- Bobby pins
- Styling cream
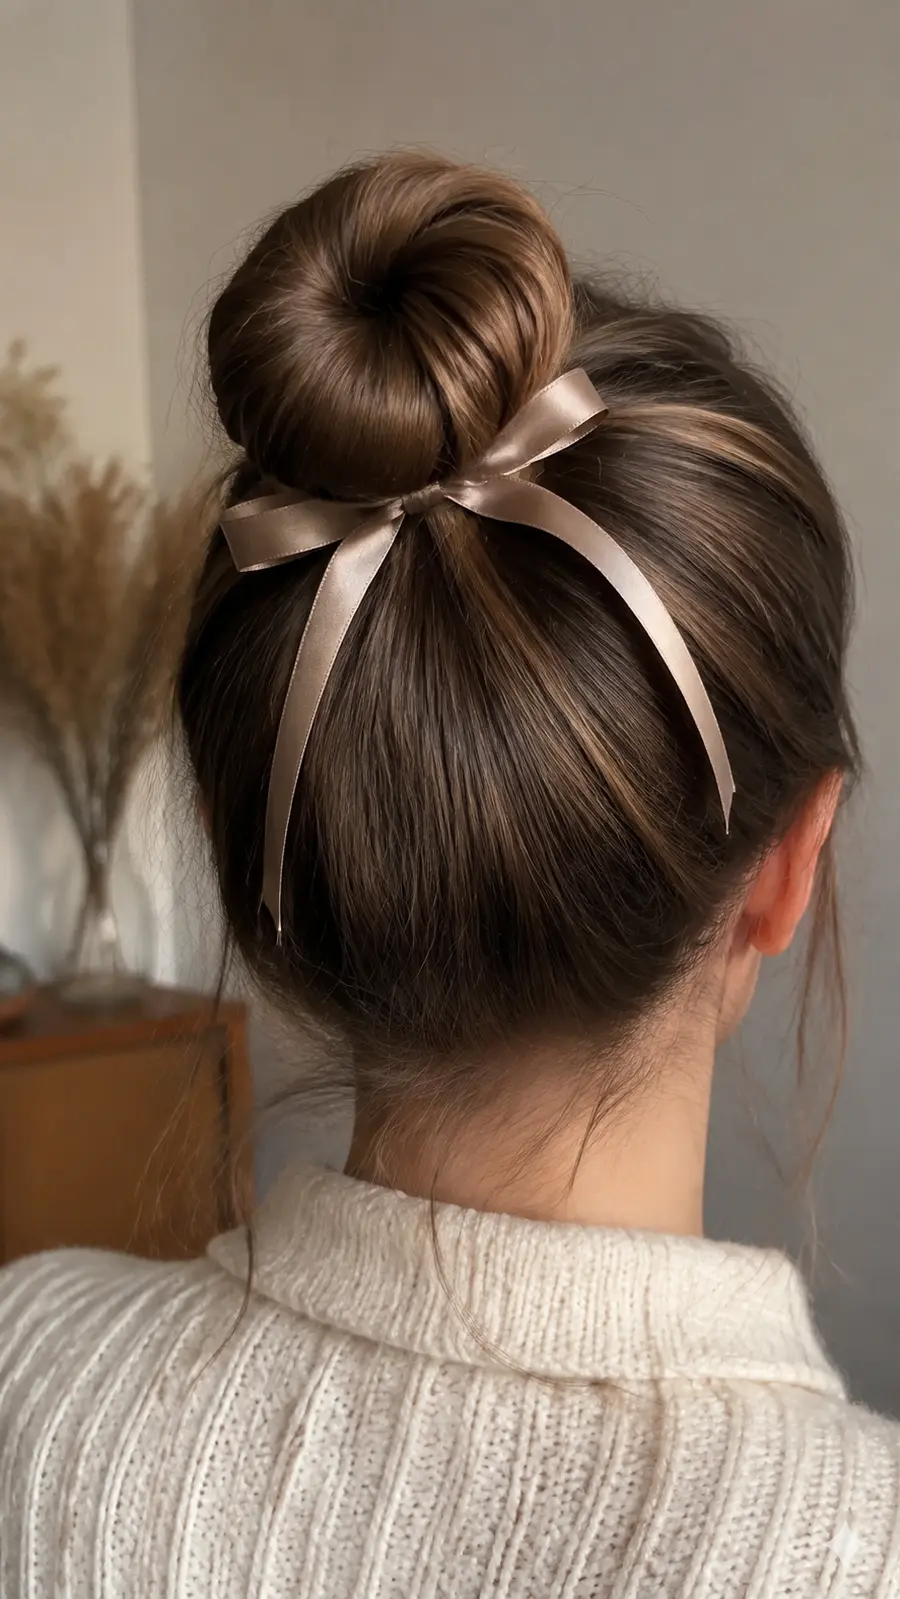
10. Ribbon-Wrapped Sock Bun
A smooth sock bun creates a perfectly rounded base, while a narrow ribbon adds a sweet feminine detail for school, brunch, or celebrations.
How-To
Pull a ponytail through a bun donut, spread the hair over it, tuck and pin the ends underneath, then wrap and tie a ribbon around the base.
Tips
Use a donut close to your hair color. A matte ribbon grips better, and a small bow will not overpower the bun.
Items Used
- Bun donut
- Hair elastic
- Bobby pins
- Narrow ribbon
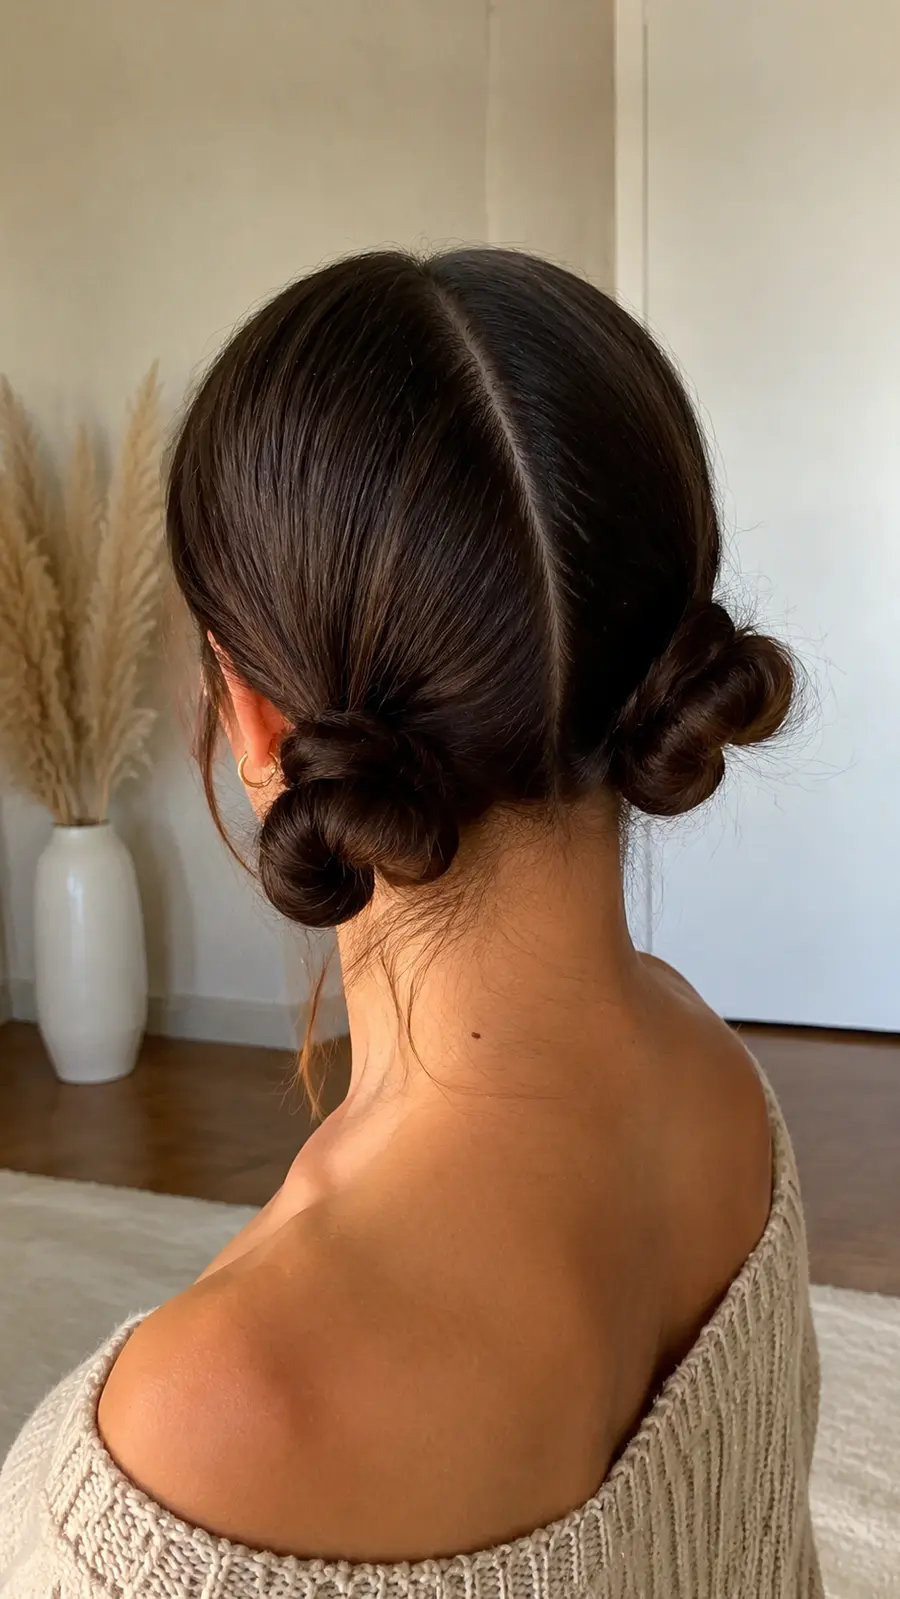
11. Chic Double Low Buns
Double low buns are playful yet understated. Their nape-level placement works beautifully with straight, wavy, or lightly curled hair.
How-To
Create a center part and two low ponytails. Twist each into a bun, pin the ends, and gently loosen the outer edges until both sides look even.
Tips
Keep the buns close to the nape. On short hair, loop each ponytail and tuck the small loose ends underneath.
Items Used
- Two elastics
- Bobby pins
- Smoothing brush
- Flexible hairspray
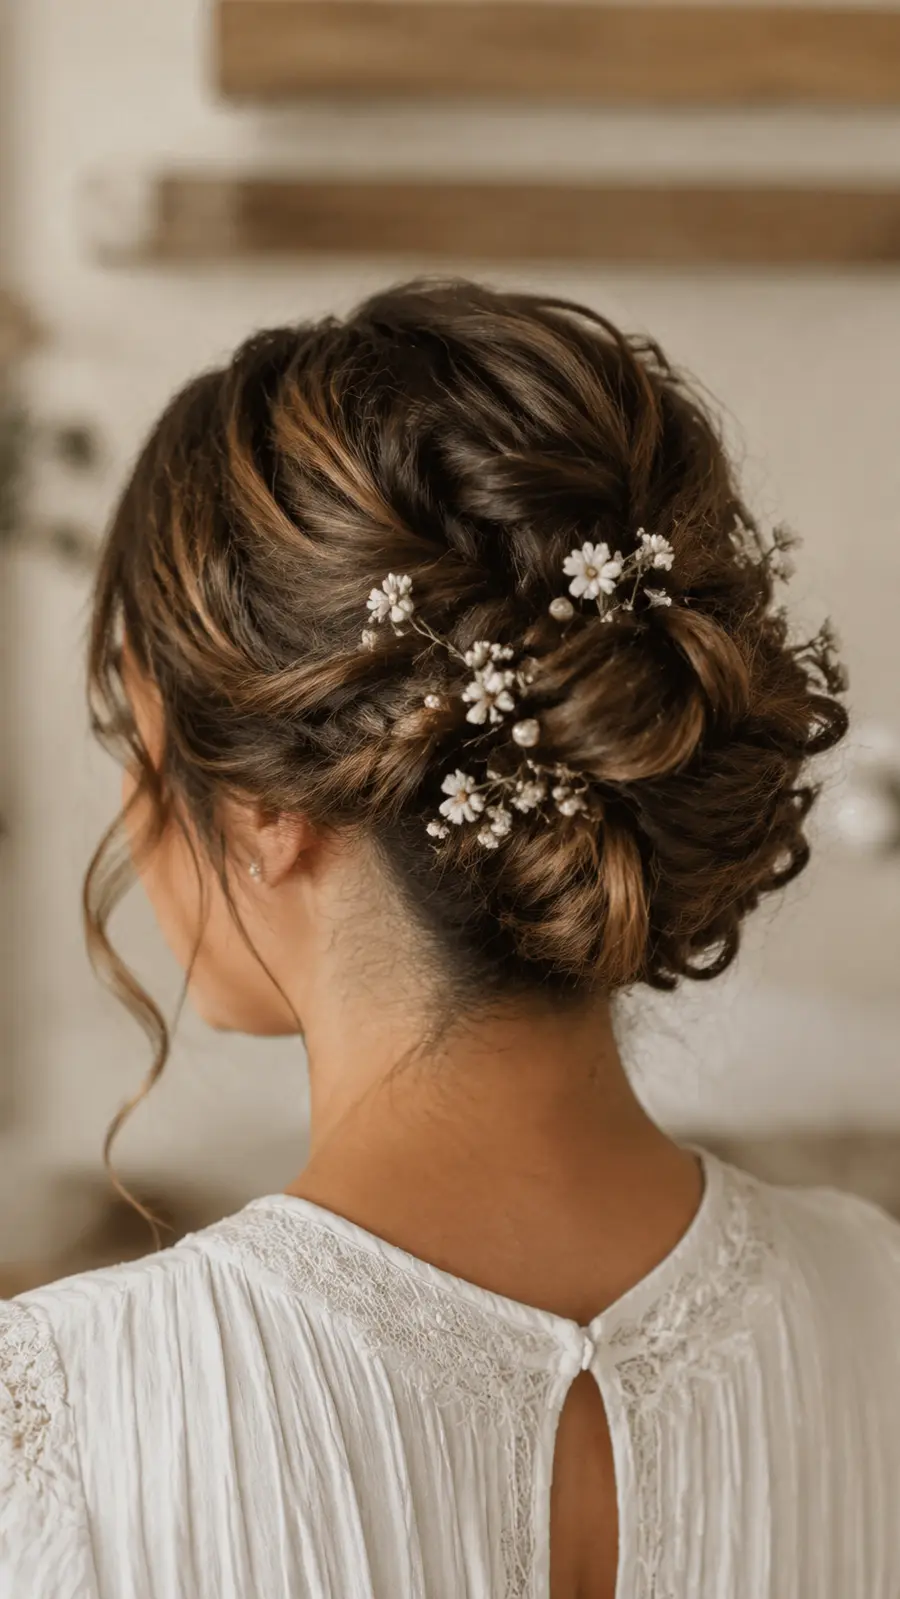
12. Romantic Floral Wedding Bun
A softly textured low bun decorated with delicate flowers feels timeless for weddings, garden parties, and formal celebrations.
How-To
Create gentle crown volume, make a low ponytail, and pin overlapping twisted sections into a loose bun. Insert floral pins along one side of the curve.
Tips
Use lightweight flowers and anchor each stem with crossed pins. Asymmetrical placement gives the most natural, refined finish.
Items Used
- Bobby pins
- Hair elastic
- Floral pins
- Texture spray
RELATED CONTENT
- 12 Braid Ponytail Hairstyles
- 12 Natural Fulani Hairstyles
- Healthy Hair Tips from the American Academy of Dermatology
Frequently Asked Questions
How do I make a bun look fuller? Add texture, loosen the outer edges after pinning, or use a small bun donut that matches your hair color.
Can I create these buns on short hair? Yes. Half-up buns, low loops, and claw-clip twists work especially well, with discreet pins holding shorter layers.
Are buns damaging for everyday wear? They can be gentle when you vary the placement, avoid tight tension, and use soft elastics.
Should I style a bun on clean or second-day hair? Second-day hair usually has more grip, but clean hair works after adding mousse or texture spray.
How can I stop bobby pins from sliding? Insert the wavy side toward the scalp and cross two pins whenever extra support is needed.
Closing
Cute bun hairstyles can be quick, comfortable, and expressive at the same time. Choose the version that suits your routine, personalize it with texture or accessories, and keep the tension gentle for a secure style that stays soft and wearable.