12 Goofy Nails Design Ideas That Are Too Cute to Ignore
Goofy Nails Design
Goofy nail designs are the perfect way to show off your playful personality while keeping your manicure fresh and memorable. From colorful cartoon-inspired details to quirky patterns and fun textures, these creative nail ideas prove that beauty doesn’t always have to be serious.
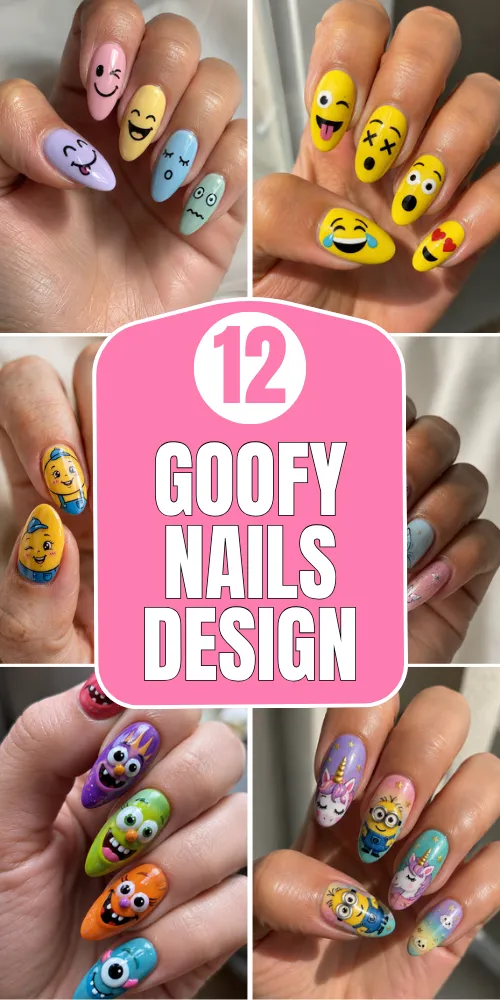
Whether you’re planning a themed party, looking for conversation-starting nail art, or simply want something that makes you smile every time you look at your hands, goofy nails offer endless possibilities. The key is balancing bold colors, clean application, and thoughtful details so the final look feels stylish instead of messy. This collection features 12 unique goofy nail designs that are fun to wear, surprisingly versatile, and suitable for beginners as well as experienced nail art lovers.
1. Minion Mischief
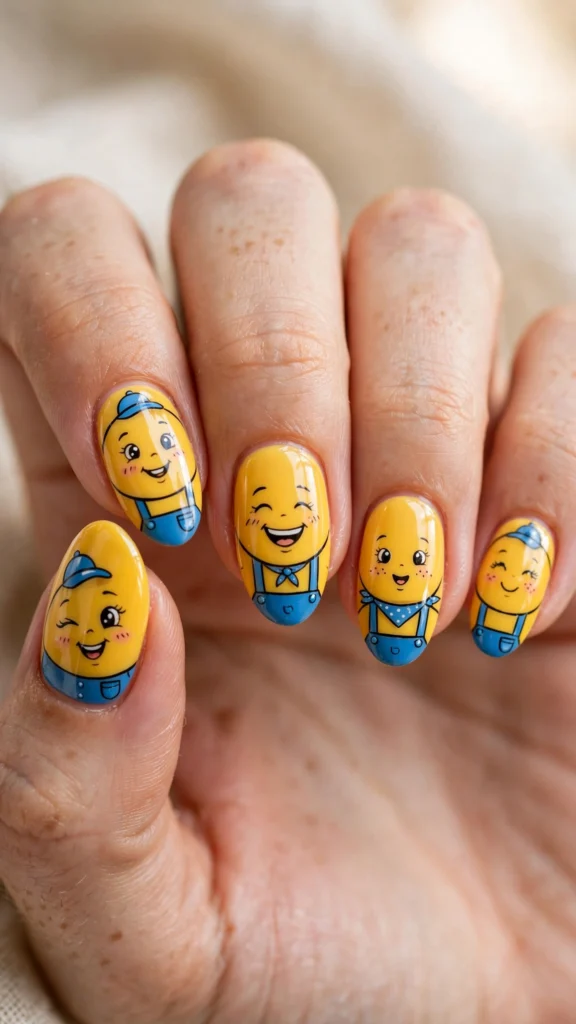
Bright yellow nails with adorable Minion-inspired faces instantly create a cheerful manicure that stands out. Mixing different facial expressions across each nail keeps the design playful without looking repetitive. Using only one or two accent nails prevents the overall look from becoming too busy while still capturing the fun character theme.
How-To
Apply a yellow gel polish as the base. Paint blue overall details near the tips before adding black goggles, white eyes, and tiny smiles using a fine nail art brush. Finish with a glossy top coat to protect the artwork.
Tips
Keep the facial features simple instead of adding excessive details. Large eyes and clean outlines create a more polished appearance than overcrowded artwork.
Items Used
Yellow gel polish, blue polish, black polish, white polish, silver polish, fine liner brush, dotting tool, glossy top coat.
2. Googly Eye Party
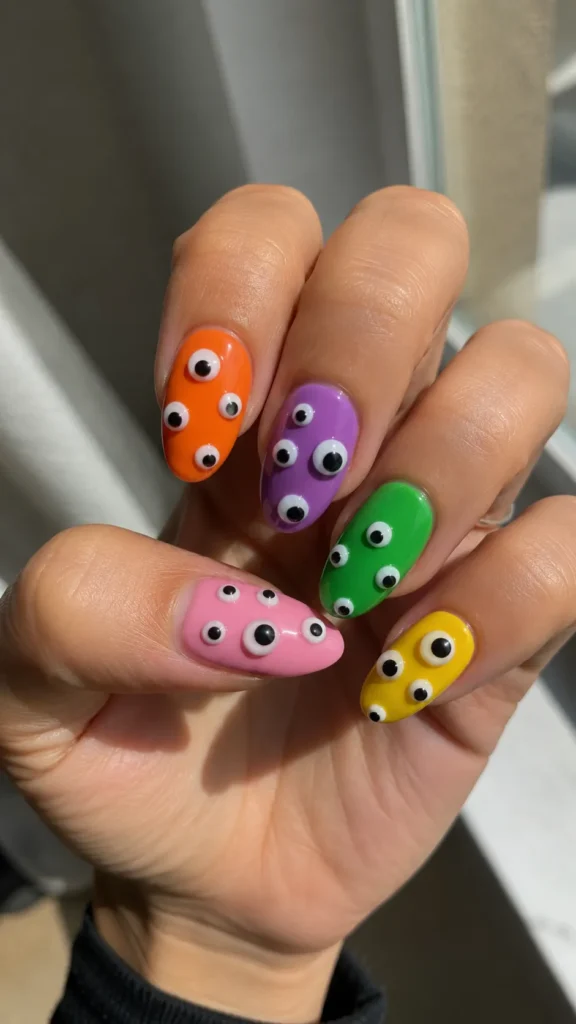
Tiny googly eyes scattered across colorful nails create a funny surprise every time your hands move. This design works especially well on short and medium nails because the moving eyes become the main attraction without overwhelming the manicure.
How-To
Paint each nail a different bright color. Attach miniature flat-backed googly eyes using nail glue or embed them into thick builder gel before sealing carefully with top coat around the edges.
Tips
Avoid placing too many eyes on one nail. Three to five eyes per nail usually creates the funniest effect while keeping the surface comfortable for everyday wear.
Items Used
Colorful gel polish, miniature googly eyes, nail glue or builder gel, tweezers, glossy top coat.
3. Silly Smiley Faces
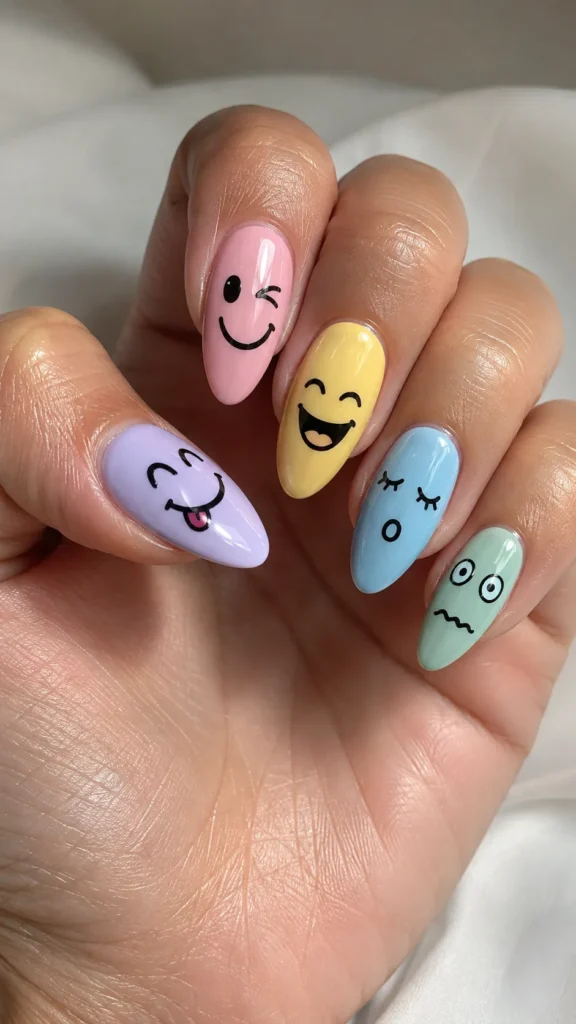
Classic smiley faces become much more entertaining when every nail features a different expression. Happy, sleepy, surprised, and goofy faces create a lighthearted manicure that feels personalized while remaining easy enough for beginners to recreate.
How-To
Choose a pastel or neon background. Use a dotting tool for the eyes and a liner brush for different mouth shapes, eyebrows, and funny expressions before sealing everything with top coat.
Tips
Sketch the expressions on paper first to avoid repeating the same face. Variety makes the final manicure much more interesting.
Items Used
Pastel or neon polish, black nail polish, dotting tool, liner brush, glossy top coat.
4. Cartoon Monster Nails
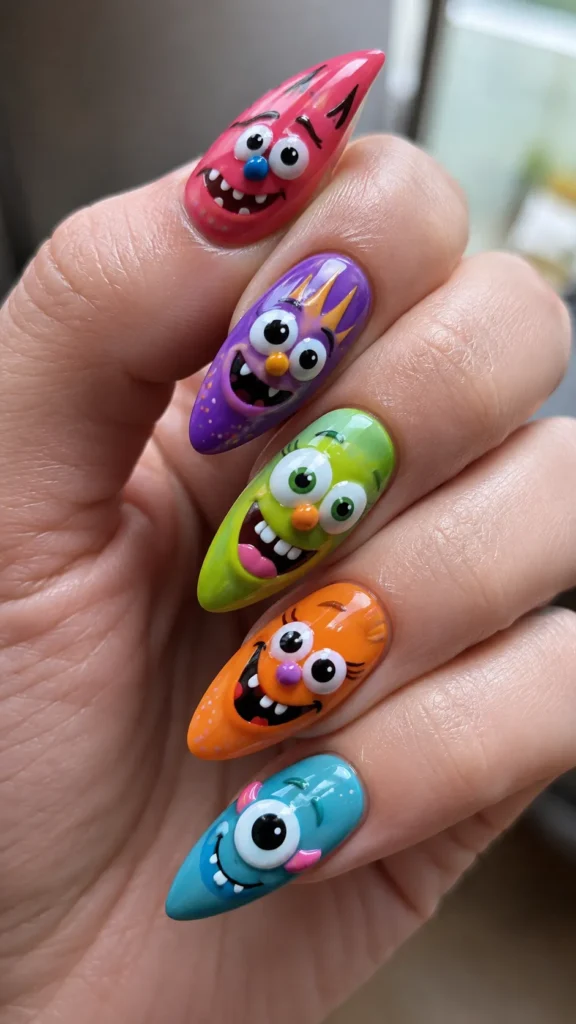
Friendly monsters with oversized eyes, colorful fur, and funny teeth transform your manicure into wearable artwork. Mixing different monster colors across each nail creates a balanced design that feels imaginative instead of scary.
How-To
Apply colorful base shades, then paint monster faces using a detail brush. Add large eyes, tiny horns, funny mouths, and exaggerated teeth before finishing with a durable glossy top coat.
Tips
Use bright colors rather than dark shades to keep the monsters playful and suitable for everyday wear.
Items Used
Bright gel polish, detail brushes, dotting tool, black and white polish, glossy top coat.
5. Popcorn & Movie Night
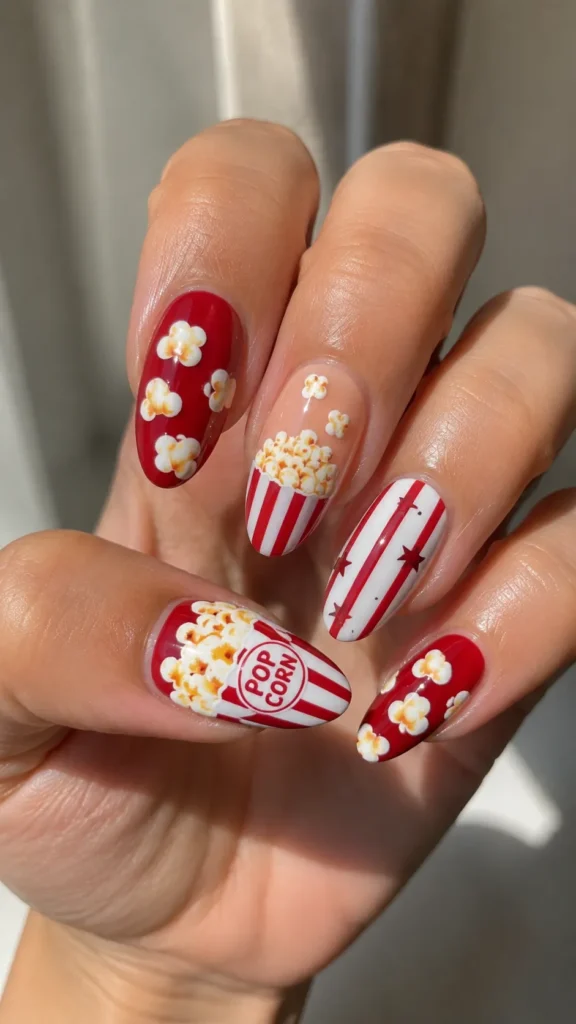
Celebrate your favorite movie nights with popcorn buckets, film reels, and buttery popcorn pieces painted across your nails. This creative theme looks especially fun for weekend outings, cinema dates, or relaxing evenings with friends.
How-To
Alternate red-and-white striped nails with popcorn illustrations. Add tiny yellow popcorn pieces using a dotting tool and outline details with a thin black brush.
Tips
Keep only two or three accent nails detailed while leaving the remaining nails striped for a cleaner overall appearance.
Items Used
Red, white, yellow, and black polish, liner brush, dotting tool, glossy top coat.
6. Color Splash Chaos
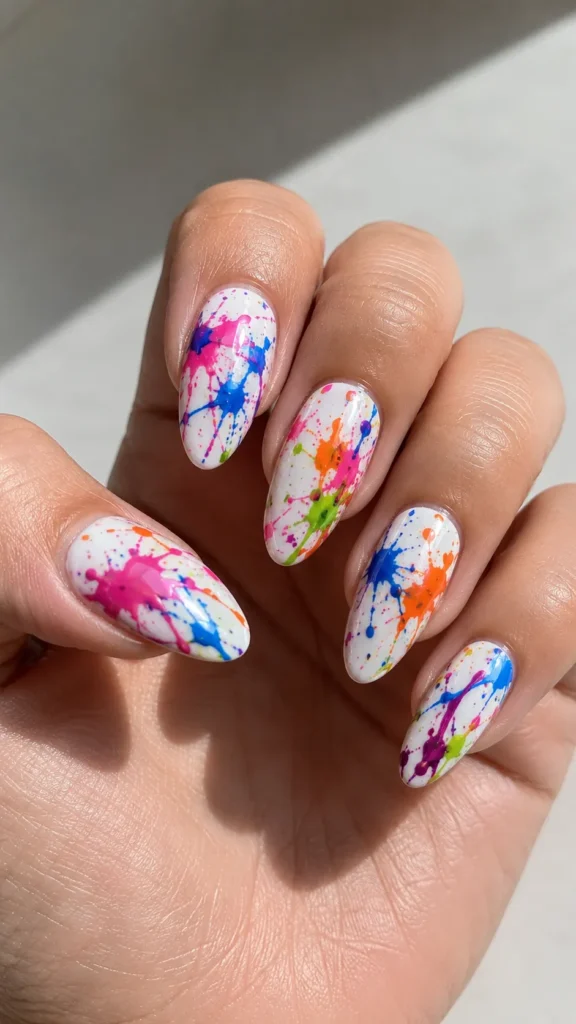
Random paint splatters in bold shades create an intentionally messy look that feels artistic rather than careless. Every manicure becomes completely unique because no two paint splatter patterns are ever identical.
How-To
Apply a white base coat, then use a small brush or straw technique to add colorful splashes. Build layers gradually before sealing with a smooth glossy finish.
Tips
Limit your palette to four or five colors to keep the design lively without becoming visually overwhelming.
Items Used
White polish, colorful polish selection, thin brush, palette, glossy top coat.
7. Funny Food Faces
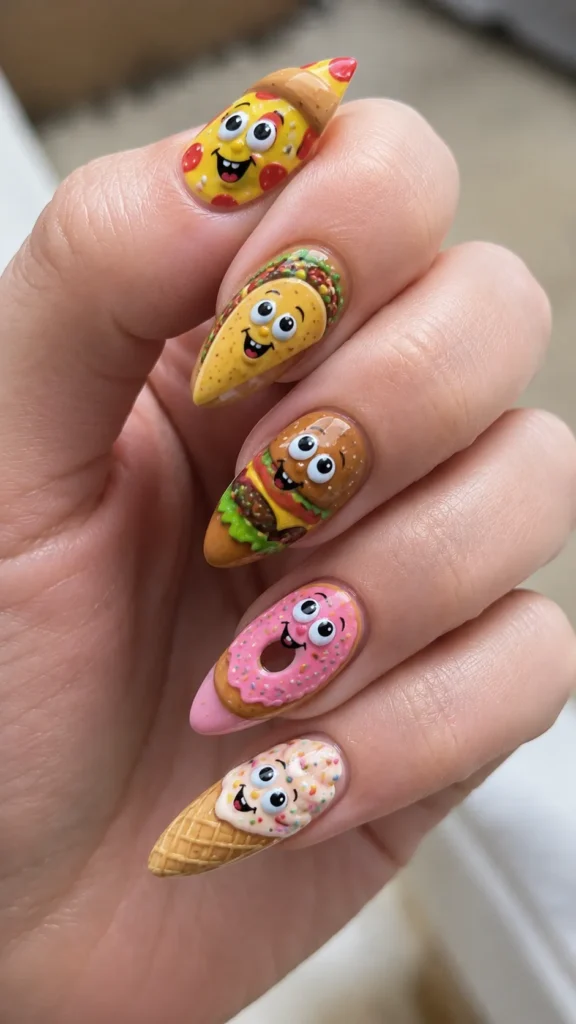
Turn tacos, pizza slices, burgers, donuts, and ice cream into smiling cartoon characters. These tiny food illustrations instantly make your manicure feel cheerful while allowing plenty of room for creative color combinations.
How-To
Paint miniature food shapes first, then add simple eyes and smiling mouths using a detail brush. Seal carefully with a glossy protective finish.
Tips
Choose foods with recognizable shapes so the designs remain easy to identify even on smaller nails.
Items Used
Assorted gel polish colors, detail brush, dotting tool, glossy top coat.
8. Unicorn Despicable Me Mix
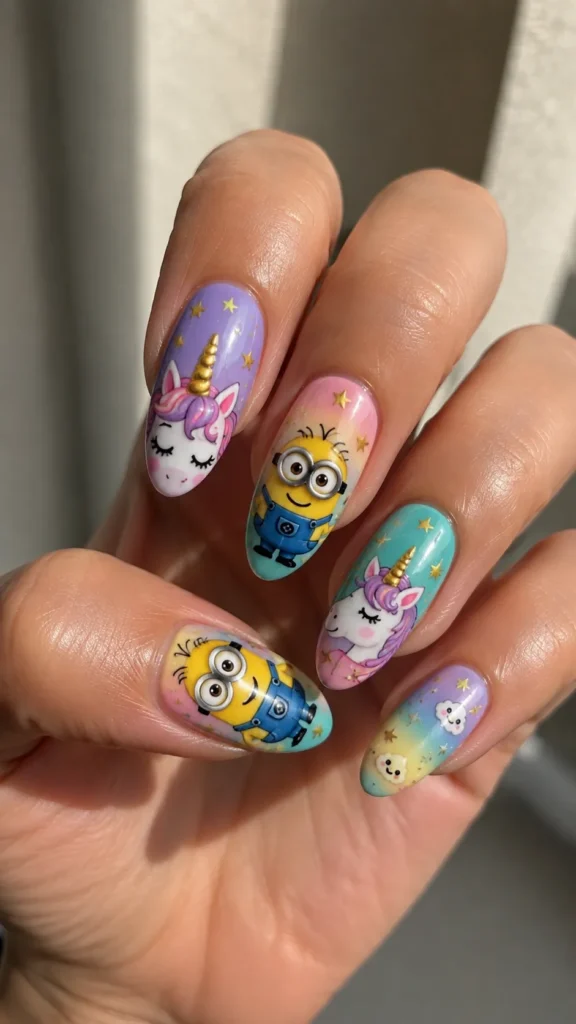
Blend fluffy unicorn colors with playful Minion-inspired accents for a manicure that combines two fun themes in one creative design. Soft pastel backgrounds balance the brighter character details beautifully.
How-To
Create pastel gradients before painting unicorn horns, rainbows, and selected Minion-inspired accents on feature nails. Finish with a high-shine protective top coat.
Tips
Keep one consistent color palette across every nail so both themes feel connected rather than competing with each other.
Items Used
Pastel gel polish, rainbow colors, liner brush, sponge, glossy top coat.
9. Comic Book Pop Art
Bold outlines, comic-style dots, and speech bubbles transform your manicure into a colorful comic strip. The dramatic black borders create depth while bright primary colors make every nail stand out.
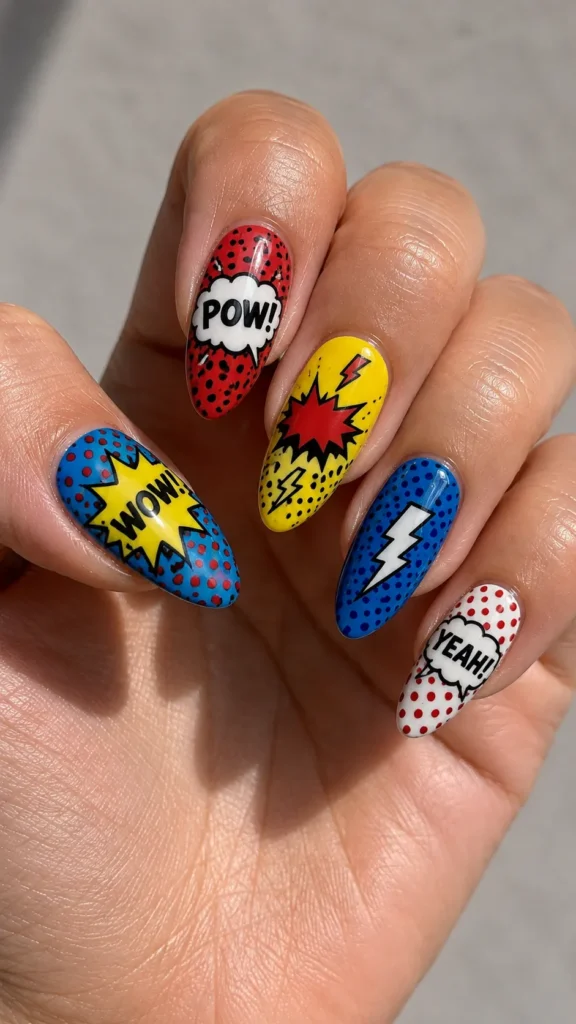
How-To
Paint vibrant backgrounds before outlining shapes with black polish. Add comic dots and fun speech bubbles like “Oops!” or “Wow!” using a fine detail brush.
Tips
Use crisp black outlines because clean borders are what give comic-inspired nails their signature appearance.
Items Used
Primary color polish, black polish, white polish, liner brush, dotting tool, glossy top coat.
10. Rubber Duck Bath Time
Cute rubber ducks floating among bubbles create a lighthearted manicure that feels nostalgic and playful. Soft blue backgrounds paired with white bubble details make the yellow ducks stand out beautifully.
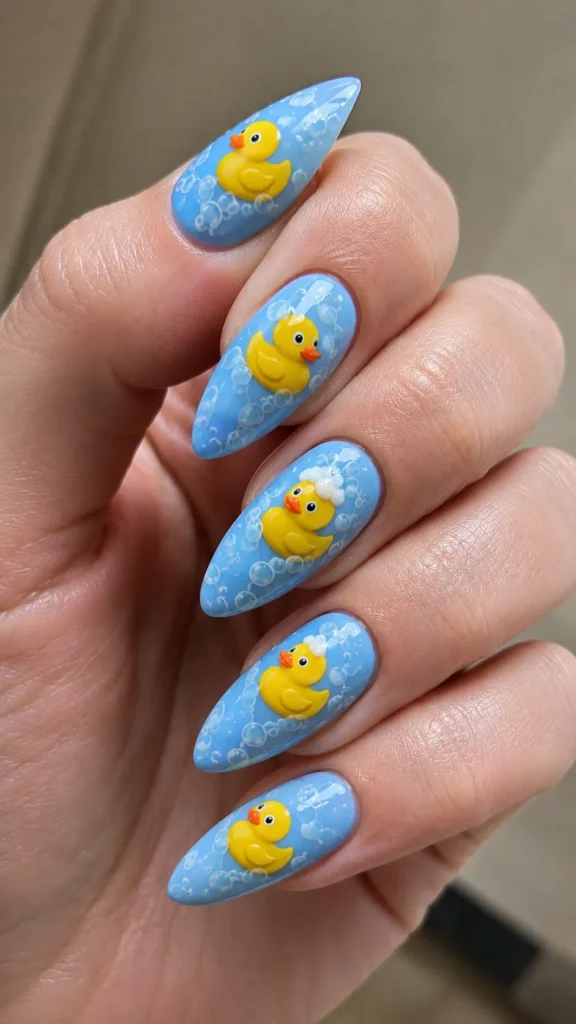
How-To
Apply a sky-blue base before painting miniature ducks with yellow polish. Add white bubble clusters and tiny water ripples for extra dimension.
Tips
Keep the ducks facing different directions to make the overall manicure appear more natural and animated.
Items Used
Blue polish, yellow polish, white polish, black polish, detail brush, dotting tool, glossy top coat.
11. Crazy Emoji Collection
Instead of repeating the same emoji, feature a different funny face on every nail. Laughing, winking, shocked, dizzy, and tongue-out expressions create a lively manicure that’s instantly recognizable.
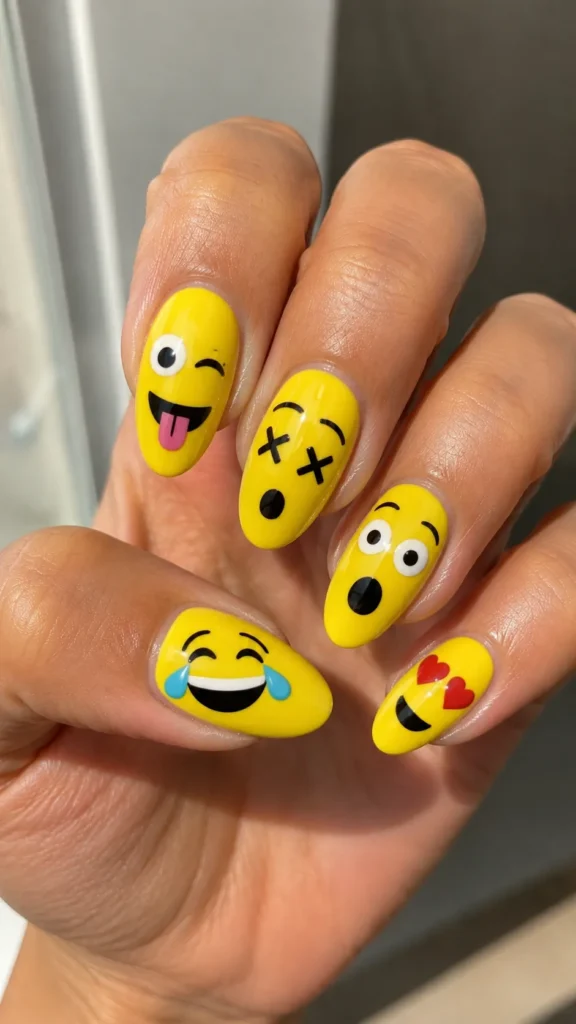
How-To
Start with yellow polish before drawing each emoji expression using black, white, and red detailing polish. Finish with a smooth glossy top coat.
Tips
Keep facial proportions large and centered so every emoji remains clear from a distance.
Items Used
Yellow polish, black polish, white polish, red polish, detail brush, glossy top coat.
12. Rainbow Confetti Celebration
Bright rainbow confetti scattered over a clear or nude base creates a festive manicure that’s playful without relying on characters. The colorful pieces catch the light beautifully and work for birthdays, celebrations, or everyday fun.
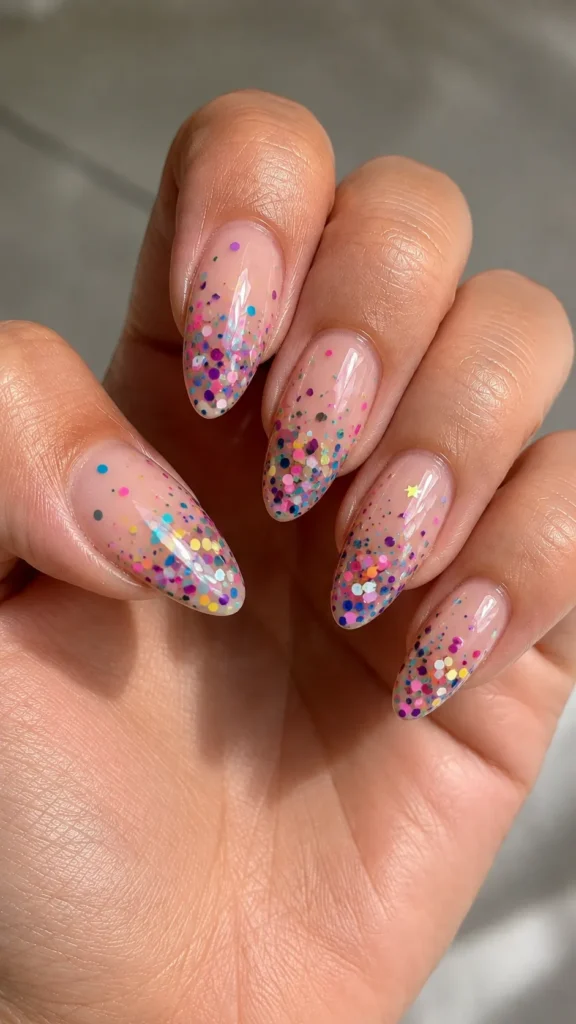
How-To
Apply a nude or transparent base before placing colorful glitter pieces and confetti shapes evenly across each nail. Seal with two layers of top coat for a smooth finish.
Tips
Distribute confetti evenly instead of clustering it in one area to achieve a balanced, professional-looking manicure.
Items Used
Nude gel polish, rainbow glitter, confetti sequins, tweezers, builder gel, glossy top coat.
FAQ Section
What nail length works best for goofy nail designs?
Medium and long nails provide more room for detailed artwork, but many goofy designs can also be adapted for short nails using simple illustrations.
Can beginners create these designs?
Yes. Start with smiley faces, color splashes, or emoji nails before attempting detailed character art. Nail stickers and stamping plates also make beginner projects easier.
Do goofy nails have to be brightly colored?
Not necessarily. Neutral backgrounds with colorful accent nails can create a playful look while remaining wearable for everyday activities.
How long do detailed nail designs last?
With quality gel polish and a durable top coat, most designs stay vibrant for two to three weeks when proper nail care is followed.
Can these designs be customized?
Absolutely. Mix colors, favorite characters, glitter finishes, or matte top coats to create a manicure that reflects your personality.
Related Content
Closing
Goofy nail designs are all about having fun while expressing your creativity in a way that feels completely your own. Whether you choose colorful cartoon characters, playful emojis, quirky food art, or cheerful confetti patterns, the best manicure is one that makes you smile every time you see it. Don’t be afraid to experiment with different color combinations and personal touches to make each design unique. Try your favorite idea, enjoy the creative process, and share your finished manicure with friends—you might inspire someone else to embrace a little more fun in their next nail appointment.