12 Kandi Star Ideas for Colorful and Creative Beaded Accessories

Kandi Star Ideas
Kandi stars are one of those crafts that look complicated at first, but become surprisingly relaxing once you understand how the beads and string work together.
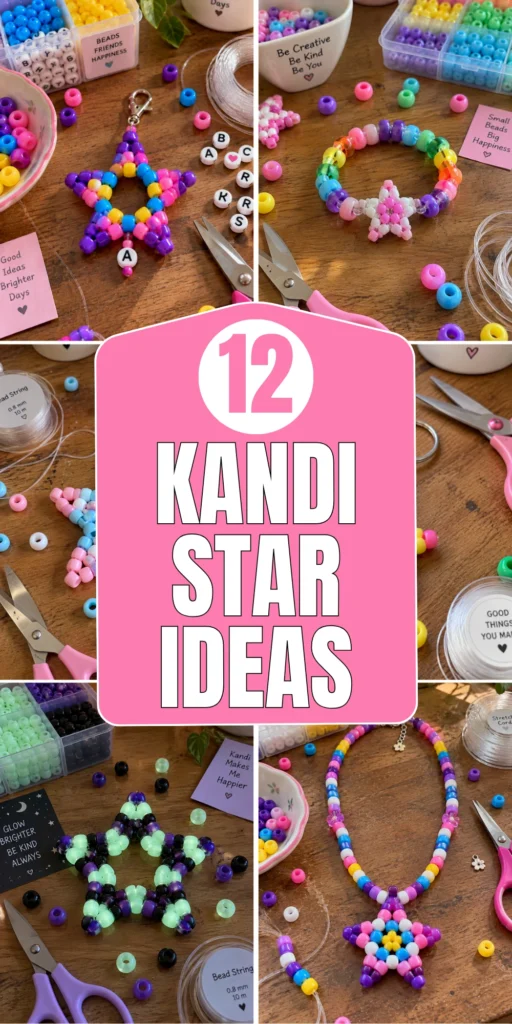
They are colorful, customizable, inexpensive, and perfect for bracelets, necklaces, belts, keychains, or small gifts. The key is keeping your tension consistent and choosing a string that can handle repeated pulling without stretching too much.
1. Classic Rainbow Kandi Star
Description
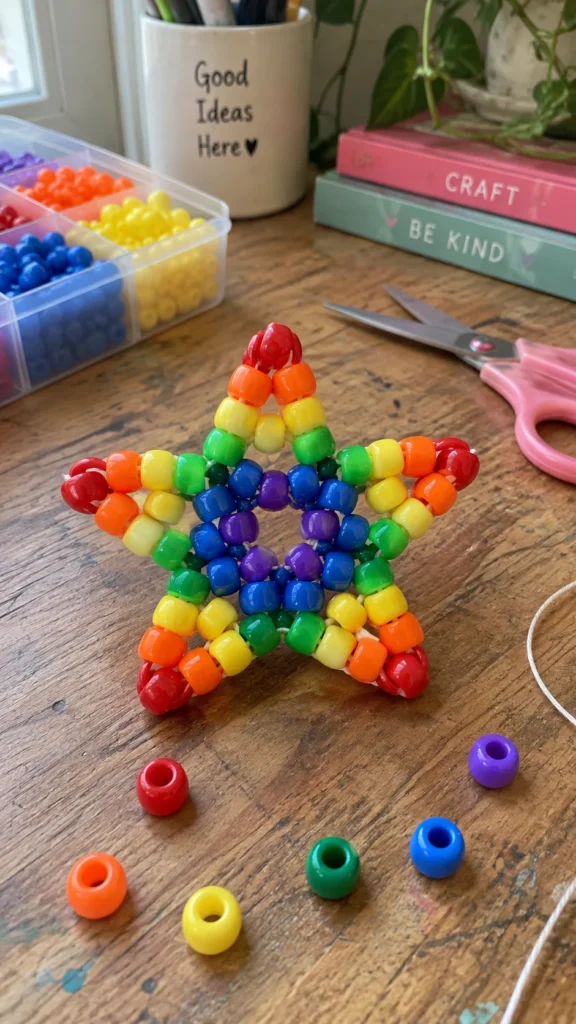
A classic rainbow star is the best place to start because the repeating color order makes the pattern easy to follow. Use six or seven bright pony-bead colors and keep the string tension firm but not tight. If the center starts looking loose, gently reshape each point before finishing rather than pulling aggressively, which can distort the star.
What It Is
A colorful five-point kandi star made with repeating rainbow pony beads and elastic or sturdy bead string.
Supplies and Budget
You need pony beads, approximately 1–1.5 m of string, scissors, and a lighter for safely sealing synthetic cord if appropriate. Expect to spend about $3–$8 depending on bead quantity.
Tutorial how to make:
Cut your string, thread the first bead group, and create the initial loop. Continue adding beads around the forming points, keeping each section evenly tensioned. Once five points are complete, pass the string through the final beads and tie several secure knots.
patterns:
Rainbow order: red, orange, yellow, green, blue, purple. Repeat the sequence around each point.
DIY Tip
Do not pull the string as hard as possible. Moderate tension gives the star structure while allowing enough flexibility to correct uneven points.
2. Pastel Kandi Star Necklace
Description
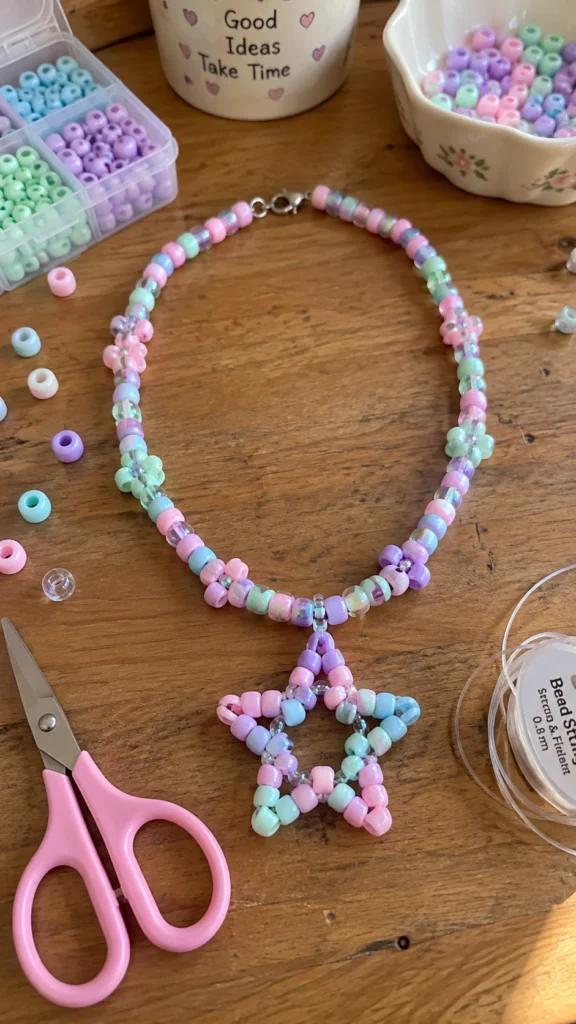
Soft pastel beads give the traditional kandi star a completely different look and work especially well as a necklace centerpiece. For a polished result, combine three or four related shades instead of using too many colors. Lightweight pony beads keep the necklace comfortable, while a slightly thicker cord helps prevent stretching around the finished star.
What It Is
A soft-colored kandi star designed to hang as the main pendant on a handmade necklace.
Supplies and Budget
Use pastel pony beads, strong elastic or bead cord, scissors, and two small findings if you want a clasp. Budget around $4–$10.
Tutorial how to make:
Make one medium-sized star using your pastel color sequence. Leave extra cord at both ends, then attach the star to a longer strand of beads or plain cord. Finish the necklace with a secure knot or clasp and check that the pendant hangs centrally.
patterns:
Try pink, lavender, mint, and pale blue in alternating groups for a balanced pastel pattern.
DIY Tip
Keep the pendant slightly lighter than you think you need. Large pony-bead stars can become surprisingly heavy when worn for several hours.
3. Star Chain Kandi
Description
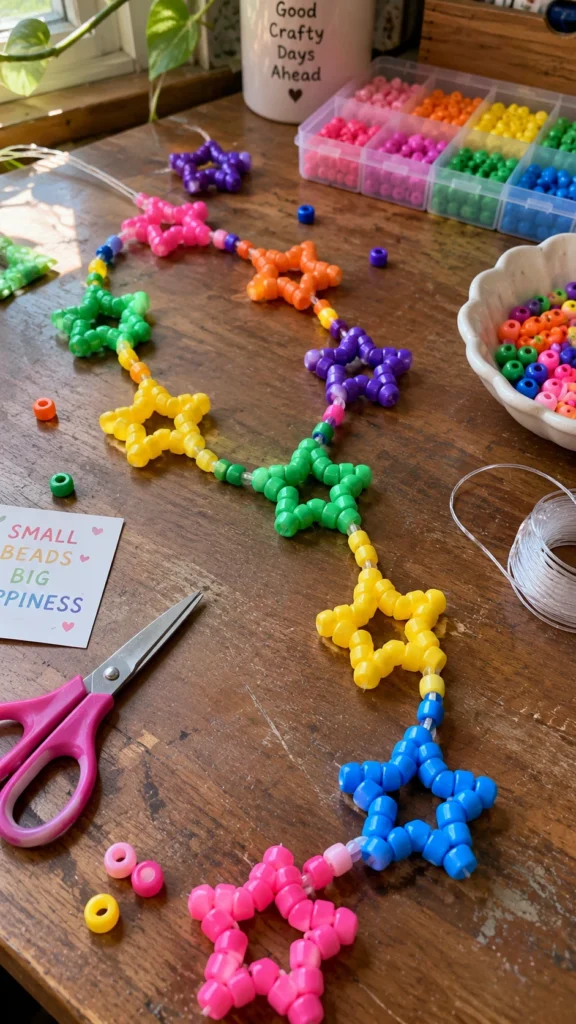
Connecting several small stars creates a playful star chain that works as a bracelet, bag charm, or decorative accessory. The trick is making every star approximately the same size. Count your beads carefully on the first star, then use it as a visual reference for the remaining pieces so the chain does not gradually become uneven.
What It Is
A series of connected miniature kandi stars arranged into a flexible chain.
Supplies and Budget
Gather pony beads, durable bead string, scissors, and optional jump rings. A small chain can cost roughly $4–$9 in materials.
Tutorial how to make:
Create several small stars separately, leaving a short string tail on each. Connect neighboring stars by threading their outer beads onto a shared cord or by using small rings. Secure every connection before trimming excess string.
patterns:
Use one color per star, alternating colors such as pink, blue, green, purple, and yellow.
DIY Tip
Make one test star first. If it looks too bulky or floppy, adjust the bead count before producing the entire chain.
4. Kandi Star Belt
Description
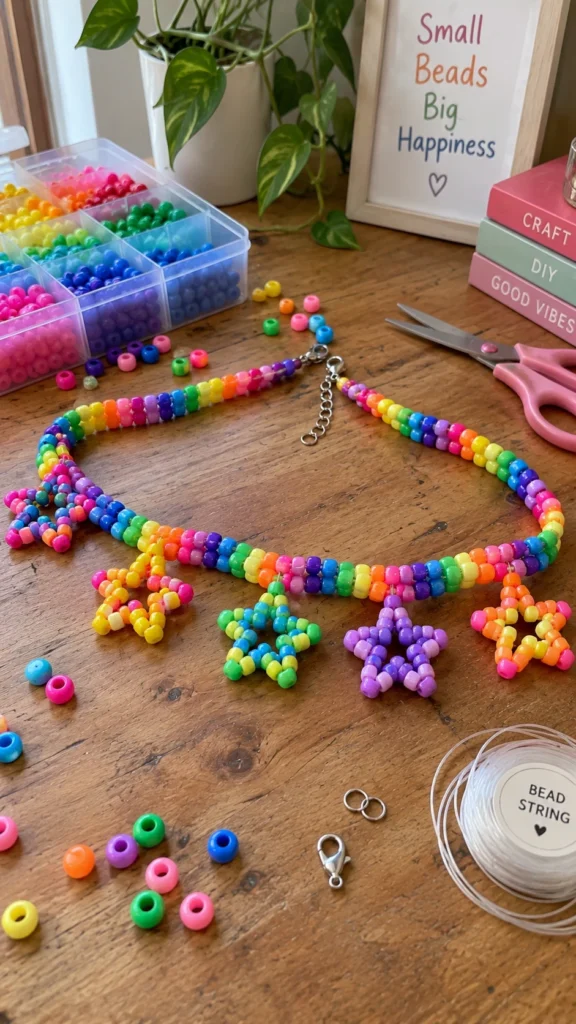
A kandi star belt combines repeated beadwork with larger decorative stars for a statement accessory. Because belts experience more movement than bracelets, use strong stretch cord or non-stretch beading cord and reinforce the attachment points. Measure the finished length against your waist before adding the final closure.
What It Is
A handmade pony-bead belt decorated with kandi stars or star-shaped sections.
Supplies and Budget
You will need several packs of pony beads, strong cord, scissors, and a belt clasp or reinforced loop. A basic belt usually costs $8–$20 depending on its length.
Tutorial how to make:
Measure the desired belt length first. Build the main beaded belt in repeating rows, then attach stars at evenly spaced intervals. Finish both ends with reinforced loops or a suitable clasp.
patterns:
Alternate solid-color stars with rainbow sections for contrast, or use a repeating two-color checker pattern.
DIY Tip
Do not rely on one knot at the belt closure. Reinforce the ending several times because this area receives the most pulling.
5. Trans Kandi Star Pattern
Description
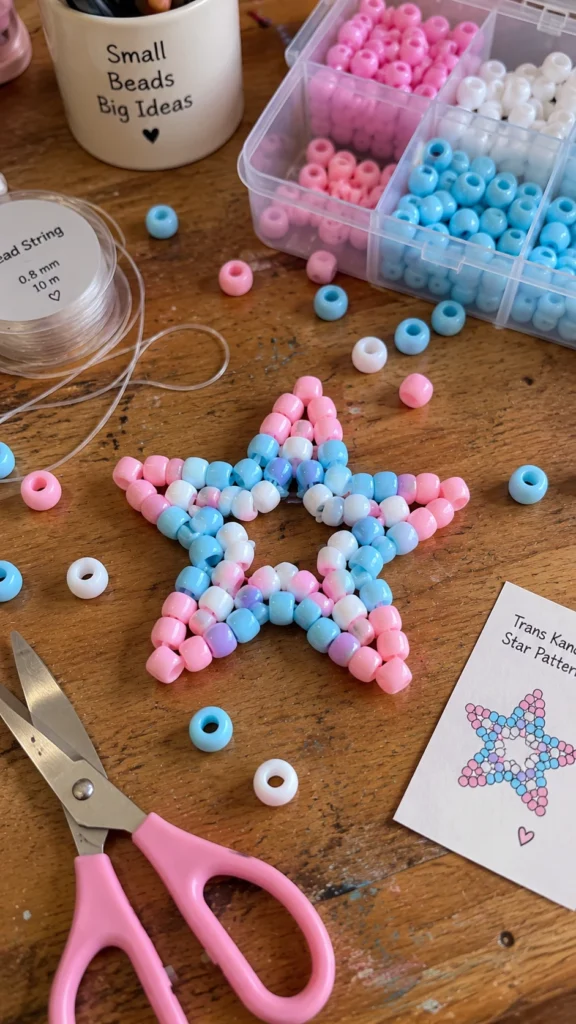
A trans-inspired kandi star uses pink, blue, and white beads to create a recognizable color arrangement. Keep the stripes consistent rather than randomly mixing the colors. This makes the finished star read clearly as a deliberate color pattern and also makes it easier to reproduce for matching accessories.
What It Is
A kandi star decorated with the pink, blue, and white colors associated with the transgender pride flag.
Supplies and Budget
Use pink, light blue, white pony beads, plus strong string and scissors. Materials generally cost $3–$8.
Tutorial how to make:
Plan the color sequence before threading. Build each point using the same stripe order, checking the front of the star regularly. Complete the five points, tighten gently, and secure the final knot.
patterns:
Use pink, blue, white, blue, pink as the repeating visual sequence for a symmetrical design.
DIY Tip
Photograph your first completed point before continuing. It gives you a quick reference when repeating the color order around the star.
6. Kandi Star Necklace Tutorial
Description
For a statement necklace, make one larger star and surround it with smaller beads rather than creating an oversized, heavy pendant. The necklace looks more finished when the pendant sits flat instead of twisting sideways. Thread the center attachment through two beads rather than one to distribute the weight.
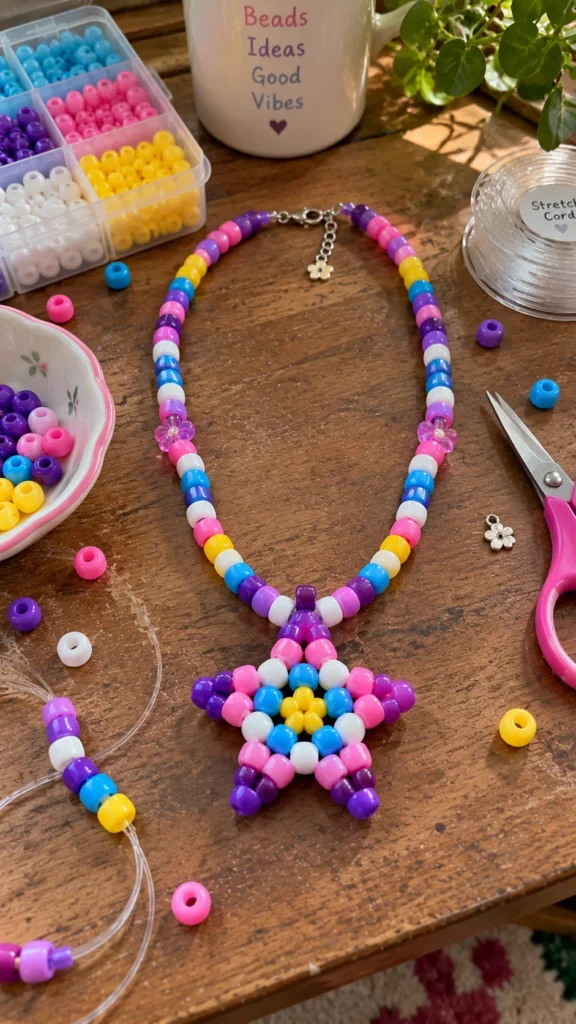
What It Is
A customizable necklace featuring a large kandi star as its focal pendant.
Supplies and Budget
Choose pony beads, strong necklace cord, scissors, and optional clasp hardware. Expect about $5–$12 for a basic version.
Tutorial how to make:
Construct your star first and inspect its shape. Create the necklace strand separately, then attach the star through two upper beads. Add a clasp or adjustable closure and test the necklace for balance before trimming the cord.
patterns:
Use a solid star surrounded by contrasting necklace beads, such as a purple star with pink and white accents.
DIY Tip
Hold the unfinished necklace against your neck before securing it permanently. This makes it easier to adjust the length and pendant position.
7. Mini Kandi Star Keychain
Description
Mini stars are perfect for keychains because they require fewer beads and remain lightweight. The most common mistake is attaching the key ring directly to a weak knot. Instead, create a reinforced cord loop through several beads before connecting the hardware, giving the finished charm a much stronger attachment point.
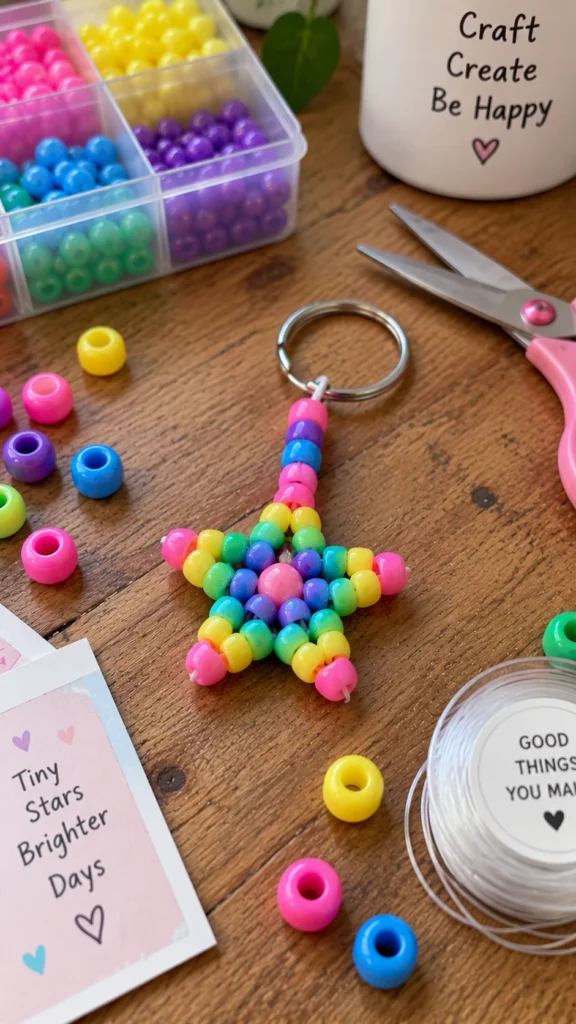
What It Is
A small kandi star transformed into a colorful keychain or bag charm.
Supplies and Budget
Use pony beads, strong cord, a key ring or lobster clasp, and scissors. Budget approximately $3–$7.
Tutorial how to make:
Make a compact star using fewer beads than a necklace pendant. Leave a reinforced loop at the top, thread it through the key ring, and knot the cord securely. Trim the excess only after testing the connection.
patterns:
Try a two-color star with alternating pink and black beads or blue and yellow beads.
DIY Tip
Pull firmly on the completed charm before using it. This simple stress test can reveal a loose knot before you attach it to your keys.
8. Glow-in-the-Dark Kandi Star
Description
Glow-in-the-dark pony beads make a fun version for parties, nighttime events, or bedroom decorations. Mix glow beads with a few opaque accent beads so the star still has visual definition in normal lighting. Avoid making every bead glow if you want the pattern to remain easy to see during the day.
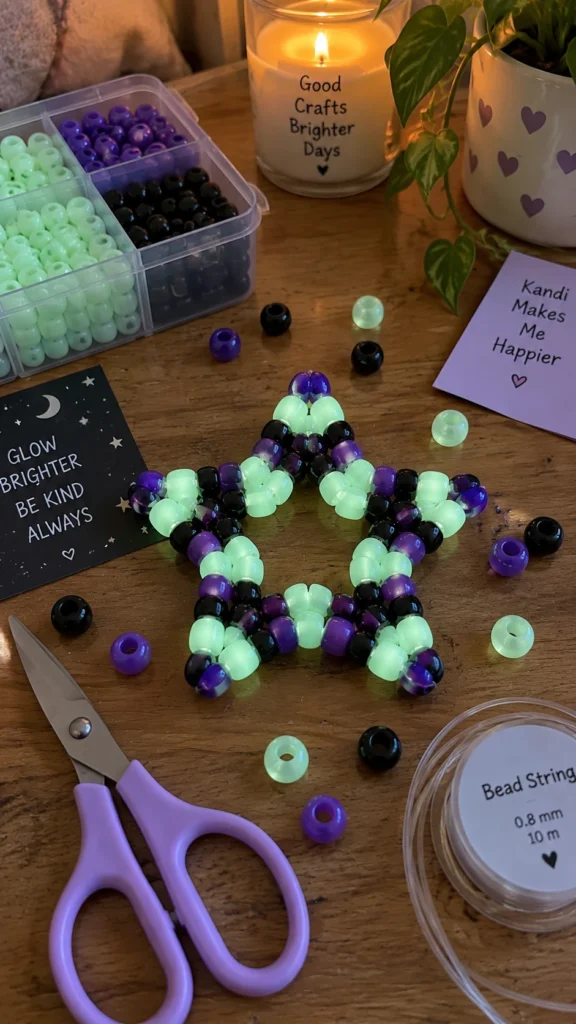
What It Is
A kandi star made partly or entirely with glow-in-the-dark pony beads.
Supplies and Budget
You need glow pony beads, optional contrasting beads, strong string, and scissors. Expect to spend around $5–$10.
Tutorial how to make:
Build the star using your chosen glow-bead arrangement, maintaining even tension between points. Secure the final knot carefully and expose the finished star to bright light according to the bead manufacturer’s instructions.
patterns:
Use glow beads for the points and dark purple or black beads through the center for contrast.
DIY Tip
Test the beads before crafting. Some glow beads produce much stronger results than others, so testing prevents disappointment after the star is finished.
9. Black-and-White Checker Star
Description
A checkerboard-inspired star looks especially striking because the simple two-color palette emphasizes the geometry. Keep the bead count identical in each repeating section. If one point contains an extra bead, the asymmetry becomes much more noticeable with a high-contrast design like black and white.
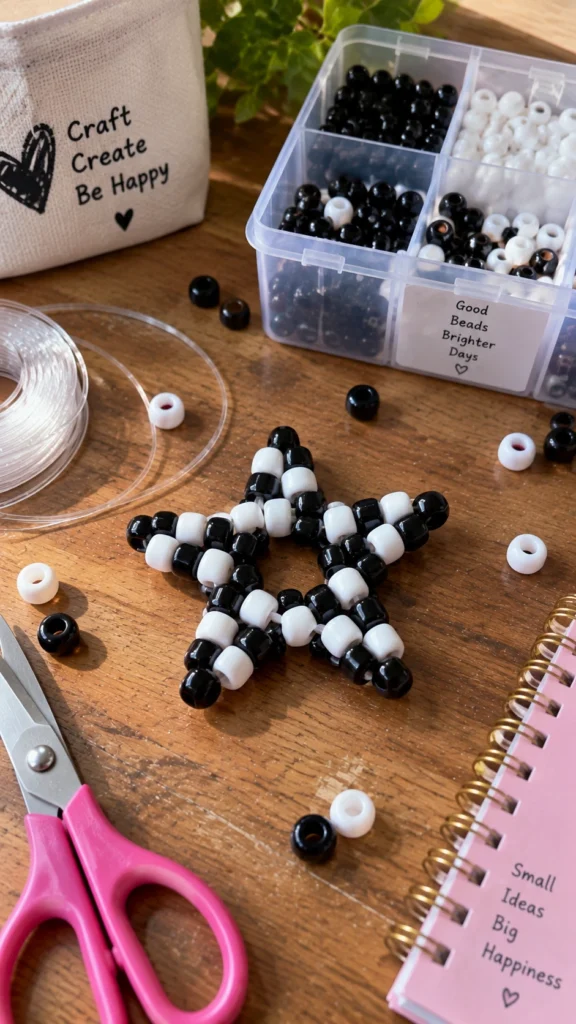
What It Is
A graphic kandi star using alternating black and white beads for a bold geometric effect.
Supplies and Budget
Use black and white pony beads, durable string, and scissors. This design can be made for roughly $3–$7.
Tutorial how to make:
Plan alternating colors before starting. Thread the first section carefully, then repeat the same sequence for each point. Keep the string tension consistent and finish with multiple secure knots.
patterns:
Alternate black and white bead groups around the entire star, keeping the same sequence at every point.
DIY Tip
Lay the unfinished star flat while checking your pattern. It is much easier to spot a misplaced bead before the final knot is secured.
10. Chunky Rainbow Star Charm
Description
A chunky star uses larger pony beads or fuller bead groupings to create a bold, almost 3D appearance. Because extra beads add weight, avoid very thin elastic. A firmer cord gives the star enough structure to hold its shape without stretching noticeably after repeated use.
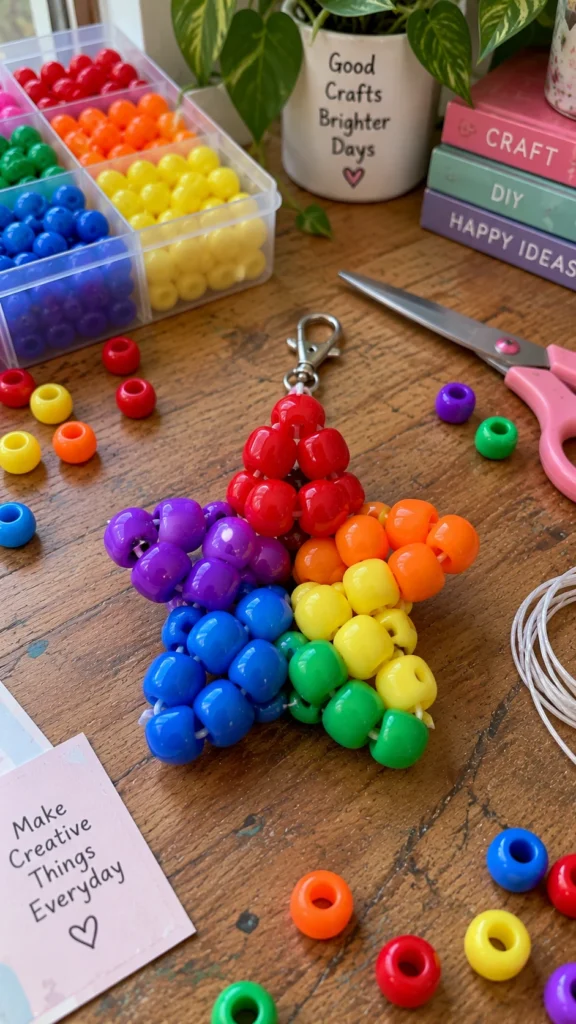
What It Is
A larger, fuller kandi star designed as a statement charm for bags, backpacks, or room decor.
Supplies and Budget
Gather larger pony beads, strong bead cord, scissors, and an optional clip. Budget approximately $5–$12.
Tutorial how to make:
Construct the basic star framework, then add additional bead sections where needed to increase its size. Keep each point symmetrical and reinforce the top loop before attaching the charm hardware.
patterns:
Use rainbow colors in larger blocks, such as two red beads followed by two orange, yellow, green, blue, and purple.
DIY Tip
Support the star in your hand while tightening. This prevents you from accidentally bending one point while trying to strengthen another.
11. Kandi Star Bracelet
Description
A star bracelet works best when the stars are small enough to sit comfortably against the wrist. You can use one central star as the focal point or connect several tiny stars around the bracelet. Leave enough flexibility for movement; an overly tight bracelet can pull on the star connections every time you bend your wrist.
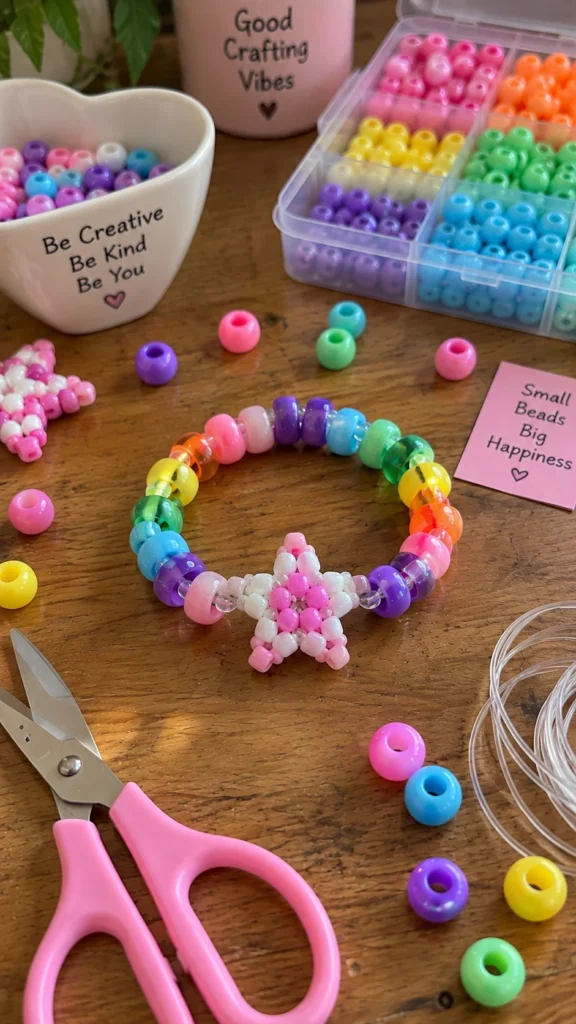
What It Is
A wearable kandi bracelet incorporating one or multiple decorative stars.
Supplies and Budget
Use pony beads, elastic cord, scissors, and optional charms. A bracelet typically costs $3–$8.
Tutorial how to make:
Measure around your wrist with a little extra room. Build the beaded bracelet, attach the star through reinforced loops, then tie and test the closure. Wear it briefly before trimming any remaining cord.
patterns:
Create a rainbow bead bracelet with one contrasting white star in the center.
DIY Tip
Add the star after measuring the bracelet rather than including it in the initial measurement. This prevents the finished bracelet from becoming unexpectedly tight.
12. Personalized Initial Kandi Star
Description
Adding an initial turns a simple kandi star into a personalized gift. The easiest method is using letter beads near the center or hanging a letter charm from the bottom point. Keep the personalization small so the star remains the main feature and does not become visually crowded.
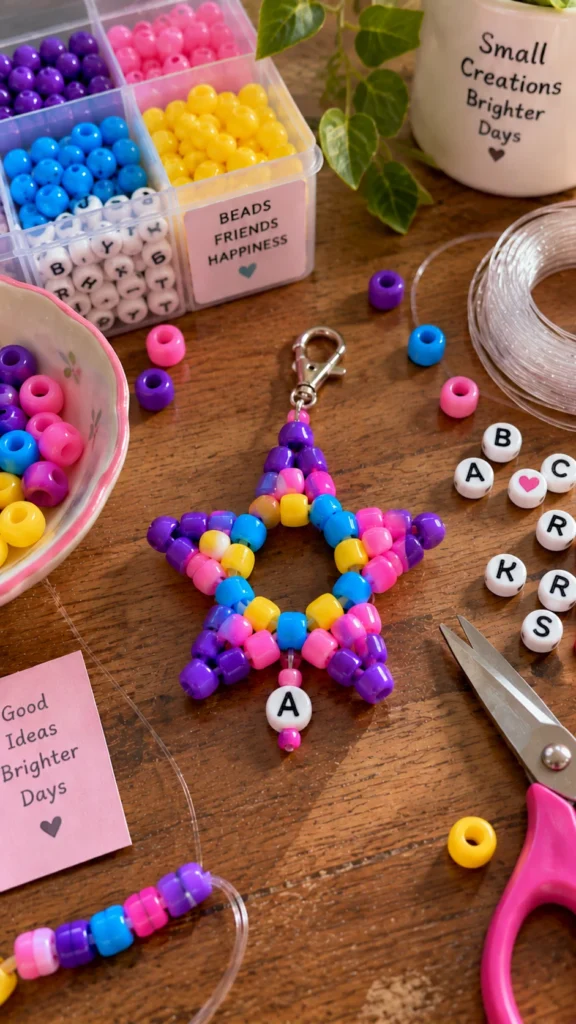
What It Is
A personalized kandi star decorated with a letter, name element, or small charm.
Supplies and Budget
You need pony beads, letter beads or a small charm, sturdy string, scissors, and optional keychain hardware. Budget about $4–$10.
Tutorial how to make:
Make the star first using a simple color pattern. Add the initial through a central bead section or attach it to the lower point with a short loop. Check that the added letter does not pull the star out of shape before securing everything.
patterns:
Use a favorite color combination and add one contrasting letter bead, such as a white initial on a purple-and-pink star.
DIY Tip
Keep the personalization lightweight. Heavy charms can pull one point downward and make an otherwise symmetrical star look crooked.
FAQ SECTION
What beads are best for kandi stars?
Standard pony beads are the easiest choice because their large holes accommodate common craft cord and their uniform size makes patterns easier to count.
What string should I use for kandi stars?
Stretch cord works well for wearable pieces, while stronger non-stretch bead cord is often better for belts, keychains, and heavier decorations.
Why does my kandi star look uneven?
Uneven tension, inconsistent bead counts, or accidentally skipping a bead are the most common causes. Lay the piece flat and compare each point before tightening the final knot.
How do I make a kandi star bigger?
Use larger pony beads, increase the number of beads in each section, or build a larger framework. Keep every point based on the same count so the shape remains balanced.
Can I use kandi stars for gifts?
Absolutely. Personalized colors, initials, pride-inspired patterns, and matching sets make simple stars especially thoughtful handmade gifts.
RELATED CONTENT
CLOSING
Kandi stars are a great reminder that a simple handful of pony beads can become something genuinely personal. Start with an easy two-color pattern, get comfortable with your tension, and then experiment with necklaces, belts, bracelets, charms, and personalized designs. Don’t worry if your first star isn’t perfectly symmetrical—that little handmade character is part of what makes these crafts special.
I hope these ideas inspire you to grab your beads, try a pattern that catches your eye, and make something completely your own. Have fun crafting, and be sure to share your finished kandi stars and the color combinations you come up with!