12 DIY Christmas Village Platform Ideas for a Magical Holiday Display

DIY Christmas Village Platform
A Christmas village becomes even more magical when it has a beautiful platform to bring all the little houses, trees, and festive details together. Instead of placing your decorations randomly on a table, you can create a handmade display with different levels, miniature pathways, cozy lighting, and charming seasonal scenery.
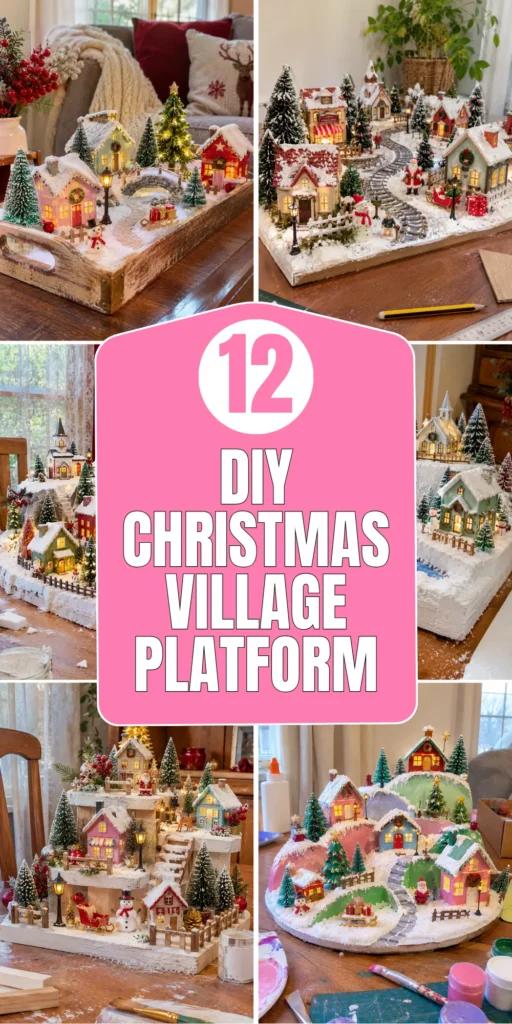
The best part is that you do not need expensive materials or professional woodworking skills. Many of these DIY Christmas village platforms can be made using cardboard, wooden boards, foam, old boxes, or materials you may already have at home. Whether you love a traditional snowy village or a colorful miniature Christmas town, these 12 creative ideas will help you build a display that feels personal, organized, and full of holiday charm.
1. DIY Wooden Christmas Village Platform with Different Levels
Description
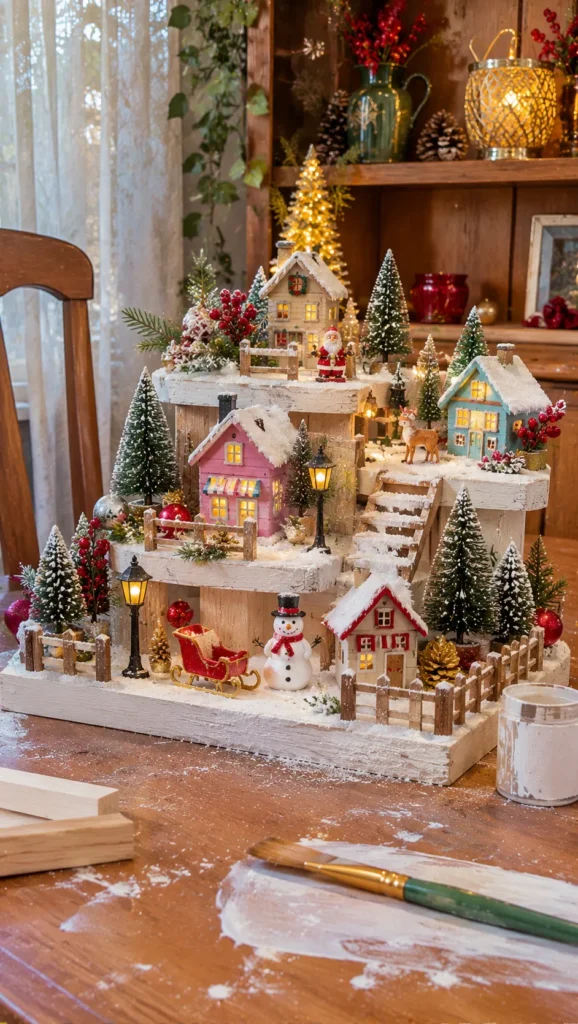
Create a charming wooden platform with several raised levels to display miniature Christmas houses at different heights. This simple design adds depth to your village and makes even a small collection look more impressive. It is especially useful when you want every little building to remain visible.
What It Is
This platform uses wooden boards or small wooden boxes arranged like steps. The different heights create a miniature landscape without requiring complicated construction.
Supplies and Budget
You will need plywood or lightweight wooden boards, small wooden blocks, wood glue, screws, sandpaper, white paint, and a paintbrush. Estimated budget: $15–$30, depending on the wood you already have.
Tutorial how to make:
- Measure the space where you plan to display your village.
- Cut the wooden boards into different lengths or use ready-made wooden boxes.
- Sand the edges until they are smooth.
- Arrange the pieces into two or three levels, checking that the platform remains stable.
- Secure the sections with wood glue and screws where appropriate.
- Paint the surface white, cream, or pale gray.
- Add miniature houses, trees, and decorative pathways.
DIY Tip
Test the arrangement with your heaviest village houses before painting. A platform that looks balanced when empty may become unstable once ceramic decorations are added.
2. Cardboard DIY Christmas Village Platform
Description
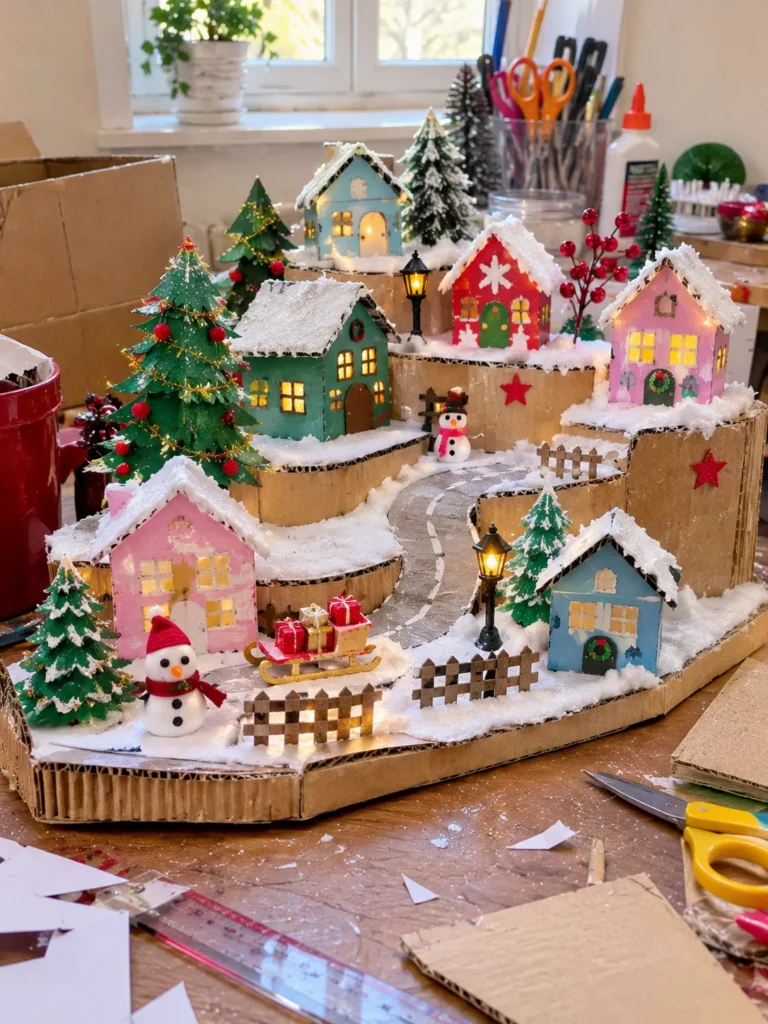
Turn ordinary cardboard boxes into a budget-friendly Christmas village platform with raised sections and snowy scenery. This project is ideal for beginners because cardboard is easy to cut, layer, and decorate. With careful reinforcement, it can support lightweight miniature houses and decorative accessories.
What It Is
A handmade platform constructed from thick cardboard layers, creating different heights and small spaces for village buildings, trees, and pathways.
Supplies and Budget
Gather sturdy cardboard boxes, a craft knife, ruler, pencil, hot glue, white acrylic paint, cotton batting, faux snow, and decorative paper. Estimated budget: $5–$12.
Tutorial how to make:
- Draw the outline of your village on a large piece of cardboard.
- Cut a base large enough for your planned decorations.
- Cut additional cardboard pieces into smaller platforms.
- Glue several layers together wherever you need extra strength.
- Add cardboard supports underneath raised sections.
- Cover visible edges with white paper or paint.
- Decorate with faux snow, miniature trees, and small houses.
DIY Tip
Use several layers of corrugated cardboard with the corrugation running in different directions. This makes the platform stronger and helps prevent sagging under decorations.
3. Snowy Foam Christmas Village Platform
Description
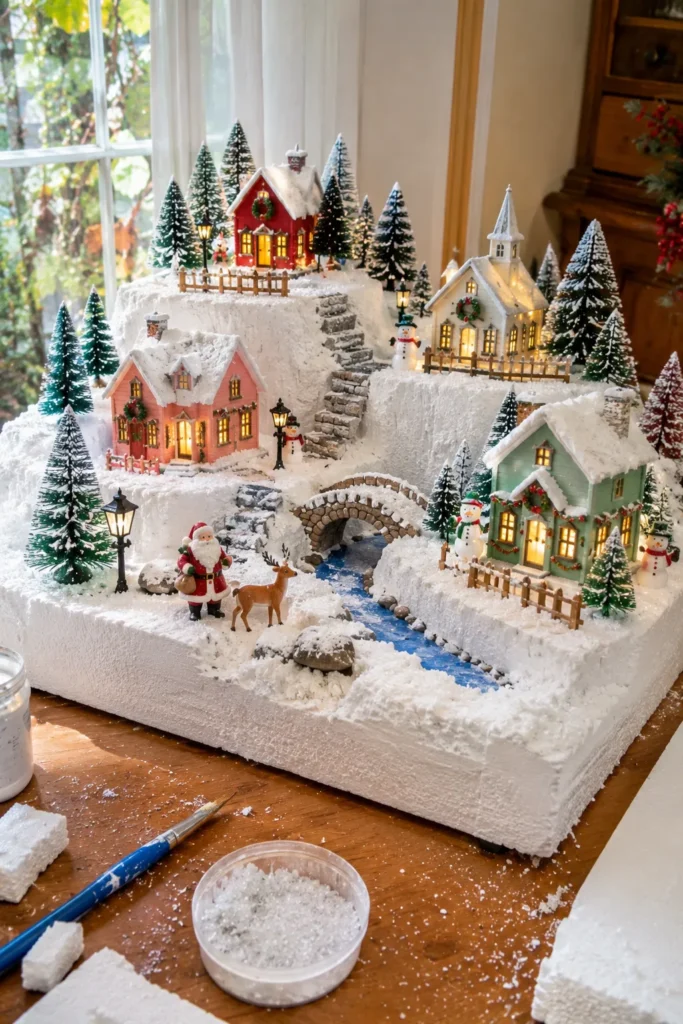
A foam platform creates a beautiful snowy landscape with soft hills, raised areas, and winding paths. It is a great choice when you want your Christmas village to look like a tiny winter scene rather than a collection of houses sitting on a flat surface.
What It Is
A lightweight display base made from craft foam or suitable rigid foam board, shaped into gentle hills and covered with snow-like materials.
Supplies and Budget
You will need rigid craft foam, a foam-safe adhesive, a craft knife, white paint, faux snow, small stones, and miniature trees. Estimated budget: $10–$25.
Tutorial how to make:
- Cut a foam board to fit your display area.
- Sketch the locations of houses, pathways, and hills.
- Cut smaller foam pieces to create raised sections.
- Shape gentle slopes using a suitable cutting tool.
- Attach the raised sections with foam-safe adhesive.
- Paint exposed surfaces white and allow them to dry.
- Add faux snow, pathways, and miniature scenery.
DIY Tip
Check that your adhesive is compatible with your foam material. Some strong household glues can damage or melt certain types of foam, so test a small hidden area first.
4. DIY Christmas Village Platform with a Miniature Mountain
Description
Give your Christmas village a dramatic winter backdrop by creating a miniature mountain platform. The raised mountain makes the display feel more like a real snowy landscape and provides an interesting place for tiny houses, trees, and decorative figures.
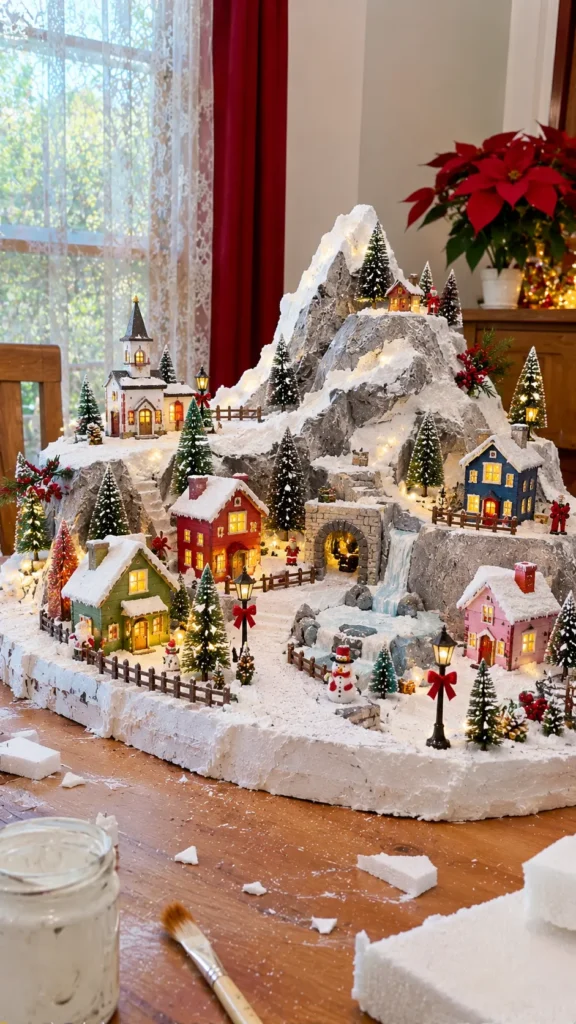
What It Is
A layered platform with a central mountain or hillside made from foam, cardboard, or lightweight craft materials.
Supplies and Budget
Prepare rigid foam board, cardboard, foam-safe glue, white paint, gray acrylic paint, faux snow, miniature pine trees, and a small brush. Estimated budget: $12–$25.
Tutorial how to make:
- Start with a sturdy flat base.
- Cut foam or cardboard into several irregular mountain-shaped layers.
- Stack the pieces toward the center to create height.
- Secure everything with suitable adhesive.
- Shape the slopes and leave a few flat areas for miniature buildings.
- Paint the mountain with soft white and light gray details.
- Add faux snow, trees, and a few small houses around the base.
DIY Tip
Do not make the mountain too tall or steep. Leave enough flat space for your buildings, and check that the mountain does not block the view of smaller houses behind it.
5. Rustic Wooden Crate Christmas Village Display
Description
Use small wooden crates to build a rustic Christmas village display with plenty of natural texture. This idea works beautifully for farmhouse-style holiday decorating and is easy to customize with white paint, greenery, wooden signs, and miniature houses.
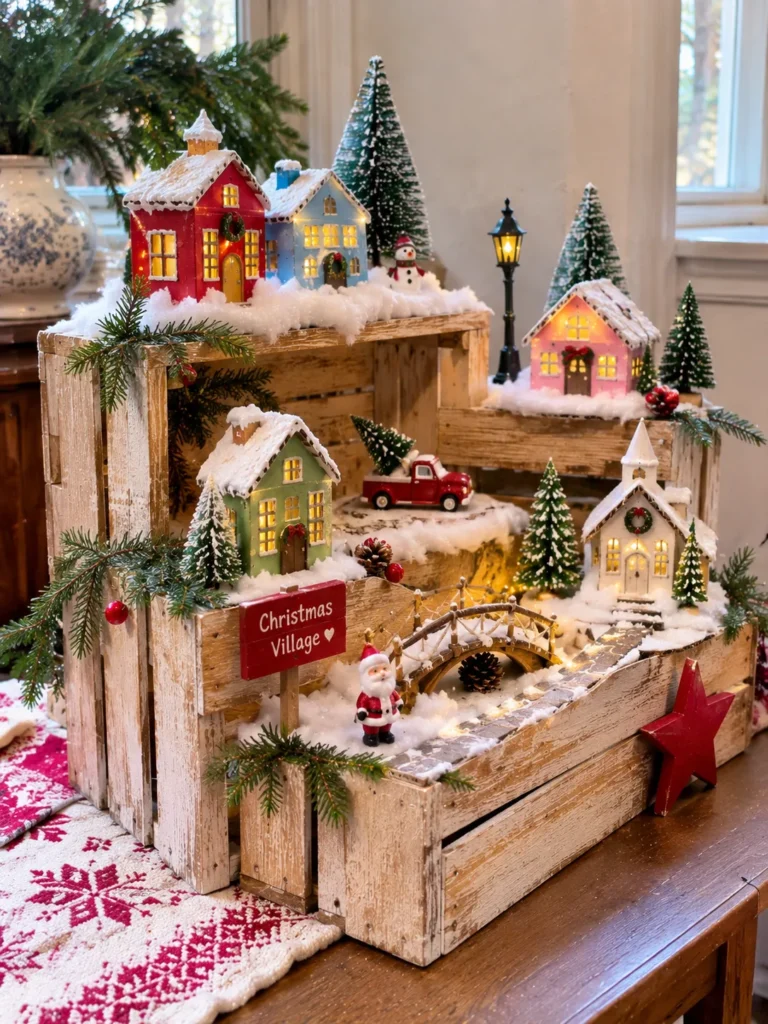
What It Is
A platform made by arranging wooden crates or shallow wooden boxes at different heights to create individual display areas for a Christmas village.
Supplies and Budget
You will need two or three small wooden crates, sandpaper, white or cream paint, wood glue or suitable fasteners, evergreen branches, and miniature decorations. Estimated budget: $15–$35.
Tutorial how to make:
- Choose crates that fit your display area.
- Lightly sand rough edges and remove loose splinters.
- Paint the crates or leave some natural wood visible.
- Arrange them side by side and stack one or two to create height.
- Secure stacked crates so they cannot shift.
- Add a white fabric or faux snow layer over the display surfaces.
- Arrange houses, trees, and small decorative accessories.
DIY Tip
Keep the crates shallow enough to avoid hiding the village buildings. A few different heights look more interesting than stacking every crate into one tall tower.
6. DIY Christmas Village Platform with a Curved Railway Path
Description
Create a miniature winter town with a curved pathway winding between the houses. This platform is perfect for anyone who wants their Christmas village to tell a little story, with tiny buildings, snowy trees, and a route connecting different parts of the display.
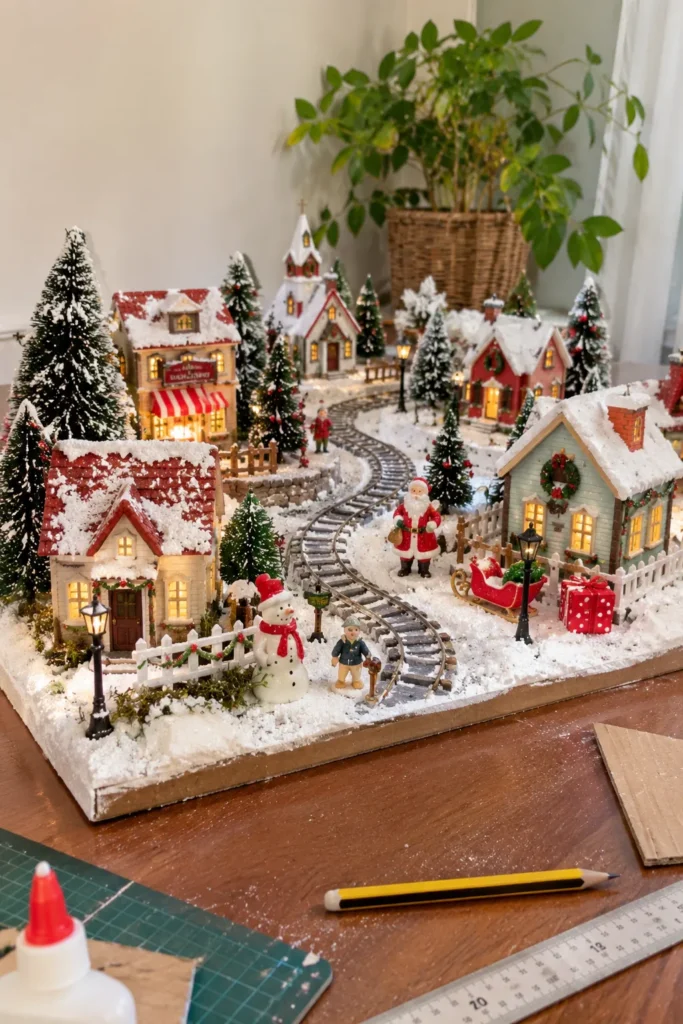
What It Is
A flat or slightly raised village base with a curved path running through the miniature landscape. The path can represent a road, walking trail, or small railway line.
Supplies and Budget
Gather a plywood or cardboard base, white paint, gray craft paint, miniature gravel, thin cardboard strips, glue, faux snow, and small trees. Estimated budget: $8–$20.
Tutorial how to make:
- Draw your village layout on the base.
- Mark a curved route that passes between the planned house locations.
- Cut thin cardboard strips or use a pencil to outline the path.
- Paint the path gray or cover it with miniature gravel.
- Paint the surrounding area white.
- Add small houses on both sides of the route.
- Finish with trees, tiny fences, and faux snow.
DIY Tip
Plan the path before attaching any buildings. It is much easier to create smooth curves when the platform is empty than to work around glued-down decorations.
7. DIY Christmas Village Platform with a Mirror Lake
Description
Add a magical winter detail to your miniature village by creating a small frozen lake. A reflective surface gives the display extra dimension and creates a lovely contrast against snowy houses and tiny evergreen trees.
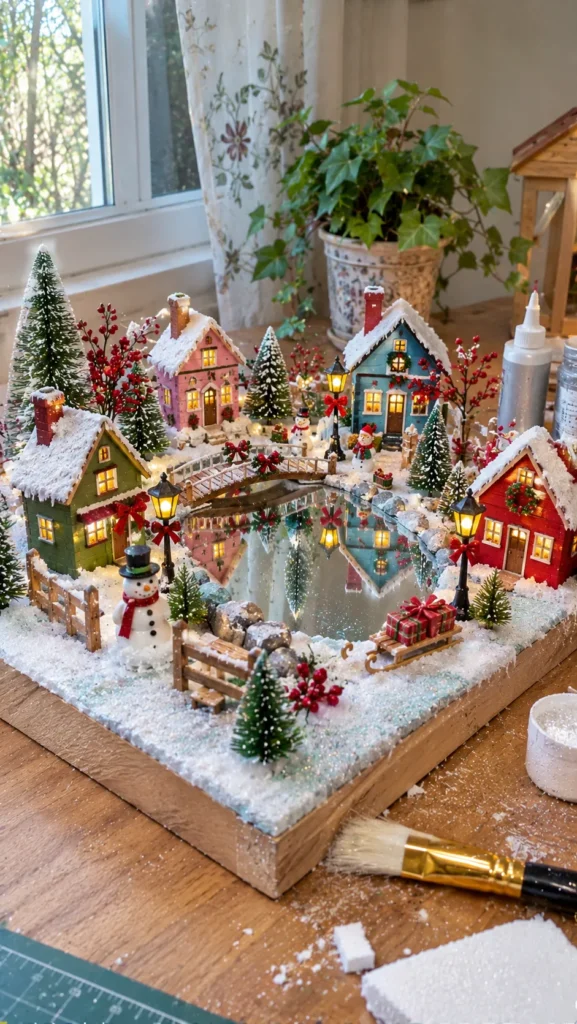
What It Is
A handmade village platform featuring a small reflective section that represents a frozen pond or lake surrounded by miniature winter scenery.
Supplies and Budget
You will need a sturdy base, a small acrylic mirror or reflective craft sheet, white and pale blue paint, faux snow, miniature stones, glue, and tiny trees. Estimated budget: $10–$22.
Tutorial how to make:
- Decide where the lake will sit within your village layout.
- Cut a shallow opening or mark the lake area on the base.
- Place a small acrylic mirror or reflective sheet inside the marked area.
- Secure it carefully with suitable adhesive.
- Paint a soft pale-blue border around the reflective surface.
- Add small stones, snow, and miniature trees along the edge.
- Position a few houses nearby to create a cozy winter setting.
DIY Tip
Use acrylic mirror rather than ordinary glass if the platform will be handled or displayed where children may reach it. Keep the reflective surface clean before adding surrounding decorations.
8. DIY Christmas Village Platform Using an Old Serving Tray
Description
Give an unused serving tray a festive second life by turning it into a compact Christmas village platform. This is one of the easiest projects for small spaces because the tray already has a defined base and raised edges to keep decorations together.
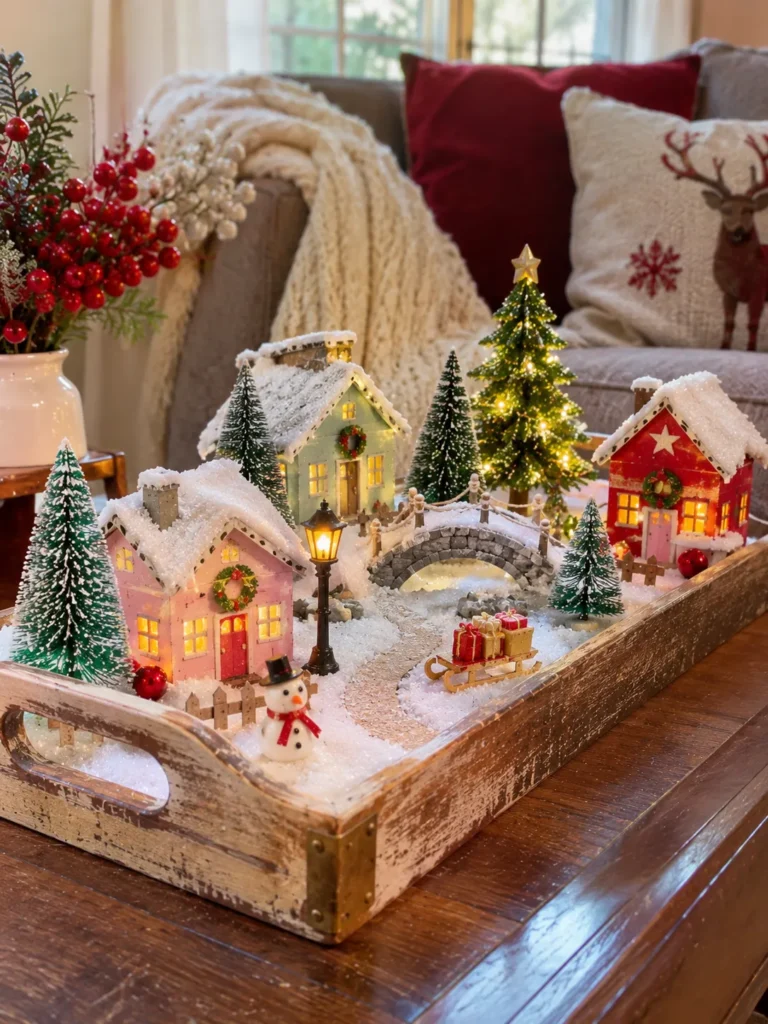
What It Is
A small portable village display arranged inside a wooden, metal, or sturdy decorative serving tray.
Supplies and Budget
You will need an old serving tray, white paint or decorative fabric, faux snow, miniature houses, bottlebrush trees, small ornaments, and removable adhesive. Estimated budget: $5–$18 if you already own a tray.
Tutorial how to make:
- Clean the tray and make sure its surface is completely dry.
- Paint it white or line it with a suitable piece of fabric.
- Arrange your largest houses toward the back.
- Add smaller houses and trees around the front.
- Fill empty spaces with faux snow and miniature decorations.
- Add battery-operated LED lights if desired.
- Place the finished tray on a sideboard, coffee table, or shelf.
DIY Tip
Avoid permanently gluing every decoration to the tray. Keeping the houses removable makes it easier to store the display and reuse the tray after Christmas.
9. Multi-Level Christmas Village Platform with Hidden Storage
Description
Combine festive decorating with practical storage by creating a raised village platform that hides extra decorations underneath. It is particularly useful if you have a growing Christmas village collection and want to keep batteries, spare ornaments, and small accessories organized.
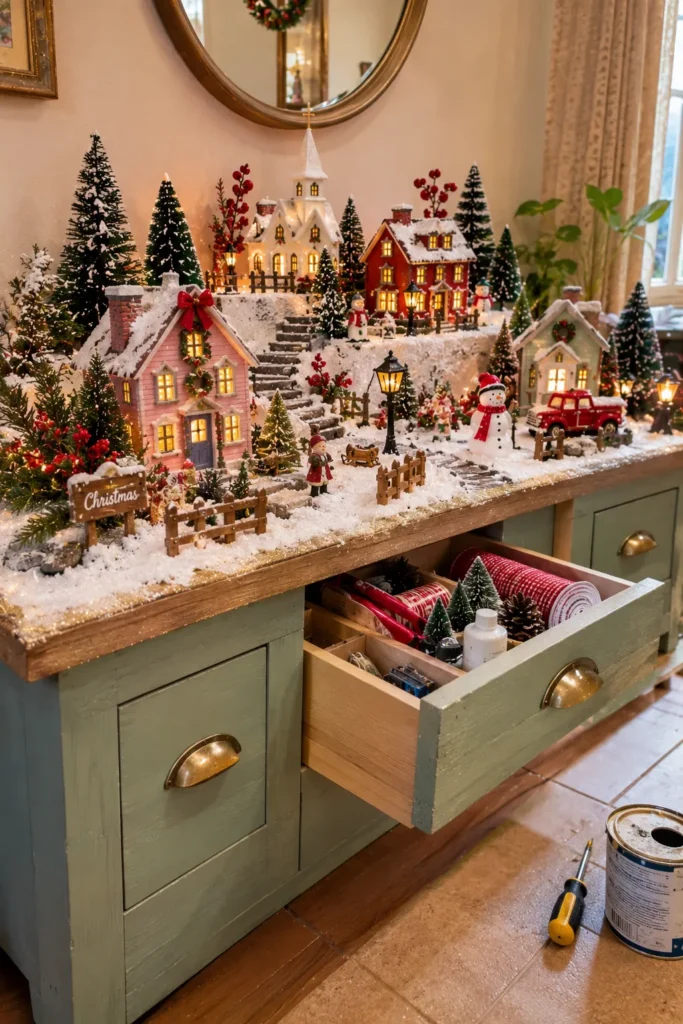
What It Is
A sturdy elevated platform supported by small boxes or storage compartments, creating a display surface with accessible space underneath.
Supplies and Budget
Gather a wooden board, small storage boxes, wood glue or screws, paint, felt pads, and miniature Christmas decorations. Estimated budget: $15–$35.
Tutorial how to make:
- Measure the space available for your village.
- Choose a wooden board large enough for the display.
- Position storage boxes underneath to act as supports.
- Make sure the supports are evenly distributed.
- Secure the board to the supports using suitable fasteners.
- Paint or decorate the visible edges.
- Place houses, trees, and scenery on top while keeping storage accessible below.
DIY Tip
Never use a thin board that bends under the weight of ceramic houses. Test the finished structure with the heaviest decorations before arranging your village.
10. DIY Christmas Village Platform with a Snowy Forest
Description
Create a peaceful miniature forest around your Christmas village with tiny evergreen trees, snowy pathways, and little open spaces for houses. This platform is especially beautiful when you want the scenery to feel natural and spacious instead of filling every corner with buildings.
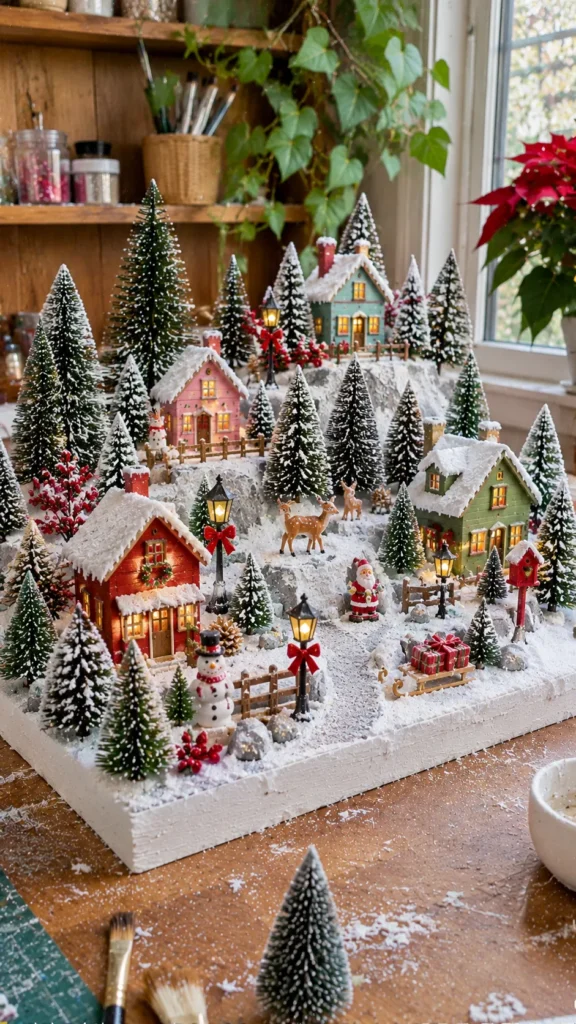
What It Is
A snowy landscape platform designed around a miniature forest, with houses placed between clusters of small trees.
Supplies and Budget
You will need a cardboard or wooden base, miniature bottlebrush trees, white paint, faux snow, small stones, craft glue, and tiny wooden fences. Estimated budget: $10–$25.
Tutorial how to make:
- Cover the base with white paint or a layer of white decorative material.
- Arrange larger trees toward the back and smaller ones near the front.
- Mark open areas for your village houses.
- Attach the trees using a suitable adhesive or small mounting bases.
- Add a winding pathway between the forest sections.
- Place miniature houses in the open areas.
- Sprinkle faux snow lightly around the trees and buildings.
DIY Tip
Use different tree heights to create depth. Repeating the same size and spacing makes the forest look artificial, while varied placement gives it a more natural appearance.
11. Colorful DIY Christmas Village Platform with Painted Hills
Description
Bring a playful twist to a traditional winter display with colorful painted hills and pastel miniature scenery. Instead of using only white and green, combine soft pink, pale blue, mint, cream, and lavender to create a cheerful Christmas village that feels handmade and unique.

What It Is
A lightweight platform decorated with raised hills and painted landscape details in a colorful winter palette.
Supplies and Budget
Prepare cardboard or rigid craft foam, foam-safe glue, acrylic paints, paintbrushes, faux snow, miniature houses, and small decorative trees. Estimated budget: $10–$22.
Tutorial how to make:
- Cut a sturdy base to your preferred size.
- Create small hills using layered cardboard or foam.
- Attach the hills securely and allow the glue to dry.
- Paint the landscape using soft pastel colors.
- Add white accents along the hilltops to represent snow.
- Position colorful miniature houses across the platform.
- Finish with tiny trees, pathways, and festive details.
DIY Tip
Test your paint colors on spare material before covering the entire platform. A limited palette of three or four main shades usually looks more cohesive than using every color at once.
12. DIY Christmas Village Platform with a Lighted Winter Scene
Description
Turn your Christmas village into a glowing miniature winter scene by adding small LED lights beneath raised sections and around the houses. The gentle illumination makes the display especially beautiful in the evening and helps create a cozy holiday atmosphere.

What It Is
A handmade platform with built-in spaces for battery-operated lights, allowing selected houses, pathways, and landscape details to glow.
Supplies and Budget
You will need a sturdy cardboard or wooden base, battery-operated LED string lights, miniature houses, faux snow, white paint, small trees, and decorative materials. Estimated budget: $12–$30.
Tutorial how to make:
- Plan where the houses and light sources will be positioned.
- Mark small openings or hidden spaces for the LED lights and battery packs.
- Build raised sections using cardboard or wooden supports.
- Paint and decorate the platform with faux snow and miniature scenery.
- Place the lights underneath suitable sections or behind buildings.
- Arrange the houses so their windows and pathways catch the light.
- Hide the battery packs in accessible areas for easy replacement.
DIY Tip
Use battery-operated LEDs designed for decorative displays and keep battery compartments accessible. Test the lighting before attaching the final layer of scenery so you do not need to dismantle the platform later.
FAQ SECTION
What is the best material for a DIY Christmas village platform?
Wood is a strong choice for larger displays and heavier ceramic houses. Cardboard works well for lightweight decorations, while rigid craft foam is useful for creating hills and snowy landscapes.
How do I make my Christmas village platform look realistic?
Create different levels, add miniature pathways, vary the height of your trees, and leave some open spaces between buildings. Small details such as fences, stones, snow, and warm lighting make the scene feel more believable.
How can I make a Christmas village platform on a budget?
Reuse cardboard boxes, old serving trays, wooden crates, and leftover craft materials. You can also make your own hills and trees instead of purchasing expensive miniature scenery.
How do I create different levels on a Christmas village platform?
Use stacked wooden boards, cardboard layers, foam blocks, or small boxes. Secure everything properly and test the stability before placing your decorations on top.
What size should a Christmas village platform be?
The ideal size depends on your available display space and the number of houses you own. Arrange your decorations first, measure the complete layout, and leave a little extra room for pathways and scenery.
How do I keep my Christmas village decorations from falling?
Use a stable base, distribute heavier houses evenly, and avoid placing fragile buildings on narrow or unsupported sections. Removable museum putty or suitable display adhesive can help secure individual decorations.
Can I add lights to a homemade Christmas village platform?
Yes. Battery-operated LED lights are a convenient option for illuminating miniature houses, pathways, and hidden sections. Plan access to the battery compartments before completing the platform.
How should I store my DIY Christmas village platform?
Remove fragile decorations, wrap them individually, and store them in labeled boxes. Keep the platform in a dry place and protect raised sections from pressure that could cause them to bend or break.
RELATED CONTENT
CLOSING
Creating your own DIY Christmas village platform is such a lovely way to make your holiday decorations feel more personal. Whether you choose a simple cardboard base, a rustic wooden display, or a magical snowy landscape with glowing lights, the little details you add will make your village special.
My favorite part of these projects is that you can start with materials you already have at home and gradually build something beautiful. Do not worry about making everything perfect. A few handmade details and creative touches can give your Christmas village so much charm.
I hope these ideas inspire you to create a miniature winter wonderland of your own. Have fun crafting, experiment with different layouts, and share your finished Christmas village with us. I would love to see what you create!