12 Christmas Tree Toppers Ideas DIY That Are Easy and Creative

Christmas Tree Toppers Ideas DIY
A Christmas tree topper is the finishing touch that brings the whole tree together. While store-bought stars and angels are beautiful, making your own topper gives you the freedom to choose colors, materials, and details that match your holiday style. It can also be a lovely way to reuse craft supplies, personalize your decorations, and create something you will enjoy bringing out every Christmas.

You don’t need expensive materials or professional crafting skills to make a beautiful tree topper. Some of these ideas use simple cardstock, ribbon, wooden pieces, or leftover ornaments, while others turn natural materials into charming decorations. The most important thing is choosing a design that is lightweight, stable, and suitable for the size of your tree. Here are 12 creative DIY Christmas tree topper ideas you can make at home.
1. Oversized Handmade Paper Star Tree Topper
Description
Create a large three-dimensional paper star using sturdy cardstock or decorative scrapbook paper. Its folded shape gives it depth and makes it stand out beautifully above the branches. Choose metallic gold, warm white, or colorful patterned paper to complement your Christmas decorations.

What It Is
This is a lightweight geometric star made from folded and joined paper sections. Unlike a flat paper star, its dimensional shape catches the light and looks impressive from different angles.
Supplies and Budget
You’ll need two sheets of thick cardstock, scissors, a ruler, pencil, craft glue, and a small cardboard tube or cone for attaching it to the tree. Expect to spend around $3–$8, depending on the paper you choose.
Tutorial how to make:
- Draw a large five-point star template on cardstock and cut out two identical shapes.
- Mark a line from each point toward the center, then score the lines gently with a ruler so the paper folds neatly.
- Fold the star sections to create a raised three-dimensional shape.
- Repeat with the second star and glue the matching sections together, leaving a small opening near the bottom.
- Attach a lightweight cardboard cone or tube behind the star so it can sit securely on the top branch.
DIY Tip
Use cardstock rather than thin printer paper. Thin paper tends to bend or lose its shape after a few days on the tree. Test the topper on a branch before decorating it further.
2. Rustic Wooden Christmas Star Topper
Description
A rustic wooden star adds natural warmth to a Christmas tree, especially when paired with burlap ribbon, pinecones, and wooden ornaments. You can make one from thin craft wood or lightweight wooden sticks, then leave it natural or add a soft coat of festive paint.

What It Is
This is a handmade star assembled from lightweight wooden pieces. Its simple texture works particularly well with farmhouse, Scandinavian, and traditional Christmas decorating styles.
Supplies and Budget
Gather thin wooden craft sticks or lightweight craft plywood, wood glue, sandpaper, acrylic paint, a small wooden support, and ribbon. Budget approximately $5–$12, depending on whether you already have basic tools.
Tutorial how to make:
- Sketch a five-point star on paper to use as a guide.
- Arrange thin wooden sticks along the outline, trimming the ends carefully where they meet.
- Glue the pieces together and allow the star to dry completely on a flat surface.
- Sand any rough edges and apply a thin coat of paint, wood stain, or clear sealant.
- Attach a small wooden support or lightweight holder at the back so the star can rest over the top branch.
DIY Tip
Keep the wood thin and lightweight. Thick pieces can make the topper too heavy, causing the highest branch to bend. Always allow the glue to cure fully before placing it on the tree.
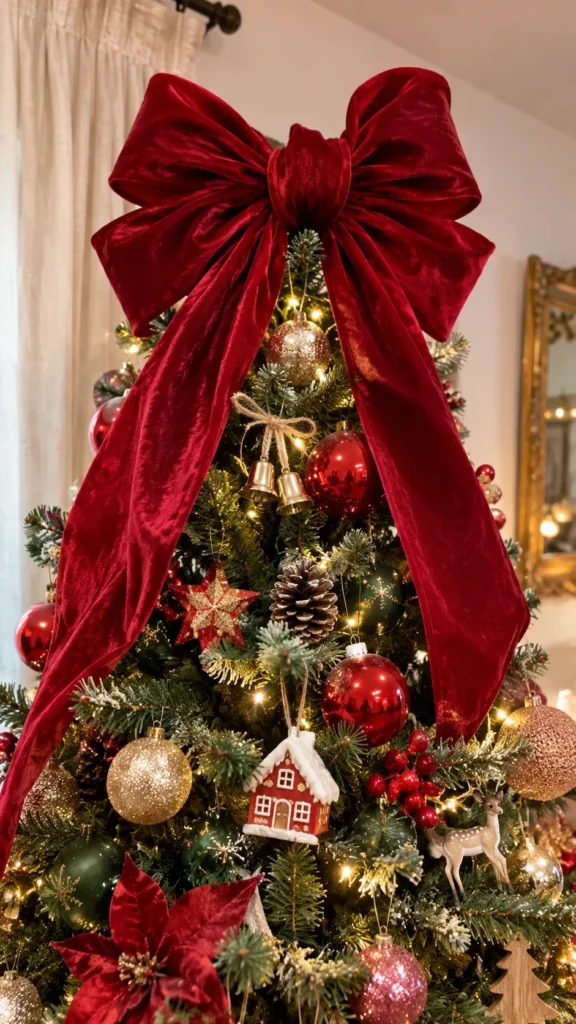
3. Giant Velvet Bow Christmas Tree Topper
Description
A large velvet bow creates a soft, elegant finish without requiring complicated crafting. Choose deep red, forest green, champagne, or dusty pink velvet ribbon for a beautiful statement. Long flowing tails add movement and make the tree feel especially festive.
What It Is
This topper is an oversized decorative bow made from wired or structured ribbon. It is a practical alternative to traditional stars and works well on both full-sized and slim Christmas trees.
Supplies and Budget
You’ll need 2–3 yards of wide velvet ribbon, floral wire, scissors, a small zip tie, and optional decorative greenery. A homemade version usually costs around $5–$15, depending on the ribbon quality.
Tutorial how to make:
- Cut a long piece of ribbon for the bow loops and two additional pieces for the tails.
- Fold the main ribbon back and forth to create two or three loops on each side.
- Pinch the center tightly and secure it with floral wire or a zip tie.
- Attach the tails behind the bow, cutting their ends diagonally or into a V shape.
- Shape the loops by hand and use the wired center to attach the bow to the top branch.
DIY Tip
Wired-edge ribbon is much easier to shape than soft, unstructured ribbon. Make the loops slightly oversized because they often look smaller once placed among the upper branches.
4. DIY Beaded Star Christmas Tree Topper
Description
Make a sparkling star using wooden beads, craft wire, and a little patience. This design combines natural texture with a delicate shine, making it a lovely choice for neutral, Scandinavian, or colorful Christmas trees. You can use gold, white, red, or mixed beads.

What It Is
A decorative star formed from shaped wire and threaded beads. Its open structure keeps it relatively lightweight while allowing the Christmas tree lights to shine through.
Supplies and Budget
Prepare flexible craft wire, assorted wooden or plastic beads, wire cutters, round-nose pliers, and a small piece of floral wire for attachment. The estimated budget is $5–$12.
Tutorial how to make:
- Draw a five-point star on paper to use as a size guide.
- Cut a long piece of craft wire and gently bend it around the outline.
- Thread beads onto the wire as you work, leaving enough space at the ends to secure the shape.
- Twist the wire ends together at the bottom and adjust the points until the star looks balanced.
- Create a small wire loop or support at the base and attach it to a sturdy top branch.
DIY Tip
Choose beads with holes large enough for your wire. Test the wire and beads together before starting, and avoid adding too many heavy beads to the upper points.
5. Colorful Pom-Pom Christmas Tree Topper
Description
Bring a playful, cheerful look to your tree with a topper covered in colorful yarn pom-poms. Combine bright pink, red, yellow, green, and blue for a fun handmade decoration, or choose a smaller palette to match your existing ornaments.

What It Is
This is a lightweight decorative topper made from yarn pom-poms attached to a cardboard or foam base. Its soft texture makes it especially suitable for playful, colorful, and family-friendly Christmas decorating.
Supplies and Budget
You’ll need assorted yarn, a pom-pom maker or cardboard circles, scissors, a lightweight cardboard cone, hot glue, and optional small felt shapes. Expect to spend around $4–$10.
Tutorial how to make:
- Make several pom-poms in different sizes using a pom-pom maker or two cardboard circles.
- Trim each pom-pom until it looks round and fluffy.
- Cut a small cone from lightweight cardboard and secure its edges with glue.
- Attach the pom-poms around the cone, starting with larger ones and filling gaps with smaller pieces.
- Add a few small felt stars or ribbon details, then place the cone over the top branch.
DIY Tip
Don’t glue the pom-poms too close together before checking the shape. Arrange them first on the table so you can balance the colors and avoid creating one overly crowded side.
6. Handmade Christmas Angel Tree Topper
Description
Create a sweet handmade angel using fabric, felt, ribbon, and a lightweight wooden bead for the head. A simple white or cream outfit gives it a traditional appearance, while gold details and delicate wings make it feel special without requiring advanced sewing skills.

What It Is
A small fabric or felt angel designed to sit above the Christmas tree. It can be made with a soft cone-shaped body, decorative wings, and a simple head attached to a stable base.
Supplies and Budget
Gather cream felt or cotton fabric, one large wooden bead, ribbon, craft glue, lightweight cardboard, gold thread, scissors, and optional lace. The estimated cost is $5–$12.
Tutorial how to make:
- Cut a wide felt or fabric triangle and roll it into a cone to form the angel’s body.
- Secure the back seam with fabric glue or a few hand stitches.
- Attach the wooden bead at the narrow top of the cone.
- Cut two matching wing shapes from felt and attach them behind the body.
- Add a small ribbon belt, gold details, or a simple halo made from thin craft wire.
- Fix a lightweight cardboard support inside the bottom so the angel can sit securely on the tree.
DIY Tip
Keep the wings proportionate to the body. Very large fabric wings can pull the angel backward, so test its balance before adding extra decorations.
7. Pinecone and Evergreen Natural Tree Topper
Description
Use real or artificial pinecones and small evergreen sprigs to create a woodland-inspired topper. A little ribbon and a few berries add color while keeping the natural materials at the center of the design. It looks beautiful on trees decorated with wooden ornaments and warm lights.
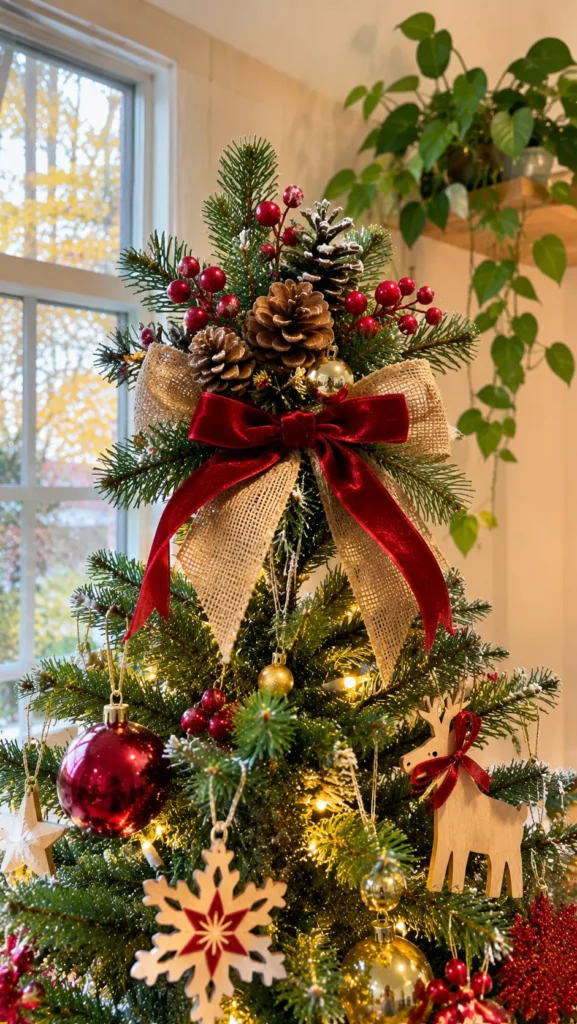
What It Is
A cluster of natural decorative elements arranged around a lightweight base. It creates a textured, organic finish that works especially well with rustic and nature-inspired Christmas decor.
Supplies and Budget
You’ll need two or three small pinecones, artificial evergreen sprigs, floral wire, a lightweight cardboard base, ribbon, and optional artificial berries. Budget around $4–$10.
Tutorial how to make:
- Choose small pinecones that are dry, clean, and free from loose debris.
- Arrange the pinecones and evergreen sprigs around a small cardboard base.
- Secure the heavier pieces with floral wire before adding glue for extra stability.
- Fill small spaces with greenery or berry stems.
- Tie a narrow ribbon around the base and attach a lightweight support for the tree branch.
DIY Tip
Avoid using damp pinecones or fresh greenery that may shed or become brittle indoors. Artificial greenery is a reliable choice if you want to reuse the topper every year.
8. DIY Snowflake Christmas Tree Topper
Description
A large handmade snowflake gives your Christmas tree a delicate winter-inspired finish. Create it from wooden craft sticks, sturdy paper, or lightweight foam, then decorate it with white paint, silver glitter, or small pearl beads for a frosty effect.

What It Is
This is a symmetrical snowflake decoration with several branches extending from a central point. Its open design looks especially pretty against dark green tree branches.
Supplies and Budget
You’ll need wooden craft sticks or thick cardstock, craft glue, scissors, white or silver acrylic paint, optional glitter, and a small cardboard support. The estimated cost is $3–$9.
Tutorial how to make:
- Draw a snowflake pattern on paper before arranging your materials.
- Build the central shape using six evenly spaced sticks or paper sections.
- Add smaller branches to each section, keeping the pattern balanced.
- Glue the pieces together and let the structure dry completely.
- Paint the snowflake white or silver, then add small decorative beads if desired.
- Attach a lightweight holder behind the center so it can sit over the tree’s top branch.
DIY Tip
Build the snowflake on a flat surface rather than assembling it directly in your hands. This helps keep the branches evenly spaced and prevents the finished shape from twisting.
9. Vintage-Inspired Christmas Ornament Topper
Description
Turn a collection of small, colorful ornaments into a beautiful vintage-inspired tree topper. Combine shiny baubles, tiny bells, and decorative picks in traditional red, green, gold, or pastel shades for a playful arrangement that feels collected over time.

What It Is
A clustered ornament decoration attached to a lightweight base. Instead of using one large ornament, several smaller pieces come together to create a full, colorful statement at the top of the tree.
Supplies and Budget
Prepare lightweight shatterproof ornaments, floral wire, artificial greenery, ribbon, a cardboard cone, and optional decorative bells. Expect to spend around $6–$15, depending on how many ornaments you already own.
Tutorial how to make:
- Select ornaments in three or four complementary colors and different sizes.
- Arrange the largest ornaments near the center of a cardboard cone.
- Secure each ornament with floral wire or strong craft glue.
- Fill gaps with smaller baubles, bells, and short greenery pieces.
- Add a ribbon bow near the base and check that the arrangement sits upright.
- Place the finished topper over the tree’s strongest upper branch.
DIY Tip
Use shatterproof ornaments whenever possible. Glass baubles can break if the topper falls, and too many heavy ornaments may make the top branch lean.
10. Rustic Burlap and Lace Christmas Tree Topper
Description
Combine burlap, soft lace, and natural ribbon to create a charming farmhouse-style topper. This design is simple to customize with small wooden stars, greenery, or tiny pinecones, making it a lovely option for a warm, handmade Christmas tree.
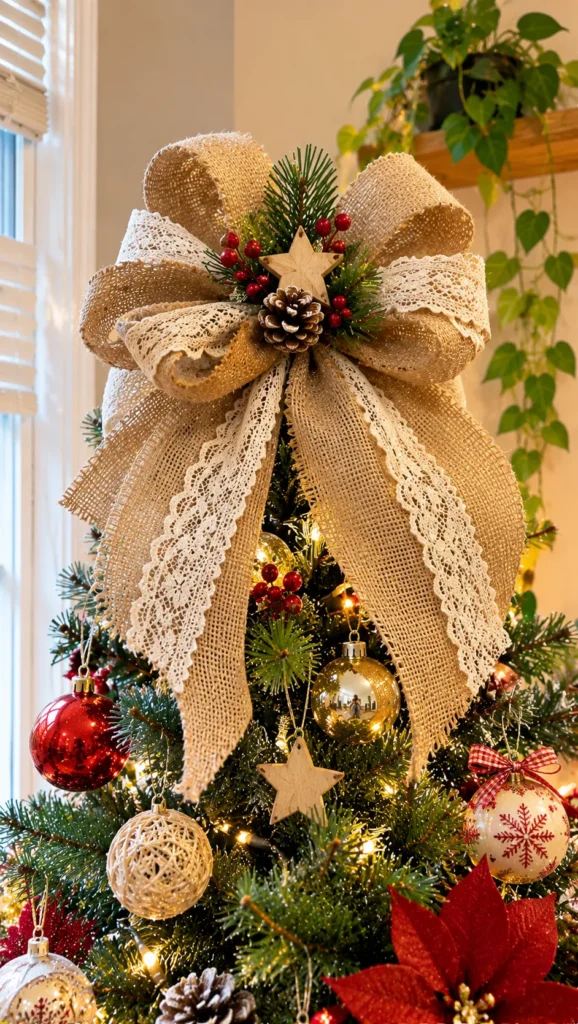
What It Is
A layered fabric decoration, usually shaped into a large bow or a soft star-like arrangement. Its combination of rough burlap and delicate lace creates an attractive contrast.
Supplies and Budget
You’ll need burlap ribbon, lace trim, floral wire, scissors, a small piece of cardboard, hot glue, and optional wooden decorations. The estimated cost is $4–$10.
Tutorial how to make:
- Cut several lengths of burlap ribbon and lace trim.
- Layer the lace over the burlap and secure the center with floral wire.
- Shape the ribbon into large loops, allowing some lace edges to remain visible.
- Add two longer ribbon tails and trim the ends neatly.
- Attach a small wooden star or pinecone to the center if desired.
- Secure the topper to a lightweight cardboard support and test it on the tree.
DIY Tip
Burlap can fray easily, so use wired-edge ribbon or apply a small amount of fabric glue along cut edges. This keeps the topper neat and prevents loose fibers from appearing on the tree.
11. DIY Glittered Cardboard Starburst Topper
Description
Create a dramatic starburst topper from cardboard strips arranged around a central circle. Paint it in gold, silver, or bright festive colors, then add a little glitter for sparkle. It is an affordable way to make a large statement piece from materials you may already have at home.
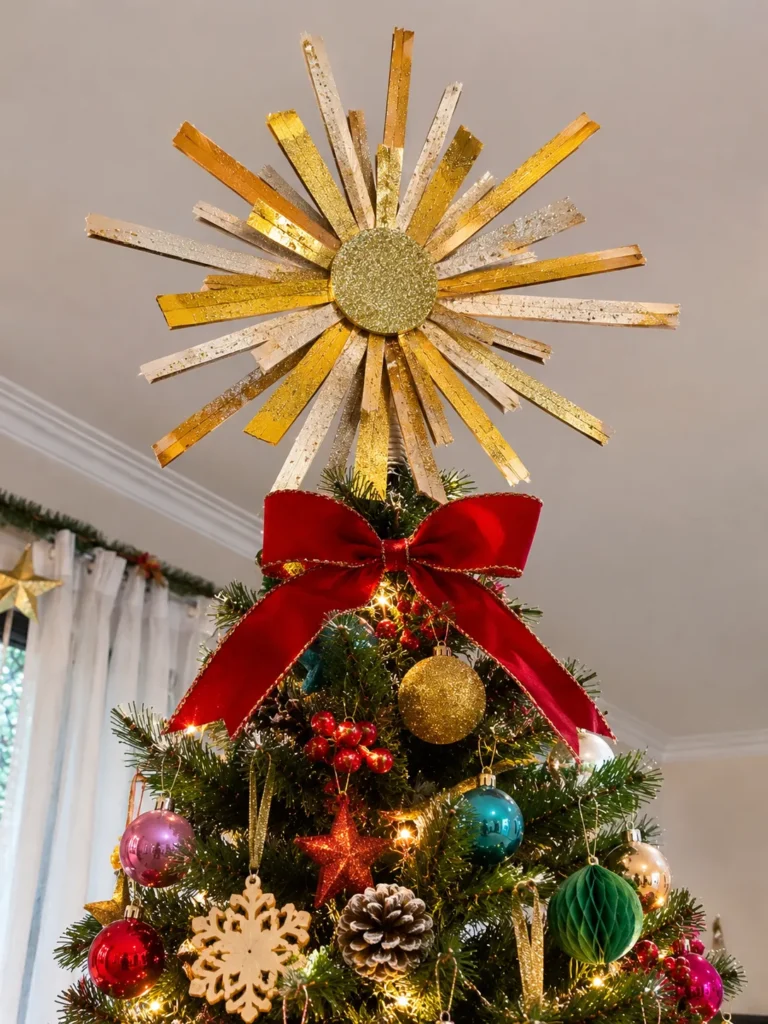
What It Is
A sunburst-style decoration with narrow rays extending from a central shape. It has a modern, playful appearance and can be customized to suit both traditional and contemporary Christmas trees.
Supplies and Budget
Gather sturdy cardboard, a pencil, ruler, craft knife, scissors, glue, acrylic paint, glitter, and a small cardboard cone. The estimated budget is $2–$7.
Tutorial how to make:
- Cut a small circle from cardboard to create the center of the starburst.
- Cut several strips of cardboard in different lengths, keeping the ends pointed or rounded.
- Arrange the strips evenly around the circle before gluing them in place.
- Attach a second cardboard circle behind the center to cover the glued ends and strengthen the structure.
- Paint the entire topper and add glitter while the paint is slightly tacky.
- Attach a lightweight cone or holder at the back.
DIY Tip
Use cardboard from a clean, sturdy box rather than thin packaging. Thin cardboard can curl when painted, so apply light coats and let each layer dry before adding another.
12. Personalized Family Christmas Tree Topper
Description
Make your Christmas tree topper meaningful by creating a personalized decoration featuring your family name, initials, or the year. Use a wooden star, painted cardboard, or a lightweight plaque and decorate it with small festive details that reflect your family’s traditions.

What It Is
A custom-made topper that turns a simple Christmas decoration into a keepsake. It can be designed in a traditional, modern, rustic, or colorful style depending on your family’s Christmas decor.
Supplies and Budget
You’ll need a lightweight wooden or cardboard star, acrylic paint, paintbrushes, letter stickers or a paint marker, ribbon, craft glue, and a small support. The estimated cost is $4–$12.
Tutorial how to make:
- Choose a lightweight star or plaque that fits the scale of your Christmas tree.
- Paint the base in a color that complements your ornaments and allow it to dry.
- Add your family name, initials, or a special year using letter stickers or a fine paint marker.
- Decorate the edges with small stars, dots, greenery, or ribbon.
- Seal the design with a suitable clear craft sealer if the material requires it.
- Attach a stable support at the back and test the topper before placing it on the tree.
DIY Tip
Keep the lettering large enough to read from a short distance. A simple design with clear lettering usually looks better than adding too many decorative details around the name.
FAQ SECTION
What is the easiest DIY Christmas tree topper to make?
A giant velvet bow is one of the easiest options. It requires only ribbon, scissors, and floral wire, and you can adjust its size and color to match almost any Christmas tree.
How do I make a homemade tree topper stay in place?
Use a lightweight support such as a cardboard cone, wire holder, or small tube that fits over the top branch. Make sure the topper is balanced and attached securely without crushing the branch.
What materials are best for a lightweight Christmas tree topper?
Cardstock, felt, thin craft wood, yarn, lightweight plastic ornaments, and wired ribbon are all practical choices. Avoid heavy wood, thick glass ornaments, and large amounts of metal.
How big should a DIY Christmas tree topper be?
The topper should be proportional to the tree. A large tree can support a more dramatic decoration, while a small or slim tree usually looks better with a compact bow, star, or snowflake.
Can I reuse homemade Christmas tree toppers every year?
Yes. Store them in a dry box with tissue paper or bubble wrap to protect delicate details. Keep fabric toppers away from moisture and avoid placing heavy decorations on top of them.
How can I make a DIY tree topper look more professional?
Choose a limited color palette, hide visible glue and wire, trim uneven edges, and check the design from different angles. A balanced shape and clean finishing details make a noticeable difference.
RELATED CONTENT
CLOSING
Making your own Christmas tree topper is a lovely way to add personality to your holiday decorations. Whether you prefer a classic handmade star, a colorful pom-pom creation, or a personalized family keepsake, there is something special about finishing your tree with a decoration you made yourself.
Start with a design that matches your crafting experience and the materials you already have. Don’t worry if the first attempt isn’t perfectly symmetrical; those little handmade details are part of what makes it special. I’d love to know which idea you try and how your finished topper looks on your Christmas tree. Happy crafting and Merry Christmas!