12 Squishy Storage Ideas to Keep Your Collection Organized

Squishy Storage Ideas
If you love collecting squishies, you probably know how quickly a small collection can turn into a big storage problem. These soft, colorful toys are fun to display, but tossing them into a drawer or box can leave them squashed, dusty, or difficult to find. The good news is that you don’t need an expensive organizer to keep everything neat. With a few simple materials and some creative DIY touches, you can make storage that protects your squishies while showing off their adorable shapes and colors.
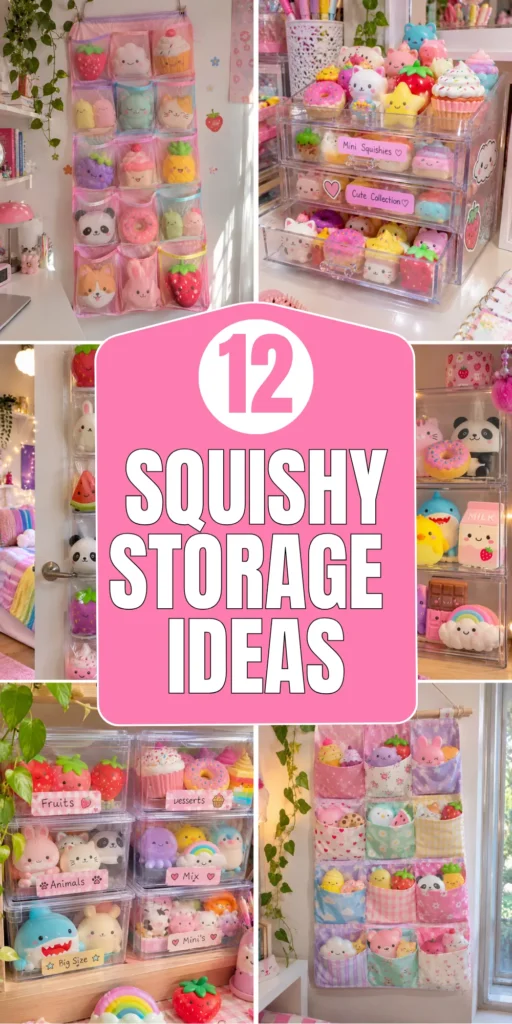
The best storage solution depends on the size of your collection, the space you have available, and whether you want your squishies displayed or tucked away. Some ideas below are perfect for small bedrooms and desks, while others work well for larger collections. These projects use practical materials, affordable organizers, and easy craft techniques that you can customize at home.
1. Clear Acrylic Display Boxes for Squishies
Description
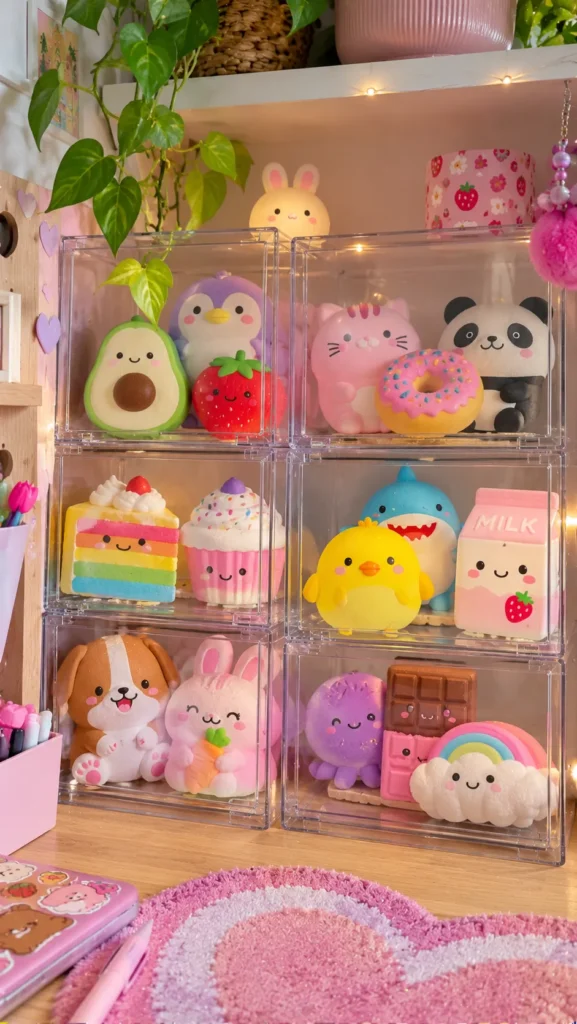
Give your favorite squishies a tidy little display with clear acrylic boxes. They keep dust away while allowing you to see every character, shape, and color. This is especially useful for special squishies you want to protect without hiding them in a drawer.
What It Is
Individual or stackable transparent boxes arranged on a shelf or desk. Each box creates a separate space for one large squishy or a small group of mini squishies.
Supplies and Budget
You’ll need clear acrylic display boxes, a measuring tape, a soft microfiber cloth, and optional adhesive shelf grips. Budget around $10–$25, depending on the number and size of boxes.
Tutorial how to make:
- Measure your largest squishy before purchasing the boxes. Leave extra room around it so the foam is not pressed against the sides.
- Clean each box with a microfiber cloth and allow it to dry.
- Place a squishy inside without squeezing or folding it.
- Arrange the boxes on a stable shelf, grouping similar colors or characters together.
- Add small handwritten labels if you want to organize different collections.
DIY Tip
Avoid boxes that fit too tightly. Squishies need enough space to keep their original shape, and a tightly packed display can leave permanent dents in soft foam.
2. DIY Hanging Mesh Storage Organizer
Description
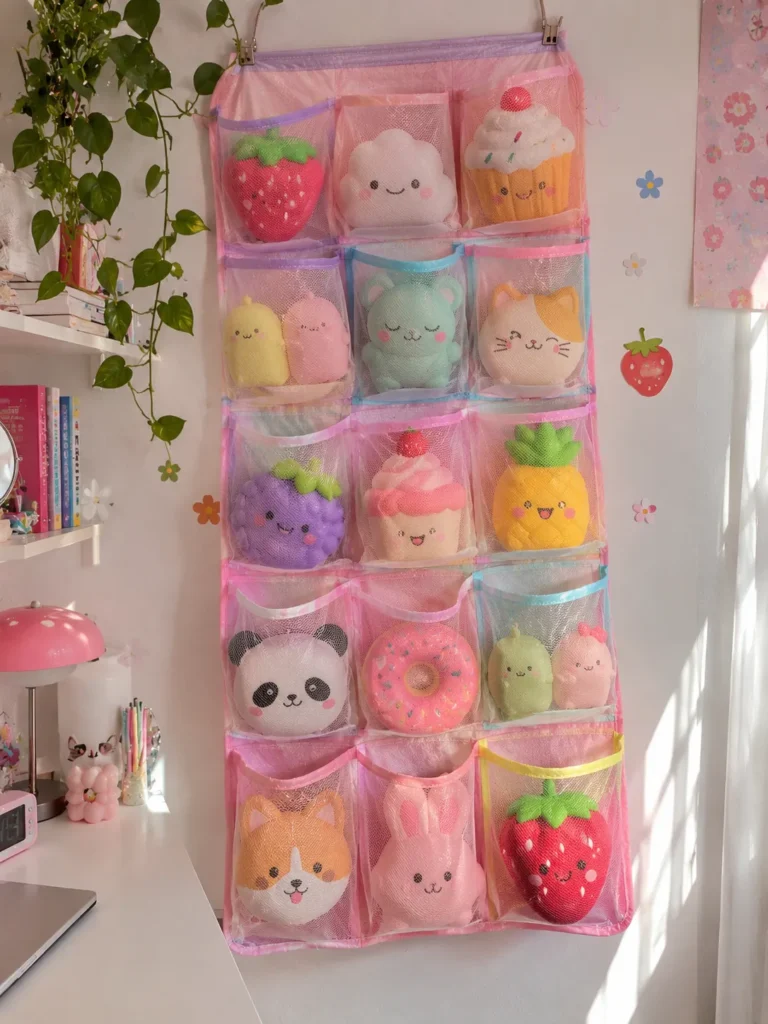
Use a hanging mesh organizer to store small squishies vertically and free up valuable desk or shelf space. Its open pockets make it easy to see your collection, while the lightweight fabric keeps everything together and accessible.
What It Is
A fabric or mesh organizer with several pockets that hangs from a wall hook, door, or closet rod. It works best for mini and small-to-medium squishies.
Supplies and Budget
Prepare a hanging mesh organizer, sturdy wall hook or over-door hook, measuring tape, and optional fabric labels. Expect to spend around $6–$15.
Tutorial how to make:
- Choose an organizer with pockets large enough for your squishies.
- Test one squishy in each pocket to make sure it fits without being compressed.
- Install a sturdy hook at a comfortable height.
- Hang the organizer and distribute the squishies evenly between pockets.
- Place heavier items in lower pockets to prevent the organizer from leaning forward.
DIY Tip
Choose mesh with a soft finish rather than rough or sharp stitching. Check the pocket depth too, because shallow pockets may allow rounded squishies to fall out.
3. Repurposed Shoe Organizer for Squishy Storage
Description
Turn a clear over-the-door shoe organizer into a colorful squishy collection display. The transparent pockets make it simple to find your favorite toys, and the vertical layout is ideal when you don’t have enough room for extra shelves.

What It Is
A hanging shoe organizer repurposed to hold squishies instead of shoes. Each pocket becomes an individual storage space for a character, food-shaped squishy, or small collection.
Supplies and Budget
You’ll need a transparent shoe organizer, an over-the-door hanger, a measuring tape, and optional decorative stickers. A simple version usually costs $8–$18.
Tutorial how to make:
- Select a shoe organizer with clear pockets and enough depth for your collection.
- Hang it over a sturdy door and check that the door can still close properly.
- Place one or two small squishies inside each pocket.
- Organize them by theme, size, or color so the display looks intentional.
- Add small labels or stickers around the pockets without covering the transparent sections.
DIY Tip
Don’t fill every pocket to its maximum capacity. Overloading can stretch the plastic and press the squishies against each other, making the organizer look messy.
4. DIY Squishy Storage Drawer Dividers
Description
Keep a desk drawer organized with homemade dividers that give every squishy its own little space. This is a practical option if you prefer keeping your collection out of sight but still want to find individual pieces quickly.

What It Is
A divided drawer organizer made from cardboard, foam board, or lightweight plastic sections. The compartments separate squishies by size, shape, or collection.
Supplies and Budget
Gather foam board or sturdy cardboard, a ruler, pencil, craft knife, double-sided tape, and optional decorative paper. Budget around $3–$10.
Tutorial how to make:
- Empty your drawer and measure its inside width, length, and height.
- Decide how many compartments you need based on your squishy sizes.
- Cut divider strips slightly shorter than the drawer’s internal height.
- Make small slots in the strips so they can slide together into a grid.
- Fit the divider grid inside the drawer and secure loose sections with removable tape.
- Place squishies in separate compartments without stacking heavy items on top.
DIY Tip
Use foam board instead of thin cardboard if you want dividers that stay upright. Make one test compartment first to check that your largest squishy fits comfortably.
5. Hanging Fabric Pocket Organizer for a Bedroom Wall
Description
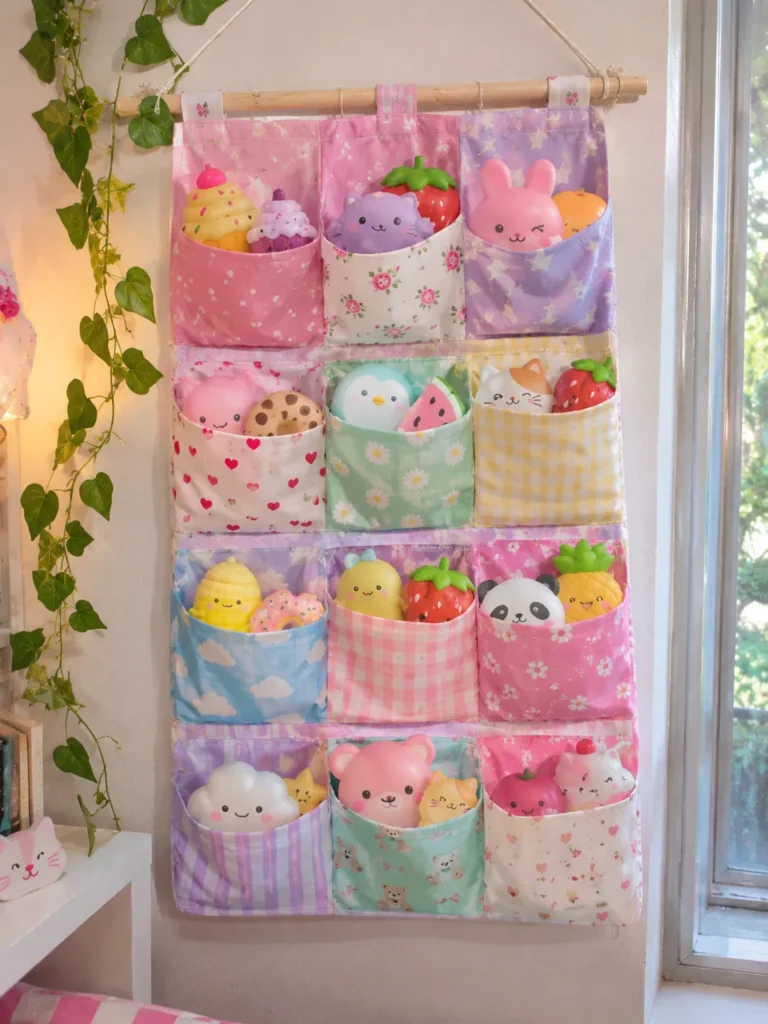
Create a cute wall organizer with fabric pockets to store squishies while adding a handmade touch to your bedroom. Choose colorful cotton prints, pastel fabrics, or playful patterns that match your room decor.
What It Is
A fabric panel with sewn or attached pockets, supported by a wooden dowel or sturdy hanging rod. It provides accessible storage without taking up floor or desk space.
Supplies and Budget
You’ll need cotton fabric, a larger backing piece, matching thread, scissors, a sewing machine or fabric glue suitable for the project, a wooden dowel, and hanging cord. Budget approximately $8–$18.
Tutorial how to make:
- Cut a large rectangle of fabric for the backing and several smaller pieces for pockets.
- Fold and sew the top edge of each pocket to create a neat opening.
- Attach the pockets to the backing, leaving enough space between them.
- Reinforce the sides and bottom of each pocket so they can support the squishies.
- Create a fabric sleeve at the top for the wooden dowel.
- Add a hanging cord and attach the organizer to a secure wall hook.
DIY Tip
Use lightweight cotton rather than thick upholstery fabric. Heavy fabric can pull the organizer downward, while shallow pockets may not hold rounded squishies securely.
6. Rotating Squishy Storage Carousel
Description
Make your collection easy to browse with a rotating storage carousel. It keeps small squishies visible from every angle and makes a fun addition to a desk, craft corner, or bedroom shelf.

What It Is
A rotating tiered organizer adapted for squishy storage. The shelves spin so you can reach different toys without moving the entire display.
Supplies and Budget
You’ll need a small rotating organizer or lazy Susan base, lightweight trays, optional removable dividers, and non-slip shelf liners. Expect to spend around $10–$25.
Tutorial how to make:
- Choose a rotating base that spins smoothly and can support the combined weight of your collection.
- Add lightweight trays or tiers if the organizer is designed to support them.
- Cut non-slip liner to fit each level.
- Arrange squishies around the trays, leaving a little room between them.
- Turn the carousel slowly to check that nothing slides or falls off.
DIY Tip
Don’t place tall squishies near the outer edge of a narrow rotating tray. Keep the weight balanced and test the rotation before filling every level.
7. Clear Stackable Plastic Bins with Handmade Labels
Description
Organize a growing squishy collection with clear stackable bins. This simple system keeps similar toys together, protects them from everyday dust, and makes it easier to find specific characters without opening several containers.

What It Is
A collection of transparent storage containers arranged on a shelf or inside a closet. Each bin can hold a category such as food squishies, animals, mini toys, or seasonal favorites.
Supplies and Budget
You’ll need clear plastic bins with lids, adhesive labels, a marker, and optional decorative label cards. Budget around $8–$20 for a small set.
Tutorial how to make:
- Sort your squishies into categories before choosing bin sizes.
- Select bins that leave enough room for the toys to sit naturally.
- Add a soft layer of clean fabric or smooth shelf liner at the bottom if needed.
- Place similar squishies together without tightly packing them.
- Label each container clearly and stack only bins designed to be safely stacked.
DIY Tip
Choose bins with smooth interiors and lids that do not press down on the contents. Keep the largest squishies in separate containers rather than forcing them into smaller spaces.
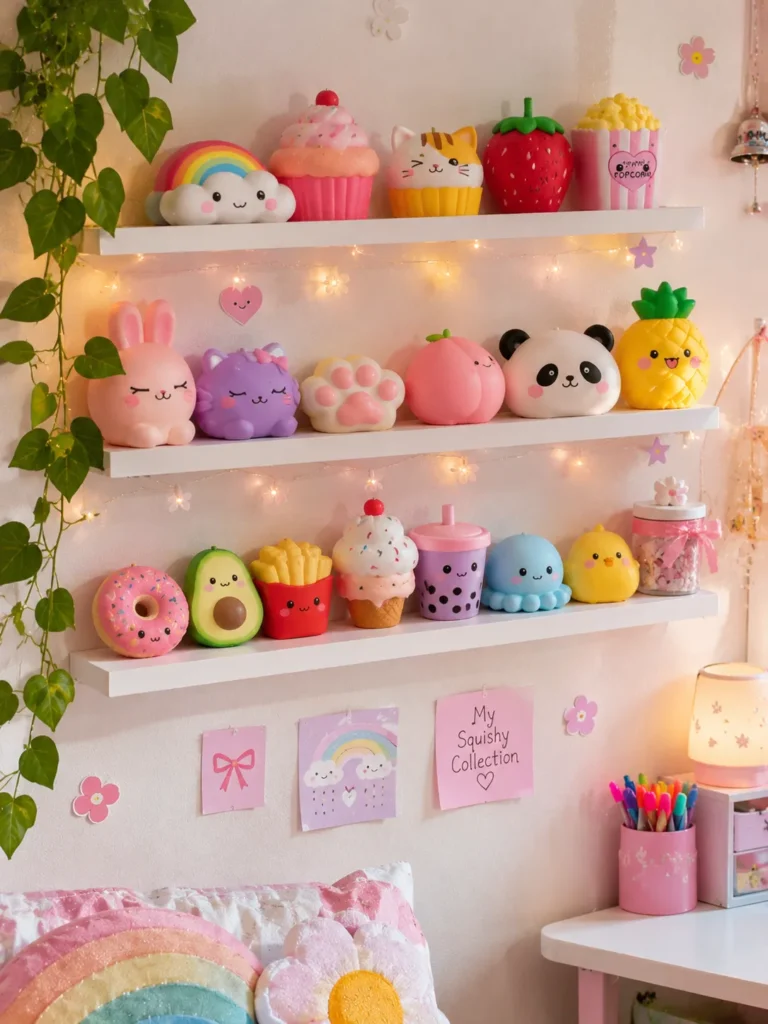
8. DIY Mini Squishy Display Shelf
Description
Turn an empty wall or desk corner into a colorful squishy display using small floating shelves. This idea is perfect for showing off your favorite pieces while keeping your collection organized and easy to enjoy.
What It Is
A series of narrow shelves mounted on a wall or arranged on a desk. Each shelf displays a small group of squishies, creating a tidy collection without overcrowding the room.
Supplies and Budget
Prepare small floating shelves, suitable wall fixings, a measuring tape, a pencil, a level, and optional decorative paper or paint. Budget around $12–$30.
Tutorial how to make:
- Measure the available wall space and decide how many shelves will fit comfortably.
- Mark the shelf positions with a pencil, checking that they are level.
- Install the shelves using fixings suitable for your wall type.
- Arrange squishies with enough space between them to avoid squeezing.
- Group the toys by color or theme and leave a little empty space for future additions.
DIY Tip
Check the weight limit of each shelf and its fixings before displaying your collection. Keep shelves away from direct sunlight, which can affect some foam materials over time.
9. Repurposed Clear Makeup Organizer for Mini Squishies
Description
Give a clear makeup organizer a new purpose by using its small compartments for mini squishies. It is an affordable way to display tiny food shapes, animals, and collectible characters neatly on a desk or vanity.

What It Is
A transparent countertop organizer with small drawers or open sections. The compartments make it easy to separate mini squishies and see the whole collection at a glance.
Supplies and Budget
You’ll need a clear makeup organizer, a soft cleaning cloth, optional removable labels, and small pieces of smooth shelf liner. Expect to spend around $8–$20.
Tutorial how to make:
- Clean the organizer thoroughly and dry all compartments.
- Check the size of each drawer or section using your smallest and largest mini squishies.
- Add smooth shelf liner if the plastic base is slippery.
- Place one or a few mini squishies in each compartment.
- Arrange the drawers by color, theme, or character type.
DIY Tip
This organizer is best for mini squishies, not large foam toys. Avoid forcing a squishy into a drawer that is too shallow, because repeated pressure can change its shape.
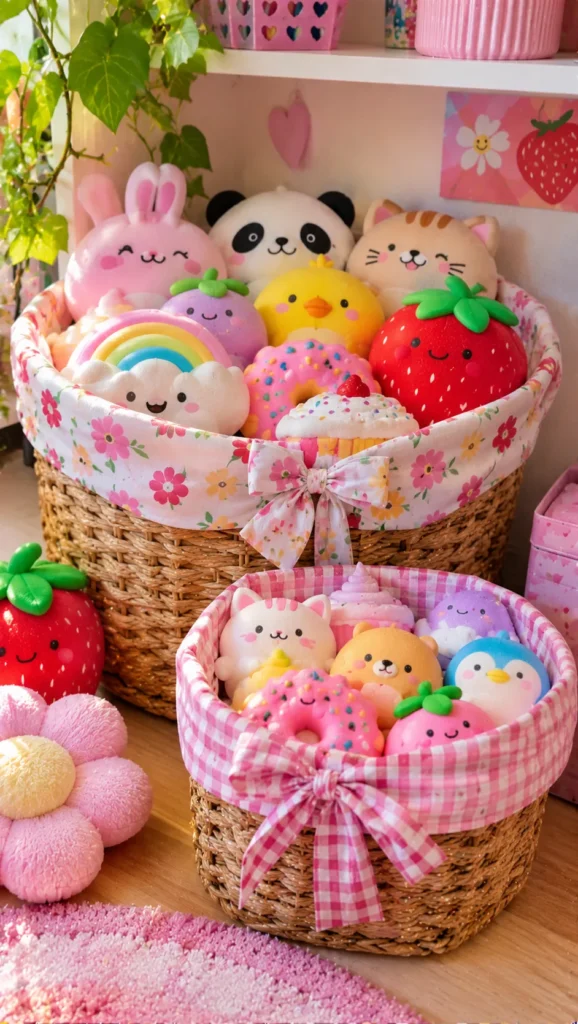
10. Decorative Basket Storage with Soft Fabric Liners
Description
Use pretty woven baskets to store squishies in a cozy, decorative way. A soft fabric liner adds a layer between the toys and the basket, while the basket itself can blend naturally into bedroom shelves or a craft room.
What It Is
A woven or fabric storage basket lined with cotton material. It is a simple solution for keeping larger squishies together while making the storage look like part of the room decor.
Supplies and Budget
You’ll need one or two baskets, cotton fabric, scissors, measuring tape, and optional ribbon or fabric labels. Budget around $7–$18.
Tutorial how to make:
- Choose a basket with enough depth and width for your largest squishies.
- Measure the base and sides to determine the fabric liner size.
- Cut the fabric and sew or fold it into a simple liner that fits inside the basket.
- Place the liner in the basket, folding excess fabric neatly over the edges.
- Arrange the squishies loosely inside, keeping heavier pieces at the bottom.
DIY Tip
Check the inside of woven baskets for rough splinters or loose fibers. A fabric liner helps protect soft foam from snagging, but it should fit smoothly without bunching up.
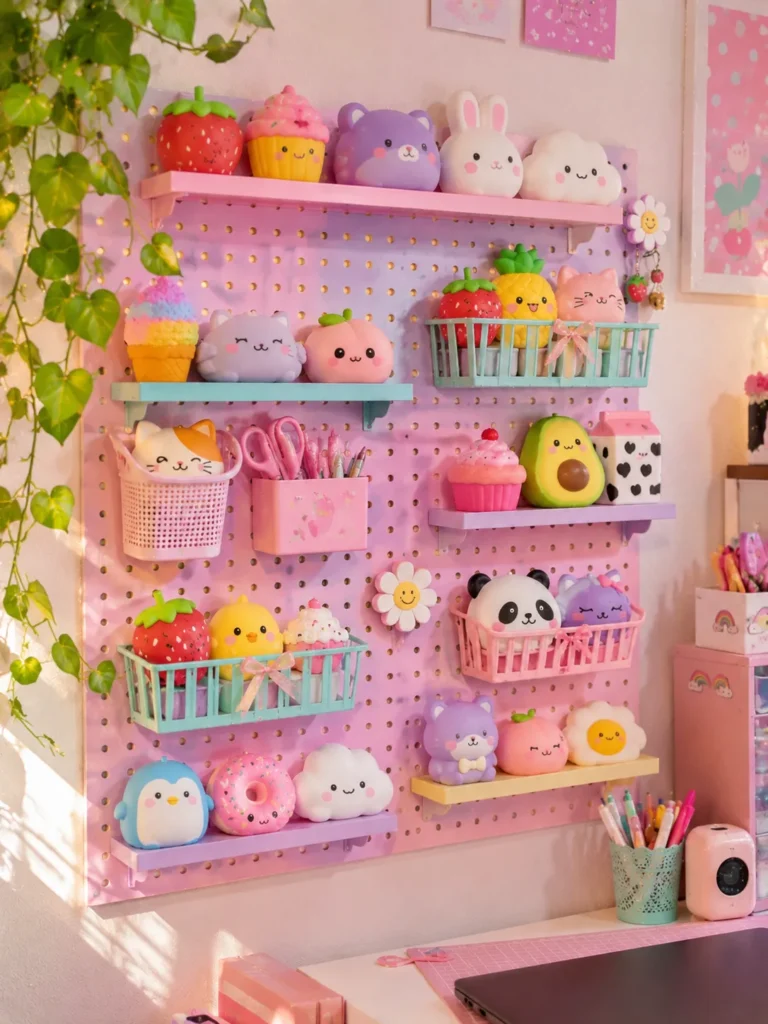
11. DIY Squishy Storage Pegboard Display
Description
Create a customizable collection wall using a pegboard and small baskets or shelves. It gives you the freedom to change the layout as your collection grows, and you can decorate the board with bright colors to make it part of your bedroom design.
What It Is
A wall-mounted pegboard fitted with lightweight shelves, hooks, and small containers. It is best for displaying selected squishies and storing accessories rather than hanging soft toys directly from sharp hooks.
Supplies and Budget
You’ll need a pegboard, compatible hooks, small baskets or shelves, wall spacers, screws, a drill, and optional paint. Budget around $12–$30.
Tutorial how to make:
- Paint the pegboard if desired and allow it to dry completely.
- Attach the correct spacers and wall fixings according to the pegboard instructions.
- Add small shelves and baskets that fit the board’s hole pattern.
- Arrange squishies in the baskets or on the shelves, leaving enough space to avoid compression.
- Adjust the layout until the display feels balanced and easy to use.
DIY Tip
Use baskets or shelves with solid bases rather than sharp hooks for the squishies themselves. Make sure the board is securely mounted before adding your collection.
12. Personalized Squishy Storage Box with Compartments
Description
Make a personalized storage box that keeps your squishies organized while reflecting your own style. Decorate it with colorful paper, stickers, labels, and simple handmade dividers to create a storage solution that feels unique and practical.

What It Is
A lidded cardboard or lightweight plastic box with removable compartments. It can be customized for different squishy sizes and decorated to match your bedroom or craft area.
Supplies and Budget
Gather a sturdy storage box, foam board or thick cardboard, decorative paper, glue, scissors, a ruler, and colorful labels. Expect to spend around $4–$12.
Tutorial how to make:
- Choose a box with enough height for your largest squishy.
- Measure the inside and plan compartments that fit your collection.
- Cut divider strips from foam board or sturdy cardboard.
- Cover the outside of the box with decorative paper, securing the edges neatly.
- Fit the dividers inside and test each compartment with a squishy.
- Add labels or stickers, then store the box somewhere cool and dry.
DIY Tip
Make the dividers removable so you can change the compartment sizes as your collection grows. Avoid using strongly scented glue or materials that may transfer odors to the squishies.
FAQ SECTION
How should I store squishies to keep them in good condition?
Keep them in a cool, dry place away from direct sunlight, dust, and excessive heat. Avoid squeezing them into tight containers or placing heavy objects on top.
Is it better to display squishies or keep them in boxes?
Both options work. Display shelves and clear organizers are great for favorite pieces, while lidded bins offer better protection from dust. You can combine both methods for a large collection.
Can I store squishies in plastic containers?
Yes, provided the containers are clean, dry, and large enough. Avoid tightly sealed storage if the squishies are not completely clean and dry, and make sure they are not compressed.
How do I organize a large squishy collection?
Sort your collection by size, theme, color, or character type. Use labeled bins for less frequently used pieces and a small display area for your favorites.
How can I keep dust off displayed squishies?
Use clear display cases or lidded organizers. If your squishies are on open shelves, gently clean them according to the manufacturer’s care instructions.
What is the cheapest way to organize squishies?
Repurposed cardboard boxes with homemade dividers, clean baskets, and existing drawer organizers are affordable options. You can decorate them with leftover craft paper and simple labels.
RELATED CONTENT
CLOSING
Organizing your squishy collection doesn’t have to mean hiding away all the cute little details you love. With a few simple materials and a little creativity, you can create storage that protects your collection, saves space, and makes your room feel more organized.
My favorite approach is to combine clear display storage for special squishies with labeled bins for the rest. That way, everything has a place without making the collection feel crowded. Start with one small project, adjust it to fit your space, and have fun making it your own. I’d love to hear which storage idea you try and how you organize your collection!