12 DIY Fireplace Ideas That Look Expensive on a Budget

DIY Fireplace Ideas
A fireplace can become one of the most inviting features in a home, even if you don’t have a large budget or a traditional built-in design. With a little creativity, you can transform a plain wall, an outdated fireplace surround, or an unused corner into a cozy focal point that feels personal and welcoming. The best part is that many fireplace projects can be completed with affordable materials, simple tools, and a few thoughtful finishing touches.
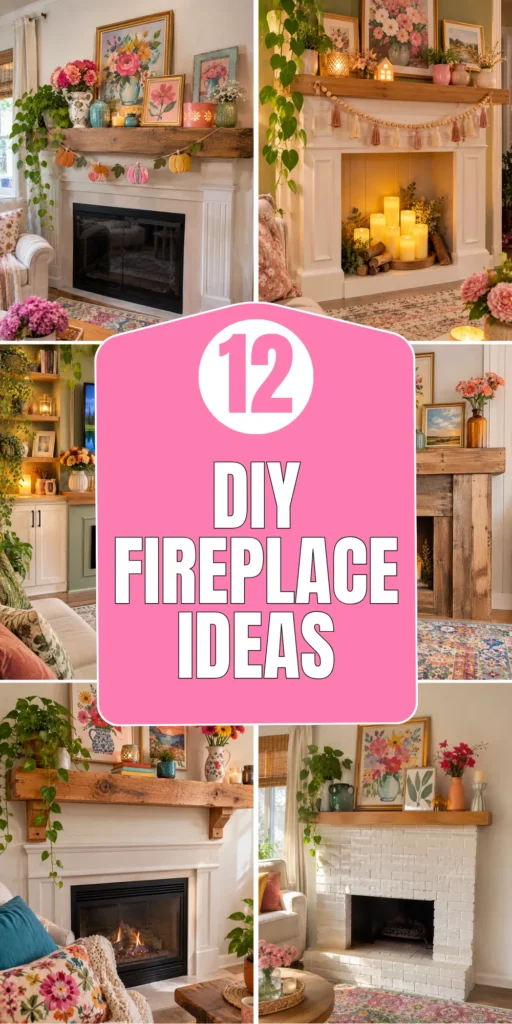
Whether you love rustic farmhouse details, modern minimalist spaces, or colorful handmade decor, these DIY fireplace ideas offer practical ways to refresh your living room. Some projects focus on decorating an existing fireplace, while others create the appearance of a fireplace where there isn’t one. Always consider whether your fireplace is functional before choosing materials: anything near an active fire must meet the appliance manufacturer’s clearance and heat-resistance requirements. Here are 12 creative projects to inspire your next home makeover.
1. DIY Faux Fireplace with a Wooden Mantel
Description
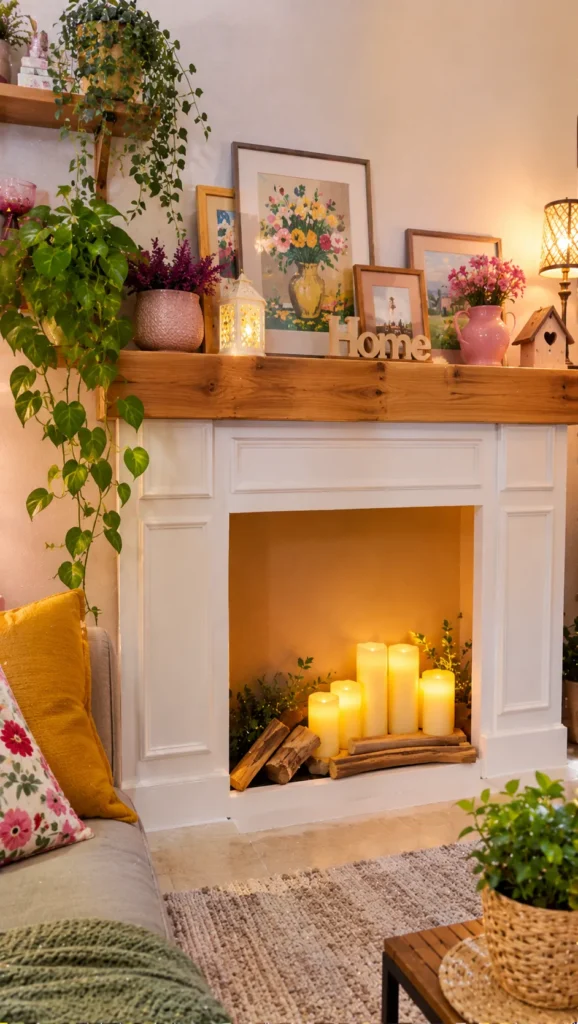
Create the cozy look of a traditional fireplace without installing a working fire. A simple wooden mantel and decorative surround can turn an empty wall into a warm focal point, especially when styled with candles, framed artwork, and seasonal decorations.
What It Is
A decorative fireplace surround built against a wall, with an open central section that creates the appearance of a fireplace. It is ideal for living rooms, bedrooms, and apartments without a chimney.
Supplies and Budget
You’ll need plywood or MDF, wooden trim, screws, wood filler, paint, construction adhesive suitable for the materials, and basic tools. Budget approximately $50–$150, depending on the size and finish.
Tutorial how to make:
- Measure the wall and sketch the width, height, and depth of your fireplace surround.
- Cut the plywood or MDF into the side panels, top section, and inner frame.
- Assemble the surround with suitable screws and reinforce the corners.
- Attach decorative trim around the opening and fill visible screw holes.
- Sand the surfaces, apply primer, and paint in your chosen color.
- Secure the mantel to the wall using appropriate fixings and decorate the opening with LED candles or logs.
DIY Tip
Use a level while assembling the frame. Even a small difference between the side panels becomes noticeable once the mantel is installed. Keep the opening decorative and never place real flames inside a faux fireplace.
2. Painted Brick Fireplace Makeover
Description
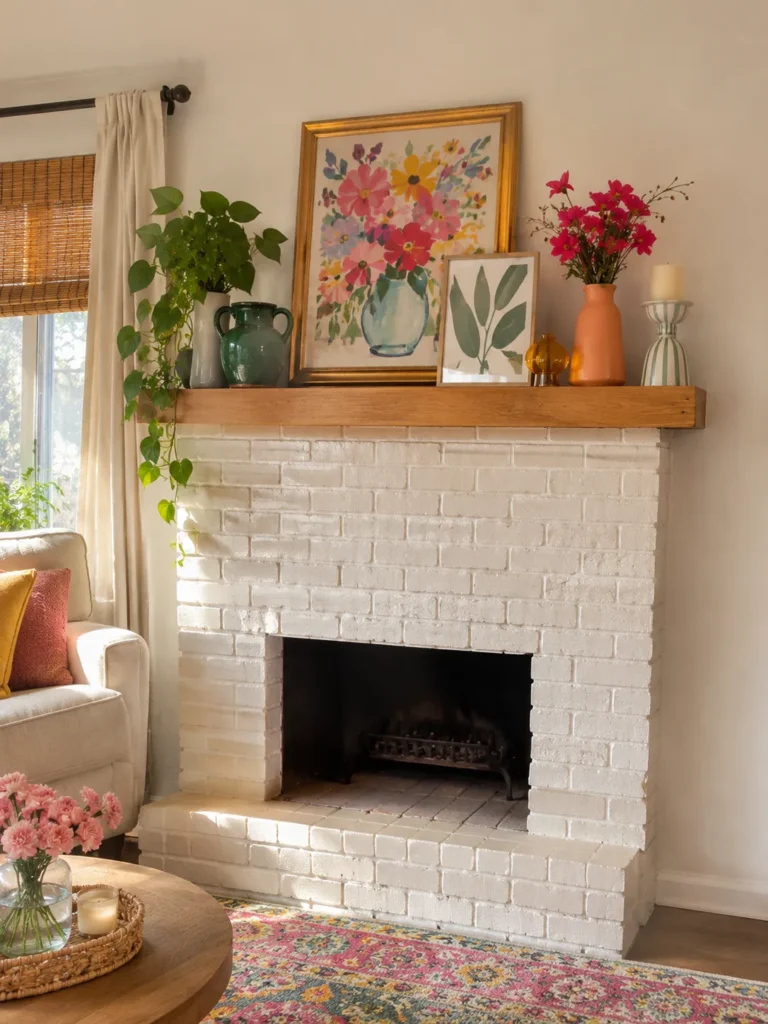
Refresh an old brick fireplace with a new paint color that suits your living room. Warm white creates a softer, brighter appearance, while charcoal or earthy tones add contrast. Proper cleaning and preparation are essential for an even finish.
What It Is
A makeover that updates the appearance of an existing brick fireplace using suitable masonry primer and paint. It works best when the brick is structurally sound and free from moisture problems.
Supplies and Budget
Prepare a stiff brush, suitable cleaner, drop cloths, painter’s tape, masonry primer, compatible paint, brushes, and rollers. Budget around $30–$90.
Tutorial how to make:
- Inspect the brick and mortar for cracks, loose sections, or signs of moisture.
- Clean away dust, soot, and grease using a product suitable for masonry.
- Allow the surface to dry completely before applying anything.
- Protect the floor, walls, and nearby furniture with drop cloths and tape.
- Apply a suitable masonry primer according to its instructions.
- Paint the brick with a compatible finish, working carefully into the mortar joints.
- Allow the coating to cure fully before styling the fireplace.
DIY Tip
Don’t paint over damp brick or active water damage. Also, check the fireplace manufacturer’s requirements before painting any surface exposed to high temperatures, particularly inside the firebox.
3. DIY Wooden Fireplace Mantel Shelf
Description
Add character to a plain fireplace with a handmade wooden mantel shelf. A thick reclaimed-wood beam gives a rustic look, while a smooth painted shelf feels more modern. The right depth and secure installation make the difference.

What It Is
A decorative shelf installed above an existing fireplace surround. It creates a place for artwork, framed photos, seasonal greenery, and carefully selected accessories.
Supplies and Budget
You’ll need a suitable wooden board, sandpaper, wood stain or paint, a level, measuring tape, and appropriate brackets or a concealed mantel mounting system. Budget around $25–$80.
Tutorial how to make:
- Measure the available wall space and check the required clearance above your fireplace.
- Choose a board with a thickness and depth that suit the fireplace proportions.
- Sand the board, paying attention to the corners and rough edges.
- Apply wood stain, paint, or a suitable protective finish and let it dry.
- Locate the wall studs and install the correct mounting hardware.
- Position the mantel shelf, check it with a level, and secure it according to the hardware instructions.
DIY Tip
Never rely on ordinary adhesive or drywall anchors alone for a heavy mantel. Use a mounting system rated for the shelf’s weight and follow the fireplace’s required clearances.
4. DIY Fireplace Surround with Decorative Wall Molding
Description
Give a simple fireplace a more finished appearance by adding decorative wall molding around it. Narrow trim creates elegant rectangular panels, while wider molding can make the fireplace feel like a custom architectural feature.

What It Is
A decorative frame made from lightweight or wooden molding installed around an existing fireplace or faux fireplace. It adds visual structure without requiring a complete renovation.
Supplies and Budget
Gather decorative molding, a measuring tape, pencil, level, miter saw or suitable cutting tool, construction adhesive, finishing nails, caulk, and paint. Budget approximately $25–$75.
Tutorial how to make:
- Measure the wall and sketch a balanced molding layout around the fireplace.
- Mark the design lightly with a pencil and check that the spacing is even.
- Cut the molding pieces to the required lengths, creating neat corners.
- Test-fit every piece before attaching it.
- Secure the molding using suitable adhesive and finishing nails where appropriate.
- Fill small gaps, sand the joints, and paint the finished frame.
DIY Tip
Make a paper template before cutting all the molding. It helps you spot awkward spacing early and reduces wasted material. Keep decorative trim outside the fireplace’s required heat-clearance area.
5. Rustic Stone-Look Fireplace Surround
Description
Bring a natural, textured appearance to your living room with a stone-look fireplace surround. Lightweight manufactured stone veneer or suitable decorative panels can create the look of a rustic cottage fireplace without the weight and cost of full natural stone.

What It Is
A decorative facing installed over a properly prepared fireplace surround. The finished look can resemble stacked stone, limestone, or rustic fieldstone.
Supplies and Budget
You’ll need a compatible stone veneer or decorative panel system, its recommended adhesive or mortar, measuring tools, a level, cutting equipment, and safety gear. Budget approximately $80–$250, depending on the area and material.
Tutorial how to make:
- Check that the existing surface is suitable for the chosen veneer system.
- Measure the fireplace surround and plan the stone layout before installation.
- Prepare the wall according to the manufacturer’s instructions.
- Dry-lay the pieces on the floor to balance different shapes and colors.
- Install the veneer using the specified adhesive or mortar.
- Cut edge pieces carefully and finish the joints as directed by the product instructions.
- Allow the installation to cure fully before decorating the area.
DIY Tip
Don’t assume every decorative stone panel is suitable near a working fire. Confirm its heat rating and required clearances, and use only the installation system recommended by the manufacturer.
6. DIY Fireplace Tile Refresh
Description
Give an outdated fireplace a fresh look with decorative tile. Small patterned tiles can introduce color and personality, while simple neutral tiles create a clean, modern finish. Careful planning helps the pattern look balanced.

What It Is
A tiled decorative surround or hearth using materials specifically rated for the intended location. It can update an existing fireplace without replacing the entire structure.
Supplies and Budget
Prepare suitable fireplace-rated tiles, compatible tile adhesive, grout, spacers, a notched trowel, tile cutter, sponge, and measuring tools. Budget around $60–$180.
Tutorial how to make:
- Check the existing surface and confirm that it can support the new tile installation.
- Measure the area and calculate how many tiles are needed, including extra pieces for cuts.
- Arrange the tiles on the floor to test the pattern and edge alignment.
- Apply the correct adhesive in manageable sections.
- Press tiles into place using spacers to maintain consistent gaps.
- Allow the adhesive to set before applying compatible grout.
- Clean the tile surface carefully and let the installation cure fully.
DIY Tip
Start the layout from the most visible center point rather than automatically beginning at one edge. This helps avoid narrow, awkward tile cuts in prominent areas.
7. DIY Electric Fireplace Built into a Media Wall
Description
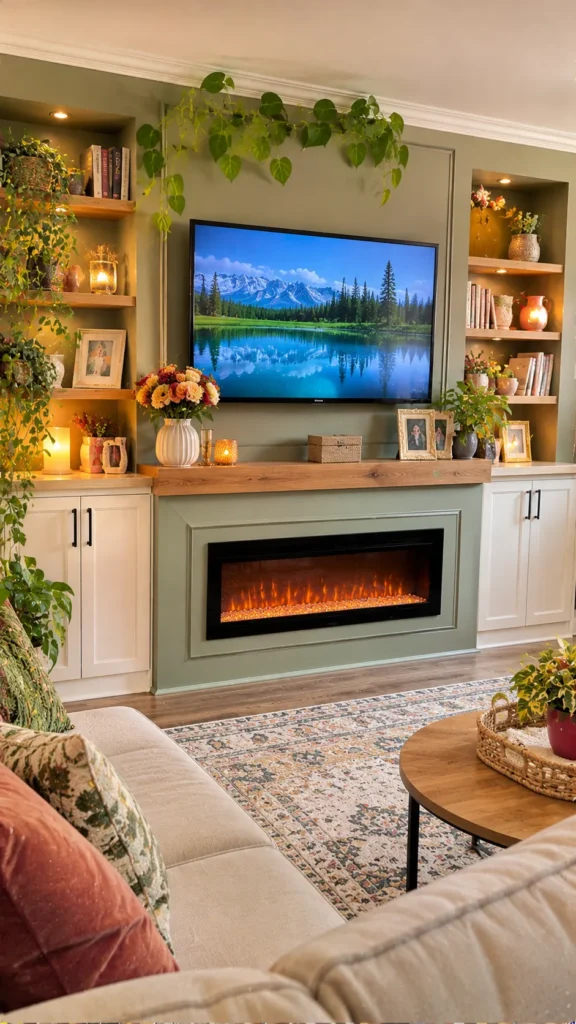
Combine a television, storage, and an electric fireplace into one attractive living room feature. A simple DIY media wall can make the room feel more organized while adding the cozy effect of a fireplace without a traditional wood-burning setup.
What It Is
A framed decorative wall or media unit designed around a compatible electric fireplace insert. The layout may include shelves, cabinets, and a space for a television.
Supplies and Budget
You’ll need framing timber or a suitable media-wall system, wall panels, screws, finishing materials, and an electric fireplace insert. Budget approximately $200–$600 or more, depending on the appliance and construction.
Tutorial how to make:
- Choose an electric fireplace designed for the planned installation type.
- Read its installation instructions and confirm ventilation, electrical, and clearance requirements.
- Measure the television, fireplace insert, and available wall space.
- Build a frame that matches the appliance’s required opening dimensions.
- Add suitable panels and finish the visible surfaces with paint or decorative materials.
- Have electrical work completed by a qualified electrician where required.
- Install the fireplace according to its instructions and test it before adding decor.
DIY Tip
Never guess the opening dimensions or block ventilation areas. The fireplace insert’s installation manual should determine the frame size, clearances, and electrical arrangement.
8. DIY Fireplace Built from Reclaimed Wood
Description
Use reclaimed wood to create a warm, rustic fireplace feature with plenty of character. Weathered boards can add texture and history to a plain wall, especially when paired with a simple mantel and neutral living room decor.
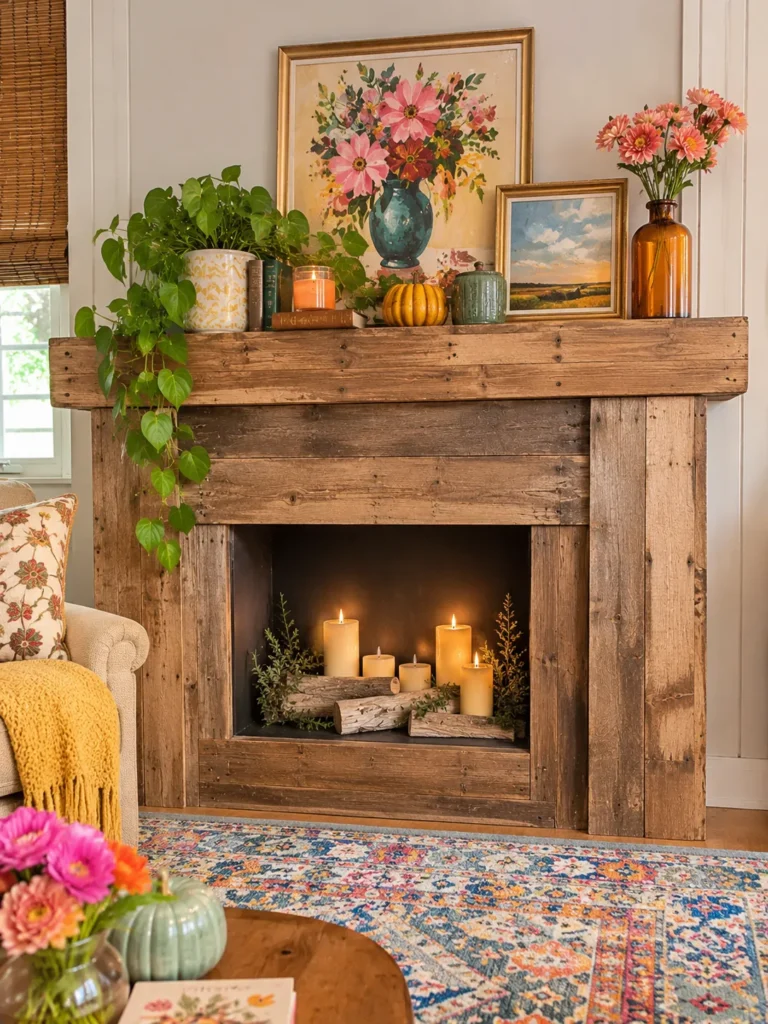
What It Is
A decorative surround or wall feature made with reclaimed timber. It can be built around a faux fireplace or used as a carefully planned finish for an existing fireplace.
Supplies and Budget
Gather reclaimed boards, suitable screws, sandpaper, wood cleaner, a level, wall fixings, and a compatible protective finish. Budget around $40–$130.
Tutorial how to make:
- Select dry, sound boards and inspect them for rot, loose nails, insects, and other damage.
- Remove old nails and clean the timber thoroughly.
- Measure the feature wall and plan the board arrangement.
- Sand rough edges while preserving some natural texture.
- Attach the boards to a suitable support structure using appropriate fixings.
- Add a simple mantel if desired, ensuring it is securely mounted.
- Apply a suitable finish and allow it to cure.
DIY Tip
Avoid using unknown treated or painted reclaimed timber where it may be exposed to heat. Keep combustible wood outside the required clearances of a functional fireplace.
9. Cozy Faux Fireplace with LED Candles
Description
Create a warm fireplace-inspired corner with LED candles arranged inside a decorative fireplace opening. Different candle heights, a few artificial logs, and soft surrounding decorations give the space a cozy glow without using a real flame.

What It Is
A non-functional fireplace display designed to imitate the warm appearance of a traditional hearth. It works well in apartments, bedrooms, and living rooms without a working fireplace.
Supplies and Budget
You’ll need a faux fireplace surround or decorative frame, battery-operated LED candles, artificial logs, optional greenery, and a few decorative accessories. Budget around $20–$80.
Tutorial how to make:
- Prepare a clean, stable decorative fireplace opening.
- Arrange artificial logs or a decorative base at the bottom.
- Place LED candles at different heights using stable, non-combustible holders.
- Mix pillar candles with smaller LED tea lights for a layered appearance.
- Add a few seasonal decorations around the surround.
- Test the candle positions from different viewing angles and adjust the arrangement.
DIY Tip
Choose LED candles with realistic warm light and a timer function. Avoid real candles inside a decorative faux fireplace, especially when artificial greenery or other flammable materials are nearby.
10. DIY Fireplace Hearth Makeover
Description
Refresh the area in front of your fireplace with a more attractive hearth finish. Depending on the existing construction, suitable tile, stone, or another approved non-combustible material can make the space feel cleaner and more intentional.

What It Is
A makeover of the floor-level platform in front of a fireplace. The hearth protects the surrounding floor and must meet the requirements for the particular appliance and fuel type.
Supplies and Budget
You’ll need a suitable hearth material, compatible mortar or adhesive, measuring tools, tile spacers if applicable, grout, and safety equipment. Budget around $50–$180.
Tutorial how to make:
- Check the fireplace manual and local building requirements for hearth dimensions and material ratings.
- Inspect the existing hearth for cracks, movement, or moisture damage.
- Measure the surface and plan the material layout.
- Prepare the base according to the installation system.
- Install the selected non-combustible finish using compatible materials.
- Complete the joints and edges carefully.
- Allow the installation to cure before using the fireplace.
DIY Tip
Don’t reduce the hearth size or cover an existing safety feature just to achieve a particular look. If the current hearth is damaged or its construction is uncertain, get professional advice before making changes.
11. DIY Fireplace Mantel Decor with Handmade Accessories
Description
Refresh your fireplace without construction by making a few handmade decorations for the mantel. A combination of framed art, small vases, seasonal greenery, and DIY candle holders can give an ordinary fireplace a personal and welcoming appearance.

What It Is
A decorative styling project using handmade accessories arranged across an existing mantel. It is one of the easiest ways to update a living room for different seasons.
Supplies and Budget
Gather small frames, decorative paper, vases, faux greenery, LED candles, ribbon, and optional painted accessories. Budget around $15–$50.
Tutorial how to make:
- Clear the mantel and measure the available display area.
- Choose a simple color palette that works with the room.
- Create a focal point using a framed print, mirror, or handmade artwork.
- Arrange taller pieces near the center or one side, then balance them with smaller accessories.
- Add greenery and LED candles to introduce texture and warm light.
- Step back and adjust the arrangement until it feels balanced without looking overcrowded.
DIY Tip
Use a mix of heights rather than lining up every object at the same level. Keep decorations away from hot surfaces and follow the fireplace’s required clearance distances.
12. DIY Fireplace Feature Wall with Built-In Shelves
Description
Turn a plain living room wall into a complete focal point with a fireplace feature and simple built-in shelves. The combination provides space for books and decorations while making the fireplace area feel more connected to the rest of the room.
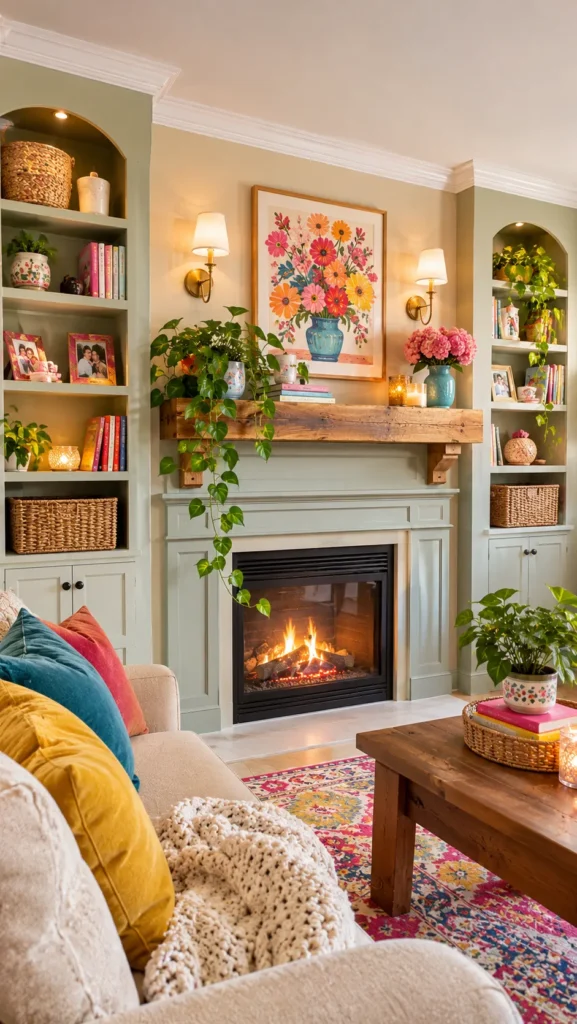
What It Is
A custom-looking wall arrangement with a central fireplace feature and shelving on one or both sides. It can be designed around a faux fireplace or a compatible electric insert.
Supplies and Budget
You’ll need framing materials or ready-made shelving, plywood or MDF panels, screws, wall fixings, paint, a level, and optional trim. Budget around $100–$350, depending on the size and design.
Tutorial how to make:
- Measure the full wall and decide how much space the fireplace and shelves will occupy.
- Sketch the layout, allowing enough room for doors, windows, and existing furniture.
- Build or install the central fireplace surround using suitable materials.
- Assemble the side shelves and secure them to the wall with appropriate fixings.
- Add decorative panels or trim to create a consistent finish.
- Fill gaps, sand, prime, and paint the entire feature wall.
- Style the shelves with books, framed photos, plants, and a few decorative objects.
DIY Tip
Plan the shelf depth around the items you actually want to store. Also, keep combustible shelves and decorations outside the required clearance zones of any working fireplace or electric appliance.
FAQ SECTION
Can I build a DIY fireplace without a chimney?
Yes. You can create a decorative faux fireplace using wood, MDF, or other suitable materials. You can also install an electric fireplace designed for your room, provided its electrical and installation requirements are followed.
What is the easiest DIY fireplace makeover?
Painting an existing brick surround or updating the mantel decor is often easier than building a new structure. Both projects can make a noticeable difference without major construction.
How much does a DIY fireplace project cost?
Small decorative updates may cost around $20–$80, while larger projects involving tile, stone veneer, or built-in shelving can cost several hundred dollars. The final price depends on materials, dimensions, and whether professional work is needed.
Can I use regular paint on a fireplace?
Not necessarily. The correct coating depends on the surface and its exposure to heat. Use products specifically approved for the material and location, and never paint inside a firebox unless the fireplace manufacturer explicitly allows it.
Are DIY faux fireplaces safe?
They can be safe when built securely and used only for decoration. Keep them stable, avoid real flames, and do not block electrical outlets, ventilation, or access routes.
What materials should I avoid near a working fireplace?
Avoid placing untreated wood, ordinary fabric, paper decorations, plastic, and other combustible materials inside required clearance zones. Follow the appliance instructions and local fire-safety requirements.
RELATED CONTENT
CLOSING
A fireplace doesn’t have to be expensive or complicated to become the heart of your living room. Sometimes a fresh coat of paint, a handmade mantel, or a few thoughtfully chosen decorations are enough to make the whole space feel different. If you’re ready for a bigger project, a faux fireplace or built-in feature wall can also give your home a completely new look.
Start with an idea that suits your space, budget, and DIY experience, and take the time to prepare your materials properly. Most importantly, remember that any project near a working fireplace needs to respect its safety and heat-clearance requirements. I’d love to hear which idea inspires you most and see how you make it your own. Happy DIY decorating!