12 Unique Kitchen Backsplash Ideas for a Kitchen Full of Personality

unique kitchen backsplash ideas
A kitchen backsplash can do much more than protect the wall behind your counters. The right material, color, pattern, and installation can change how the entire kitchen feels, especially when the backsplash is treated as a design feature rather than an afterthought.
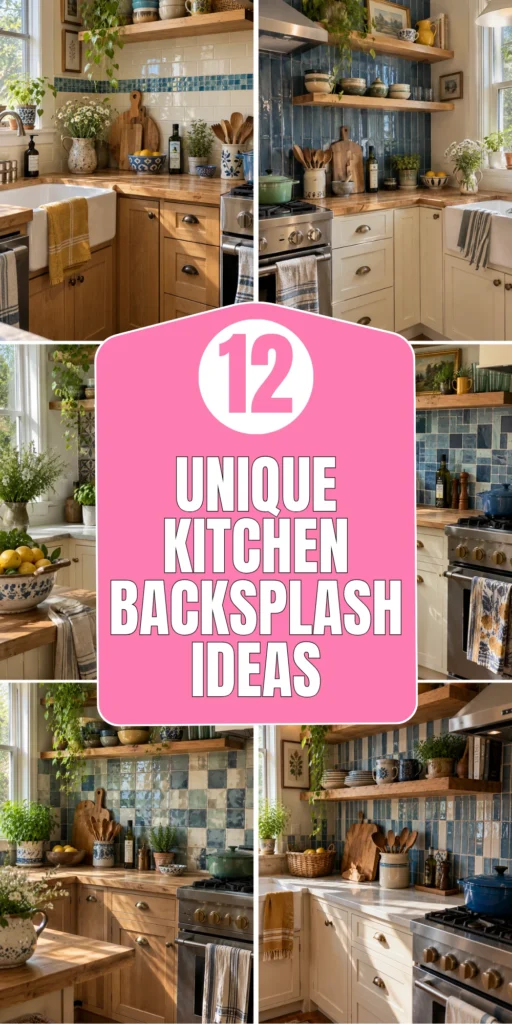
These unique kitchen backsplash ideas focus on combinations that feel personal, practical, and achievable, from colorful glass tile arrangements to rustic materials and unexpected layouts.
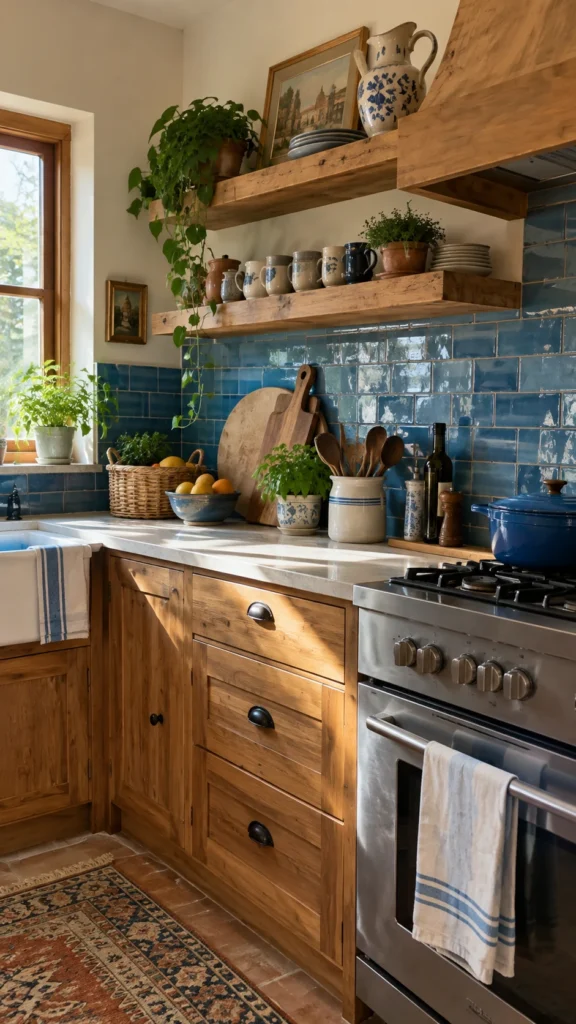
1. Rustic Blue Glass Tile With Warm Wood
Description
Blue glass tile becomes especially inviting when paired with warm natural wood rather than a completely white kitchen. Choose slightly varied blue tones to create depth without making the wall look overly busy. In practice, glossy glass reflects daylight beautifully, but very dark grout can emphasize every individual tile, so a softer grout color usually creates a more relaxed rustic effect.
What You’ll Need:
- Blue glass tiles in 2–3 related shades
- Warm wood cabinetry or shelving
- Flexible tile adhesive
- Coordinating grout
- Tile spacers and sealer
Quick How-To:
Plan the tile layout before installation, then mix the blue shades instead of placing each color in a strict pattern. Install from the most visible countertop section outward, keeping grout lines consistent.
Styling Tip:
Add wooden cutting boards, woven baskets, and aged brass hardware to soften the reflective glass.
2. Hand-Painted Blue-and-Brown Backsplash
Description
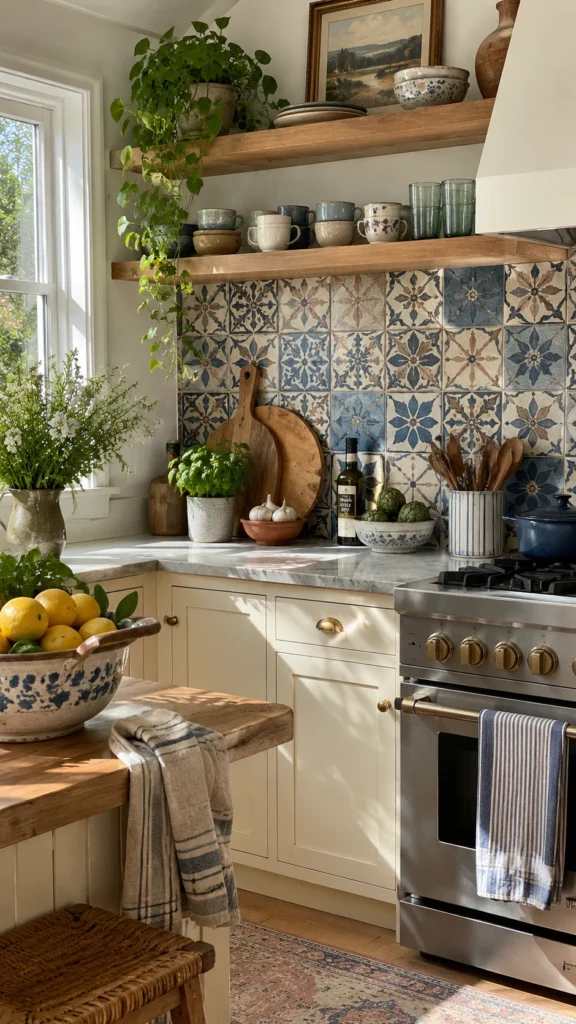
Blue and brown can create a surprisingly sophisticated backsplash when the colors are slightly muted rather than extremely saturated. Look for handmade or hand-painted tiles with small variations in tone. Those imperfections make the installation feel collected over time. Keep surrounding cabinets simple so the backsplash remains the visual feature instead of competing with it.
What You’ll Need:
- Blue-and-brown decorative tiles
- Neutral field tiles
- Tile adhesive and grout
- Level and spacers
- Sealing product if required
Quick How-To:
Use the decorative tiles primarily behind the range or sink, then transition into simpler tiles around the remaining counter. Dry-lay everything first to prevent awkward color clusters.
Styling Tip:
Repeat the brown tones through wooden utensils, leather accents, or natural stone accessories.
3. Vertical Blue Tile For Extra Height
Description
Installing rectangular blue tiles vertically is a simple way to make a kitchen wall appear taller. This works particularly well when upper cabinets are limited or when you want the backsplash to visually connect the countertop with the ceiling. Avoid extremely narrow tiles, however, because too many grout lines can make a small kitchen feel visually fragmented.
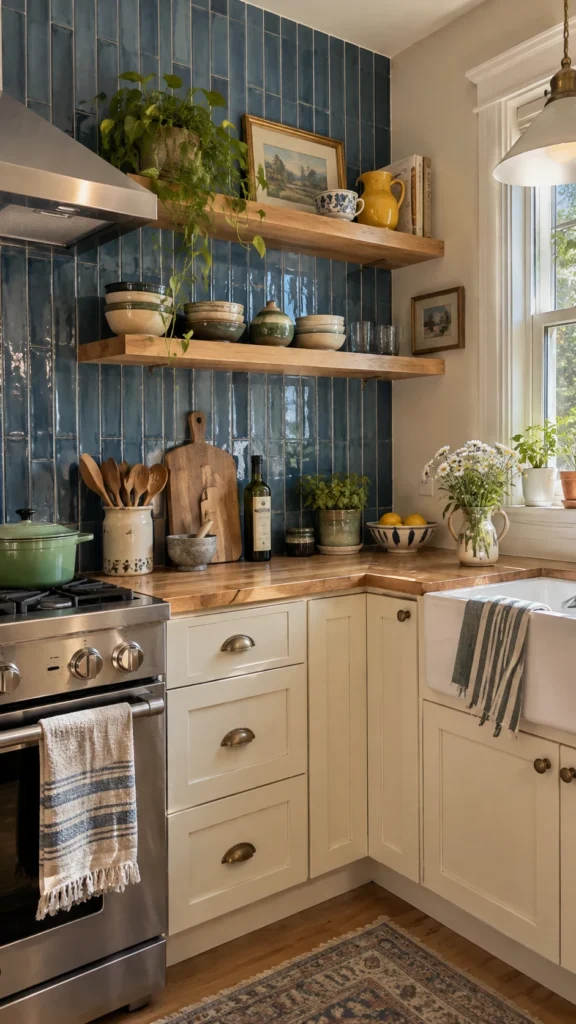
What You’ll Need:
- Rectangular blue ceramic or glass tiles
- Tile adhesive
- Matching grout
- Spacers
- Level and tile cutter
Quick How-To:
Mark a perfectly level starting line above the countertop. Stack the tiles vertically with consistent spacing, checking every few rows because small alignment errors become obvious in a vertical layout.
Styling Tip:
Choose simple pendant lighting and open shelving so the vertical pattern remains easy to see.
4. Blue Rustic Glass Backsplash With Open Shelves
Description
A rustic blue glass backsplash can look fresh rather than farmhouse-heavy when combined with open wooden shelving. The glass provides a cleanable surface behind busy preparation areas, while unfinished or lightly finished wood introduces warmth. One common mistake is installing shelves too close to the backsplash, which makes cleaning difficult and visually crowds the wall.
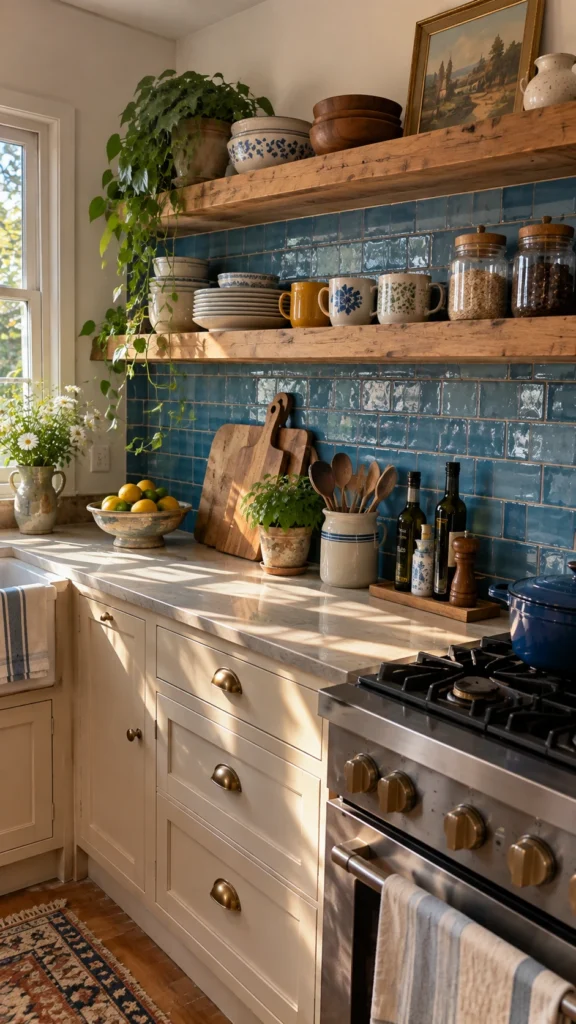
What You’ll Need:
- Rustic blue glass tiles
- Two or three wooden shelves
- Heavy-duty shelf brackets
- Tile adhesive and grout
- Measuring and leveling tools
Quick How-To:
Finish the backsplash completely before installing the shelves. Position shelves where they will not interfere with cabinet doors, appliances, or normal countertop work.
Styling Tip:
Display everyday ceramics, small plants, and wooden bowls rather than filling every shelf with decorative objects.
5. Mixed-Size Blue Tile Mosaic
Description
For a backsplash that feels custom, combine several sizes of the same blue tile family. The trick is keeping the color palette narrow while allowing the shapes or dimensions to vary. Mixing too many colors and tile sizes can quickly look chaotic. A controlled palette gives you the handmade mosaic effect while maintaining enough visual order for everyday kitchens.
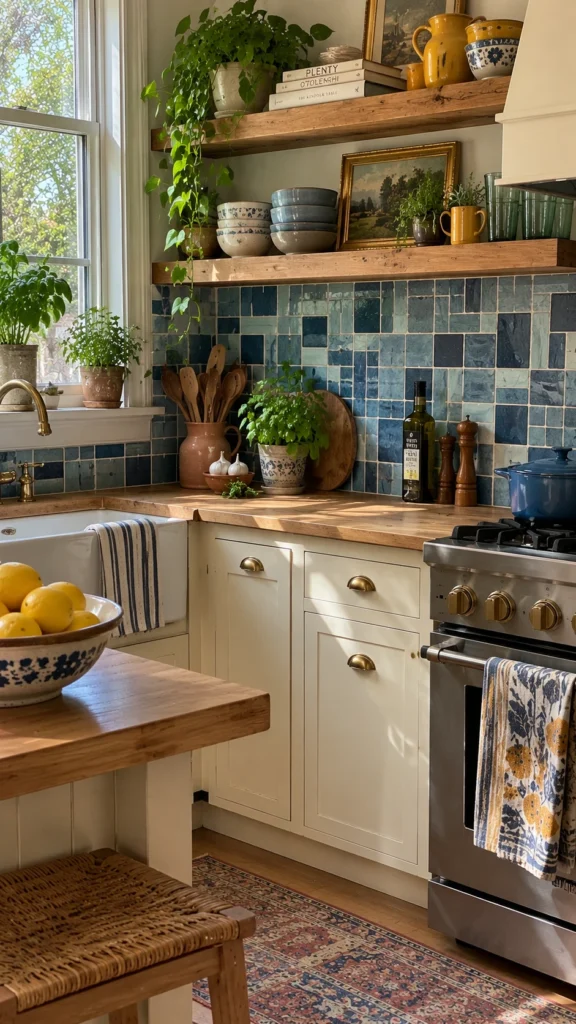
What You’ll Need:
- Small and medium blue tiles
- One coordinating neutral tile
- Mosaic adhesive
- Grout
- Tile nippers and spacers
Quick How-To:
Create a sample arrangement on the floor first. Repeat the basic composition across the wall rather than randomly placing pieces as you work.
Styling Tip:
Use neutral countertops and cabinetry to give the varied tile layout enough breathing room.
6. Soft Japanese-Inspired Backsplash
Description
A Japanese-inspired backsplash works best when simplicity, texture, and natural materials take priority. Choose softly textured tiles in warm white, beige, muted blue, or earthy gray rather than glossy statement pieces. The goal is subtle variation that becomes noticeable when light moves across the surface. Avoid excessive accessories, because visual clutter quickly defeats the calm quality of the design.
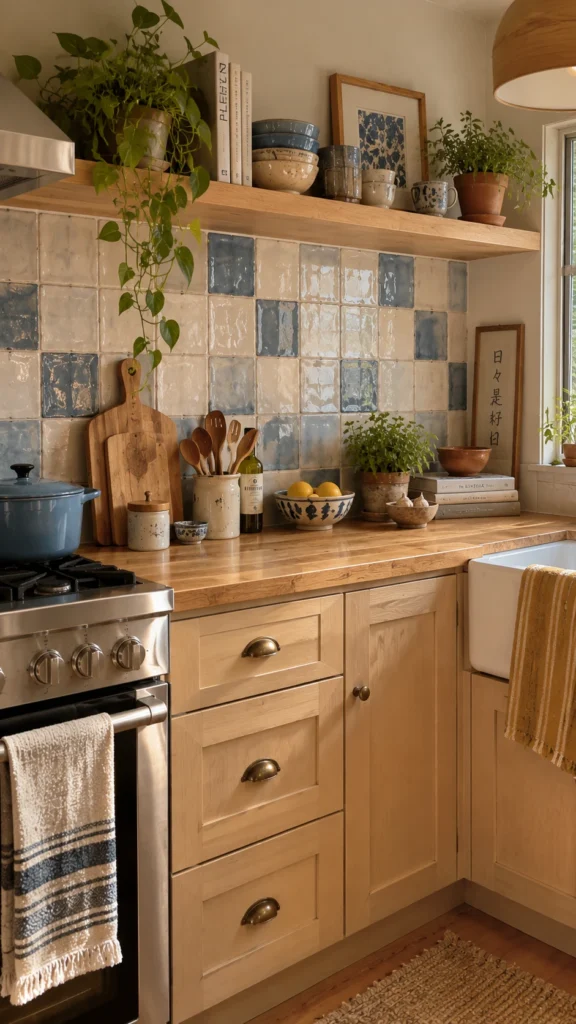
What You’ll Need:
- Handmade-look ceramic tiles
- Warm neutral grout
- Natural wood shelf or trim
- Tile adhesive
- Level and spacers
Quick How-To:
Select one tile shape and let texture provide most of the variation. Install it in a simple stacked or offset arrangement with carefully aligned edges.
Styling Tip:
Pair the backsplash with pale wood, simple ceramics, linen textiles, and restrained countertop styling.
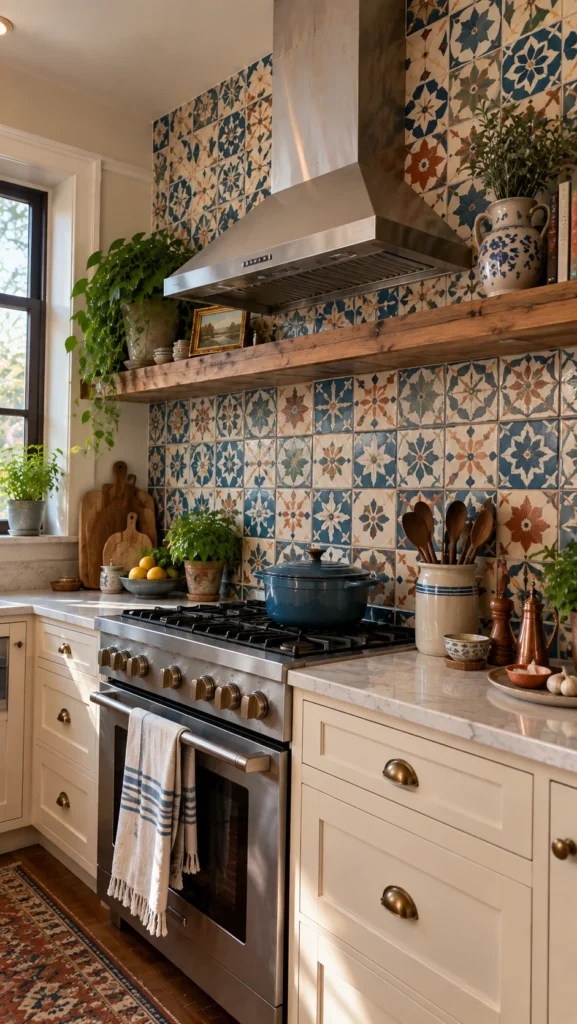
7. Floor-to-Ceiling Statement Tile
Description
Taking the backsplash beyond the normal countertop height can make an ordinary kitchen feel intentionally designed. Extending colorful tile to the ceiling works especially well behind a range or on a wall with open shelving. Before committing, check outlet positions, cabinet dimensions, and appliance clearances. Stopping randomly at different heights can make the installation appear unfinished.
What You’ll Need:
- Statement ceramic or porcelain tile
- Matching trim pieces
- Tile adhesive and grout
- Wet saw or tile cutter
- Level and measuring tools
Quick How-To:
Map the entire wall before ordering materials. Decide exactly where the tile will stop, including around outlets, cabinets, and windows.
Styling Tip:
Use fewer wall decorations so the extended tile can function as the kitchen’s main architectural feature.
8. Handmade Zellige-Style Color Variation
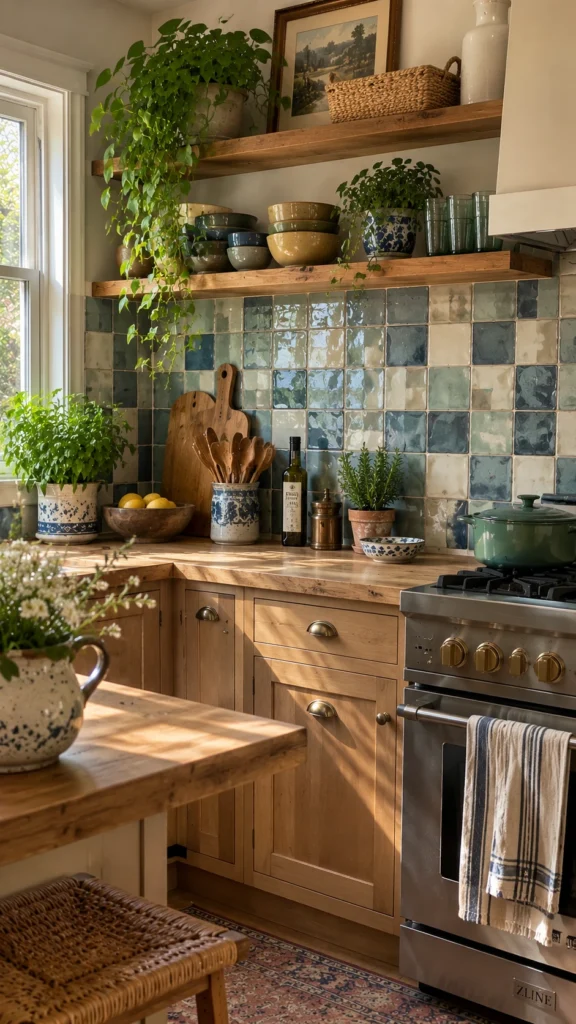
Description
Irregular handmade-look tiles bring character because their uneven surfaces catch light differently throughout the day. Soft blue, cream, sage, or sandy shades work particularly well in kitchens where you want warmth without heavy pattern. The biggest practical consideration is grout: extremely contrasting grout can exaggerate irregular edges, while a closely matched shade creates a more cohesive handmade finish.
What You’ll Need:
- Handmade or zellige-style tiles
- Tile adhesive
- Coordinating grout
- Tile spacers if recommended
- Sealer appropriate for the material
Quick How-To:
Blend tiles from different boxes during installation so color variations distribute naturally. Do not force every edge into perfect visual uniformity.
Styling Tip:
Combine the backsplash with unlacquered-looking metal, wood, stone, and simple ceramic accessories.
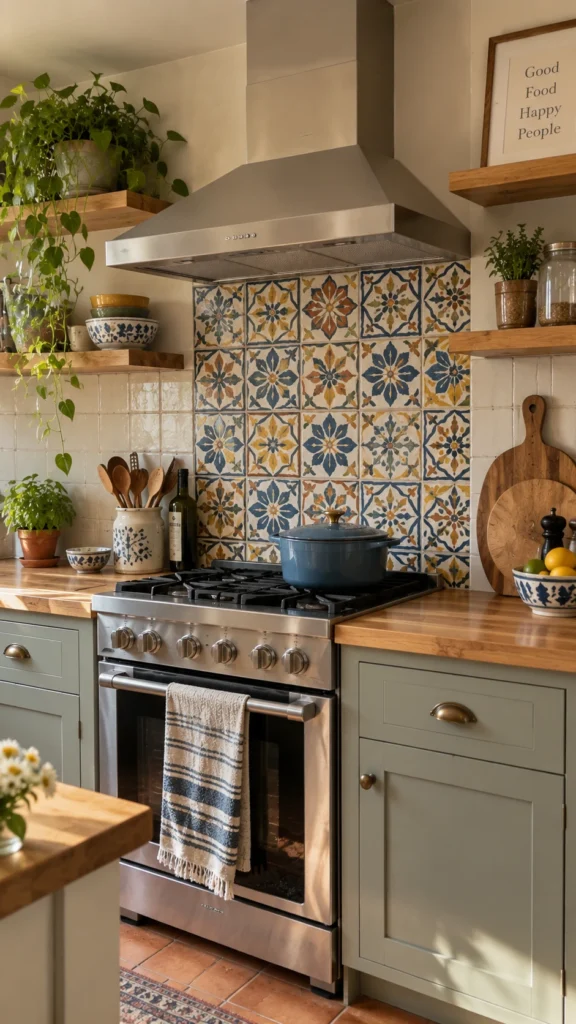
9. Patterned Tile Behind the Range Only
Description
You do not need to cover every kitchen wall with an elaborate pattern. A concentrated patterned backsplash behind the range creates a focal point while keeping the rest of the kitchen calmer. This approach is especially useful when you love colorful tile but worry about visual overload. Use a simpler coordinating tile on surrounding walls to make the feature area feel intentional.
What You’ll Need:
- Patterned ceramic tiles
- Coordinating plain tiles
- Adhesive and grout
- Range-wall measurements
- Tile cutting tools
Quick How-To:
Center the pattern on the range or cooking zone. Mark the centerline carefully before installing, particularly if the pattern has geometric details that must remain symmetrical.
Styling Tip:
Repeat one color from the patterned tile in towels, cookware, or a small countertop accessory.
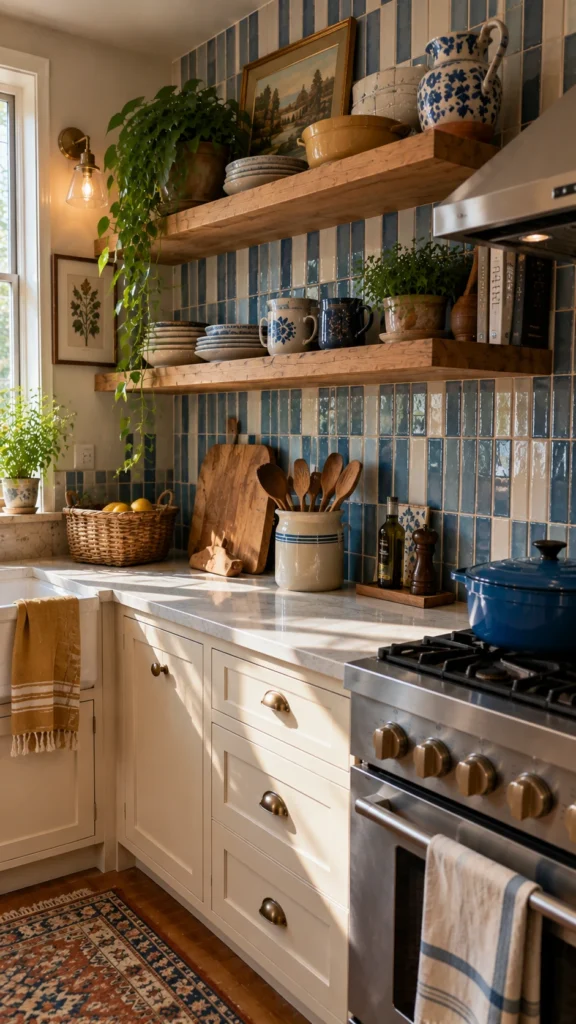
10. Narrow Tile Strips With Contrasting Grout
Description
Thin rectangular tiles can create a graphic backsplash without relying on large decorative patterns. Use a restrained tile color and let the grout provide the contrast. This technique works particularly well in modern-rustic kitchens because it adds structure without feeling overly polished. Choose a grout that is practical for cooking areas and test the combination before committing to the entire wall.
What You’ll Need:
- Narrow rectangular tiles
- Contrasting but coordinated grout
- Tile adhesive
- Spacers
- Level and tile cutter
Quick How-To:
Install a small test section first to judge how strong the grout contrast looks under your kitchen lighting. Continue only after confirming the spacing and color balance.
Styling Tip:
Keep cabinet fronts relatively simple and use natural accessories to prevent the lines from becoming too stark.
11. Stone-and-Tile Combination Backsplash
Description
Combining stone with tile can create a backsplash that feels layered and custom rather than like a single-material installation. Use stone around the cooking zone and smaller tiles elsewhere, or reverse the arrangement for a more subtle effect. The materials should share at least one undertone. Mixing unrelated warm and cool tones is a common mistake that can make the kitchen feel visually disconnected.
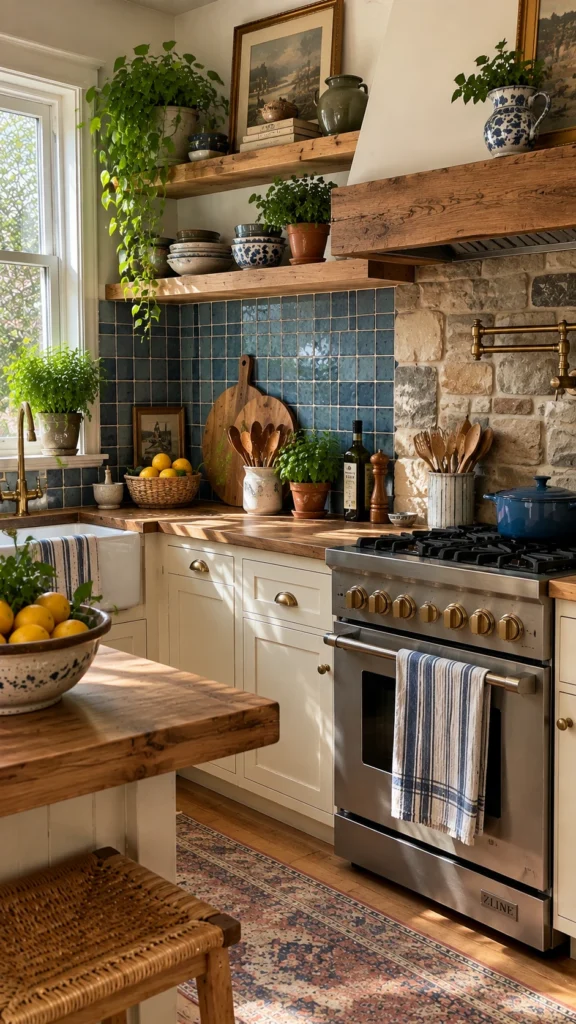
What You’ll Need:
- Natural or engineered stone slab/tile
- Coordinating ceramic tiles
- Appropriate adhesives
- Grout and stone sealer
- Measuring and cutting tools
Quick How-To:
Choose the dominant material first, then select the secondary tile from its undertones. Plan transitions carefully so the change occurs at a deliberate architectural point.
Styling Tip:
Echo the stone color in countertops or accessories to visually connect the different surfaces.
12. Colorful Glass Tile Border Detail
Description
A narrow border can make a simple backsplash feel custom without requiring a fully decorative installation. Start with a neutral tile field and introduce a colorful glass strip at countertop height, around a window, or behind the range. Keep the border narrow enough to act as an accent rather than another competing pattern, especially in kitchens that already contain colorful cabinetry.
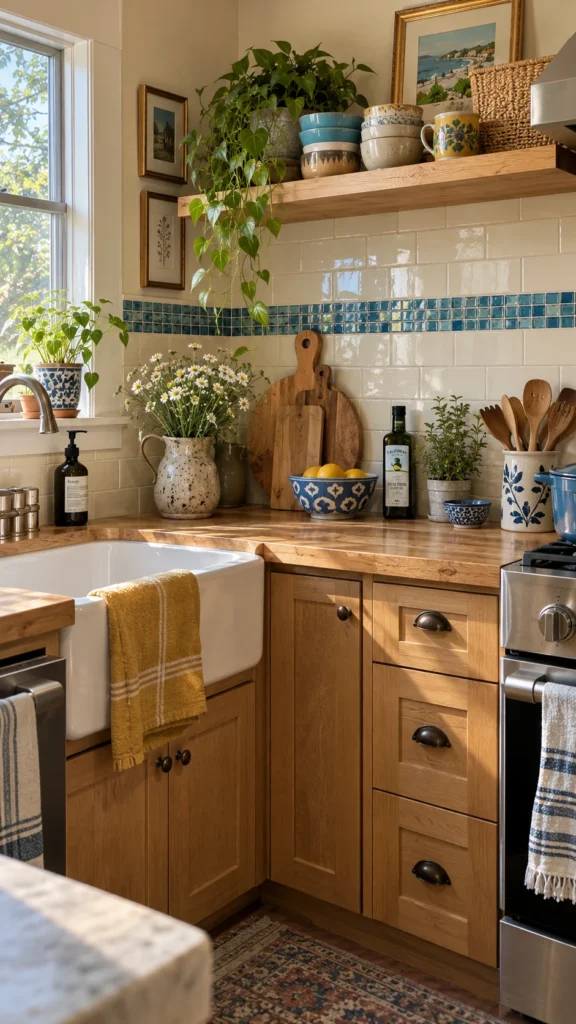
What You’ll Need:
- Neutral base tiles
- Colorful glass accent tiles
- Tile adhesive and grout
- Spacers
- Level and tile cutter
Quick How-To:
Mark the accent line across the entire installation before laying tile. Make sure the border aligns with nearby cabinet lines or architectural features instead of ending awkwardly.
Styling Tip:
Repeat the accent color in one or two small kitchen details for a polished, connected look.
FAQ SECTION
What backsplash color works best in a rustic kitchen?
Muted blue, warm cream, earthy green, brown, and soft gray are excellent choices. Natural wood and stone help these colors feel grounded rather than overly decorative.
Are glass backsplash tiles practical for everyday kitchens?
Yes. Glass is generally easy to wipe clean, making it useful behind sinks and cooking areas. However, fingerprints and water spots may be more visible on highly glossy finishes.
Should backsplash grout match the tile?
Not always. Matching grout creates a calmer, more seamless appearance, while contrasting grout emphasizes the tile shape. For handmade or irregular tiles, closely matched grout often looks more natural.
How high should a kitchen backsplash go?
A standard backsplash commonly covers the wall between the countertop and upper cabinets, but there is no universal rule. Extending tile higher can create a stronger architectural feature, particularly behind a range or open shelving.
Can blue backsplash tiles work with brown cabinets?
Absolutely. Blue and brown create a warm, balanced combination when their undertones work together. Medium or muted blues are particularly easy to pair with natural walnut, oak, or medium-brown cabinetry.
RELATED CONTENT
CLOSING
The best backsplash is not necessarily the most expensive or elaborate one. It is the one that fits how your kitchen is actually used while adding personality to the space. Whether you choose rustic blue glass, a handmade-look mosaic, a Japanese-inspired neutral tile, or a small colorful border, focus on materials and layouts that you will enjoy seeing every day.
Start with one wall, test your colors and grout together, and let the surrounding finishes guide your final choice. A thoughtful backsplash can make even a simple kitchen feel much more personal and finished. I hope these ideas inspire you to try something a little different in your own space—and if you do, enjoy the process and make it your own.