12 DIY Christmas Ornaments Easy Ideas for a Handmade Holiday

DIY Christmas Ornaments Easy
There is something special about decorating a Christmas tree with ornaments you have made yourself. They do not have to look perfect or cost a lot of money to make your home feel festive. A simple paper star, a cinnamon-scented ornament, or a tiny wreath made from leftover ribbon can become a decoration you look forward to bringing out every December. I especially love DIY Christmas ornaments because they give you a chance to experiment with colors, reuse craft supplies, and create little keepsakes with family and friends.
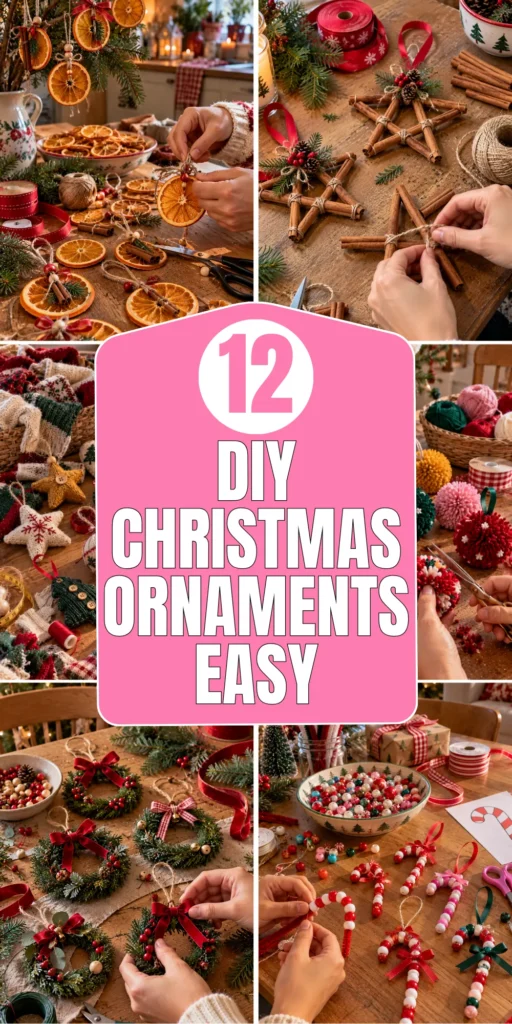
If you are searching for DIY Christmas ornaments easy enough for beginners, this collection includes projects that use accessible materials and straightforward techniques. You will find paper crafts, natural decorations, painted ornaments, and charming handmade designs that work with different Christmas decorating styles. I have also included practical tips for avoiding common crafting problems, from choosing the right glue to making sure your ornaments hang securely. Gather your supplies, put on your favorite holiday music, and enjoy creating decorations that feel personal and meaningful.
1. Rustic Cinnamon Stick Christmas Stars
Description
These rustic stars combine cinnamon sticks and natural twine to create simple ornaments with a warm, woodland-inspired look. They are inexpensive, beginner-friendly, and easy to customize with small bows, dried orange slices, or evergreen sprigs.
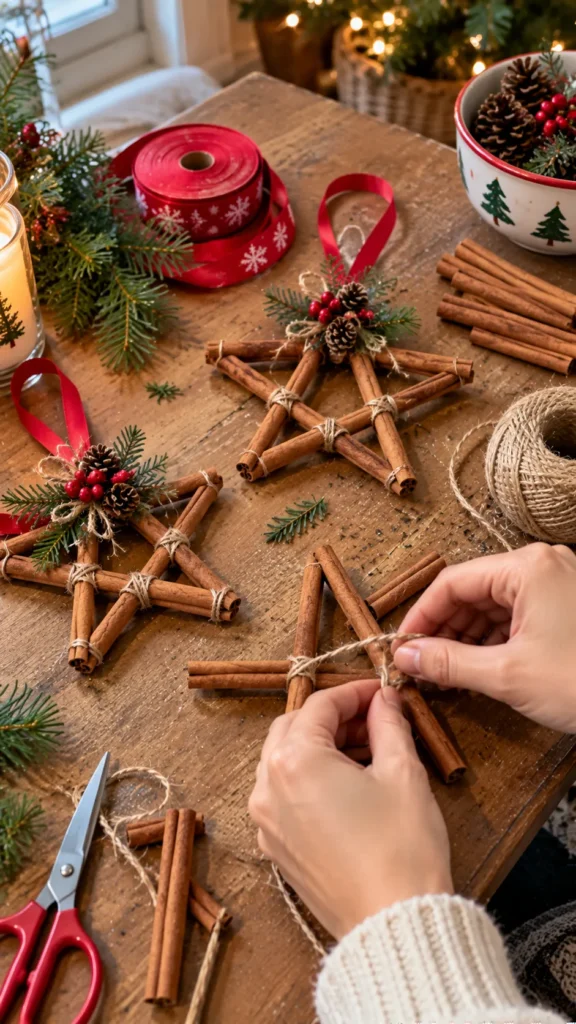
What It Is
A star-shaped ornament made by arranging cinnamon sticks into a simple five-point star and securing the joints with twine or craft glue.
Supplies and Budget
- Five cinnamon sticks per star
- Natural twine or thin jute cord
- Craft glue or a low-temperature glue gun
- Small ribbon pieces, optional
Estimated budget: $5–$10 for several ornaments, depending on the materials you already own.
Tutorial how to make:
- Arrange five cinnamon sticks into a five-point star on a flat surface.
- Adjust the sticks until the shape looks balanced, then secure each overlapping joint with twine or a small amount of suitable glue.
- Allow the glue to dry completely before lifting the ornament.
- Tie a small loop of twine around an upper point for hanging.
- Add a tiny ribbon bow if you prefer a more decorative finish.
DIY Tip
Make one complete star before cutting materials for a whole batch. Cinnamon sticks vary in thickness, so testing the arrangement first helps you avoid awkward gaps. Keep hot glue away from children and let it cool completely before handling.
2. Colorful Paper Christmas Baubles
Description
Turn colorful craft paper into lightweight baubles that bring a cheerful handmade touch to your Christmas tree. This project is ideal for using leftover paper scraps and experimenting with stripes, polka dots, and coordinated holiday color palettes.
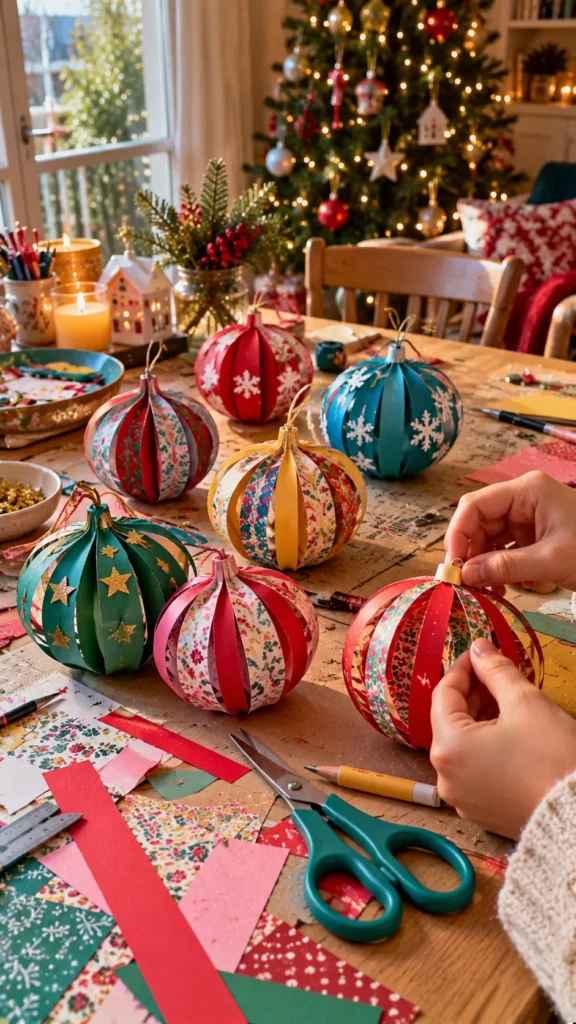
What It Is
A three-dimensional hanging ornament created by folding and joining paper strips into a rounded bauble shape.
Supplies and Budget
- Colored cardstock or sturdy craft paper
- Ruler and pencil
- Scissors
- Glue stick or double-sided tape
- Thread or thin ribbon
Estimated budget: $3–$8 for several ornaments.
Tutorial how to make:
- Cut six to eight equal paper strips for each bauble, keeping their lengths and widths consistent.
- Arrange the strips in a fan-like stack and secure one end.
- Gently curve the strips outward to form a rounded shape, then bring the opposite ends together and secure them.
- Add a thread loop at the top before closing the shape completely.
- Adjust the strips so the ornament hangs evenly and leave the adhesive to dry.
DIY Tip
Use cardstock that bends without cracking. Very thick paper can be difficult to curve, while thin paper may lose its shape. Test one bauble first to find the right balance.
3. Dried Orange Slice Christmas Ornaments
Description
Dried orange slices create beautiful translucent ornaments with warm amber tones and a natural citrus appearance. They work particularly well with rustic, Scandinavian, and traditional Christmas decorations, especially when paired with wooden beads and simple twine.
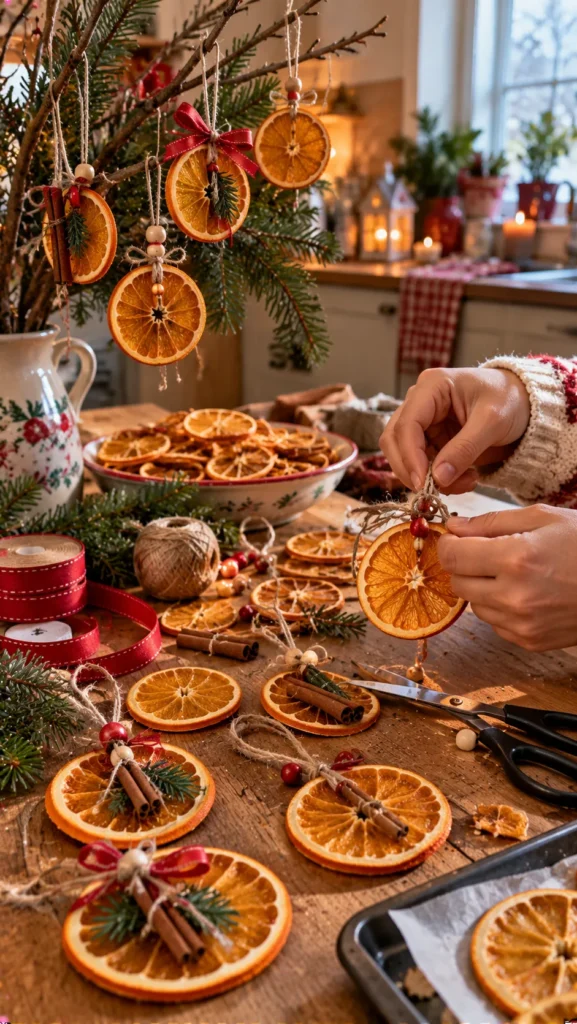
What It Is
A natural ornament made by drying thin orange slices and threading them with twine for hanging.
Supplies and Budget
- Two or three oranges
- Sharp knife and cutting board
- Baking tray and parchment paper
- Twine or narrow ribbon
- Optional cinnamon sticks or wooden beads
Estimated budget: $4–$9 for a small collection.
Tutorial how to make:
- Preheat the oven to approximately 200°F (95°C). Slice the oranges into even rounds about ¼ inch thick.
- Blot both sides with paper towels to remove excess juice.
- Place the slices on a parchment-lined tray and dry them slowly for several hours, turning them periodically. Exact timing depends on thickness and moisture.
- Remove the slices when they are dry and no longer noticeably wet in the center. Let them cool completely.
- Thread twine through a small opening near the edge or carefully secure a loop around the dried slice.
DIY Tip
Do not rush the drying process by raising the oven temperature too much, because the edges can brown before the centers dry. Store the ornaments in a dry place and discard any that develop mold.
4. Mini Felt Christmas Tree Ornaments
Description
These soft felt trees are easy to cut, decorate, and personalize with colorful buttons, tiny stitched stars, or simple embroidered details. They are lightweight, child-friendly when made with appropriate supervision, and ideal for using leftover felt from other craft projects.
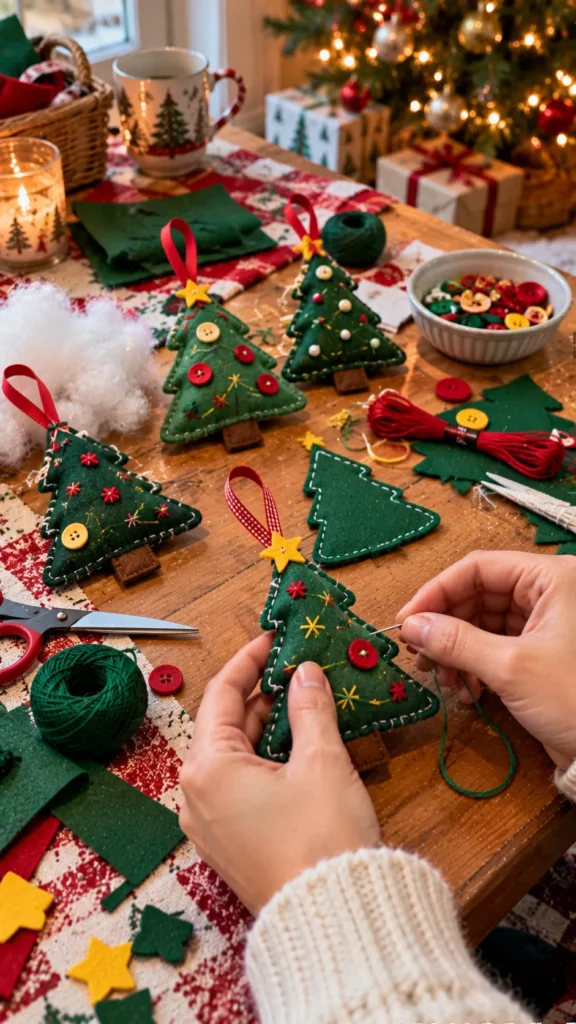
What It Is
A small Christmas tree made from two felt shapes joined together and lightly stuffed to create a soft ornament.
Supplies and Budget
- Green felt
- Scissors and pencil
- Needle and embroidery thread, or fabric glue
- Small felt scraps or suitable decorations
- A little polyester stuffing, optional
- Ribbon for hanging
Estimated budget: $5–$10 for several ornaments.
Tutorial how to make:
- Draw a simple tree silhouette on paper and use it as a template to cut two matching shapes from green felt.
- Decorate the front piece with stitched stars, small felt circles, or simple embroidery.
- Place the two pieces together and stitch around the edges, leaving a small opening.
- Add a little stuffing if desired, then close the opening and secure a ribbon loop at the top.
- Trim loose threads and check that the seam is secure before hanging.
DIY Tip
Avoid placing heavy decorations near the top of the tree, where they can distort the felt. If crafting with young children, use fabric glue and large, easy-to-handle decorations instead of small buttons that could pose a choking hazard.
5. Painted Wooden Slice Ornaments
Description
Wooden slices make charming ornaments because their natural grain adds texture to even the simplest painted design. Create tiny snowflakes, stars, trees, or colorful abstract patterns for a handmade look that suits rustic and modern Christmas decor.
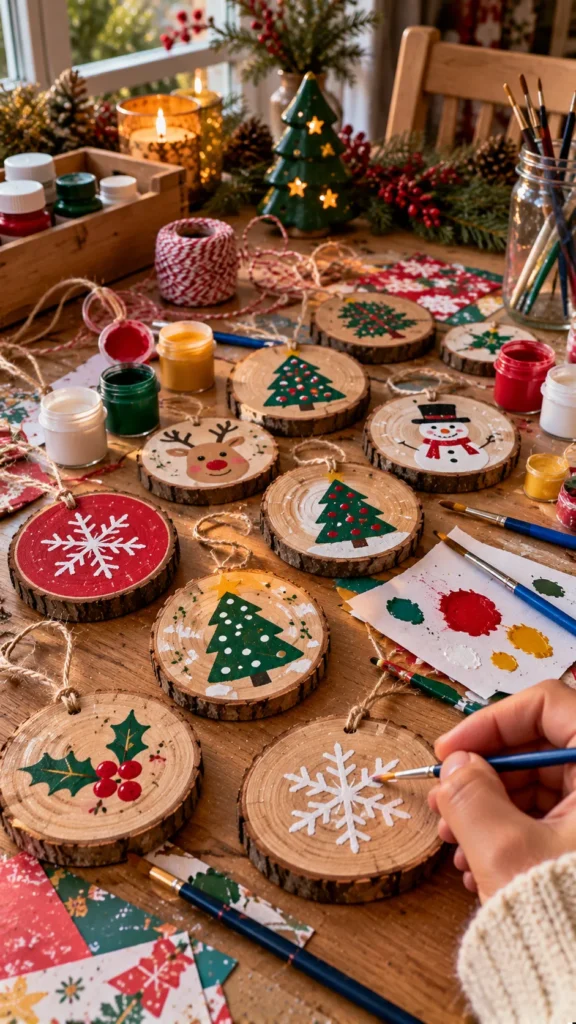
What It Is
A flat wooden ornament decorated with acrylic paint and finished with a hanging loop.
Supplies and Budget
- Pre-cut wooden slices with holes, or suitable craft wood
- Acrylic paints
- Small paintbrushes
- Pencil and optional stencil
- Twine or ribbon
- Optional clear craft sealer suitable for wood
Estimated budget: $6–$12 for several ornaments.
Tutorial how to make:
- Wipe the wooden slices with a dry cloth and check that the surfaces are smooth enough to paint.
- Sketch a simple design lightly with a pencil.
- Paint the main shapes first, then add smaller details once the base coat dries.
- Allow the paint to dry fully before adding an optional compatible sealer.
- Thread twine through the hole and tie a secure loop.
DIY Tip
Use thin layers of paint instead of one thick coat. Thick paint can obscure the wood grain and take longer to dry. If the slices have rough edges, sand them lightly before painting and wipe away the dust.
6. Beaded Candy Cane Ornaments
Description
Colorful bead candy canes are a playful project for beginners who enjoy simple threading crafts. Traditional red and white beads create a classic holiday look, while pink, turquoise, green, and gold offer a more modern and colorful finish.
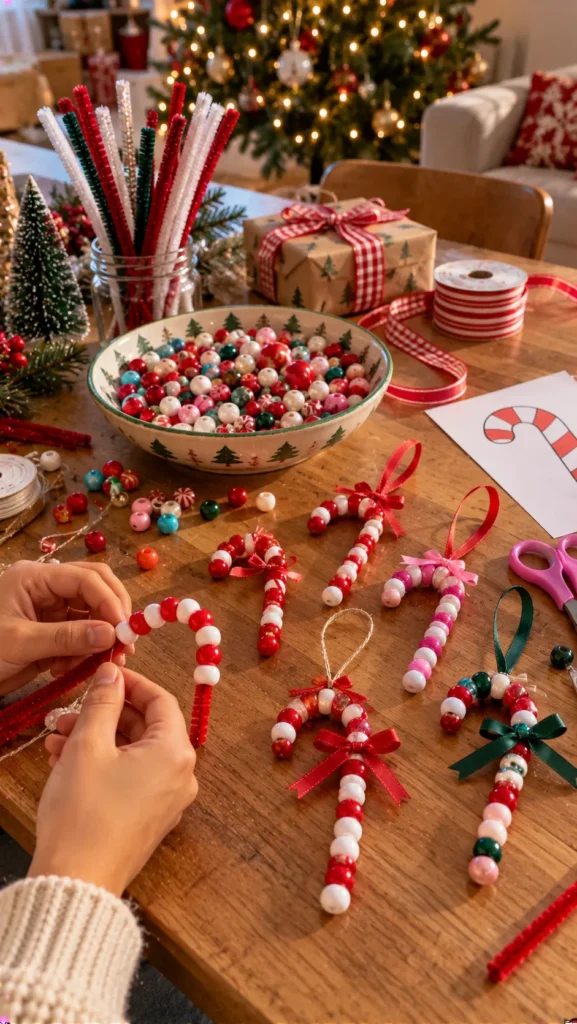
What It Is
A candy cane-shaped ornament made by threading beads onto a flexible craft stem or suitable bendable wire.
Supplies and Budget
- Red and white beads, or your chosen colors
- Flexible craft stems or suitable craft wire
- Wire cutters if using wire
- Small ribbon, optional
Estimated budget: $4–$8 for several ornaments.
Tutorial how to make:
- Cut a manageable length of flexible craft stem or wire, leaving enough room to secure both ends.
- Thread beads in alternating colors to create a striped pattern.
- Leave a short section at each end unfilled so the beads do not slip off.
- Secure the ends according to the material used, then bend the top into a candy cane hook.
- Add a small ribbon if desired and check that the ornament holds its shape.
DIY Tip
Choose beads with holes large enough for your stem or wire. Avoid sharp exposed wire ends, and supervise children carefully when using small beads or wire-cutting tools.
7. Handmade Salt Dough Christmas Ornaments
Description
Salt dough ornaments are an affordable way to make personalized stars, hearts, trees, and snowflakes at home. Once dried and decorated, they can become keepsakes marked with names, simple patterns, or the year they were made.

What It Is
A homemade dough ornament shaped with cookie cutters, dried thoroughly, and decorated with paint.
Supplies and Budget
- 2 cups all-purpose flour
- 1 cup salt
- Approximately ¾ cup water, added gradually
- Rolling pin and cookie cutters
- Straw or skewer for making holes
- Acrylic paint and ribbon
Estimated budget: $4–$9 for a batch.
Tutorial how to make:
- Mix the flour and salt, then add water gradually until a firm, workable dough forms.
- Knead until smooth, then roll it to approximately ¼ inch thick.
- Cut out shapes and make a hanging hole near the top of each one.
- Dry the shapes thoroughly in a low oven, around 200°F (95°C), or allow them to air-dry for several days. Drying time depends on thickness.
- Cool completely, decorate with paint, and thread ribbon through the holes.
DIY Tip
Make the holes slightly larger than you think you need because the dough can shrink during drying. These ornaments are decorative only and should not be eaten; keep them away from pets and small children who might put them in their mouths.
8. Mini Wreath Ornaments with Ribbon and Greenery
Description
Tiny wreaths made with flexible greenery and ribbon bring a traditional Christmas look to the tree. They are easy to customize with miniature bows, small bells, wooden beads, or a little red berry detail.
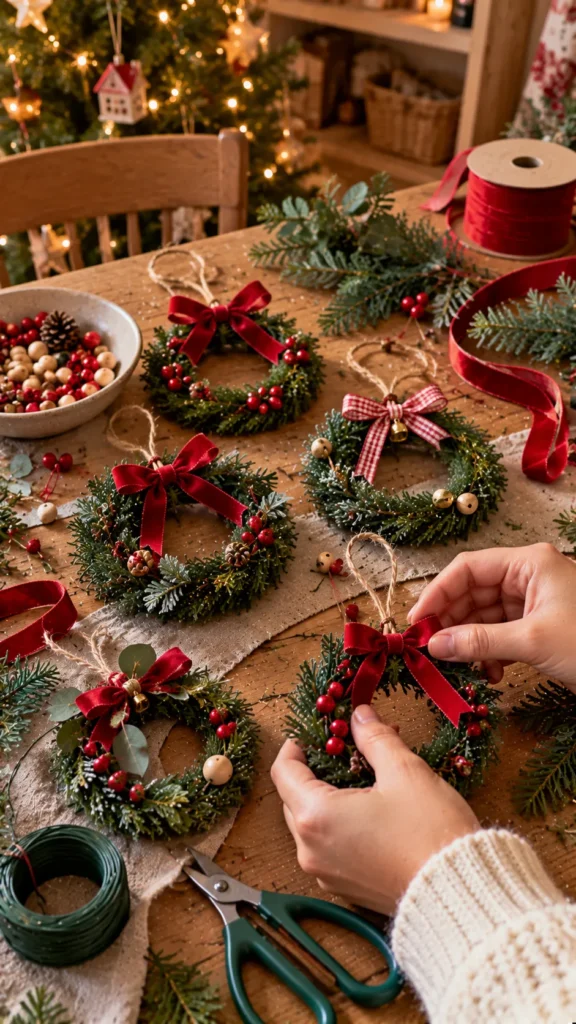
What It Is
A miniature circular wreath created by wrapping greenery or flexible craft material around a small ring.
Supplies and Budget
- Small craft rings or flexible wire
- Faux evergreen sprigs or suitable natural greenery
- Floral wire or craft glue
- Thin ribbon
- Optional miniature bells or wooden beads
Estimated budget: $5–$12 for several ornaments.
Tutorial how to make:
- Shape flexible wire into a small circle, or use a ready-made craft ring.
- Trim greenery into short pieces and arrange them around the ring.
- Secure the pieces with floral wire, overlapping them to hide the fastening points.
- Tie a small bow at the top or bottom, depending on the look you prefer.
- Attach a hanging loop and gently adjust the greenery so the wreath looks full without becoming bulky.
DIY Tip
Use small, lightweight decorations to keep the wreath from tilting. If using fresh greenery, make the ornaments shortly before decorating and store them away from heat to slow drying.
9. Upcycled Christmas Ornaments from Old Sweaters
Description
Give an old knitted sweater a second life by turning its fabric into cozy Christmas ornaments. The visible knit texture adds warmth, and small fabric scraps can be transformed into hearts, stars, or padded baubles with very little waste.
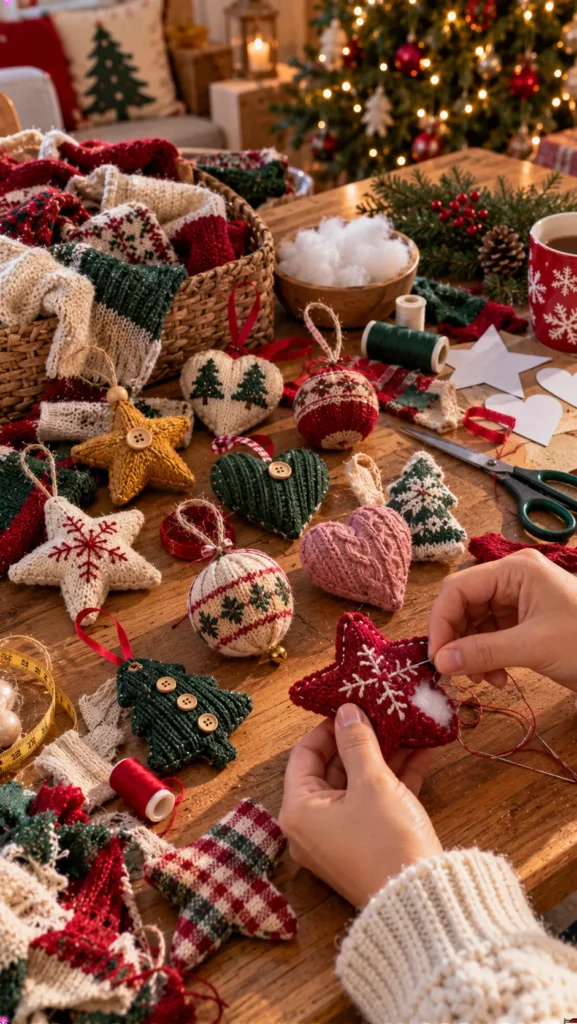
What It Is
A soft ornament made from clean, unwanted sweater fabric, cut into shapes and lightly stuffed.
Supplies and Budget
- A clean old sweater or knitted fabric scraps
- Paper template
- Scissors
- Needle and thread or fabric glue
- Small amount of stuffing
- Ribbon or twine
Estimated budget: $2–$7 if you already have a sweater.
Tutorial how to make:
- Wash and dry the sweater before cutting it.
- Draw a simple ornament shape on paper and cut two matching fabric pieces.
- Place the pieces together with the knit texture facing outward.
- Stitch or carefully glue around the edges, leaving a small opening for stuffing if needed.
- Close the opening, attach a ribbon loop, and trim loose threads.
DIY Tip
Choose a sweater with a relatively tight knit because loose stitches can unravel after cutting. If the fabric stretches too much, use a small amount of fabric interfacing or choose a more stable section of the garment.
10. Paper Straw Star Ornaments
Description
Paper straw stars are lightweight, colorful ornaments that are easy to make in batches. They look lovely in bright red, green, and white, but pastel shades or metallic paper straws can create a more playful or contemporary Christmas style.
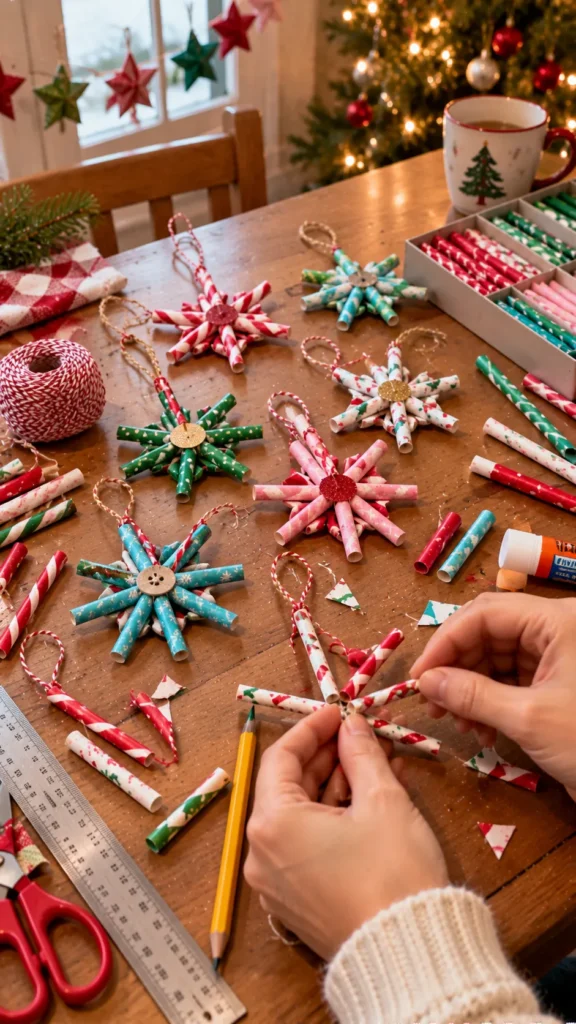
What It Is
A star-shaped ornament assembled from short paper straw pieces arranged into a symmetrical star pattern.
Supplies and Budget
- Paper straws in your chosen colors
- Scissors
- Craft glue
- Ruler
- Thread or ribbon for hanging
Estimated budget: $3–$8 for several stars.
Tutorial how to make:
- Cut the paper straws into equal lengths, making sure the ends are neat.
- Arrange the pieces into a star shape on a flat surface, checking that the points are evenly spaced.
- Glue the joints carefully and hold them in place until the adhesive begins to set.
- Let the star dry completely before attaching a hanging loop.
- Add a second color or a small paper circle in the center if you want extra detail.
DIY Tip
Make a paper template first so each star has the same proportions. Too much glue can soften paper straws or leave visible lumps, so apply small amounts and allow enough drying time.
11. Clear Baubles Filled with Colorful Confetti
Description
Transparent fillable baubles offer an easy way to create bright, personalized ornaments with paper confetti, tiny ribbons, or lightweight decorative pieces. Their clear shells allow the colors to stand out while keeping the materials contained.
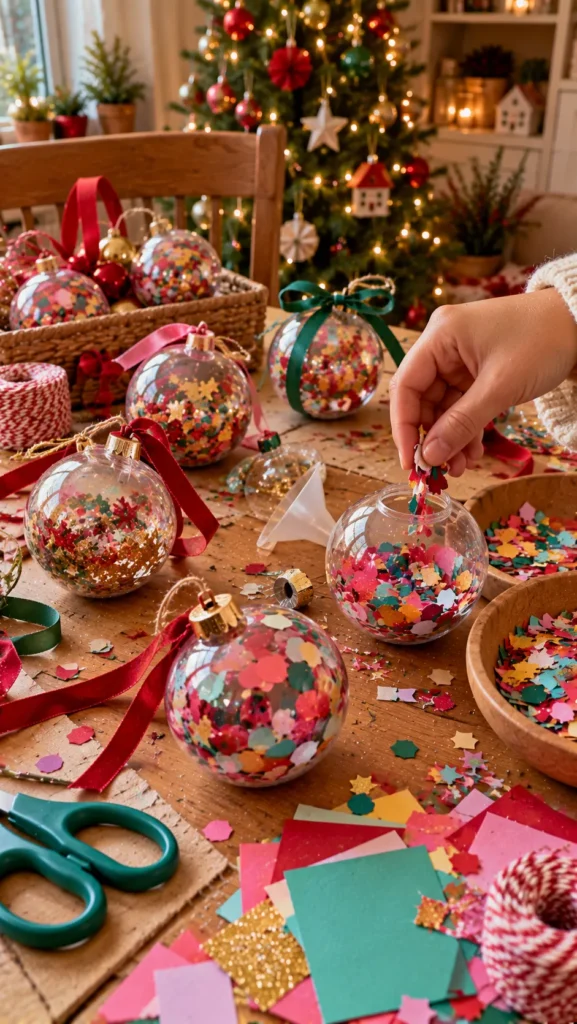
What It Is
A clear fillable ornament decorated from the inside with lightweight craft materials.
Supplies and Budget
- Clear fillable plastic baubles
- Paper confetti or small paper shapes
- Tweezers or a small funnel
- Ribbon
- Optional small pieces of tinsel or lightweight decorative filler
Estimated budget: $5–$12 for a small set.
Tutorial how to make:
- Open the fillable bauble carefully and check that the two halves fit securely.
- Add a small amount of confetti or lightweight filler using a funnel.
- Turn the ornament gently to distribute the contents without packing it too tightly.
- Close the bauble and check the seam.
- Attach a ribbon loop and hang it briefly from a sturdy hook to test that it stays closed.
DIY Tip
Use lightweight, dry filler and avoid liquids, food, or materials that could spoil inside the ornament. Plastic baubles are generally safer than glass for homes with young children or pets, but small parts should still be kept out of reach.
12. Pom-Pom Christmas Tree Ornaments
Description
Fluffy pom-pom ornaments add a soft, colorful touch to a Christmas tree and are an excellent way to use leftover yarn. Make them in one color for a simple look or combine several shades for playful decorations that feel handmade and cheerful.
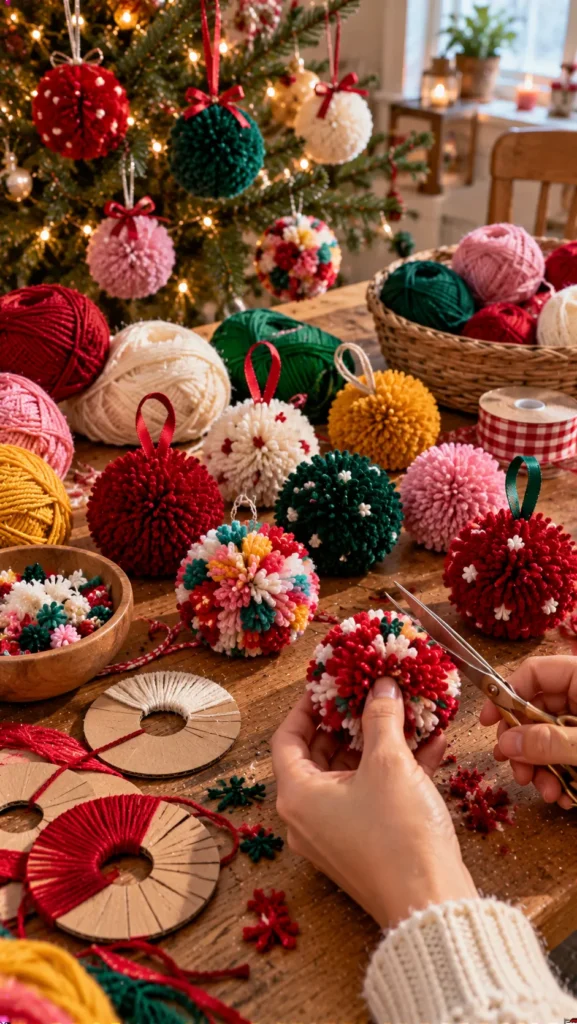
What It Is
A round ornament made from yarn pom-poms, with a secure thread loop for hanging.
Supplies and Budget
- Yarn in your favorite colors
- Pom-pom maker or cardboard circles
- Scissors
- Strong thread or yarn for tying
- Optional small ribbon
Estimated budget: $4–$10 for several ornaments.
Tutorial how to make:
- Wrap yarn around a pom-pom maker or two cardboard circles until the shape looks full.
- Tie a separate piece of yarn tightly around the center before removing the cardboard or opening the maker.
- Cut through the loops and fluff the pom-pom.
- Trim uneven strands gradually until the shape is round, keeping the center tie secure.
- Use the center tie to attach a hanging loop, then gently tug the yarn to check that it holds.
DIY Tip
Trim in small amounts rather than cutting the pom-pom into shape all at once. Use tightly spun yarn for a neater result, and avoid hanging loose fibers where curious pets could chew or swallow them.
FAQ SECTION
What are the easiest DIY Christmas ornaments for beginners?
Paper baubles, dried orange slices, wooden slice ornaments, and beaded candy canes are good starting points. They require relatively few supplies and allow you to practice simple cutting, threading, or decorating techniques.
How can I make homemade Christmas ornaments on a budget?
Reuse materials you already have, such as old sweaters, leftover yarn, paper scraps, cardboard, and ribbon. Natural materials like pinecones and fallen twigs can also be useful when collected responsibly and prepared properly.
How do I make DIY ornaments last for several Christmas seasons?
Let paint and glue dry completely, use suitable finishes where appropriate, and store ornaments in a cool, dry place. Wrap delicate pieces individually and keep natural ornaments dry to reduce the risk of mold or deterioration.
Which homemade ornaments are safest for children?
Paper decorations and larger felt ornaments are good options when made with age-appropriate materials. Supervise children when using scissors, hot glue, wire, small beads, or other choking hazards, and avoid sharp or breakable components.
Can I use homemade ornaments outdoors?
Some ornaments can be used outdoors if their materials are designed for exposure to moisture and temperature changes. Paper, untreated dough, yarn, and many natural decorations are better suited to indoor use unless appropriately protected.
How can I make homemade ornaments look coordinated?
Choose a small color palette, such as red and cream, green and gold, or pink and turquoise. Repeat those colors across different ornament styles and mix materials such as paper, wood, felt, and ribbon to create texture without making the tree feel chaotic.
RELATED CONTENT
CLOSING
Making your own Christmas ornaments is a lovely way to slow down and enjoy the creative side of the holiday season. You can turn inexpensive craft supplies into meaningful decorations, reuse materials that might otherwise be discarded, and create keepsakes that become part of your family’s Christmas traditions.
You do not have to make all twelve projects. Choose one or two that match your skill level and the materials you already have, then experiment with your favorite colors and details. Remember that handmade ornaments do not need to be perfectly symmetrical to be beautiful; those little differences are often what make them special.
I hope these DIY Christmas ornaments easy ideas inspire you to set aside a little crafting time and create something you will be excited to hang on your tree. Have fun with the process, make each project your own, and share your finished ornaments with friends and family. I would love to see which handmade design becomes your new holiday favorite!