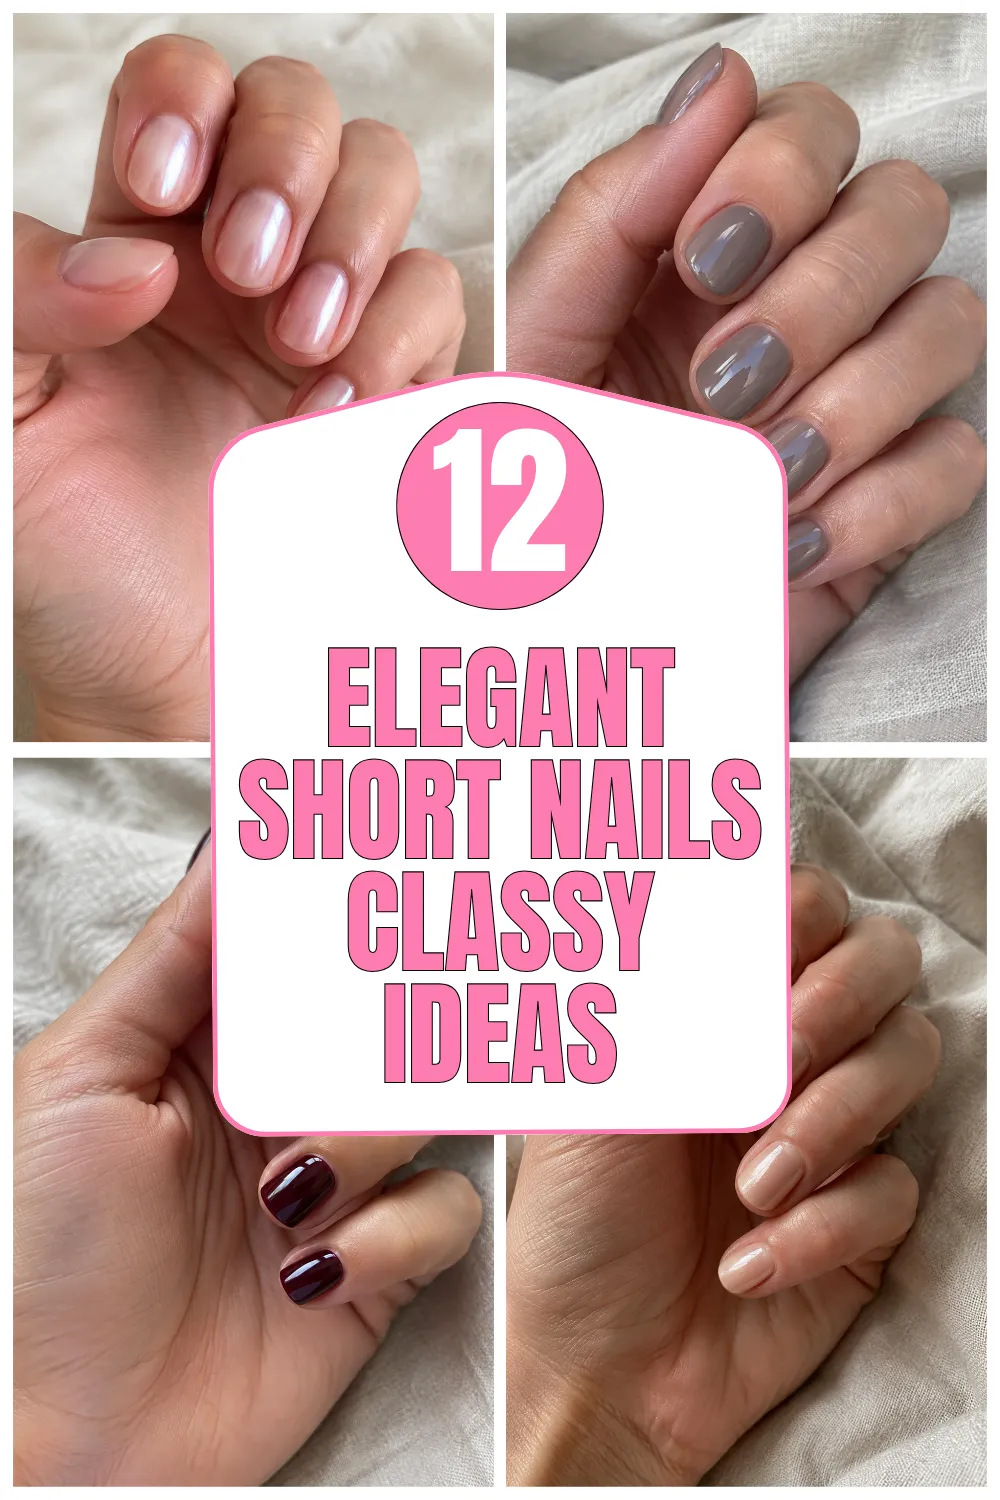
12 Basic Gel Nails That Look Clean and Elegant
Basic Gel Nails
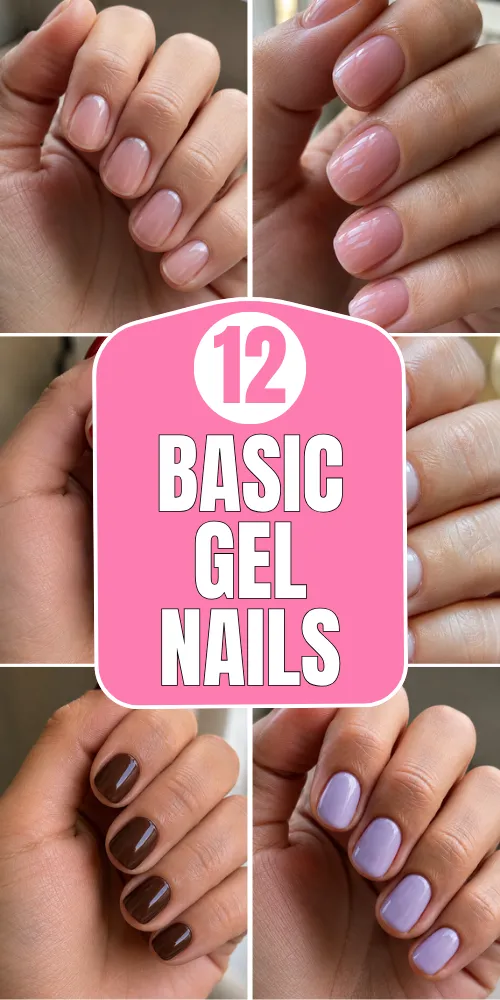
Whether you are new to gel manicures or simply prefer nails that look polished without complicated designs, basic gel nails can be surprisingly versatile. The key is choosing clean shapes, wearable colors, and small details that make a simple manicure look intentional. These ideas focus on practical designs that work well on short, natural nails as well as extensions.
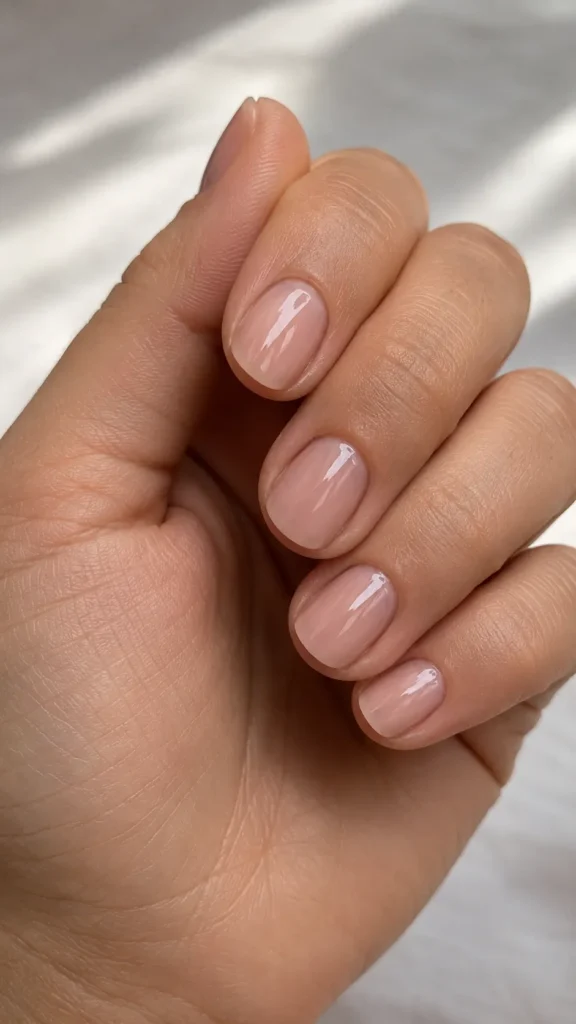
1. Soft Nude Rounded Gel Nails
Description
A soft nude gel manicure is one of the easiest styles to wear every day. Choose a shade close to your natural skin tone, then keep the nails short and softly rounded. The most important detail is an even application around the cuticle because nude polish makes uneven edges especially noticeable. A thin, glossy top coat gives the manicure a clean finish without making it look overly styled.
How-To
Prep and lightly buff the nails, apply a thin base coat, then add two very thin layers of nude gel. Cure each layer according to the product instructions. Finish with a glossy top coat and carefully seal the free edge.
Tips
Choose a nude with a slightly pink or beige undertone that complements your skin. Avoid applying thick gel near the cuticle because it can flood the skin and shorten the manicure’s wear time.
Items Used
Nude gel polish, base coat, glossy top coat, nail file, buffer, cuticle pusher, LED or UV lamp.
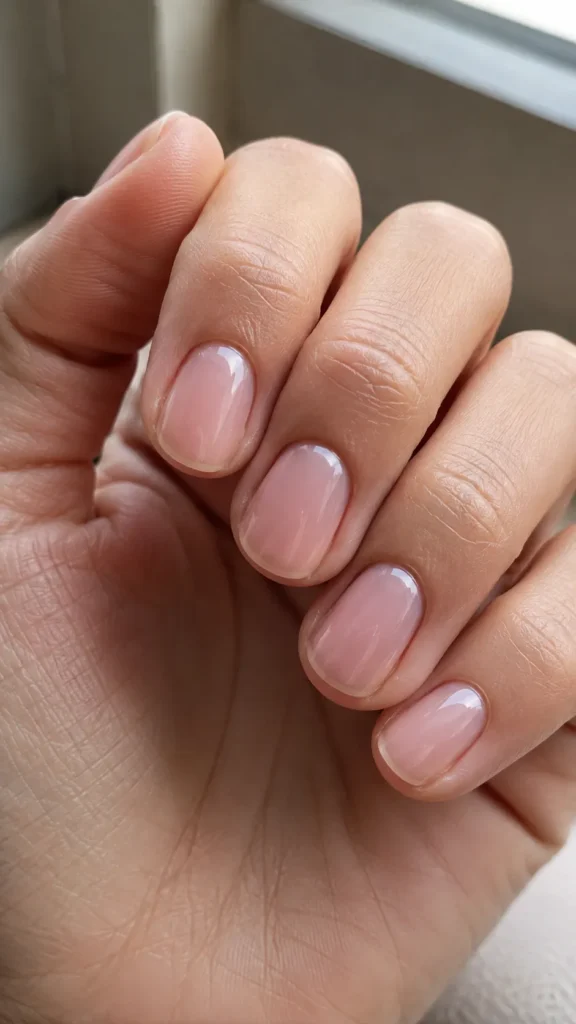
2. Sheer Pink Short Gel Nails
Description
Sheer pink gel creates the look of naturally healthy nails while adding a subtle polished finish. It works particularly well when the nails are short because the translucent color follows the natural nail instead of visually adding length. For a realistic result, use one or two thin coats rather than trying to build complete opacity. A smooth surface and glossy finish make this simple design look professionally done.
How-To
Shape the nails into a short rounded or squoval shape. Apply base coat, followed by one thin layer of sheer pink gel. Add a second layer only where extra coverage is needed, then cure and finish with a glossy top coat.
Tips
Do not over-file the natural nail when preparing it. Sheer colors reveal ridges, so gentle buffing and a smooth base are more useful than applying several thick layers.
Items Used
Sheer pink gel polish, base coat, top coat, nail file, buffer, cuticle oil, LED or UV lamp.
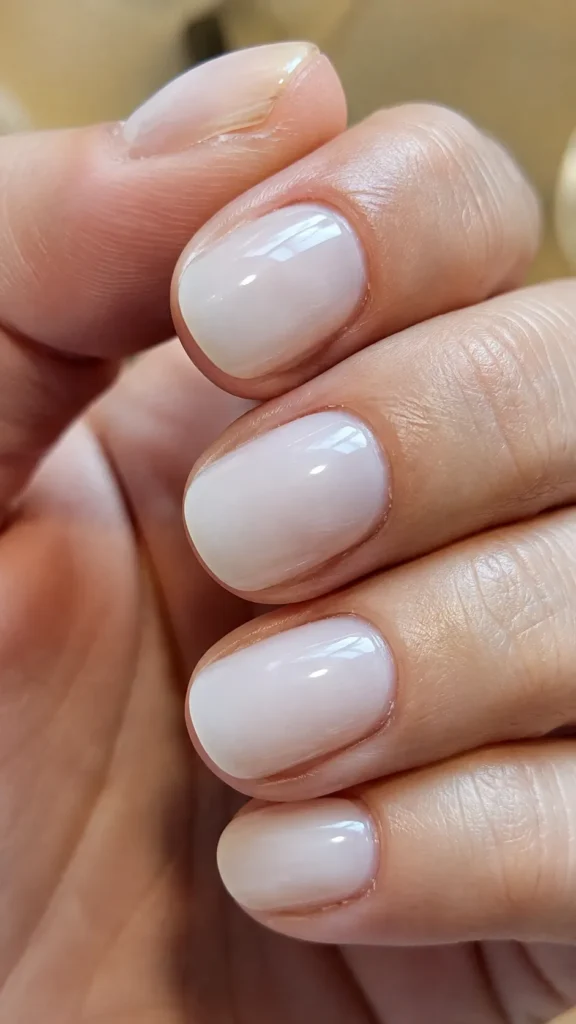
3. Creamy Milky White Gel Nails
Description
Milky white gel nails offer a softer alternative to bright white polish. The slightly translucent finish makes them easy to wear with casual outfits, workwear, or special occasions. This style looks best when the color remains smooth and lightly translucent instead of becoming chalky. Keeping the length short and the shape rounded gives the manicure a natural appearance while the white tone adds a fresh, polished look.
How-To
Prepare the nails and apply a thin base coat. Apply one sheer layer of milky white gel and cure it. Add another thin coat for slightly more coverage, then finish with a high-shine top coat.
Tips
If the white gel appears streaky, allow the first coat to cure completely before adding another. Thin coats create a smoother finish than trying to correct uneven coverage with one thick application.
Items Used
Milky white gel polish, base coat, glossy top coat, nail file, buffer, cuticle pusher, curing lamp.
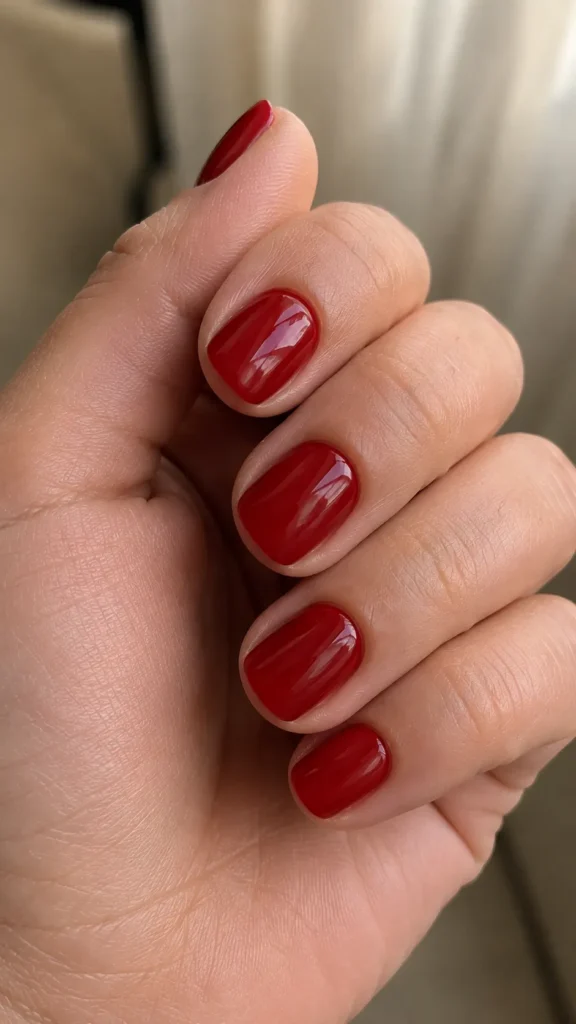
4. Classic Short Red Gel Nails
Description
Short red gel nails prove that a basic manicure does not need complicated nail art to stand out. A clean red shade creates a polished appearance while the shorter length keeps the look practical. For the most professional result, pay close attention to the sidewalls and cuticle line. Red polish can make small application mistakes obvious, so thin layers and controlled brush movement are more important than using a large amount of product.
How-To
Shape the nails evenly, prep the surface, and apply base coat. Add two thin coats of red gel, curing after each layer. Carefully apply a glossy top coat and seal the tips to protect the color.
Tips
Leave a tiny gap around the cuticle rather than touching the skin with gel. If polish accidentally reaches the skin, clean it before curing.
Items Used
Red gel polish, base coat, top coat, nail file, buffer, cleanup brush, LED or UV lamp.
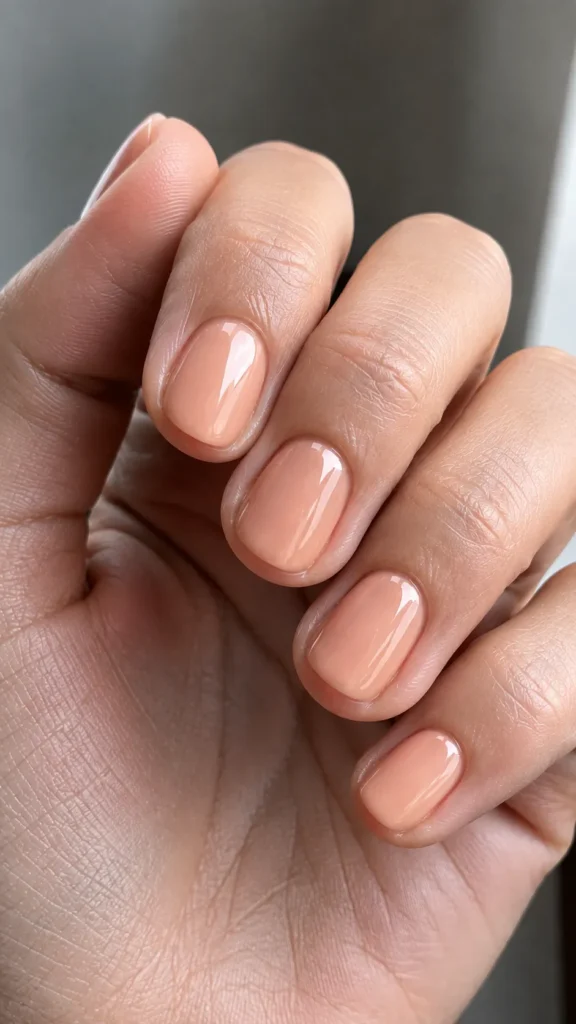
5. Peachy Beige Gel Nails
Description
Peachy beige is a useful middle ground between nude and colorful nails. It adds a subtle hint of warmth while remaining neutral enough for everyday wear. This shade works especially well on short rounded nails because it creates a neat, soft appearance without emphasizing the nail length. Choose a creamy formula with good self-leveling properties so the final surface stays smooth and even.
How-To
Prepare and shape the nails, then apply a thin base layer. Follow with two thin coats of peachy beige gel, curing between applications. Finish with a glossy or soft satin top coat depending on the desired effect.
Tips
Compare the color against your skin before applying it to every nail. Very yellow beige shades can look different once cured, so test one nail first if possible.
Items Used
Peach beige gel polish, base coat, top coat, nail file, buffer, cuticle pusher, curing lamp.
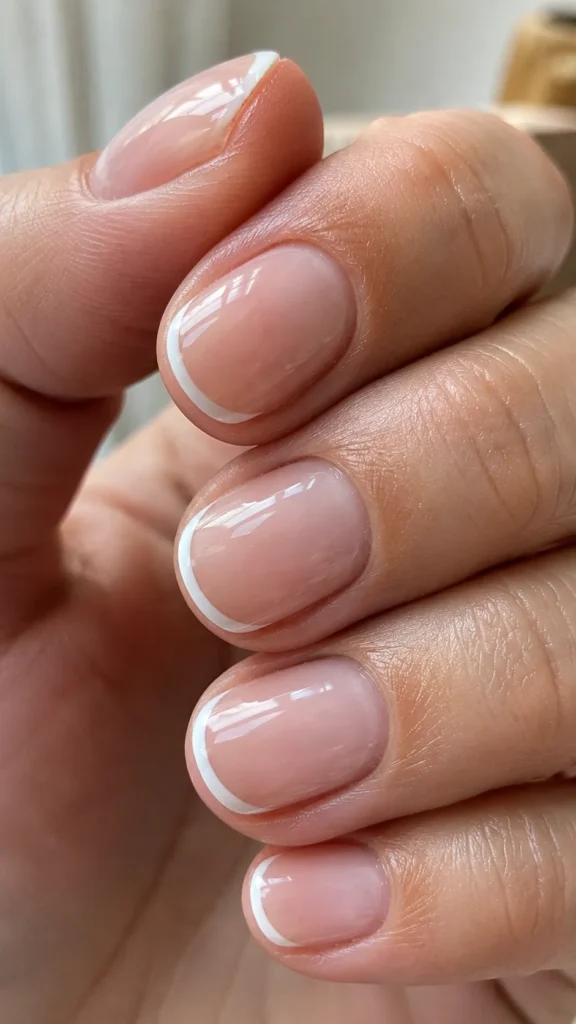
6. Basic French Gel Tips
Description
A simple French manicure remains one of the most practical ways to make basic gel nails look refined. On shorter nails, keep the white tip narrow rather than creating a thick smile line. A sheer pink or nude base helps soften the contrast and makes minor imperfections less noticeable. The most important part is keeping the French tips similar in width and shape across every nail.
How-To
Apply a sheer nude or pink base and cure it. Use a fine nail-art brush to create a thin white French tip, checking both sides for symmetry. Cure the design, then apply a glossy top coat.
Tips
Do not try to create the entire French line with one heavy stroke. Small controlled strokes give better symmetry, especially on short nails.
Items Used
Sheer nude gel, white gel polish, base coat, top coat, fine nail-art brush, cleanser, curing lamp.
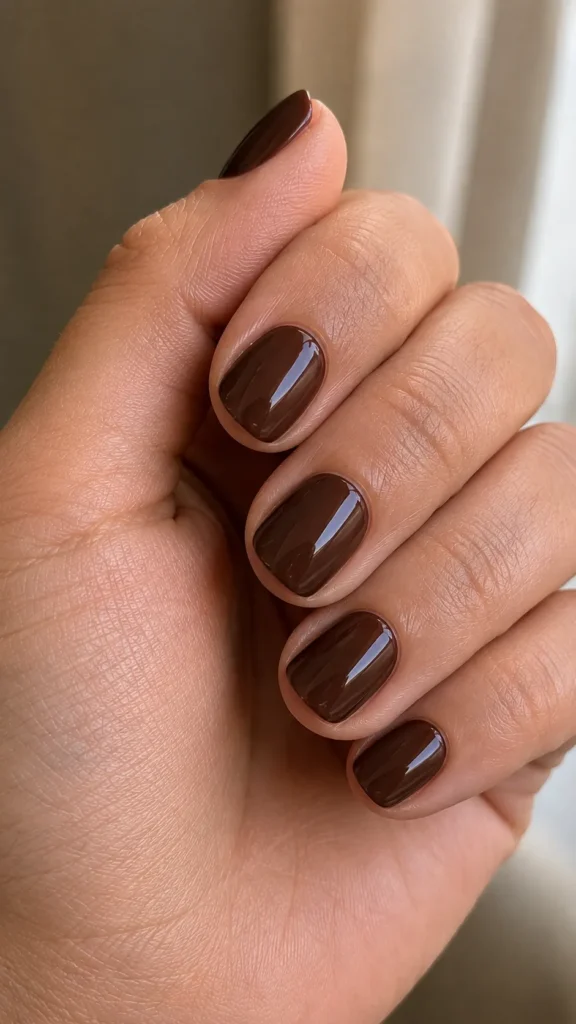
7. Chocolate Brown Minimal Gel Nails
Description
Chocolate brown gives basic gel nails a richer alternative to black while remaining easy to wear. It looks particularly good on short squoval or rounded nails because the dark shade creates definition without needing additional decoration. A glossy finish makes brown appear deeper and more polished. For a clean result, focus on consistent length and carefully controlled edges because darker colors show uneven shaping more clearly.
How-To
File all nails to the same length and shape. Apply base coat, then two thin layers of chocolate brown gel, curing each layer. Finish with a glossy top coat and seal the nail tips.
Tips
If the gel looks uneven, resist adding a thick third coat. Thin layers cure more reliably and are less likely to shrink or wrinkle.
Items Used
Chocolate brown gel polish, base coat, top coat, nail file, buffer, cuticle pusher, curing lamp.
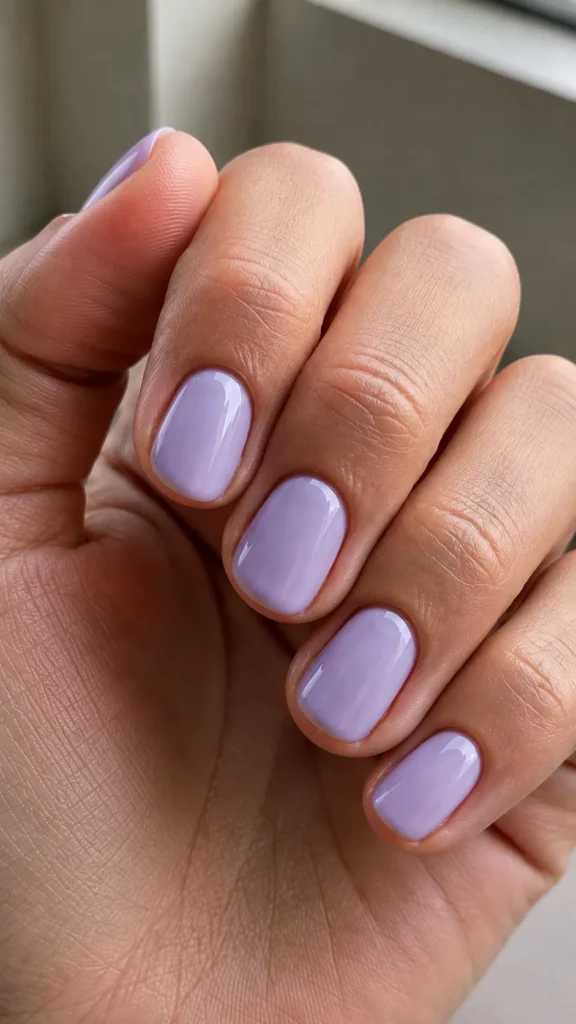
8. Soft Lavender Basic Gel Nails
Description
Soft lavender brings a small amount of color to a simple manicure without becoming difficult to coordinate with clothing. A muted lavender is generally easier to wear than an intensely purple shade and works especially well with short rounded nails. The finish should remain smooth and glossy, with the color applied thinly enough to avoid a bulky appearance. This is an easy option when you want basic nails with a little personality.
How-To
Prep the nails and apply base coat. Apply two thin layers of muted lavender gel, curing each coat. Check the sidewalls before finishing with a clear glossy top coat.
Tips
Pastel formulas can sometimes become streaky. Use very thin coats and allow the brush to glide rather than repeatedly brushing over the same area.
Items Used
Lavender gel polish, base coat, glossy top coat, nail file, buffer, cuticle pusher, LED or UV lamp.
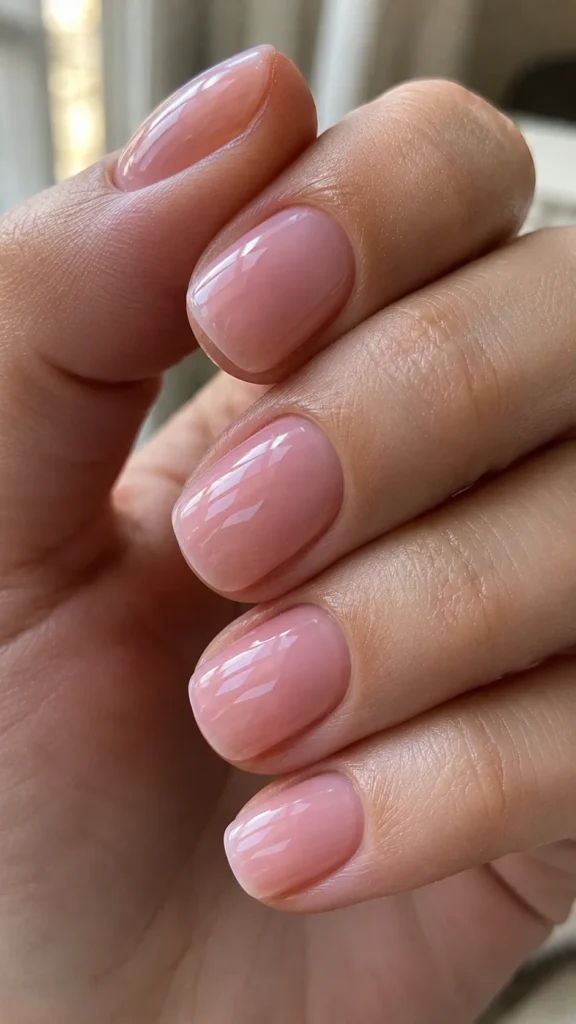
9. Natural Pink Squoval Gel Nails
Description
A squoval shape combines the straight appearance of a square nail with softly rounded corners, making it practical for everyday activities. Pairing this shape with a natural pink gel creates a tidy manicure that does not require frequent maintenance. Keep the free edge relatively short and make the corners symmetrical. This combination is particularly useful for anyone who wants their nails to look groomed while keeping the design understated.
How-To
File the free edge straight, then gently soften both corners to create the squoval shape. Apply base coat, two thin coats of natural pink gel, and a glossy top coat.
Tips
Check the nails from several angles while shaping. Looking only from above can make one side appear longer or more curved than the other.
Items Used
Natural pink gel polish, base coat, top coat, nail file, buffer, cuticle pusher, curing lamp.
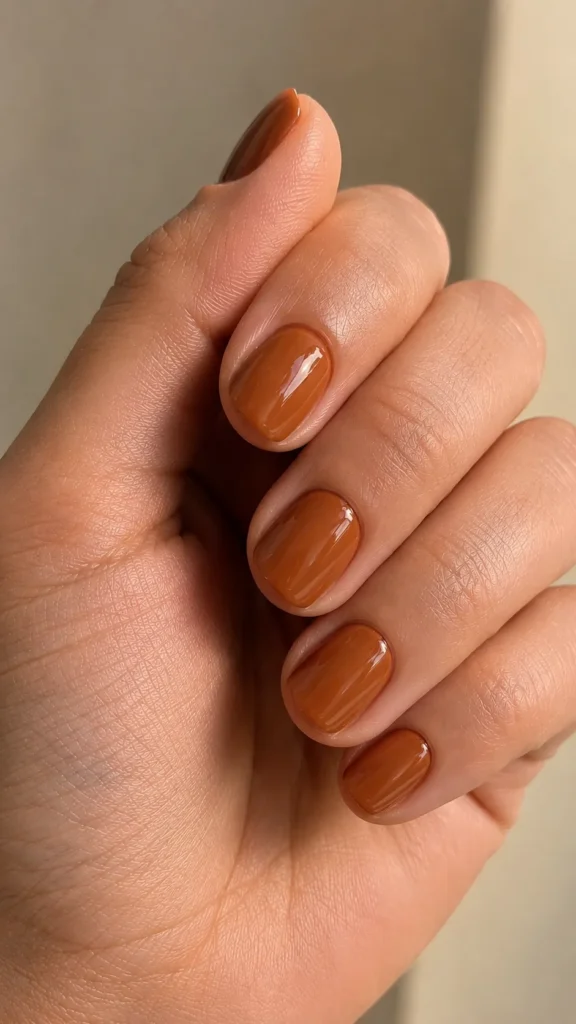
10. Glossy Caramel Gel Nails
Description
Caramel gel is a warm neutral that gives basic nails more depth than a traditional nude. It works particularly well during autumn and winter but remains wearable throughout the year. A medium caramel shade looks polished on short nails when the cuticle area is neat and the surface is perfectly smooth. Keep the design completely solid so the color itself remains the main feature.
How-To
Shape and prep the nails before applying base coat. Apply two thin layers of caramel gel, curing each coat thoroughly. Finish with a high-gloss top coat and carefully seal the free edges.
Tips
Warm shades can vary significantly between brands. If you are unsure of the undertone, test the color on one nail before completing the entire manicure.
Items Used
Caramel gel polish, base coat, glossy top coat, nail file, buffer, cuticle pusher, curing lamp.
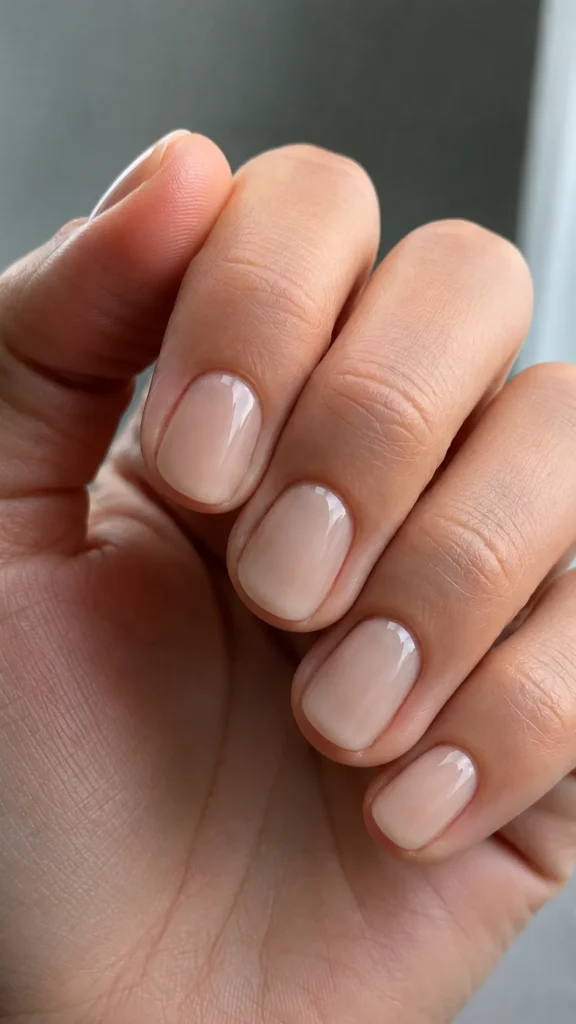
11. Barely-There Beige Gel Nails
Description
Barely-there beige creates an understated manicure for people who prefer nails that look almost natural. The goal is not complete coverage but a smooth, clean enhancement of the natural nail. This design is especially forgiving when the nails are short and neatly shaped. Choose a beige that is close to your natural nail tone and avoid overly opaque formulas if you want the finished manicure to remain subtle.
How-To
Prepare the nail surface and apply a thin base coat. Add one or two thin layers of beige gel depending on the desired coverage. Cure each layer, then finish with a clear glossy top coat.
Tips
Use the thinnest possible coats around the cuticle. Because the shade is subtle, bulky product can make the manicure look less natural even when the color itself is correct.
Items Used
Beige gel polish, base coat, clear top coat, nail file, buffer, cuticle pusher, curing lamp.
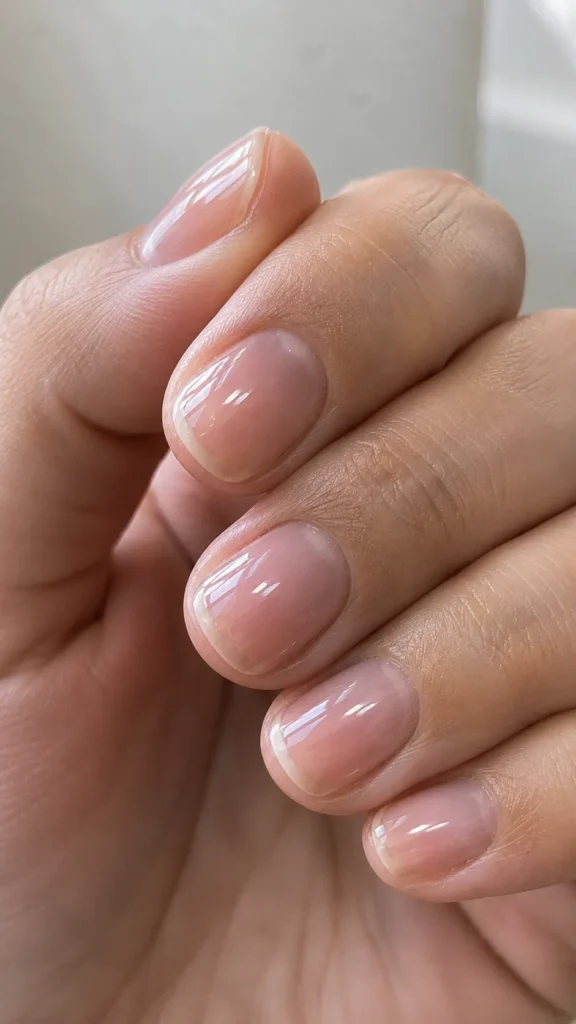
12. Clean Glossy Clear Gel Nails
Description
Clear gel nails are the simplest option for creating a polished natural appearance while keeping the original nail visible. They work particularly well when the natural nails already have a healthy shape and you want protection without adding noticeable color. The finish depends heavily on preparation, so smooth the surface carefully and keep the product evenly distributed. A glossy top coat gives the nails a fresh, glass-like appearance.
How-To
Shape and lightly buff the nails, remove dust, and apply a thin base coat. Apply a clear gel layer evenly across each nail, avoiding the skin. Cure thoroughly, then apply a glossy top coat.
Tips
Clear gel magnifies imperfections, so do not rush nail preparation. Remove every trace of dust before applying the gel, and check the surface under good lighting before curing.
Items Used
Clear gel polish, base coat, glossy top coat, nail file, buffer, cuticle pusher, lint-free wipes, curing lamp.
FAQ SECTION
How long do basic gel nails usually last?
A properly prepared gel manicure can commonly last around two to three weeks, although wear depends on nail growth, product quality, preparation, and daily activities. Picking or peeling the gel can significantly shorten wear and damage the natural nail.
Are short nails suitable for gel polish?
Yes. Short nails are excellent for gel polish because the product can provide a durable, polished finish without requiring extensions. Rounded, squoval, and short square shapes are particularly practical.
Why does gel polish lift near the cuticle?
Lifting often comes from product touching the skin, insufficient nail preparation, oily residue, or incomplete curing. Keeping the product slightly away from the cuticle and following the manufacturer’s curing instructions can improve retention.
How many coats of gel polish should I use?
Most gel colors work best with two thin coats. Some highly pigmented shades may need only one, while sheer or pastel colors may need an additional thin layer. Thick coats are more likely to cure poorly or wrinkle.
Can basic gel nails still look professional without nail art?
Absolutely. Clean shaping, precise cuticle application, even color, and a smooth top coat often make a bigger difference than complicated nail art.
RELATED CONTENT
CLOSING
Basic gel nails are all about getting the small details right. A carefully shaped nail, thin product application, clean cuticle area, and glossy finish can completely change how simple a manicure looks. Start with the color and shape that fit your everyday routine, then experiment with slightly different neutrals, soft colors, or a classic French tip when you feel ready.
I hope these ideas give you a few new favorites to try at home or show your nail technician. Pick one that matches your style, take your time with the preparation, and enjoy creating a manicure that feels like you. If you try one of these designs, I would love to hear which one became your favorite and how your finished nails turned out.