12 Kesha Nails That Bring Glitter, Color, and Pop-Star Energy
Kesha Nails
These 12 Kesha nails turn the singer’s fearless beauty energy into manicures that are colorful, glittery, and genuinely wearable. The strongest sets do not simply cover every nail in sparkle. They balance one dramatic finish with clean shaping, intentional negative space, and repeated colors. From concert-ready gold glitter to hand-painted flowers and jewel-tone aura gradients, each idea below includes practical details that help the finished manicure look polished rather than costume-like.
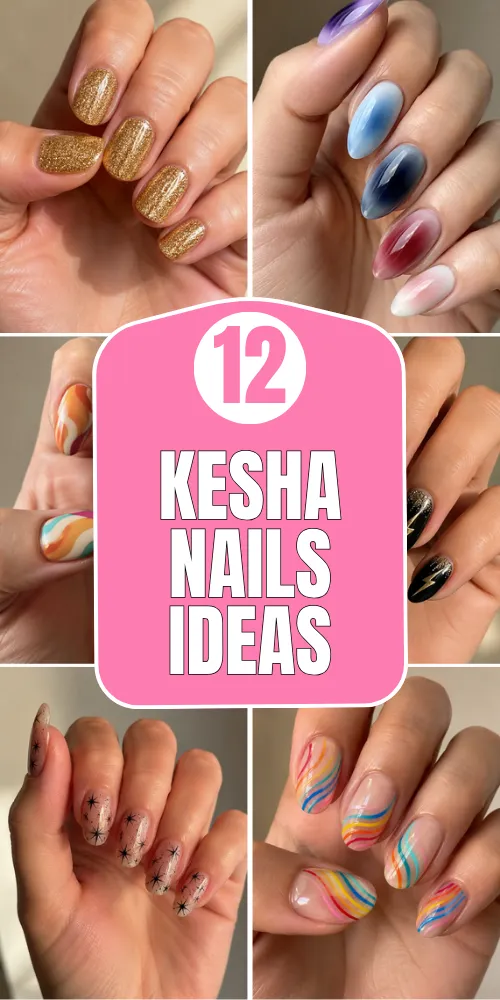
Before choosing a design, decide whether you want the manicure to feel nostalgic, glam-rock, or closer to Kesha’s more recent colorful nail art. Keep the nail length comfortable, repeat two or three shades across the hand, and seal textured details thoroughly. If you are bringing a reference to a nail artist, point out the shape, finish, and placement you want instead of asking for every detail at once.
1. Concert Gold Glitter
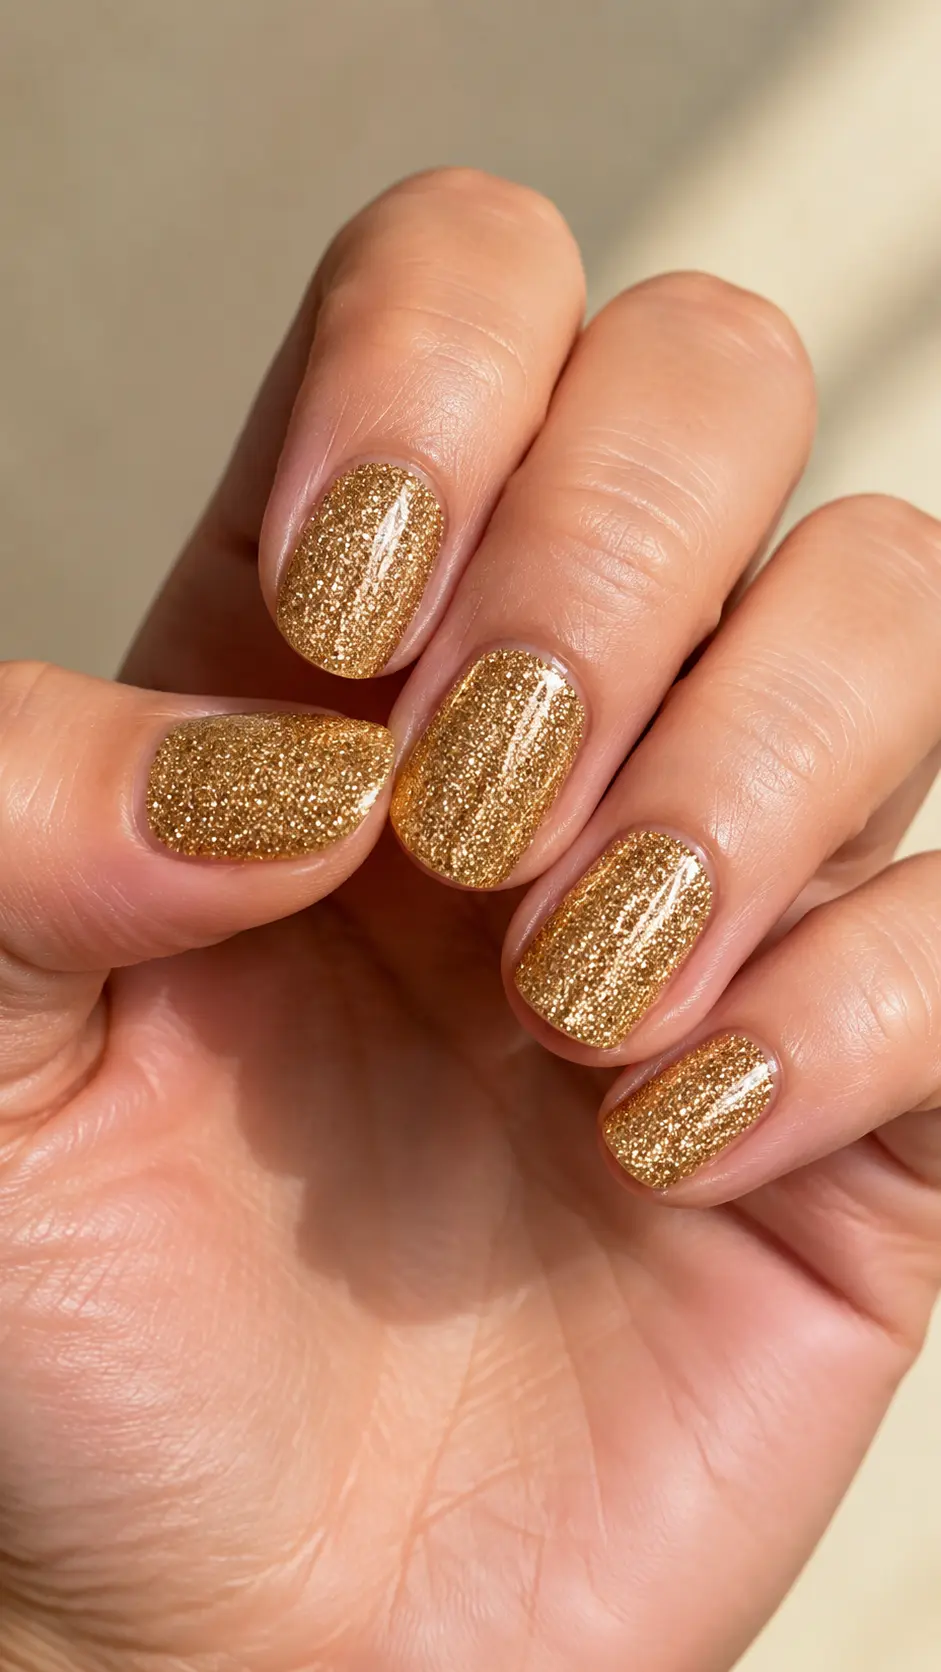
Dense antique-gold sparkle captures the high-energy stage mood without requiring complicated artwork. The short rounded shape keeps the finish practical, while a fine glitter mix reflects light more smoothly than chunky particles. Build coverage in thin layers so the surface stays even and the gold looks luminous rather than heavy.
How-To
Prep and shape the nails, then apply a warm nude or metallic-gold base. Press fine gold glitter into the second tacky coat, concentrating any sparse areas before sealing with two thin layers of leveling top coat.
Tips
Use cosmetic-grade nail glitter and keep it slightly away from the sidewalls. A tinted gold base prevents visible gaps and reduces the amount of loose sparkle needed.
Items Used
- Warm gold polish
- Fine antique-gold glitter
- Flat application brush
- Leveling glossy top coat
2. Nude Rainbow Micro Stripes
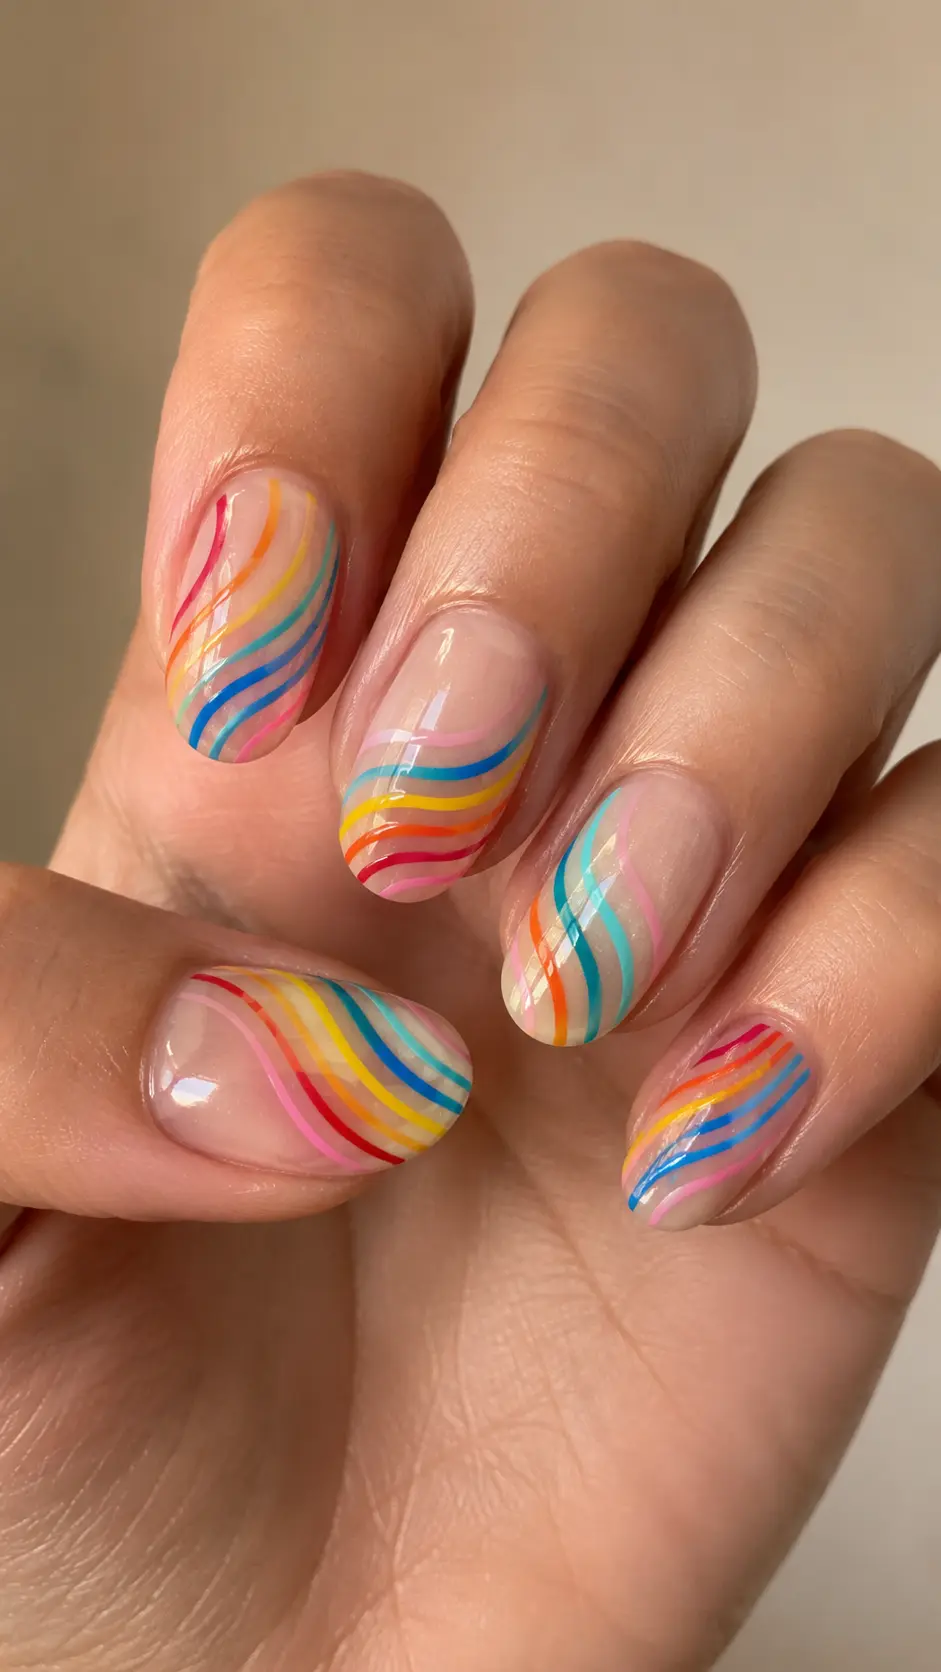
A sheer nude base lets tiny rainbow lines feel playful without making the manicure visually crowded. Curved stripes in red, orange, yellow, teal, blue, and pink echo Kesha’s love of colorful nail art. Keeping each band narrow and repeating the same palette makes every nail different but still connected.
How-To
Apply two thin coats of sheer nude. Use a long liner brush to paint two or three curved stripes on each nail, curing or drying between overlapping colors. Finish with a smooth, high-shine top coat.
Tips
Map the curves with tiny dots before drawing full lines. Rotate the finger while keeping the brush steady; this produces cleaner arcs than moving your wrist across the nail.
Items Used
- Sheer nude polish
- Rainbow liner gels
- Long detail brush
- Glossy top coat
3. Black Star Champagne Shimmer
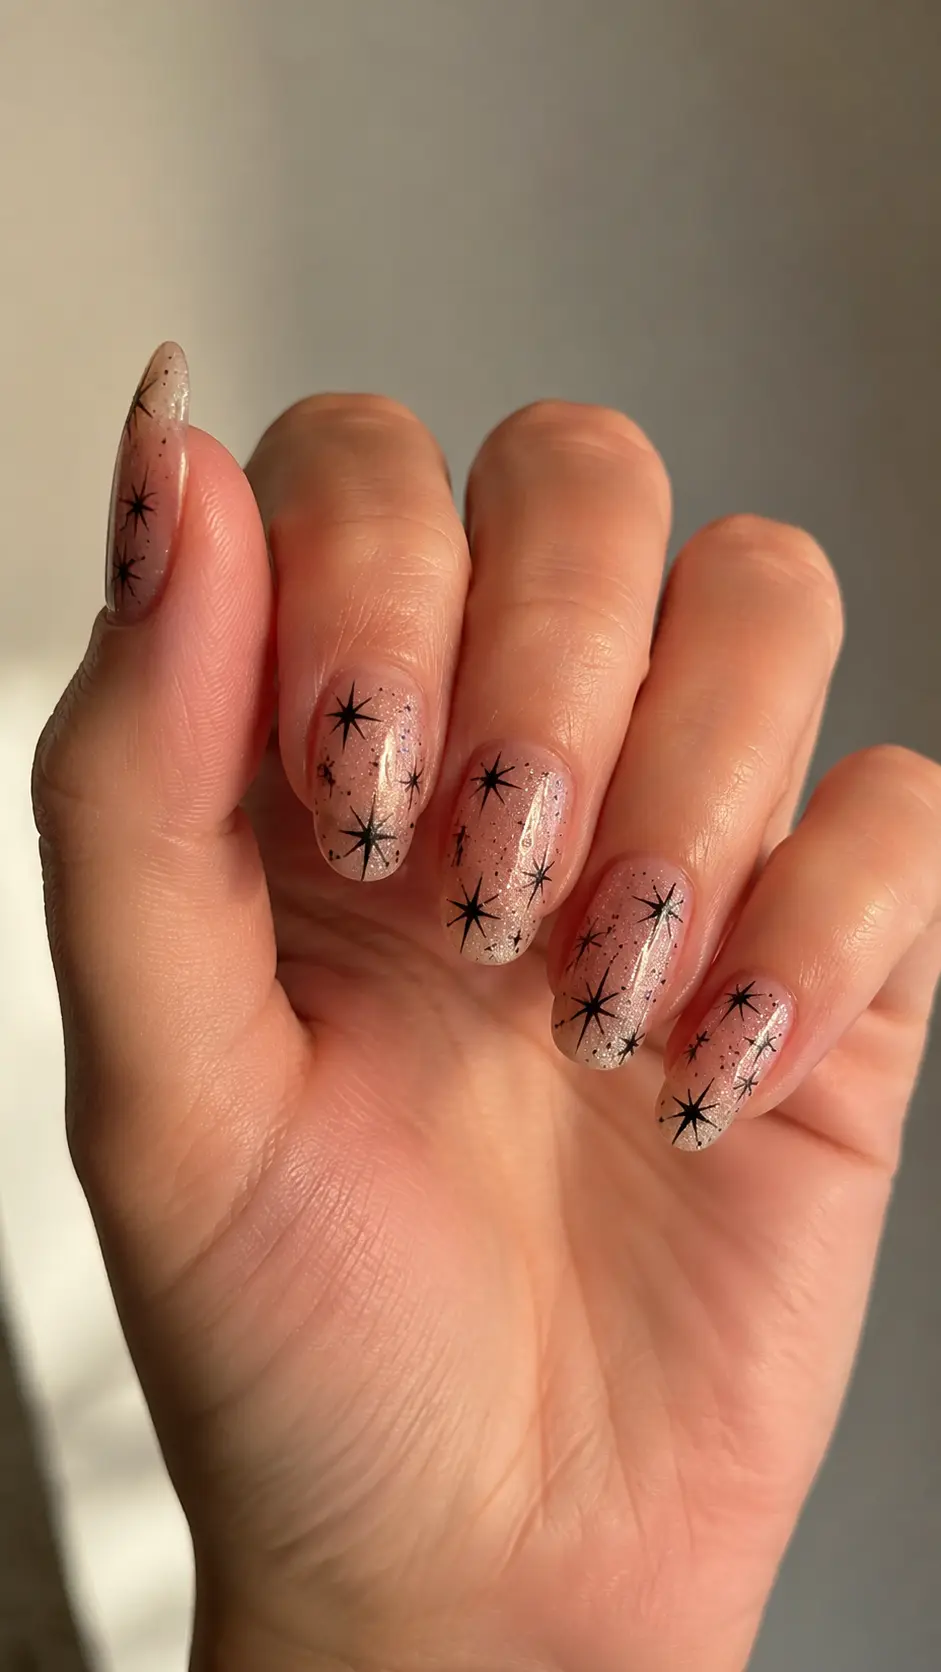
Irregular black stars over champagne shimmer create the right mix of edgy and glamorous. The translucent base gives the artwork breathing room, and scattered micro-glitter adds movement without competing with the stars. Varying the star sizes makes the design feel hand-painted and relaxed rather than stamped.
How-To
Paint a sheer champagne base and cure. Draw four- and five-point stars with black art gel, placing the largest shapes first. Tap sparse micro-glitter into open areas, then float top coat over the artwork.
Tips
Limit each nail to one focal star plus one tiny accent. Leave a narrow clean margin around the cuticle so the dark art stays sharp and professionally finished.
Items Used
- Champagne shimmer polish
- Black art gel
- Micro-glitter
- Fine liner brush
4. Jewel-Tone Winter Aura
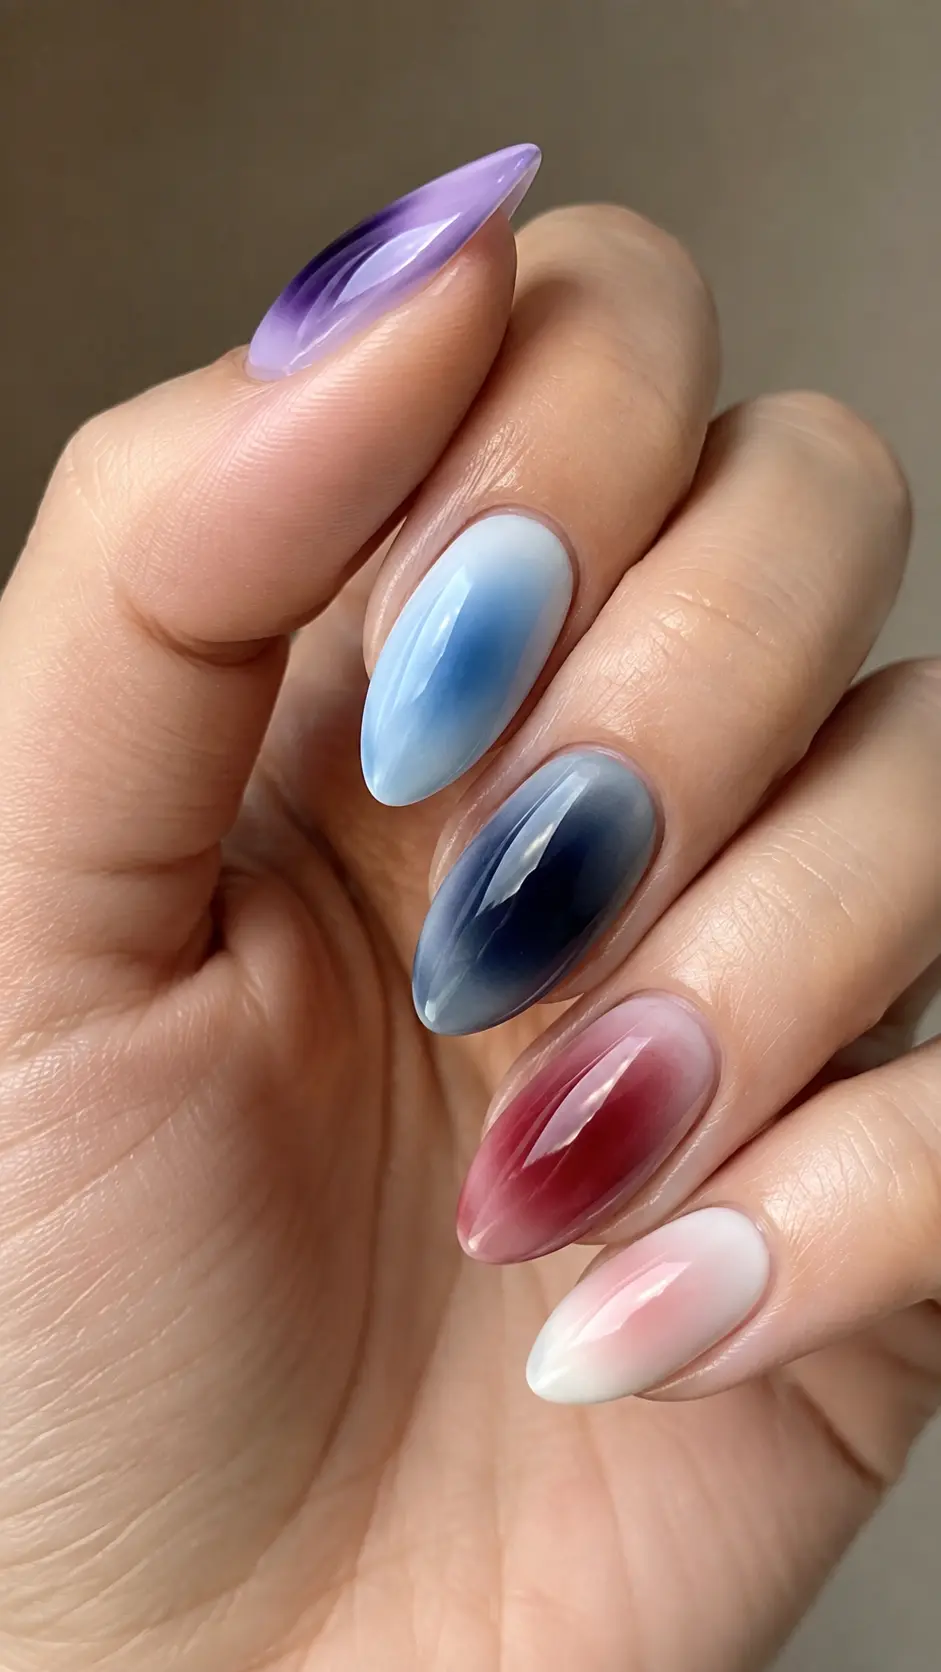
Deep purple, baby blue, navy, cranberry, red, and white create a moody aura manicure inspired by Kesha’s colorful red-carpet set. Each nail can carry a different gradient, but the medium almond shape and glossy finish unify the hand. Soft edges are essential; harsh circles lose the glowing effect.
How-To
Apply the darker edge color first. Dab the lighter center shade with a small sponge or airbrush in several sheer passes, widening the glow gradually. Repeat the palette across the hand and seal once the blend is smooth.
Tips
Use colors with similar undertones so transitions remain clean. Remove excess product from the sponge before touching the nail; one wet press can create an obvious ring.
Items Used
- Jewel-tone gel colors
- Mini ombré sponge
- Latex skin barrier
- High-gloss top coat
5. Tiny 3D Flower Garden
Miniature cream, lilac, yellow, and pink flowers bring a softer side to these 12 Kesha nails. A sheer blush base keeps the detailed petals light, while restrained crystal centers add stage-worthy sparkle. Low-profile flowers are more wearable than oversized charms and are less likely to catch on hair.
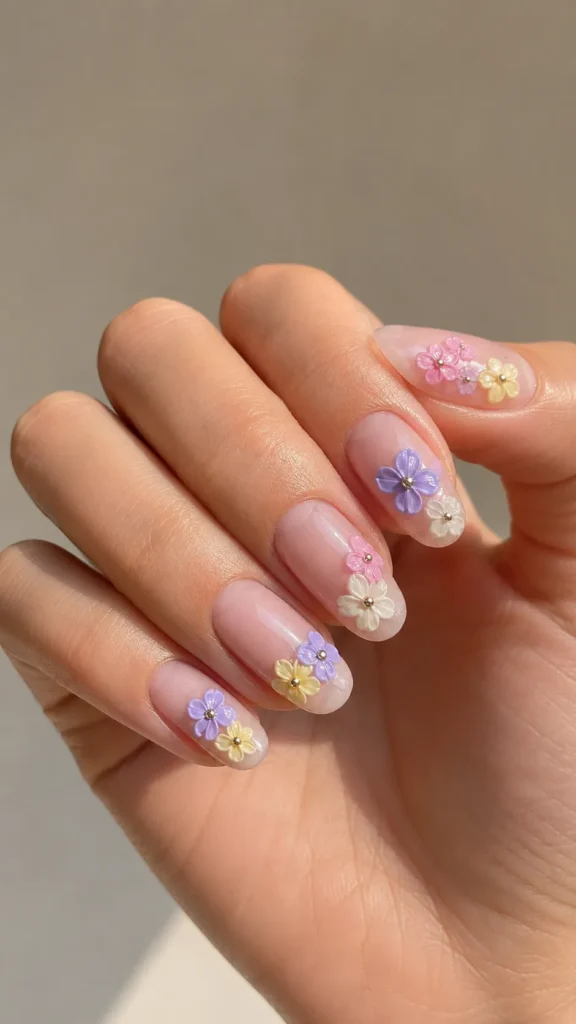
How-To
Finish the blush base, then sculpt each flower from five tiny petals using thick art gel. Cure individual flowers before adding a contrasting center or flat crystal. Seal around the petals without flooding their texture.
Tips
Place the largest flowers on the flatter center of the nail. Keep sidewall petals small, and test every edge after curing to make sure nothing feels sharp.
Items Used
- Sheer blush base
- 3D sculpting gels
- Silicone detail tool
- Flat-back micro crystals
6. Holographic Silver Chrome
Fine holographic chrome gives a clean almond manicure a full rainbow shift whenever the hand moves. It delivers obvious pop-star shine with no raised decoration, making it surprisingly practical. The best result starts with an exceptionally smooth base because mirror powder reveals every ridge underneath it.
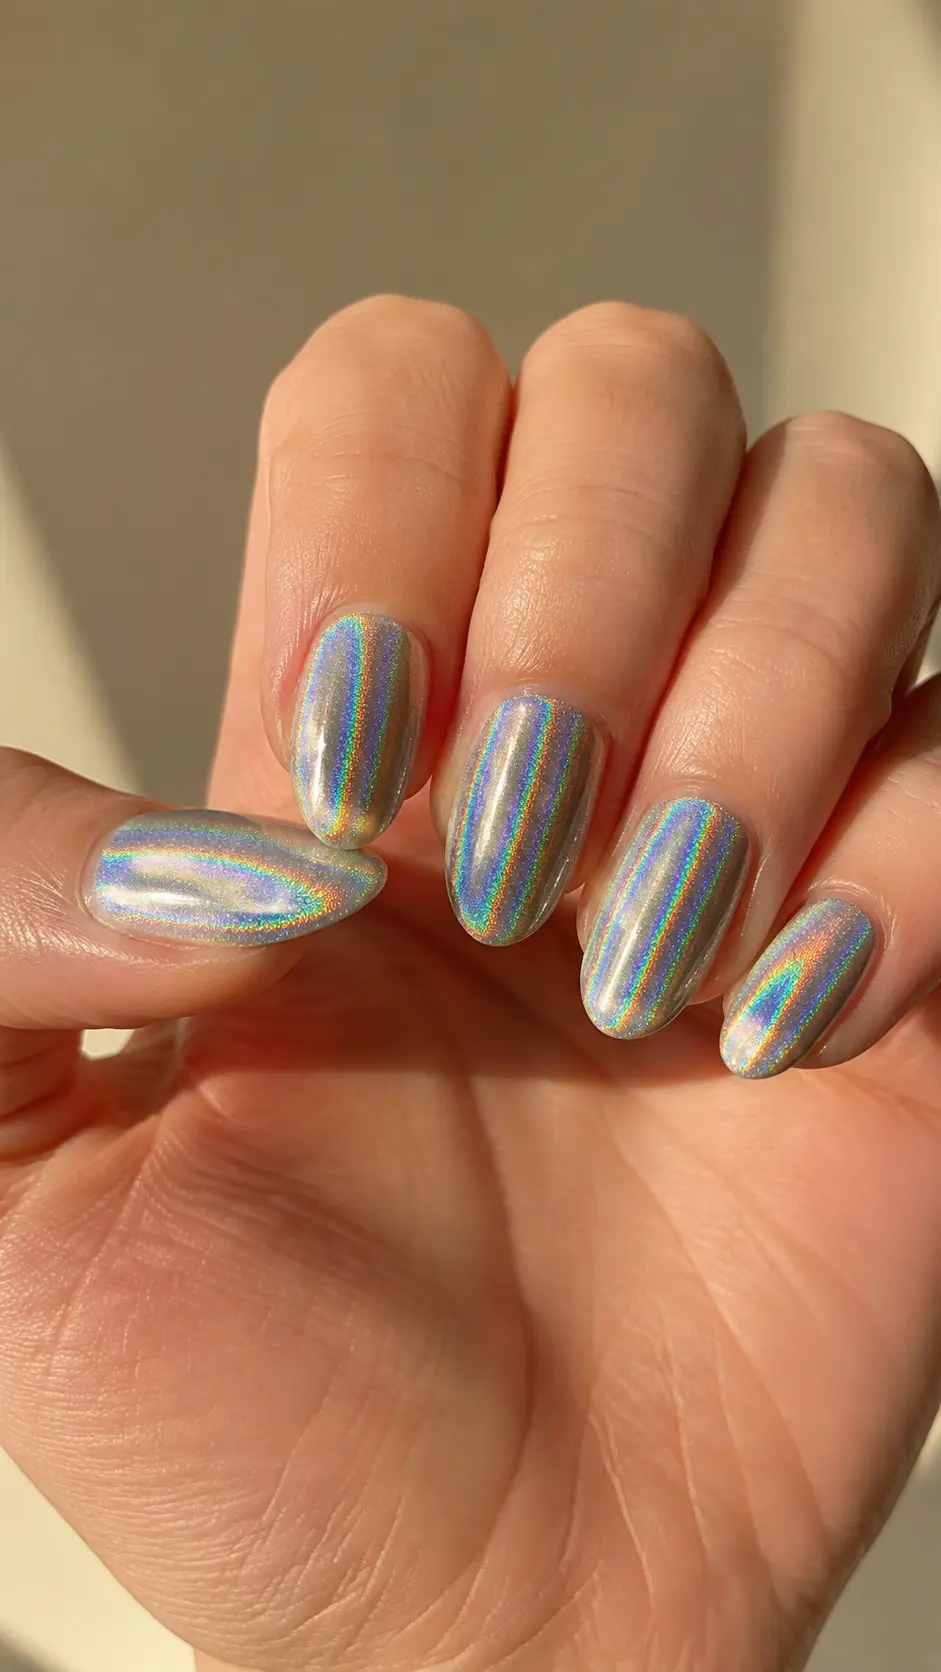
How-To
Apply a smooth black or silver gel base and cure. Add no-wipe top coat, cure for the recommended time, then rub holographic powder over the entire nail. Dust away excess and seal the free edge twice.
Tips
Use a separate soft brush for cleanup so stray powder does not contaminate the top coat. A flexible base underneath helps prevent cracking on longer natural nails.
Items Used
- Smooth gel base
- Holographic chrome powder
- Silicone applicator
- No-wipe top coat
7. Black and Gold Glam-Rock Bolts
Jet-black nails with thin gold lightning bolts channel seventies glam rock while remaining sleek. A little champagne glitter at the cuticle softens the contrast and catches light when the hand moves. The graphic looks strongest when the bolts are narrow, angular, and placed differently on each nail.
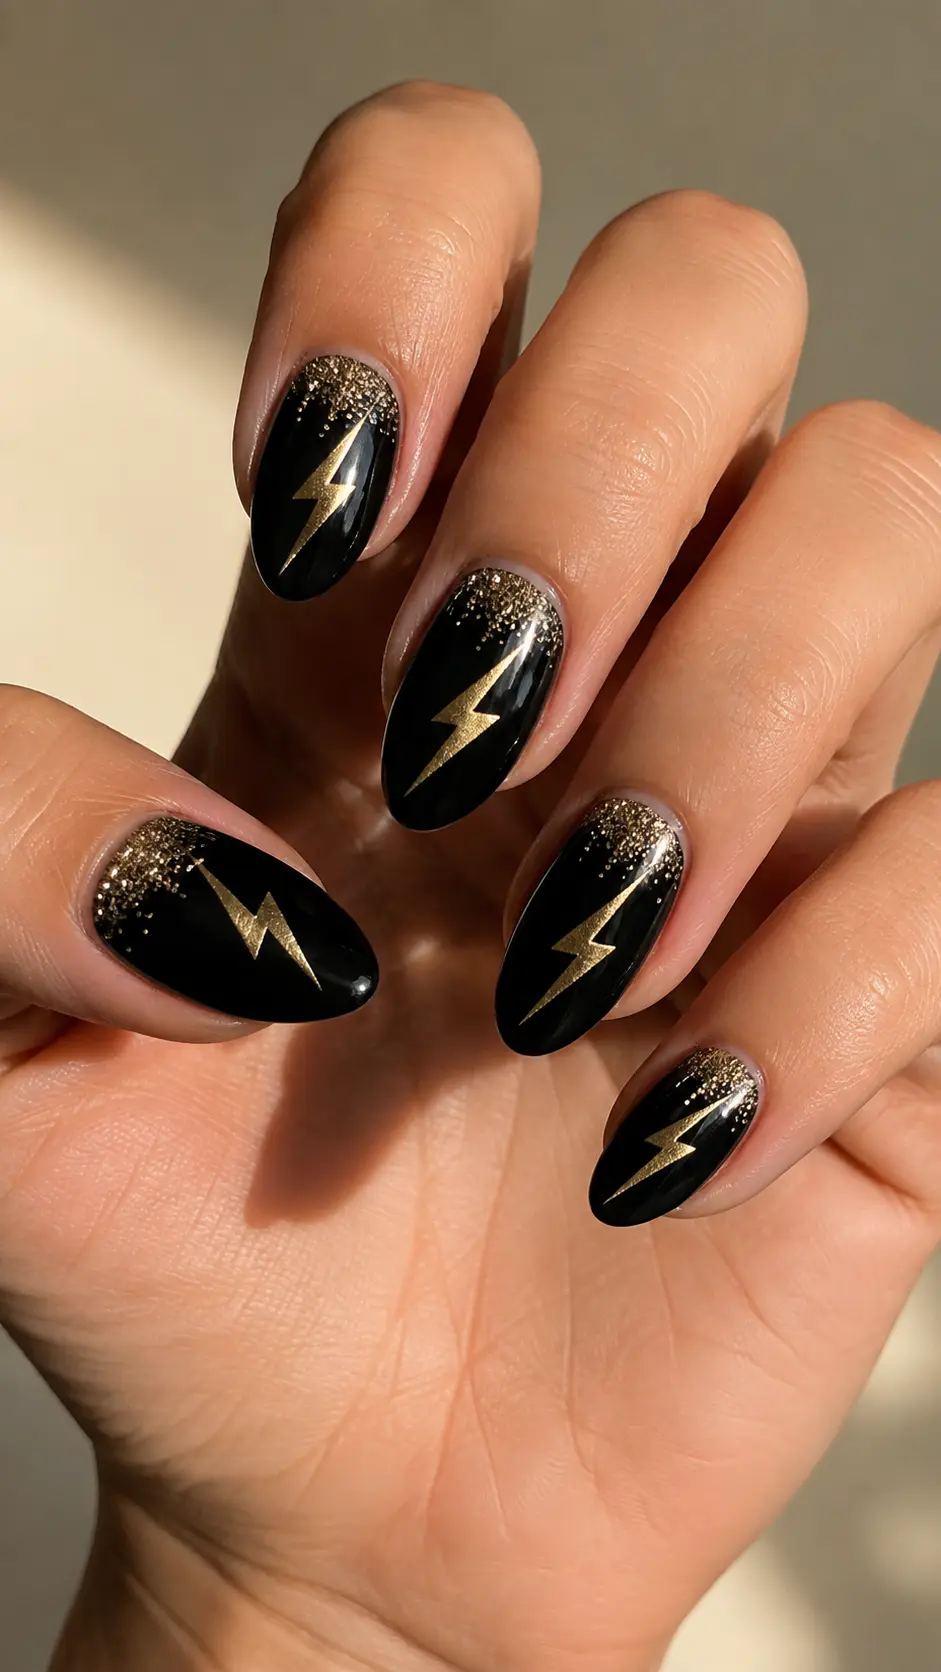
How-To
Paint two thin coats of black. Sketch each bolt with brown gel, refine the angles, then cover the guide with metallic gold. Press a small glitter fade near selected cuticles and top coat the full set.
Tips
Do not draw identical bolts. Change their length and direction while repeating the same line weight, which gives the manicure energy without making it messy.
Items Used
- Jet-black gel polish
- Metallic gold art gel
- Champagne glitter
- Ultra-fine liner
8. Rainbow Confetti Ombré
Multicolor confetti fading from clear tips into a nude base feels celebratory yet airy. Encapsulating flat pieces under a smooth layer creates the illusion that the color is suspended inside the nail. Mixing several tiny shapes with only a few medium pieces keeps the gradient controlled and flattering.
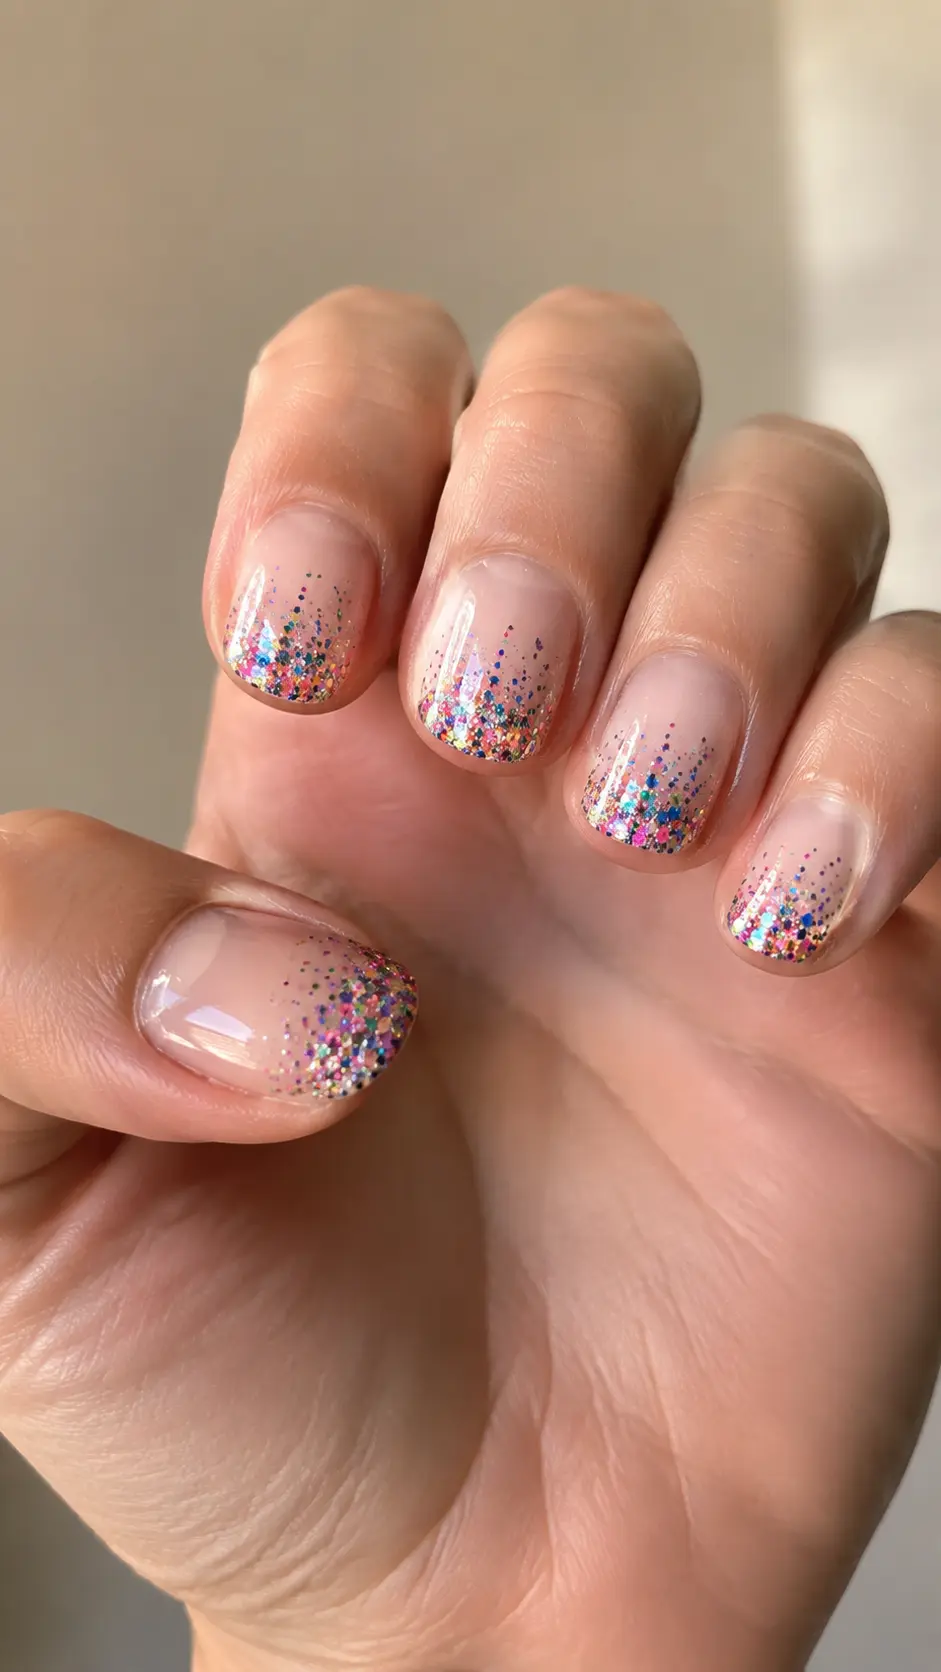
How-To
Apply a sheer nude base. Place larger confetti near the free edge first, then scatter smaller pieces upward with a wax pencil. Fill uneven areas with clear builder gel, refine the surface, and add top coat.
Tips
Keep the cuticle third mostly clear. Turn every reflective piece face-up before curing and avoid thick clusters that could create bumps after filing.
Items Used
- Sheer nude polish
- Flat rainbow confetti
- Wax pickup pencil
- Clear builder gel
9. Gemstone Micro French
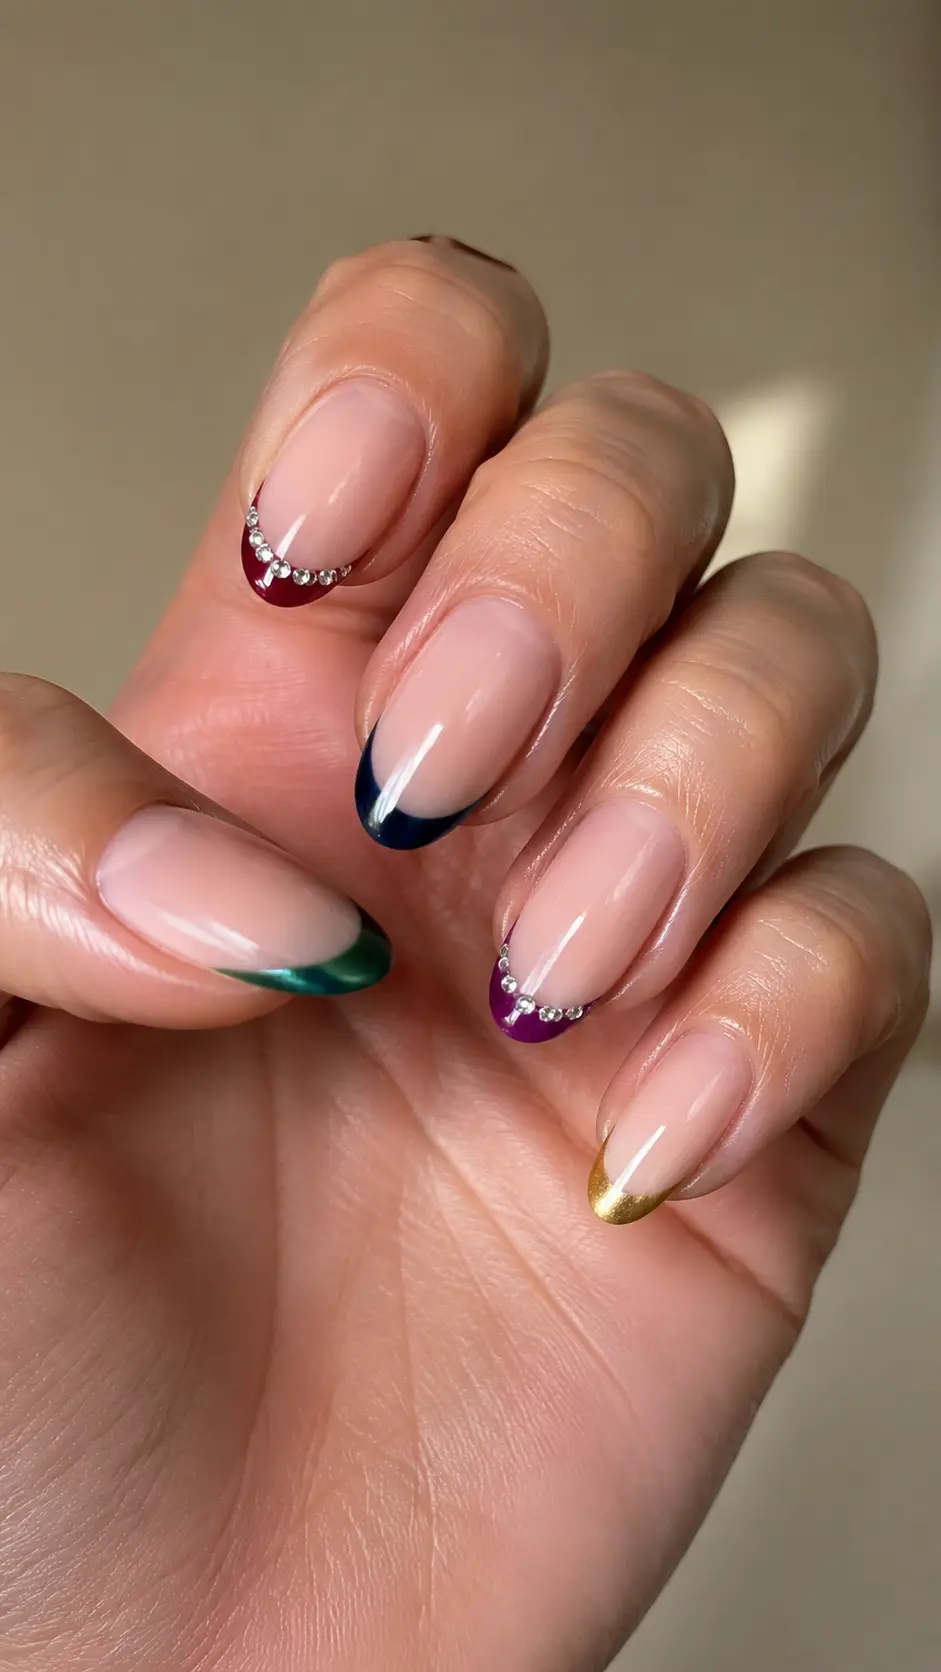
Emerald, ruby, sapphire, amethyst, and gold tips give a classic nude manicure a jewel-box update. The micro-French placement keeps rich colors elegant, while two restrained crystal accents supply the playful luxury associated with Kesha’s bold nail choices. Match the tip depth across all five nails.
How-To
Perfect the milky nude base, then paint a narrow curved tip in a different jewel tone on each finger. Secure tiny crystals along only two smile lines and seal carefully around their edges.
Tips
Check the hand straight on before curing. Short nail beds need especially slim tips; a deep colored band can make the entire nail look shorter.
Items Used
- Milky nude polish
- Jewel-tone art gels
- Short liner brush
- Micro crystals and gem gel
10. Neon Wild-Animal Mix
Hot pink, orange, and teal leopard spots reference Kesha’s wild-animal era without copying a costume. A translucent nude background keeps the neon print fresh and gives each marking room to read. Natural variation is important: spots should change in size and remain partially open rather than becoming perfect circles.

How-To
Dot irregular neon shapes over the cured nude base. Add broken black outlines around two sides of each spot, then place a few tiny black marks in the gaps. Seal only after every line is fully cured.
Tips
Use no more than three neon shades across the hand. Leave visible negative space near the cuticle and sidewalls so the print feels deliberate, not crowded.
Items Used
- Translucent nude base
- Pink orange and teal gels
- Black art gel
- Dotting tool and liner
11. Psychedelic Seventies Swirls
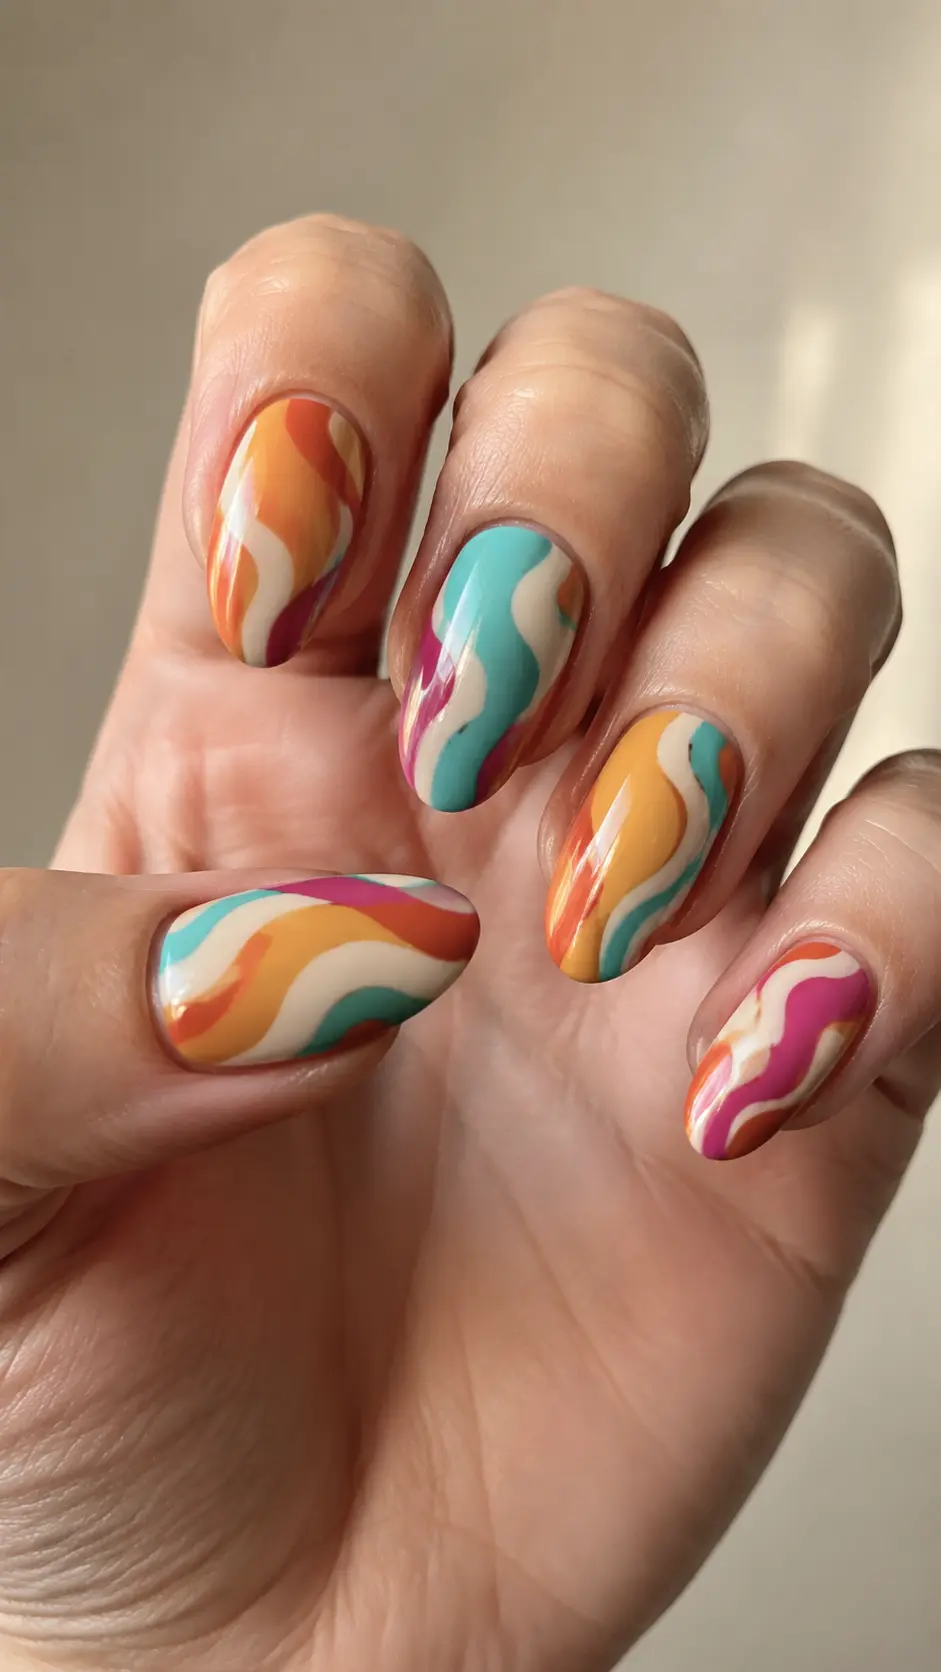
Mustard gold, burnt orange, magenta, turquoise, and cream form flowing retro waves with unmistakable seventies energy. The palette is vibrant, but repeating each shade across several nails creates harmony. A consistent line width and small gaps between colors prevent the design from looking muddy.
How-To
Paint a cream base, then pull one long S-curve down each nail. Add parallel waves beside it in alternating colors, curing between overlapping sections. Refine the edges with a cleanup brush before top coating.
Tips
Plan each nail as part of the full hand rather than a separate canvas. Alternate the dominant shade from finger to finger so the set stays balanced.
Items Used
- Cream base polish
- Retro-colored art gels
- Long liner brush
- Small cleanup brush
12. Silver Disco Cat-Eye
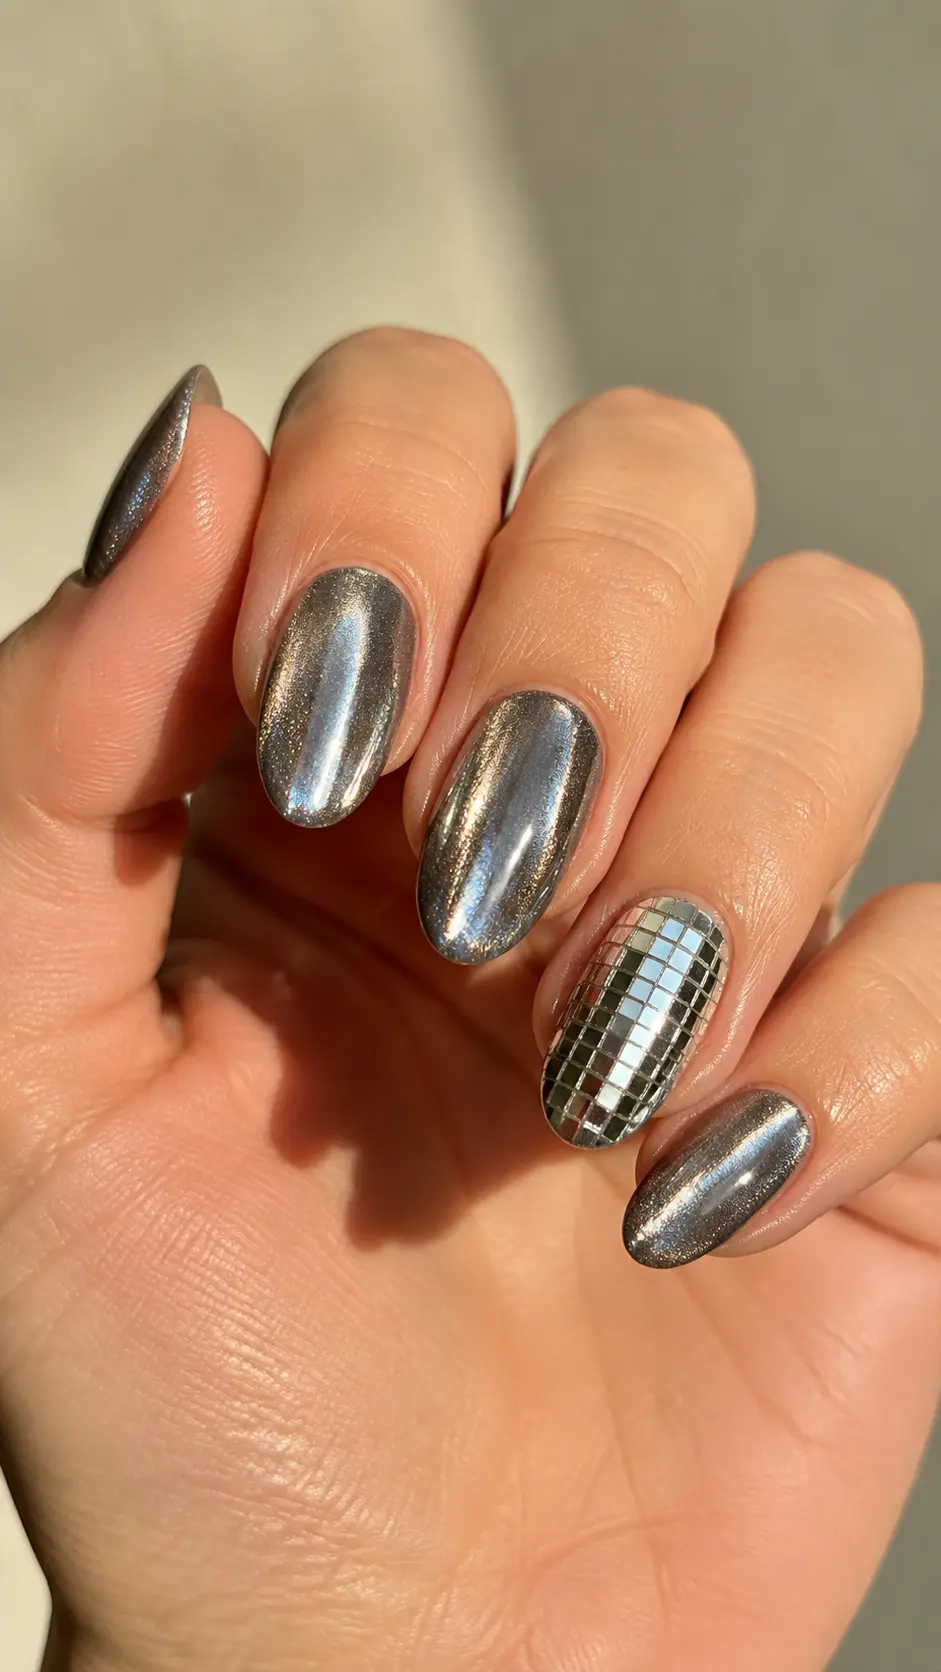
Silver magnetic polish creates a narrow velvet beam that shifts like stage lighting. One tiny disco-mosaic accent adds texture while the remaining nails stay smooth and luminous. This is the easiest high-impact option in the roundup because the moving reflection provides detail without intricate hand painting.
How-To
Apply black gel, then one even coat of silver magnetic polish. Hold the magnet close to each side until a centered beam forms and cure immediately. Build one mosaic accent from tiny flat silver pieces.
Tips
Magnetize one nail at a time so the particles do not spread before curing. Keep mosaic pieces flat and seal their perimeter with a leveling top coat.
Items Used
- Black gel base
- Silver magnetic polish
- Cat-eye magnet
- Flat silver mosaic pieces
Frequently Asked Questions
What makes a manicure feel Kesha-inspired?
Glitter, rainbow color, unexpected mixed art, glam-rock metallics, and playful details all fit the mood. The manicure should feel expressive, but clean shaping and a repeated palette keep it intentional.
Can these Kesha nails work on short natural nails?
Yes. Gold glitter, aura color, micro stripes, animal spots, and magnetic polish all translate well to short nails. Reduce the number and scale of details rather than changing the whole concept.
How do I stop glitter and crystals from lifting?
Keep embellishments away from the free edge, secure them with appropriate gel, seal around every side, and check for gaps. Never pick at a lifted piece because it can pull layers from the natural nail.
Can I combine two of these ideas?
Choose one dominant design and use the second as an accent. For example, pair gold glitter with black stars or silver cat-eye with one rainbow stripe, while keeping the shape and base finish consistent.
Related Content
- 12 Cute Fun Nails That Are Playful and Trendy
- 12 Simple Y2K Nails That Feel Cute and Nostalgic
- 12 Cool Nails Design Ideas That Feel Fresh and Trendy
Closing
The best 12 Kesha nails are not about piling every bold detail onto one set. They are about choosing the part of her beauty style that feels most like you—glitter, color, flowers, chrome, or glam-rock graphics—and executing it with care. Start with one favorite idea, adjust the scale to your nail length, and make the palette personal. Try the design that caught your eye and share how you turned it into your own pop-star manicure.