
12 Winter Crafts for Kids Elementary Students Will Love

Winter Crafts for Kids Elementary
Winter is a wonderful time for elementary school kids to get creative, especially when cold weather keeps everyone indoors. Simple craft projects give children a chance to experiment with colors, practice fine motor skills, and make decorations they can proudly display at home or in the classroom. The best winter crafts do not need expensive supplies or complicated instructions. Everyday materials such as paper plates, cotton balls, cardboard, felt, recycled jars, and craft sticks can become surprisingly creative projects.
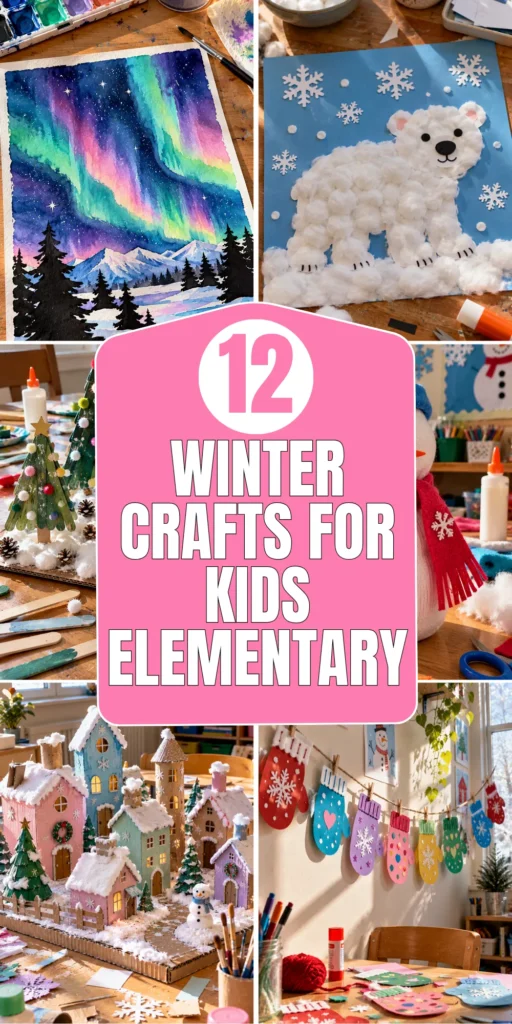
When choosing crafts for elementary-aged children, I like projects that offer enough freedom for kids to add their own personality while keeping the steps manageable. Some children enjoy cutting and assembling, while others prefer painting, drawing, or decorating. These 12 winter craft ideas include a mixture of activities for different ages and skill levels. Each project uses practical materials, simple techniques, and a little imagination to turn an ordinary afternoon into a fun winter crafting session.
1. Build a 3D Paper Snowflake Winter Mobile
Description
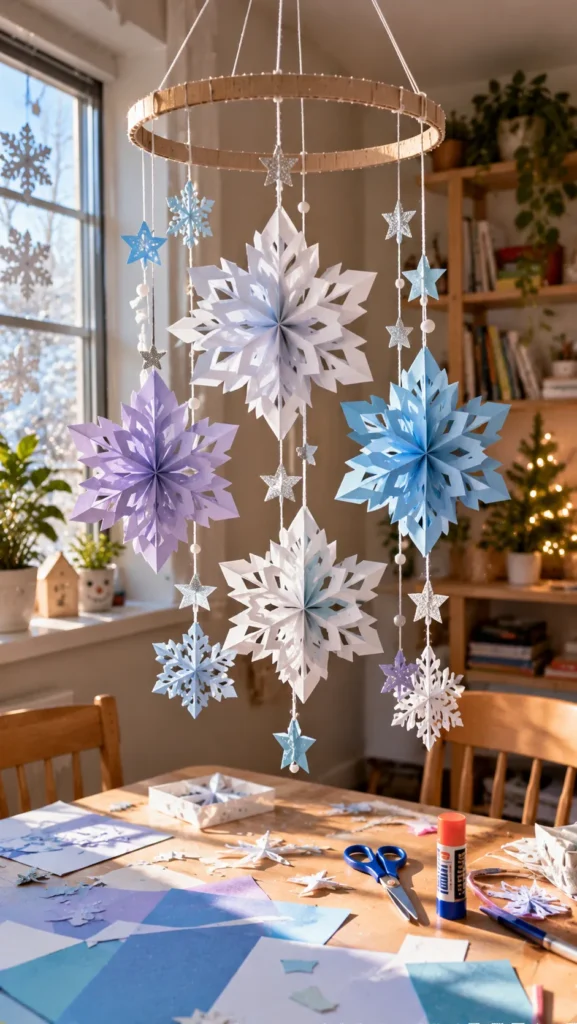
Instead of making ordinary flat snowflakes, children can create layered 3D paper snowflakes and hang them from a homemade mobile. This project introduces basic folding and cutting while producing a beautiful decoration that moves gently when the air circulates around it.
What You’ll Need
- White and pale-blue construction paper
- Child-safe scissors
- String or clear thread
- A wooden craft hoop or cardboard ring
- Glue stick and pencil
Quick How-To
Fold square paper diagonally and make several small cuts along the folded edges, leaving enough paper connected so the snowflake stays together. Carefully unfold each piece and repeat with different sizes. Layer two snowflakes together for a fuller effect, then attach string to each one. Tie the strings at different lengths around a craft hoop or cardboard ring. An adult can help secure the hanging mobile to the ceiling or a suitable hook.
Styling Tip
Mix white, icy blue, and silver paper for a soft winter look. Add a few tiny paper stars between the snowflakes to make the mobile more interesting without overcrowding it.
2. Make a Cotton Ball Arctic Polar Bear
Description
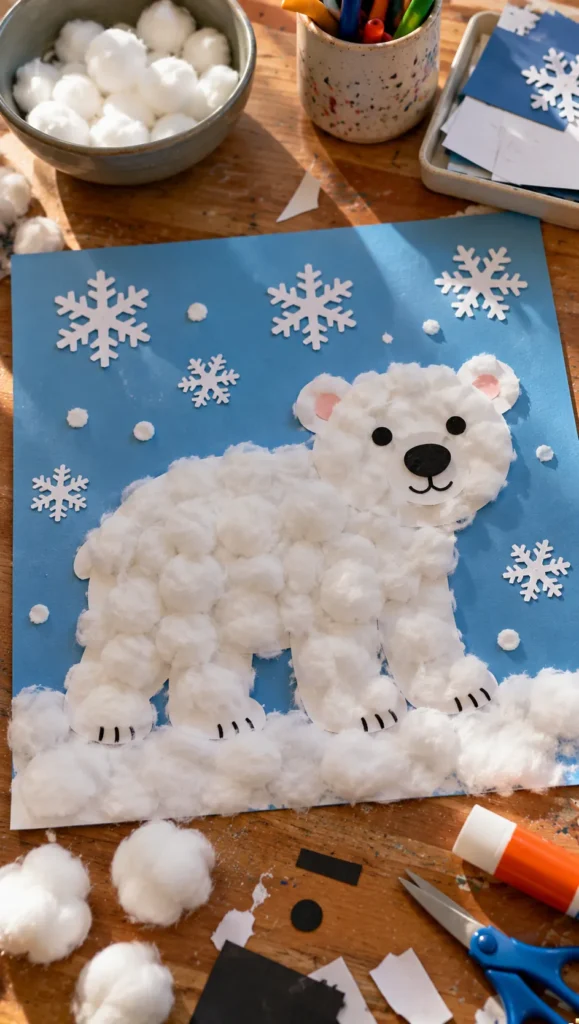
A cardboard polar bear covered with fluffy cotton balls is a fun winter craft that combines simple cutting, gluing, and creative decoration. Children can create their own friendly Arctic animal while learning about how polar bears live in cold environments.
What You’ll Need
- White cardstock or thin cardboard
- Cotton balls
- Child-safe scissors
- Glue
- Black construction paper
- Googly eyes or a black marker
Quick How-To
Draw a large polar bear shape on white cardstock, including its head, body, and four legs. An adult can cut out the shape for younger children. Let the kids cover the body with small cotton balls, leaving the face area visible. Add two eyes, a black nose, and a simple mouth using paper or a marker. Cut out a small white snowbank and glue the bear onto it to complete the scene.
Styling Tip
Mount the finished bear on pale-blue paper and add tiny paper snowflakes around it. Avoid using too much glue, as it can flatten the cotton and make the fluffy texture disappear.
3. Create a Winter Northern Lights Watercolor Painting
Description
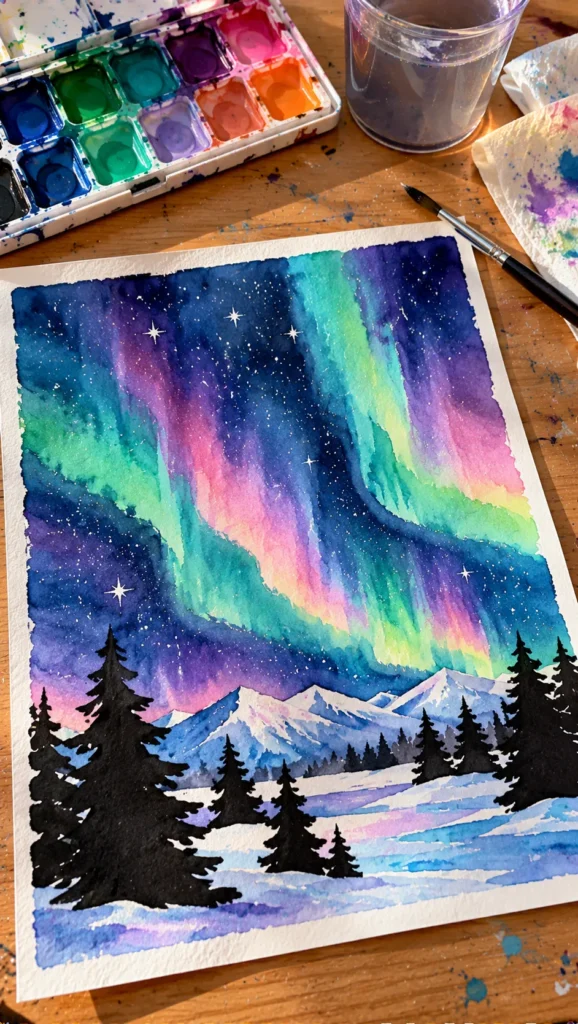
Children can recreate the beautiful colors of the northern lights with a simple watercolor activity. Blending green, blue, purple, and pink teaches them how colors interact while giving every child the freedom to create a completely different winter sky.
What You’ll Need
- Watercolor paper
- Washable watercolor paints
- Paintbrushes
- A cup of water
- Paper towels
- Black construction paper for silhouettes
Quick How-To
Lightly wet the watercolor paper with a clean brush. Let children paint broad, curved bands of green, blue, purple, and pink across the upper part of the page, allowing some colors to blend naturally. Once the paper is completely dry, cut simple tree, mountain, or cabin silhouettes from black paper and glue them along the bottom. Add small white stars with paint or a white crayon.
Styling Tip
Encourage children to leave some dark areas between the colorful bands. This creates a more dramatic sky and makes the northern lights stand out.
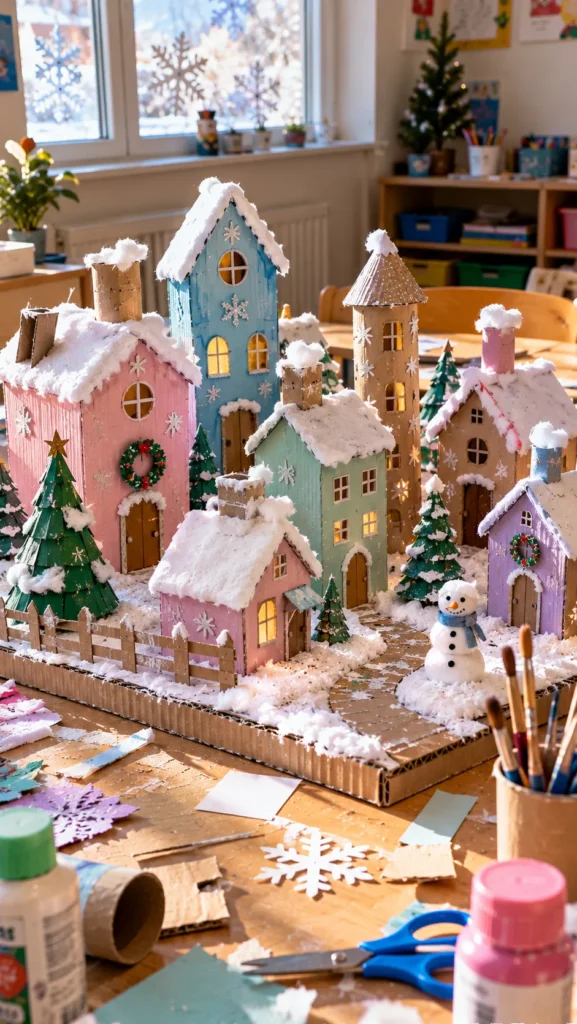
4. Make a Recycled Cardboard Winter Village
Description
Turn empty cardboard boxes and toilet paper rolls into a miniature winter village. Children can design little houses, decorate snowy rooftops, and create their own imaginary neighborhood. It is a particularly good group activity because everyone can contribute a different building.
What You’ll Need
- Small cardboard boxes and empty cardboard tubes
- White, blue, and colorful paint
- Construction paper
- Cotton balls
- Glue and child-safe scissors
- Markers
Quick How-To
Choose cardboard boxes and tubes in different sizes to create houses, shops, and towers. Paint them in soft winter colors and let them dry. Cut small windows, doors, and roof shapes from construction paper, then glue them into place. Add cotton balls or torn white paper to represent snow on the roofs. Arrange all the buildings on a larger piece of cardboard to create a village display.
Styling Tip
Give each child a different building to decorate, then combine everything into one shared winter town. Add paper trees and a winding white-paper pathway to connect the houses.
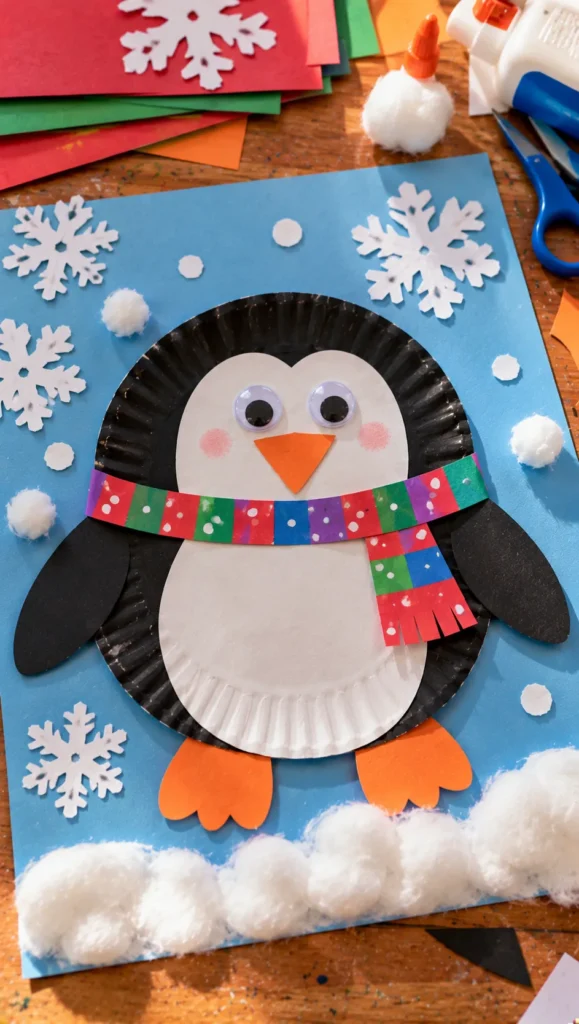
5. Design a Paper Plate Winter Penguin
Description
Paper plates make a useful base for a cheerful winter penguin craft. Children can practice cutting basic shapes and arranging facial features while learning about an animal that lives in cold environments. The project is inexpensive and works well for classrooms or a family craft afternoon.
What You’ll Need
- White paper plates
- Black and orange construction paper
- White paper
- Child-safe scissors
- Glue stick
- Googly eyes or a black marker
Quick How-To
Cut a large black oval or rounded body shape from construction paper and glue it onto the paper plate. Leave a white oval area in the center for the penguin’s belly. Cut two black wings, two orange feet, and a small orange triangle for the beak. Attach the pieces and add the eyes. Children can also cut a small scarf from colorful paper and wrap it around the penguin’s neck.
Styling Tip
Let children choose different scarf patterns and colors. Display several penguins together on a classroom wall to create a playful winter animal collection.
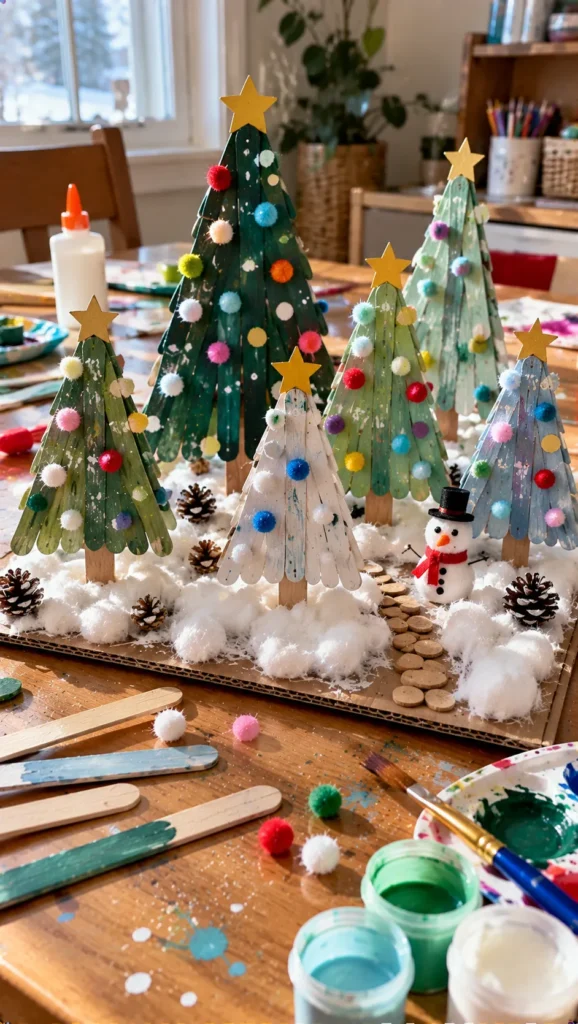
6. Craft a Winter Forest with Popsicle Stick Trees
Description
Popsicle stick trees are an easy way for elementary kids to create a miniature winter forest. Children can experiment with different tree shapes, paint colors, and decorations while using inexpensive craft materials. Each tree can stand alone or become part of a larger winter landscape.
What You’ll Need
- Wooden craft sticks
- Green, white, or blue paint
- Glue
- Small pom-poms or paper decorations
- Cotton balls
- Cardboard for the base
Quick How-To
Arrange three or four craft sticks into a simple triangular tree shape and glue them together. Add a short craft stick at the bottom to create a trunk. Once the glue dries, paint the tree and decorate it with small pom-poms, paper circles, or dots of washable paint. For a snowy tree, add small pieces of cotton or white paint along the branches. Glue the finished trees onto a cardboard base.
Styling Tip
Make trees in different heights and shades of green. A few white and blue trees can create a frosty forest effect without needing many additional supplies.
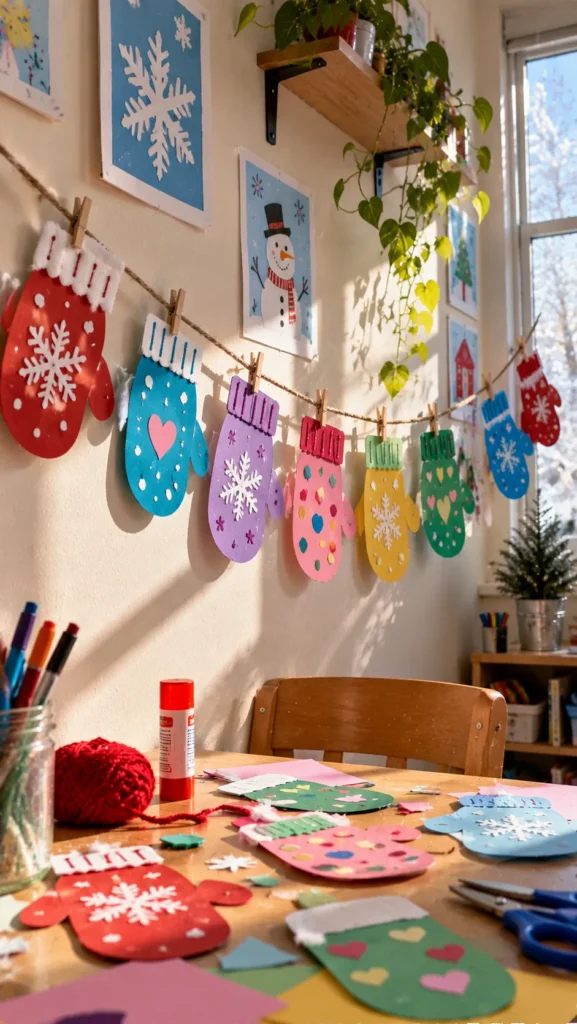
7. Make a DIY Winter Mitten Garland
Description
A colorful mitten garland is a simple winter decoration that gives children plenty of opportunities to practice cutting, coloring, and pattern-making. Each child can design a pair of mittens with different patterns, turning a basic paper craft into a cheerful display for a bedroom, classroom, or playroom.
What You’ll Need
- Colored construction paper
- White cardstock
- Crayons or washable markers
- Child-safe scissors
- Yarn or string
- Glue and small paper decorations
Quick How-To
Draw a mitten shape on cardstock and use it as a template. Trace and cut out several mittens from different colored papers. Let children decorate each mitten with stripes, dots, zigzags, snowflakes, or small paper hearts. Cut a small paper cuff for each mitten and glue it near the opening. Attach the finished mittens to a length of yarn using small clips or paper loops.
Styling Tip
Alternate bright mittens with white and pale-blue ones to create a balanced winter color scheme. Hang the garland across a classroom noticeboard or along a wall where it can be easily seen.
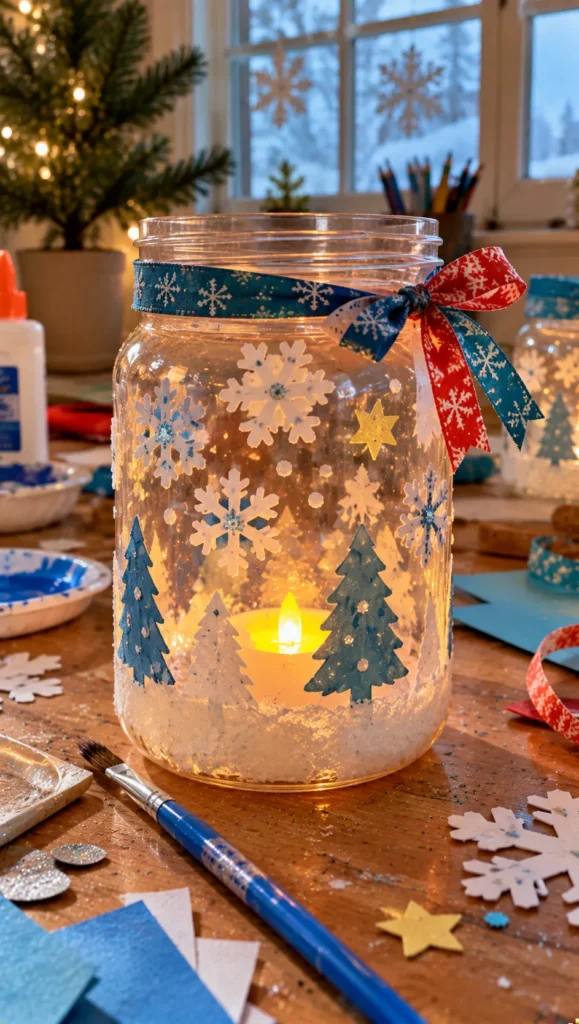
8. Create a Snowy Mason Jar Lantern
Description
An empty glass jar can become a beautiful winter lantern with a little paint, paper decoration, and creativity. Children can personalize their own snowy scene using simple shapes and winter colors. This craft is best completed with adult supervision because glass jars can break and decorative lights should be handled safely.
What You’ll Need
- Clean, empty glass jars or plastic jars
- White washable paint or paper snowflakes
- Paintbrushes
- Blue construction paper
- Glue suitable for the jar material
- Battery-operated LED tea lights
Quick How-To
Clean and dry the jar before decorating. Children can paint small snowflakes, dots, or winter trees around the outside, or glue paper decorations onto a suitable plastic jar. Let everything dry completely. Place a battery-operated LED tea light inside, making sure it is stable and does not touch loose decorations. Avoid using real candles or open flames.
Styling Tip
Use different-sized jars and decorate each with a slightly different winter scene. Place them together on a safe display surface to create a little glowing winter village.
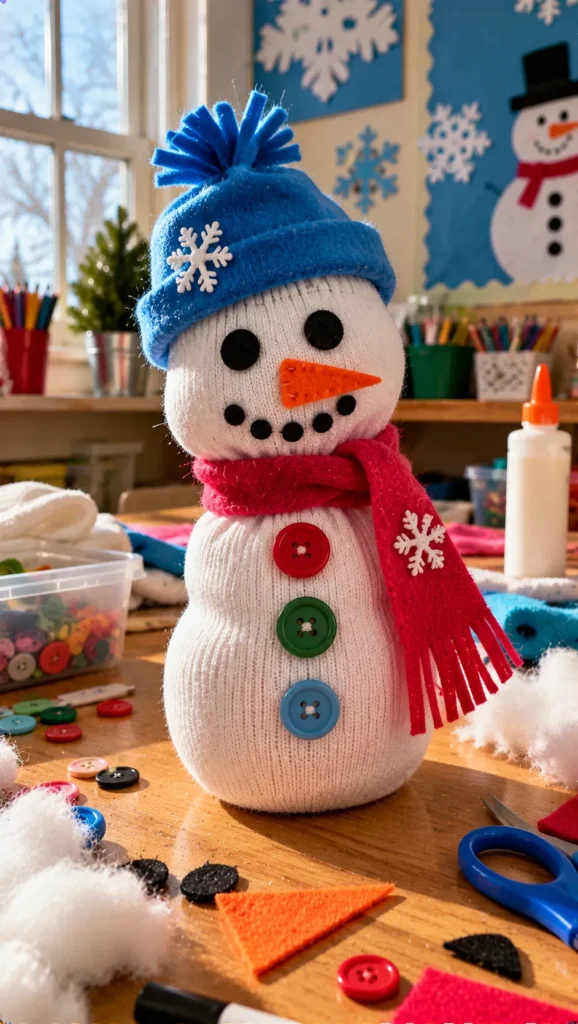
9. Make a Snowman Sock Puppet
Description
A white sock can become a friendly snowman puppet with a few simple decorations. This project combines crafting and imaginative play, giving children something they can use for storytelling after they finish decorating. It is also a useful way to reuse clean socks that no longer have a matching pair.
What You’ll Need
- Clean white socks
- Cotton stuffing or soft fabric scraps
- Small buttons or felt circles
- Orange felt or paper
- Ribbon or fabric scraps
- Glue and child-safe craft materials
Quick How-To
Fill the sock with soft stuffing until it forms a rounded snowman shape. Secure the top with an adult’s help using a tight knot or suitable fastener. Tie a colorful ribbon around the middle to create a scarf. Add felt eyes, a small orange nose, and buttons down the front. For a hat, use a small fabric scrap or a piece of colored felt. Make sure small pieces are securely attached and supervise younger children.
Styling Tip
Give every snowman a different personality with colorful scarves, funny expressions, and little handmade hats. Children can introduce their puppets and invent short winter stories.
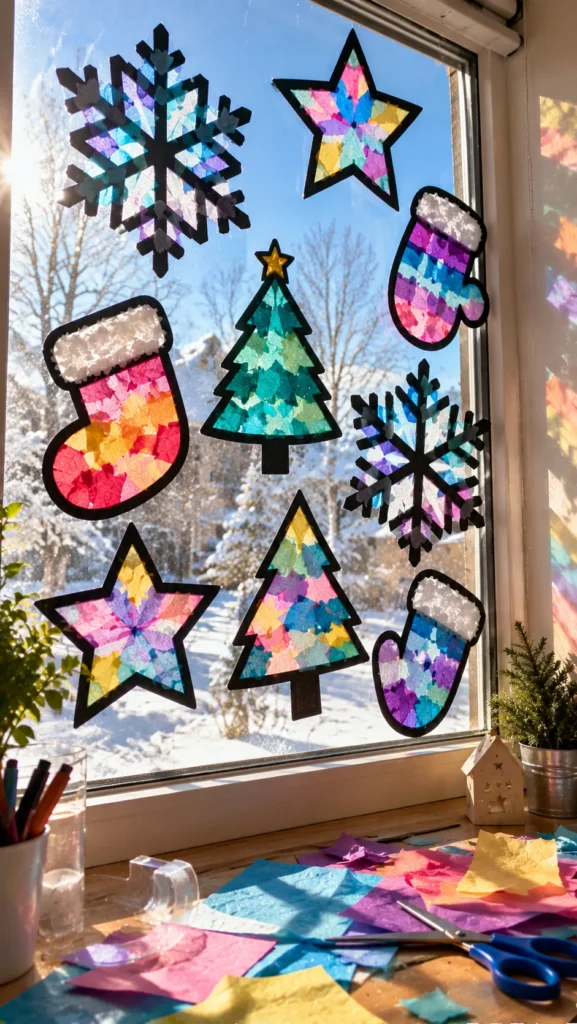
10. Design a Winter Window Suncatcher
Description
Winter window suncatchers let children explore color and light using translucent craft materials. When sunlight passes through the finished decoration, the colors create a cheerful effect on the window. Snowflakes, mittens, stars, and winter trees are all simple shapes that work beautifully for this project.
What You’ll Need
- Clear contact paper
- Tissue paper in different colors
- Black construction paper
- Child-safe scissors
- Pencil and winter shape templates
Quick How-To
Cut a simple winter shape from black construction paper, leaving an open center like a frame. Place a piece of clear contact paper behind the frame with its sticky side facing up. Tear small pieces of colored tissue paper and let children arrange them inside the shape, overlapping some pieces if they wish. Cover the back with another piece of contact paper and trim the edges. Attach it to a window using removable tape.
Styling Tip
Use pale blue, purple, pink, and white tissue paper for a frosty winter look. Try different shapes and sizes so the window display feels colorful rather than repetitive.
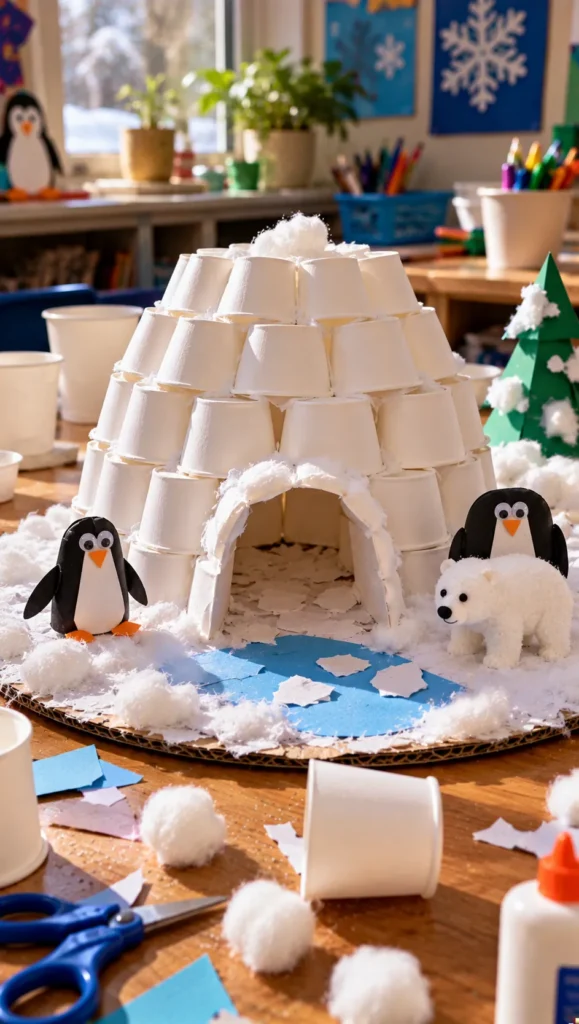
11. Build a Mini Winter Igloo from Paper Cups
Description
A miniature igloo made from paper cups is a fun building activity for elementary-aged children. It encourages patience, simple problem-solving, and teamwork as kids arrange repeated shapes into a dome. The finished project can become part of a larger Arctic-themed classroom display.
What You’ll Need
- Small white paper cups
- Cardboard base
- Glue suitable for paper
- White cotton or paper scraps
- Blue construction paper
- Markers
Quick How-To
Place the paper cups upside down on the cardboard base, arranging them in a wide circle. Glue the first row in position, then add smaller rows on top, moving each cup slightly inward to form a dome. Leave a small opening for the entrance. Allow the structure to dry between rows if needed. Add white paper around the base and draw a snowy landscape with blue paper details.
Styling Tip
Add small paper penguins or polar bears beside the igloo to turn it into a miniature Arctic scene. For younger children, build the structure together rather than expecting them to balance all the cups independently.
12. Create a Winter Memory Snow Globe
Description
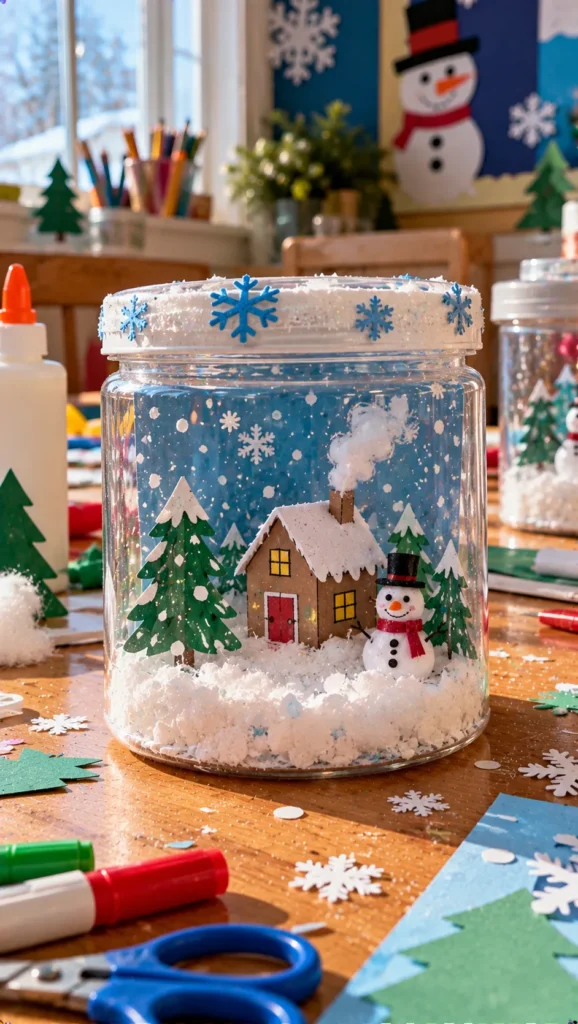
A homemade snow globe lets children create a tiny winter scene inside a clear container. They can design a little snowy landscape with paper trees, a cardboard cabin, or a winter character. Using a dry, sealed display version makes the project easier and avoids spills, while still giving kids the fun of creating their own miniature world.
What You’ll Need
- A clean, clear plastic container with a secure lid
- Cardboard or waterproof craft decorations
- White paper or cotton for snow
- Child-safe glue
- Blue construction paper
- Small winter-themed decorations
Quick How-To
Choose a clear plastic container with a lid that closes securely. Create a small winter scene using cardboard shapes, paper trees, and a little winter character. Attach the decorations to a stable cardboard base that fits inside the container. Let the glue dry completely, then place the scene inside and add a few small pieces of white paper to suggest snow. Close the container securely with adult help. Keep the finished craft as a dry display rather than adding water unless using materials specifically designed for a sealed water-filled snow globe.
Styling Tip
Keep the scene simple so the little details remain visible through the container. A tiny cabin, two paper trees, and a snowman can create a charming winter landscape without making the inside feel crowded.
FAQ SECTION
What are the easiest winter crafts for elementary students?
Paper plate penguins, cotton ball polar bears, paper snowflakes, and mitten garlands are excellent starting points. They use inexpensive materials and simple steps while allowing children to add their own creative details.
What materials should I keep for winter crafts?
A basic craft box can include construction paper, cardstock, glue sticks, child-safe scissors, washable paints, cotton balls, craft sticks, yarn, markers, and recycled cardboard. Keeping these supplies together makes it easier to start projects without extra preparation.
How can I organize winter crafts for a classroom?
Prepare individual supply trays before the activity and demonstrate each step briefly. For larger projects, divide children into small groups and give each group a different task. This reduces waiting time and makes cleanup easier.
How do I adapt winter crafts for different elementary grade levels?
Younger children may need pre-cut shapes, larger materials, and help with assembly. Older elementary students can plan their own designs, use more detailed patterns, and complete additional steps independently. Keep the main creative idea the same while adjusting the amount of assistance.
How can I make winter crafts more affordable?
Use recycled jars, cardboard boxes, paper scraps, old socks, and leftover craft materials. Many winter projects need only a few basic supplies, and children can share materials such as paint, glue, and decorations.
How can I display children’s winter crafts?
Create a winter-themed wall, hang paper decorations from a classroom display, or arrange three-dimensional projects on a shelf. Add each child’s name to their creation so everyone receives recognition for their work.
Are these winter crafts suitable for group activities?
Yes. Several projects, including the cardboard winter village, popsicle stick forest, and mitten garland, work especially well as group activities. Children can make individual pieces that combine into one larger display.
What safety precautions should I take?
Choose child-safe scissors, washable materials, and age-appropriate supplies. Adults should supervise cutting, hot glue, small decorative pieces, glass jars, and hanging decorations. Use battery-operated LED lights instead of real candles, and check that all finished decorations are securely assembled.
RELATED CONTENT
CLOSING
Winter crafting is about more than making decorations. It gives children an opportunity to experiment, solve little problems, express their ideas, and feel proud of something they created themselves. You do not need perfect materials or complicated instructions to make these activities enjoyable. Sometimes the most memorable projects are the ones with funny snowman faces, uneven paper snowflakes, and colorful decorations that show each child’s personality.
Choose a project that matches your children’s ages and interests, prepare a few simple supplies, and let their imaginations take over. I hope these winter crafts bring plenty of creativity and fun to your home or classroom. If you try any of these ideas, I would love to see the little masterpieces your kids create!



One Comment