12 Kids Christmas Crafts for Gifts That Family Will Love

Kids Christmas Crafts for Gifts
Christmas is such a lovely time to encourage children to get creative and make something special for the people they love. Homemade gifts do not need to be expensive or perfectly finished to feel meaningful. In fact, the little fingerprints, colorful decorations, and funny handmade details are often what make these presents unforgettable.
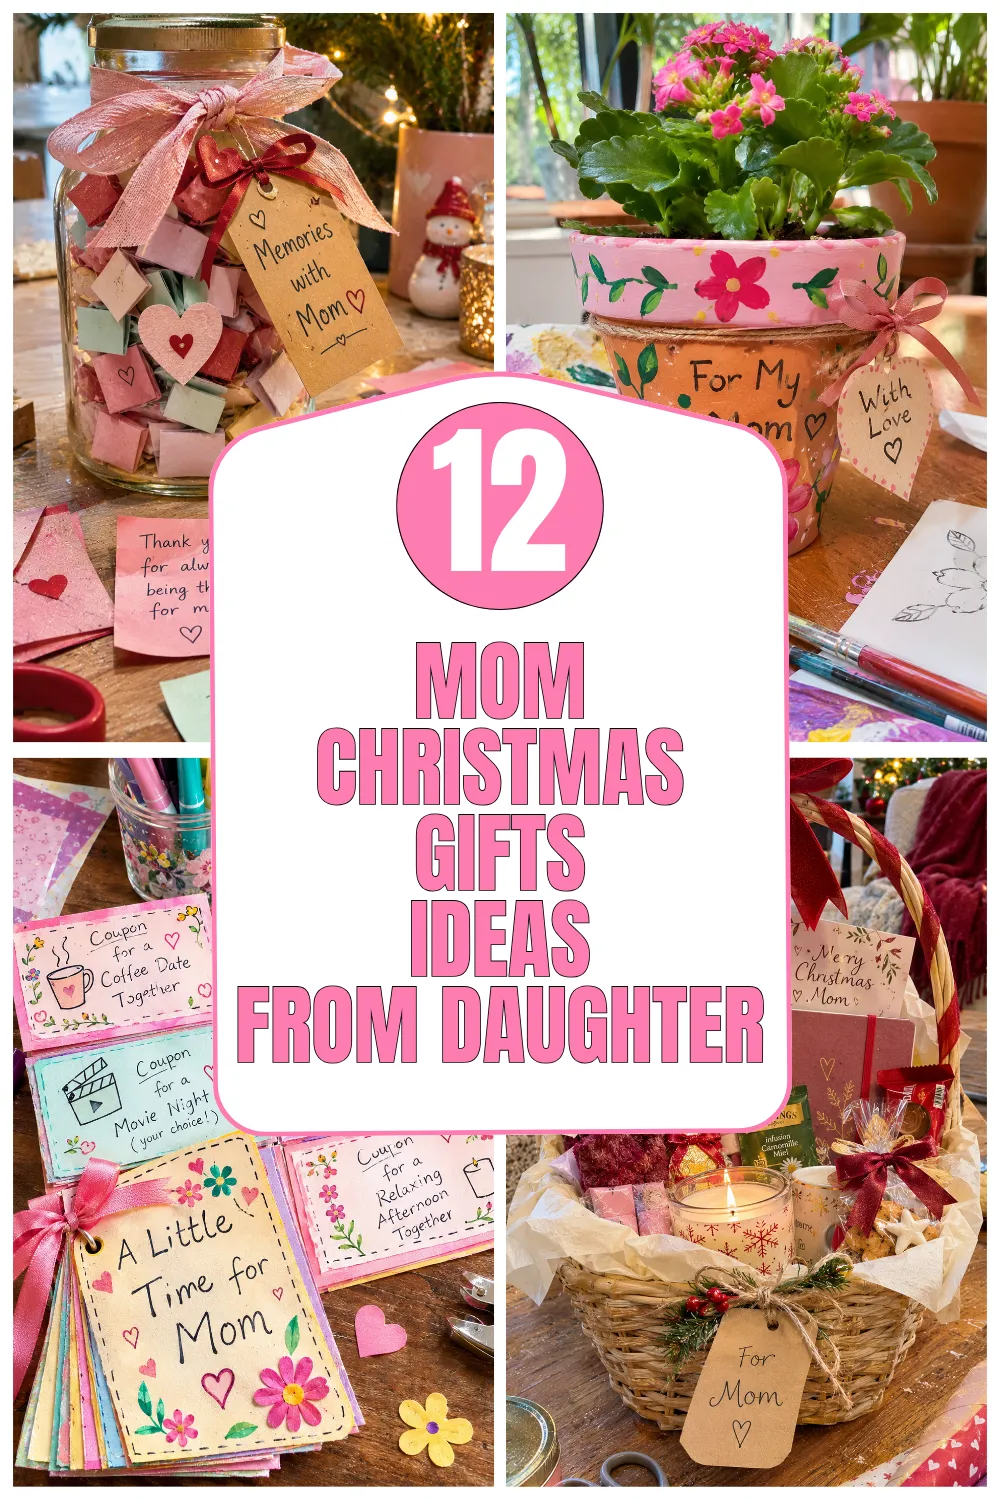
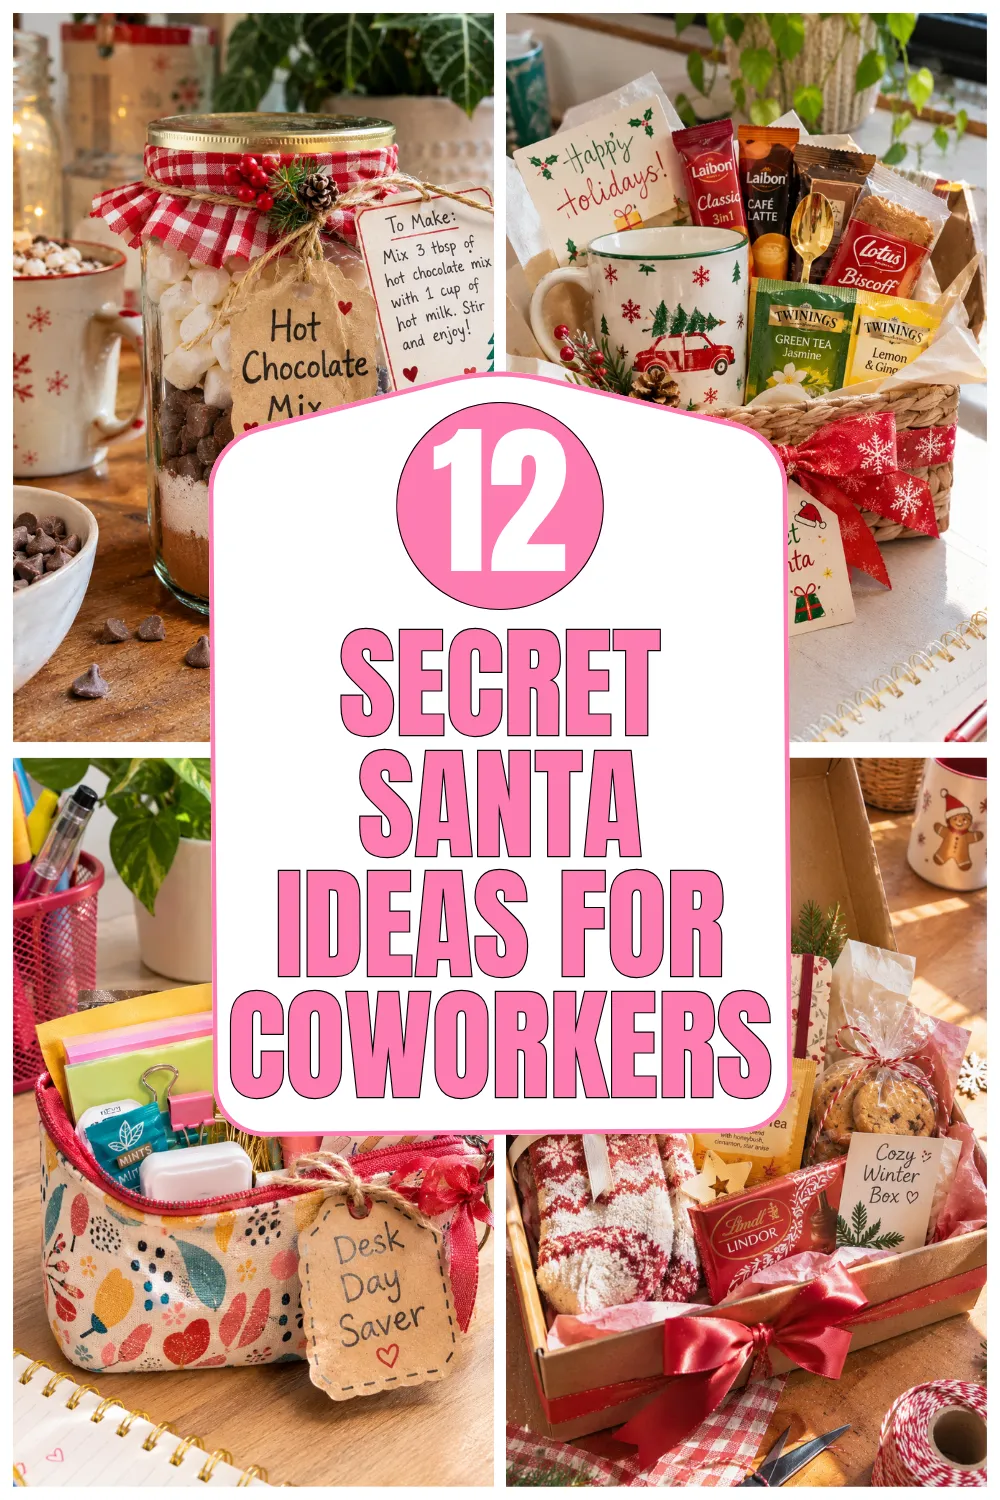
These 12 kids Christmas crafts for gifts are designed to be fun, affordable, and practical for making at home, in the classroom, or during a family craft afternoon. Most use easy-to-find supplies such as paper, cardboard, felt, jars, paint, and ribbon.
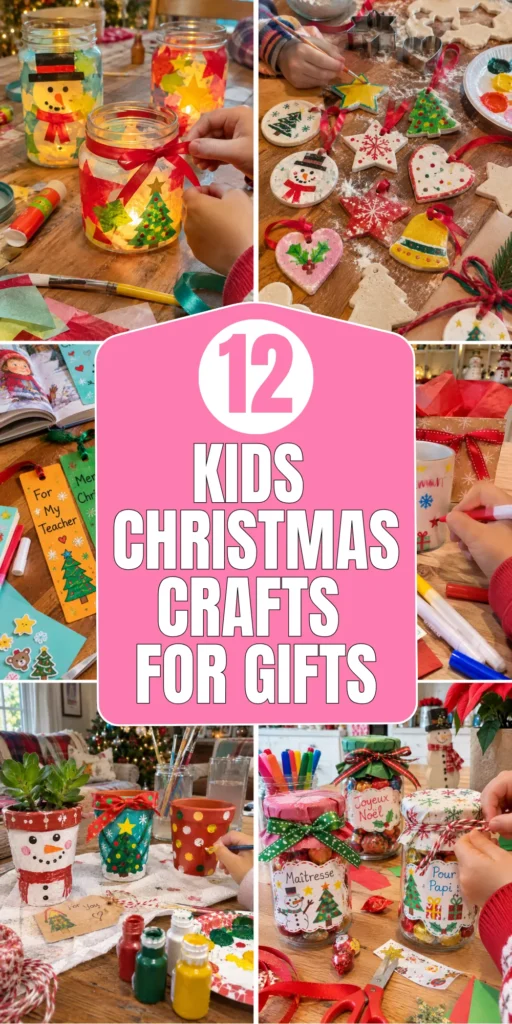
Younger children may need help with cutting, hot glue, or small parts, while older kids can handle more of the decorating and assembly themselves.
The best part is that every project can be personalized. Children can choose colors, add names, include a handwritten message, or decorate each gift to match the person receiving it. A little handmade present can become a keepsake that family members will treasure long after Christmas.
1. DIY Christmas Handprint Keepsake Ornaments
Description
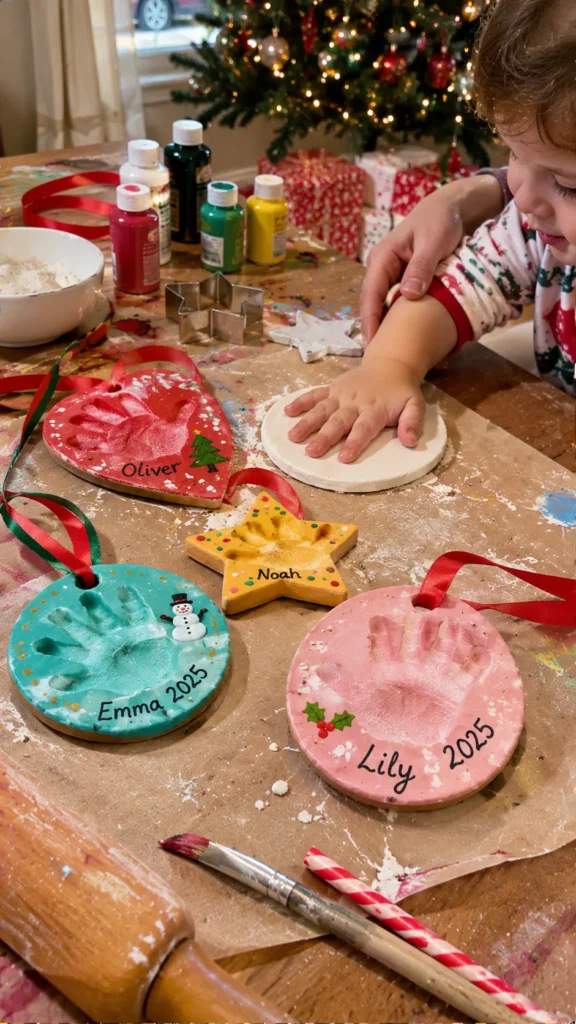
Turn a child’s little handprint into a meaningful Christmas keepsake for grandparents, parents, or relatives. These ornaments are inexpensive to make and can be personalized with names and dates. Using air-dry clay creates a sturdy result, while careful handprint placement helps preserve the tiny details.
What It Is
A handmade Christmas tree ornament featuring a child’s handprint pressed into air-dry clay. It can be shaped like a circle, star, or heart and decorated with the child’s name, the year, and a festive ribbon.
Supplies and Budget
- Air-dry clay: $4–$7
- Rolling pin: use one from your kitchen
- Cookie cutters: $2–$4
- Drinking straw for the hanging hole
- Acrylic paint: $3–$5
- Ribbon: $2–$3
Estimated budget: $11–$19 for several ornaments.
Tutorial how to make:
- Knead the clay until it feels soft and smooth, without dry cracks.
- Roll it out to approximately ¼ inch thick so the ornament will be strong enough to handle.
- Cut out a circle, star, or heart shape.
- Help the child press their hand gently into the clay. Avoid pushing too hard because the clay may become too thin.
- Use a straw to make a hanging hole near the top, leaving enough space around it.
- Write the child’s name and year with a wooden stick or clay tool.
- Let the ornament dry completely according to the clay instructions, turning it if necessary.
- Once dry, paint the design and add a ribbon through the hole.
DIY Tip
Make a test handprint on a small piece of leftover clay before creating the final ornament. If the child presses too hard, the clay can become uneven or crack while drying. Always allow the ornament to dry fully before painting or hanging it.
2. Handmade Christmas Photo Frames
Description
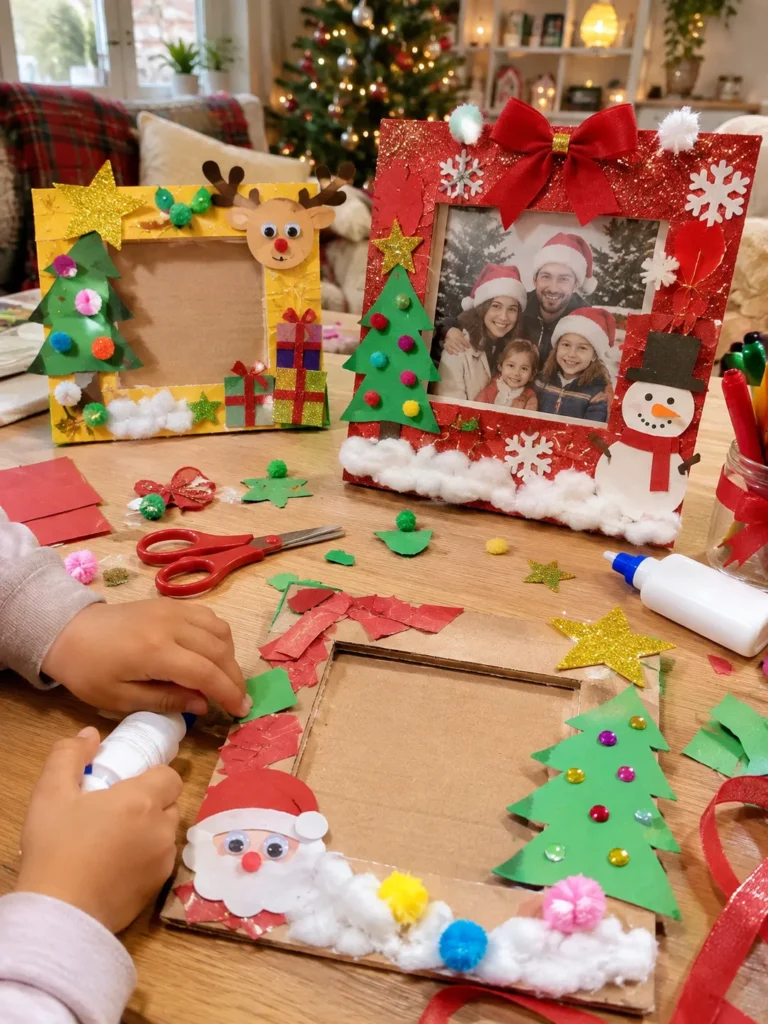
A personalized photo frame is a sweet gift that children can decorate for parents, grandparents, or other family members. Cardboard makes this project affordable and easy to customize. The most important detail is making the frame sturdy enough to hold a photograph without bending.
What It Is
A homemade picture frame decorated with Christmas colors, paper shapes, buttons, pom-poms, or small craft ornaments. Add a favorite family photograph to turn it into a personal Christmas present.
Supplies and Budget
- Thick cardboard: $1–$3
- Colored cardstock: $2–$4
- Glue stick or craft glue: $2–$4
- Child-safe scissors
- Markers or crayons: $2–$4
- Ribbon, buttons, or pom-poms: $3–$5
- Printed photograph: $1–$2
Estimated budget: $11–$22.
Tutorial how to make:
- Cut two matching cardboard rectangles slightly larger than the photograph.
- Cut a smaller rectangle from the center of the front piece to create the photo opening.
- Cover the front piece with colored cardstock or let the child paint it.
- Decorate the border with paper Christmas trees, stars, snowflakes, or small pom-poms.
- Glue the photograph onto the solid back piece, positioning it so it shows through the opening.
- Attach the front frame around the photograph, leaving one side accessible if you want to change the picture later.
- Create a cardboard stand by folding a long strip into a triangular support and attaching it to the back.
- Write a small message such as “Merry Christmas” or the recipient’s name.
DIY Tip
Use thick corrugated cardboard rather than thin paperboard from a cereal box for the main structure. Thin cardboard can curl when glue and paint are applied, especially around the photo opening.
3. DIY Christmas Candle Jars with LED Lights
Description
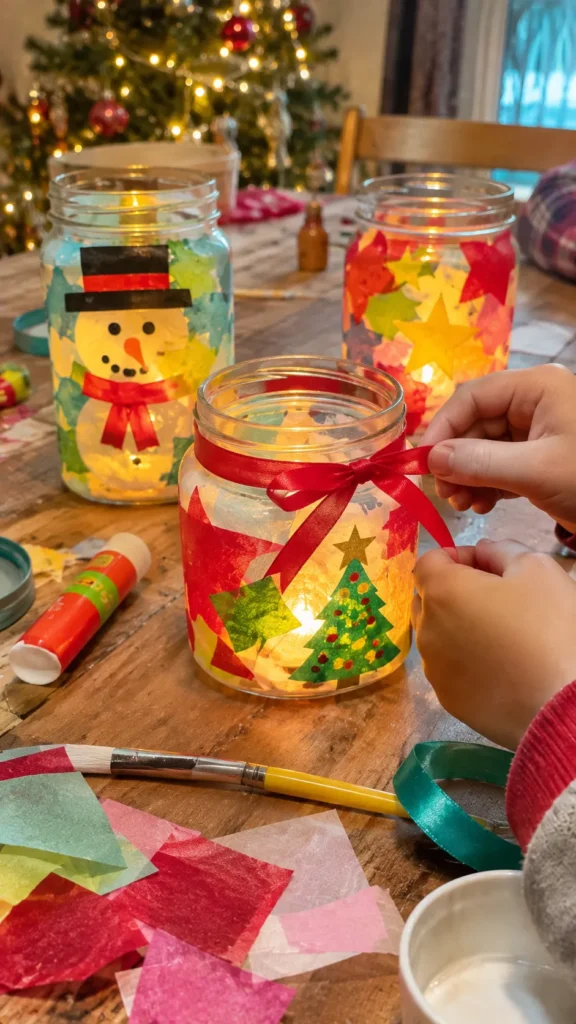
Children can turn clean glass jars into colorful Christmas decorations that make thoughtful gifts for relatives and teachers. Tissue paper, ribbons, and painted details create a lovely handmade finish. Use battery-operated LED tea lights rather than real candles to keep this child-friendly project safer.
What It Is
A decorated glass jar that works as a festive lantern or small decorative light. Children can create snowmen, Christmas trees, stars, or colorful patterns on the outside.
Supplies and Budget
- Clean glass jars: free if reused
- Tissue paper: $2–$4
- Craft glue: $2–$4
- Paint or paint markers: $3–$5
- Ribbon or twine: $2–$3
- Battery-operated LED tea light: $2–$4
Estimated budget: $11–$20 for multiple jars.
Tutorial how to make:
- Wash and dry the jars thoroughly, removing any labels and sticky residue.
- Cut tissue paper into small pieces or simple festive shapes.
- Brush a thin layer of craft glue onto the outside of the jar.
- Place the tissue paper pieces onto the glue, overlapping them slightly to create a colorful design.
- Add painted stars, snowflakes, Christmas trees, or a simple snowman face once the surface has dried.
- Tie a ribbon or twine around the top of the jar.
- Place a battery-operated LED tea light inside and check that the light is visible through the decoration.
- Add a small gift tag with the child’s name and a Christmas greeting.
DIY Tip
Do not cover the entire jar with thick layers of tissue paper. Too much material can make the light look dull. A few thin layers allow the LED glow to shine through more clearly.
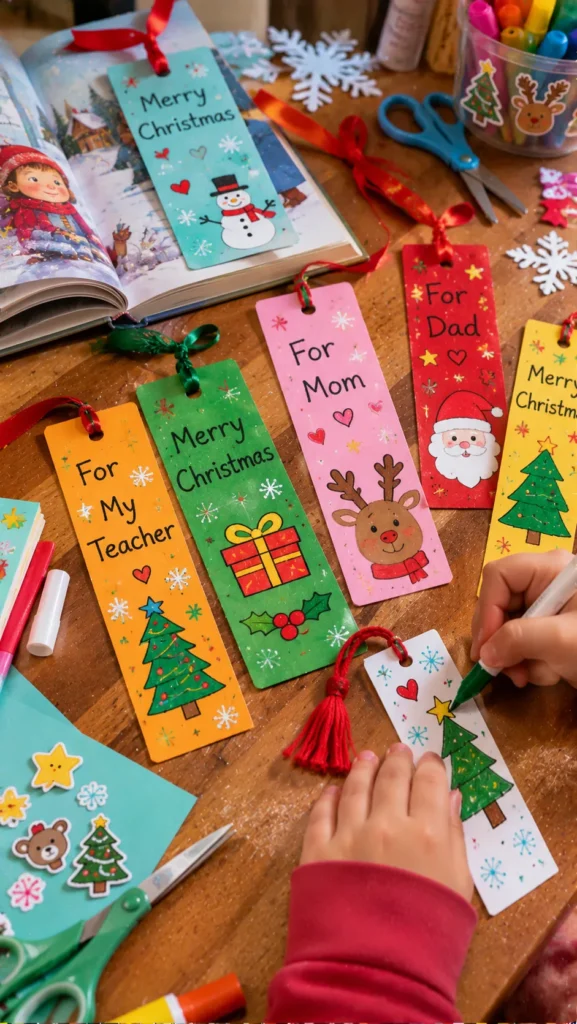
4. Personalized Christmas Bookmarks
Description
Handmade bookmarks are practical little gifts for teachers, grandparents, siblings, and anyone who enjoys reading. Children can create several in one afternoon using cardstock, markers, and ribbon. Laminating them or covering them with clear adhesive film helps protect the artwork from everyday use.
What It Is
A personalized Christmas bookmark decorated with festive illustrations, handwritten names, colorful patterns, or a small seasonal message. Each one can be designed to match the person receiving it.
Supplies and Budget
- Thick cardstock: $2–$4
- Colored markers: $3–$5
- Stickers: $2–$3
- Hole punch: $2–$4
- Ribbon or yarn: $2–$3
- Clear adhesive covering: $3–$5
Estimated budget: $14–$24 for several bookmarks.
Tutorial how to make:
- Cut cardstock into rectangles approximately 2 inches wide and 6 inches long.
- Round the corners with scissors to prevent sharp edges.
- Let children draw Christmas trees, snowflakes, reindeer, stars, or other festive pictures.
- Add the recipient’s name or a short personal message.
- Cover both sides with clear adhesive film if available, smoothing out air bubbles carefully.
- Punch a hole near the top, leaving enough space so the paper does not tear.
- Thread a small piece of ribbon or yarn through the hole and tie a secure knot.
- Write the child’s name and the year on the back.
DIY Tip
Choose cardstock that is thick enough to stay flat but not so thick that it becomes difficult to cut. If using clear adhesive film, apply it slowly from one edge to reduce wrinkles and trapped air.
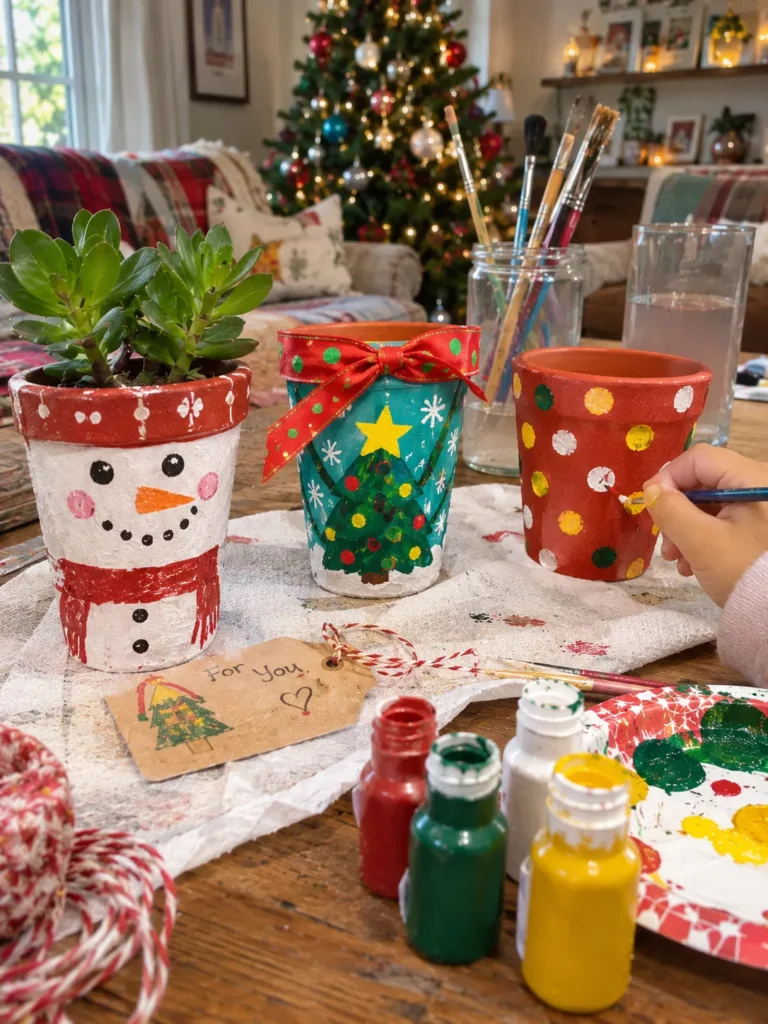
5. DIY Christmas Painted Flower Pots
Description
Small painted flower pots make cheerful gifts for grandparents, teachers, and family friends. Children can decorate simple terracotta pots with Christmas colors and playful designs. Pairing each pot with a small, easy-care plant makes the gift feel complete and useful.
What It Is
A small terracotta plant pot decorated with hand-painted Christmas designs such as snowmen, stars, candy canes, Christmas trees, or colorful patterns. It can hold a small succulent or another suitable plant.
Supplies and Budget
- Small terracotta pots: $2–$4 each
- Acrylic paint: $3–$5
- Paintbrushes: $2–$4
- Paint markers: $3–$5
- Clear water-based sealer suitable for the intended use: $3–$5
- Small plant: $3–$6
Estimated budget: $16–$29 for one complete gift.
Tutorial how to make:
- Wipe the pot with a dry cloth to remove dust.
- Paint the outside with a base color such as white, red, green, or pastel blue.
- Allow the base coat to dry completely before adding details.
- Let children paint simple Christmas designs using small brushes or paint markers.
- Add the recipient’s name or a short message near the top of the pot.
- Once the paint is dry, apply a suitable sealer according to its instructions if the pot needs extra protection.
- Add a small plant and arrange the soil neatly.
- Wrap the pot with tissue paper and tie a ribbon around it.
DIY Tip
Terracotta absorbs paint quickly, so two thin coats usually give a more even finish than one thick coat. Keep paint and sealant away from the inside of the pot if the plant will need direct contact with the soil.
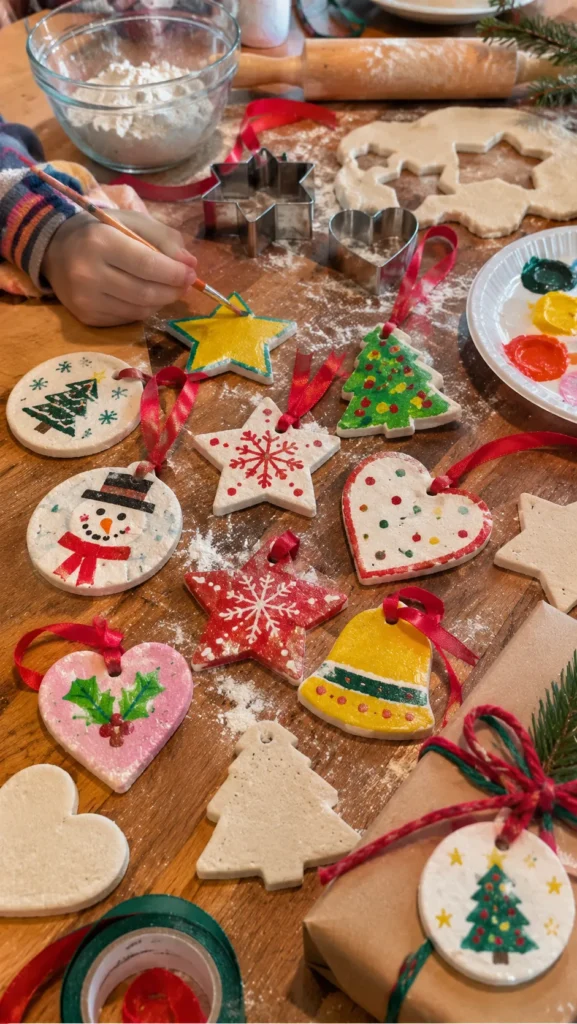
6. Handmade Christmas Salt Dough Gift Tags
Description
These homemade gift tags are a lovely way for children to add a personal touch to Christmas presents. Salt dough is inexpensive and easy to shape, and children can make stars, hearts, trees, and other festive designs. Allow enough drying time so the finished tags become firm before decorating.
What It Is
Small decorative tags made from homemade salt dough, painted in Christmas colors and attached to gift packages with ribbon or twine. They can also become keepsake decorations for family members.
Supplies and Budget
- Flour: $1–$2
- Salt: $1–$2
- Water: free
- Rolling pin
- Cookie cutters: $2–$4
- Acrylic paint: $3–$5
- Ribbon or twine: $2–$3
Estimated budget: $9–$16.
Tutorial how to make:
- Mix two cups of flour with one cup of salt in a large bowl.
- Gradually add approximately one cup of water, mixing until a firm dough forms.
- Knead the dough until smooth. Add a little flour if it feels too sticky.
- Roll it out to approximately ¼ inch thick.
- Cut out stars, hearts, trees, or circles using cookie cutters.
- Make a small hole near the top of each shape using a straw.
- Dry the pieces completely in a low-temperature oven according to a suitable salt-dough drying method, or air-dry them for several days until firm.
- Once cool and completely dry, let children paint them and add names or dates.
- Thread ribbon through the holes after the paint has dried.
DIY Tip
The most common problem with salt dough is uneven drying. Keep all pieces approximately the same thickness and avoid making them too thick. These tags are decorative only and should not be eaten.
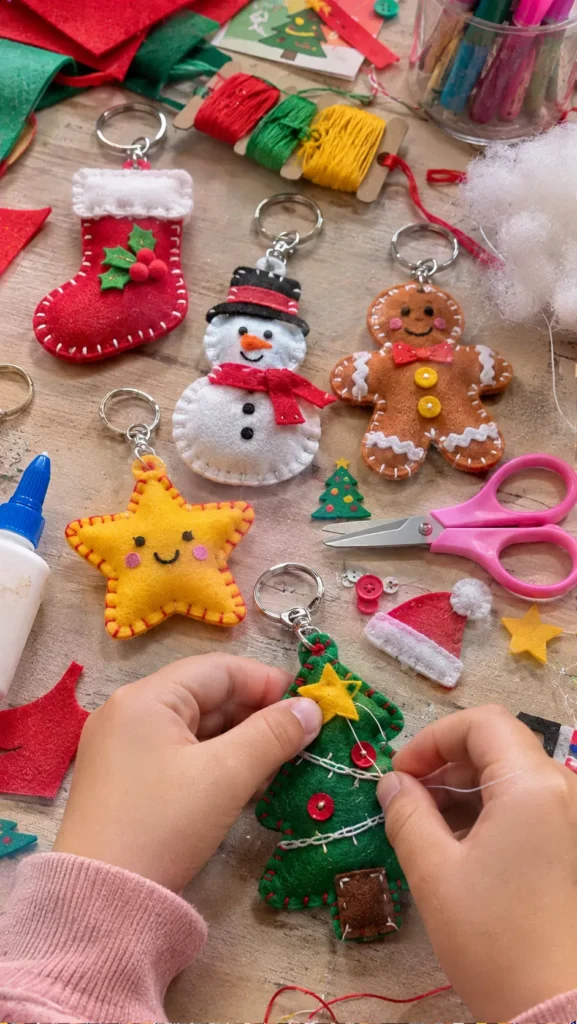
7. DIY Christmas Felt Keychains
Description
Felt keychains are small, colorful gifts that children can make for siblings, cousins, teachers, or friends. Felt is easy to handle and comes in many festive colors. Simple shapes work best, especially when children are learning to sew or use fabric glue.
What It Is
A soft handmade keychain shaped like a Christmas tree, gingerbread person, star, stocking, or snowman. It can be personalized with small felt details, embroidery thread, or a name.
Supplies and Budget
- Colored felt sheets: $3–$5
- Child-safe scissors
- Fabric glue: $2–$4
- Cotton stuffing: $2–$3
- Embroidery thread: $2–$4
- Keychain rings: $3–$5
- Buttons or felt decorations: $2–$3
Estimated budget: $14–$24 for several keychains.
Tutorial how to make:
- Draw a simple festive shape onto paper and cut it out to create a template.
- Trace the template twice onto a sheet of felt.
- Cut out both matching shapes carefully.
- Decorate the front piece with smaller felt shapes, stitched details, or fabric glue.
- Place the two large felt pieces together with the decorated sides facing outward.
- Sew around the edges with a simple running stitch, or use fabric glue if sewing is not suitable.
- Leave a small opening, add a little stuffing, and close the remaining gap.
- Attach a small felt loop and connect it to a keychain ring.
DIY Tip
Avoid adding too much stuffing because the keychain can become bulky and difficult to close. For younger children, prepare the felt shapes in advance and let them focus on decorating and assembling with adult help.
8. DIY Christmas Mug Gift with Handmade Decorations
Description
A decorated mug can become a useful Christmas present when children personalize it with simple festive artwork. Choose a plain mug and use markers specifically designed for ceramic surfaces, following the manufacturer’s curing instructions. Pair it with a small handmade card for a thoughtful finished gift.

What It Is
A plain ceramic mug decorated with Christmas drawings, names, stars, snowflakes, or cheerful messages. It can be presented with hot chocolate sachets or wrapped sweets for a complete gift.
Supplies and Budget
- Plain ceramic mug: $3–$5
- Ceramic paint markers: $5–$8
- Small gift tag or cardstock: $1–$2
- Ribbon: $2–$3
- Hot chocolate sachet: $1–$2
- Gift wrap: $2–$3
Estimated budget: $14–$23.
Tutorial how to make:
- Wash the mug and dry it completely so there is no dust or grease on the surface.
- Plan the design on paper before drawing directly onto the mug.
- Let children create simple pictures using ceramic markers.
- Add the recipient’s name or a short Christmas message.
- Allow the design to dry and cure exactly as instructed by the marker manufacturer.
- Check the product’s care instructions before gifting. Some decorations are not suitable for food-contact areas or dishwasher use.
- Add a hot chocolate sachet and a small card.
- Wrap the mug carefully with tissue paper and place it in a protective gift box.
DIY Tip
Do not use ordinary permanent markers if you want a lasting design on a mug. Choose products specifically made for ceramics, and follow their instructions carefully. Keep decorations away from the rim and inside drinking surface unless the product is explicitly approved for those areas.
9. Handmade Christmas Button Art Cards
Description
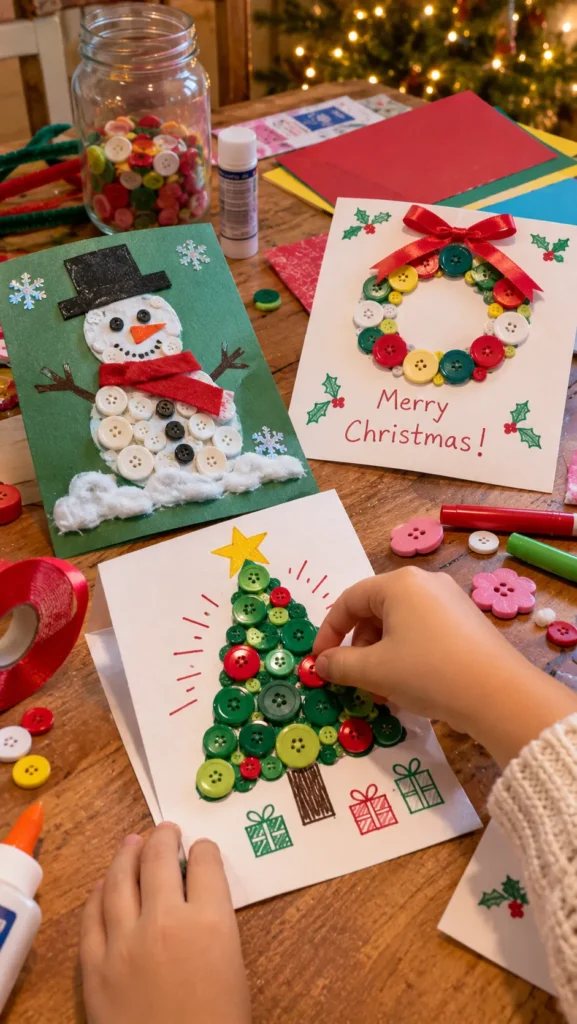
Christmas cards decorated with colorful buttons are an easy way for children to make thoughtful gifts for relatives and friends. The buttons can become Christmas tree ornaments, snowmen, wreaths, or festive patterns. Using a sturdy card base helps prevent the finished design from bending.
What It Is
A handmade greeting card featuring buttons arranged into a Christmas picture, with a handwritten message inside. Each card can be unique and made for a particular person.
Supplies and Budget
- Blank cardstock: $2–$4
- Assorted buttons: $2–$4
- Craft glue: $2–$4
- Markers: $2–$4
- Ribbon or decorative paper: $2–$3
- Envelopes: $2–$3
Estimated budget: $12–$22 for several cards.
Tutorial how to make:
- Fold a piece of cardstock in half to create the card base.
- Draw a simple outline of a Christmas tree, wreath, snowman, or star on the front.
- Arrange the buttons over the outline before gluing them down.
- Use different button sizes and colors to create a playful design.
- Glue each button carefully and allow the card to dry flat.
- Add details with markers, such as a tree trunk, snowflakes, or decorative lines.
- Write a personal Christmas message inside the card.
- Place the finished card inside an envelope and add the recipient’s name.
DIY Tip
Arrange all buttons before applying glue. This makes it easier to balance the colors and avoid gaps. For very young children, use larger buttons with close adult supervision because small craft pieces can be choking hazards.
10. DIY Christmas Sock Snowman Gift
Description
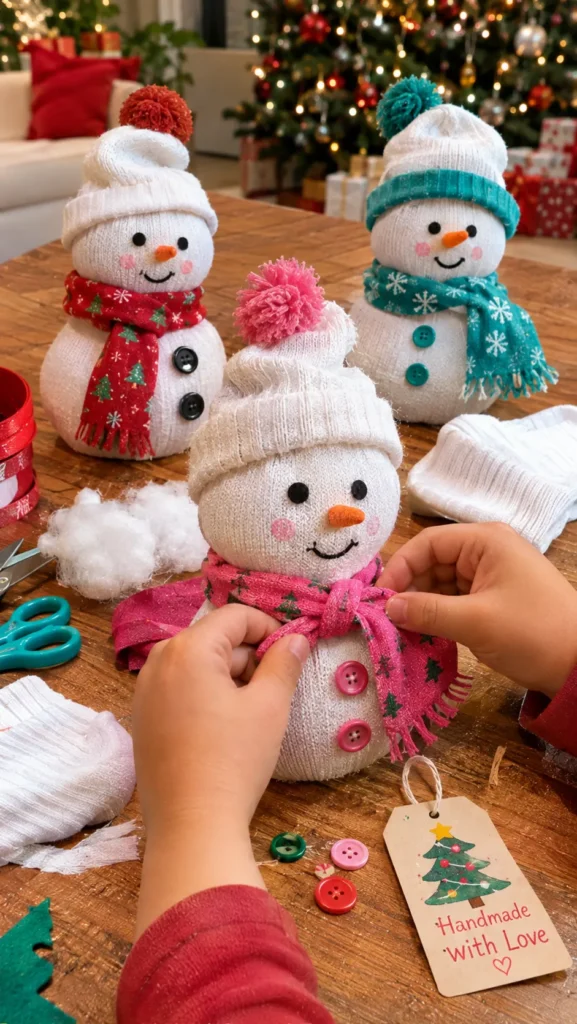
A handmade sock snowman is a playful little gift that children can create using an old clean sock, rice, and simple decorations. It makes a cute desk or shelf decoration for grandparents, teachers, or friends. Adult help is useful when securing the body and attaching small details.
What It Is
A soft decorative snowman made from a white sock filled with rice or suitable stuffing, shaped into a round body, and decorated with a fabric scarf, buttons, and a little hat.
Supplies and Budget
- Clean white sock: reuse one or buy a pair for $2–$3
- Rice or stuffing: $2–$3
- Rubber bands or strong thread: $1–$2
- Colored fabric scraps: $2–$4
- Buttons: $2–$3
- Felt or craft paper: $2–$3
- Craft glue: $2–$4
Estimated budget: $11–$22.
Tutorial how to make:
- Fill the lower part of the sock with rice or stuffing until it forms a rounded base.
- Secure the top of the filled section tightly with a strong rubber band or thread.
- Add more filling above the first section to create the snowman’s head.
- Secure the neck area to separate the head and body.
- Fold the remaining sock fabric down to create a simple hat.
- Cut a narrow strip of fabric and tie it around the neck as a scarf.
- Add eyes, buttons, and a small nose using suitable craft materials.
- Check that all decorations are firmly attached before wrapping the snowman as a gift.
DIY Tip
Stuff the snowman gradually rather than filling the sock all at once. This makes it easier to create a rounded shape with a clear head and body. Avoid loose small decorations when making gifts for very young children.
11. DIY Christmas Treat Jars with Handmade Labels
Description
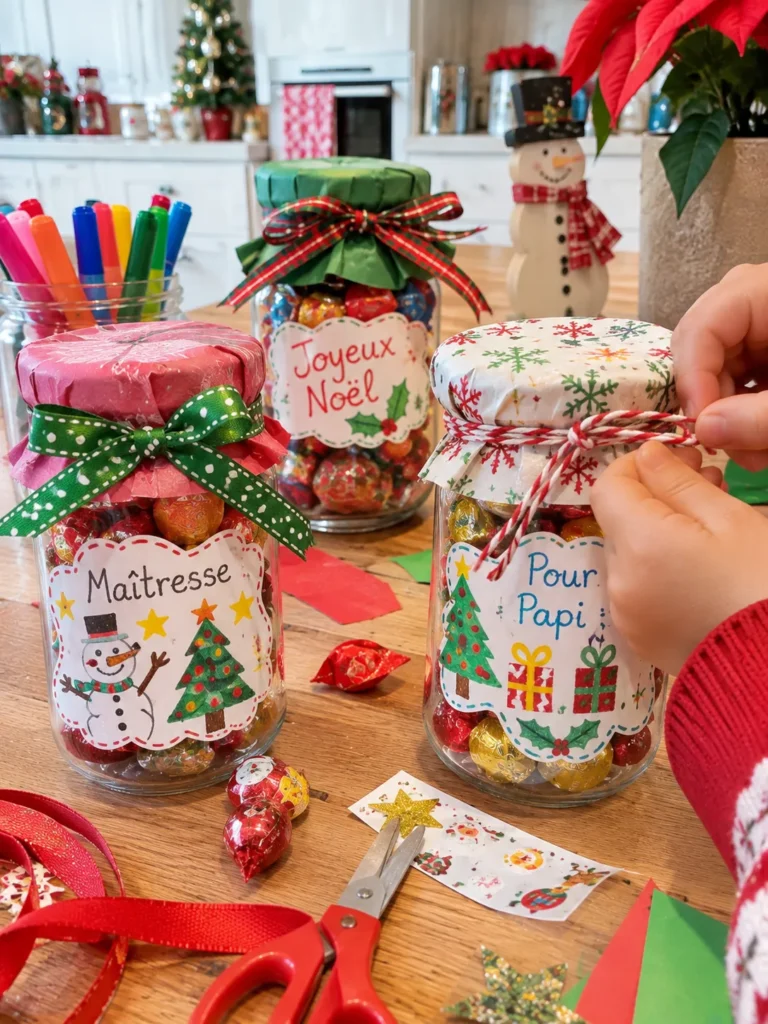
A homemade treat jar is a simple gift that children can personalize with colorful labels and ribbons. Fill it with wrapped sweets, hot chocolate ingredients, or other suitable treats. The jar looks more thoughtful when the child designs the label and writes a small message for the recipient.
What It Is
A clean glass or food-safe plastic jar filled with Christmas treats and decorated with a handmade label, ribbon, and festive artwork. It is a practical present for teachers, neighbors, relatives, or friends.
Supplies and Budget
- Clean jars with lids: free if reused
- Wrapped sweets or suitable treats: $4–$7
- Colored cardstock: $2–$3
- Markers: $2–$4
- Ribbon or twine: $2–$3
- Stickers: $2–$3
- Small gift tags: $1–$2
Estimated budget: $13–$22 per jar, depending on the treats.
Tutorial how to make:
- Wash the jar and lid thoroughly, then dry them completely.
- Choose treats that are appropriate for the recipient and check for common allergies.
- Fill the jar neatly, leaving a little space at the top.
- Cut a cardstock label into a rectangle, circle, or festive shape.
- Let children decorate the label with Christmas drawings, stickers, and the recipient’s name.
- Write a short message such as “A Little Christmas Treat” on the label.
- Attach the label to the jar using ribbon or a piece of string around the neck.
- Tie a bow around the lid and add a small gift tag.
DIY Tip
Use clean food-safe containers and individually wrapped treats whenever possible. If the jar is reused, make sure it has no cracks or damaged edges and that the lid closes properly.
12. Handmade Christmas Mini Gift Baskets
Description
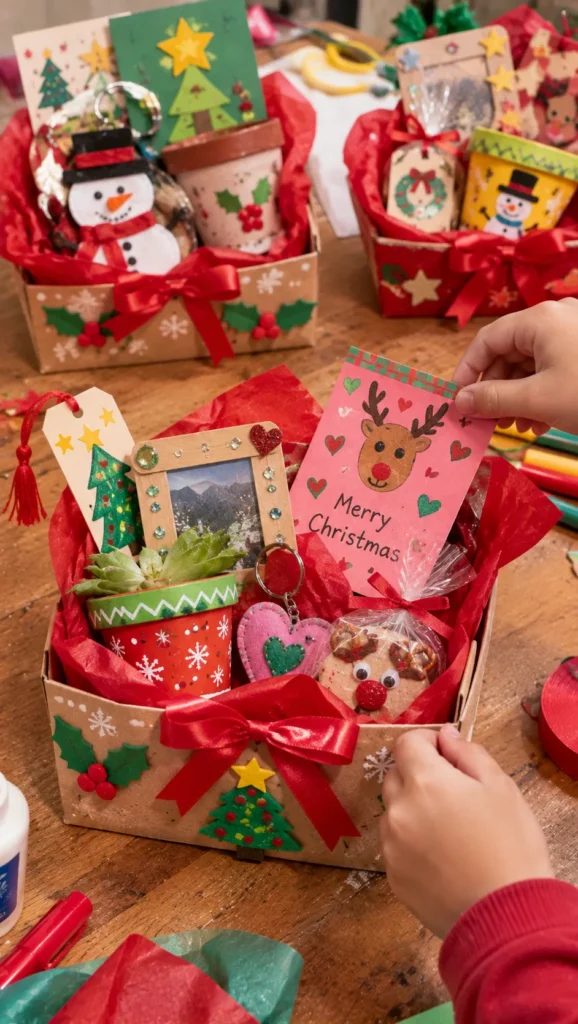
A mini Christmas gift basket lets children combine several small handmade creations into one thoughtful present. It is especially lovely for grandparents, teachers, or family friends. Choosing a simple color theme and arranging items at different heights makes even inexpensive gifts look carefully prepared.
What It Is
A small basket or decorated cardboard box filled with handmade Christmas items such as a bookmark, greeting card, ornament, treat jar, or small decoration. Children can choose what to include based on the recipient.
Supplies and Budget
- Small basket or cardboard box: $3–$5
- Tissue paper: $2–$3
- Ribbon: $2–$3
- Handmade crafts: varies depending on the projects
- Small wrapped treats: $2–$4
- Gift tag: $1–$2
Estimated budget: $10–$17, excluding the cost of making the included crafts.
Tutorial how to make:
- Choose a small basket or sturdy cardboard gift box.
- Pick two or three handmade crafts that fit comfortably inside.
- Add crumpled tissue paper to the bottom to create a soft base.
- Place the tallest item toward the back and smaller items toward the front.
- Fill empty spaces with additional tissue paper so the gifts stay in place.
- Add a small wrapped treat if appropriate for the recipient.
- Create a handmade gift tag with the child’s name and a Christmas message.
- Finish with a ribbon around the basket or box, making sure the contents remain easy to see.
DIY Tip
Do not overcrowd the basket with too many items. Two or three well-made crafts arranged neatly usually look more thoughtful than a box filled with unrelated decorations. Keep fragile items protected with tissue paper.
FAQ SECTION
What are the easiest Christmas gifts for kids to make?
Some of the easiest projects are handmade bookmarks, Christmas cards, decorated treat jars, photo frames, and gift tags. They require simple supplies and can be completed in one afternoon with minimal adult preparation.
What Christmas crafts can young children make as gifts?
Young children can decorate paper cards, paint flower pots, make simple bookmarks, create handprint ornaments, and decorate jars with adult supervision. Adults should handle sharp tools, hot glue, and any steps involving small pieces that could be swallowed.
How can I make homemade Christmas gifts look more personal?
Add the recipient’s name, a handwritten message, a family photograph, or the year. Let children choose colors and decorations that remind them of the person receiving the gift. These little details often make a simple craft feel much more meaningful.
How much should I spend on kids’ Christmas crafts?
Many projects can be made for around $5–$15 each, especially when you reuse cardboard, jars, fabric scraps, and leftover craft supplies. Buying materials in multipacks can also reduce the cost when making gifts for several people.
How far in advance should children make Christmas gifts?
Simple paper crafts can be completed a few days before Christmas, but projects involving clay, paint, glue, or salt dough need extra drying time. Starting one or two weeks early gives children time to finish their gifts without rushing.
How can I help kids make gifts without doing everything for them?
Prepare the materials, demonstrate the tricky steps, and let children make their own creative decisions. Their gifts do not need to look perfect. The personal touches and effort are what make handmade presents special.
RELATED CONTENT
- Christmas Tree Toppers Ideas DIY That Are Easy and Creative
- DIY Christmas Ornaments for a Handmade Tree
CLOSING
Making Christmas gifts with children is about so much more than creating something beautiful. It is about spending time together, sharing ideas, learning new skills, and giving children the chance to make something with their own hands. Even a simple bookmark or a little painted jar can become a special memory for the person who receives it.
I hope these 12 kids Christmas crafts for gifts inspire you to plan a fun afternoon of creativity with your little makers. Remember to let them experiment with colors, add their own personal touches, and enjoy the process instead of worrying about perfection.
I would love to know which craft your children enjoyed making the most. Have a wonderful, creative Christmas, and happy crafting!