12 Ceramic Ornaments Pottery Ideas with Beautiful Handmade Details

Ceramic Ornaments Pottery
Ceramic ornaments are a beautiful way to bring handmade charm, personality, and creativity into your home. Whether you love working with clay, decorating small objects, or experimenting with simple pottery techniques, these projects offer plenty of opportunities to create something truly personal. You don’t need a professional pottery studio or years of experience to get started. With a few basic supplies, some patience, and a little imagination, you can make decorative pieces that look lovely on shelves, walls, Christmas trees, gift packages, or coffee tables.
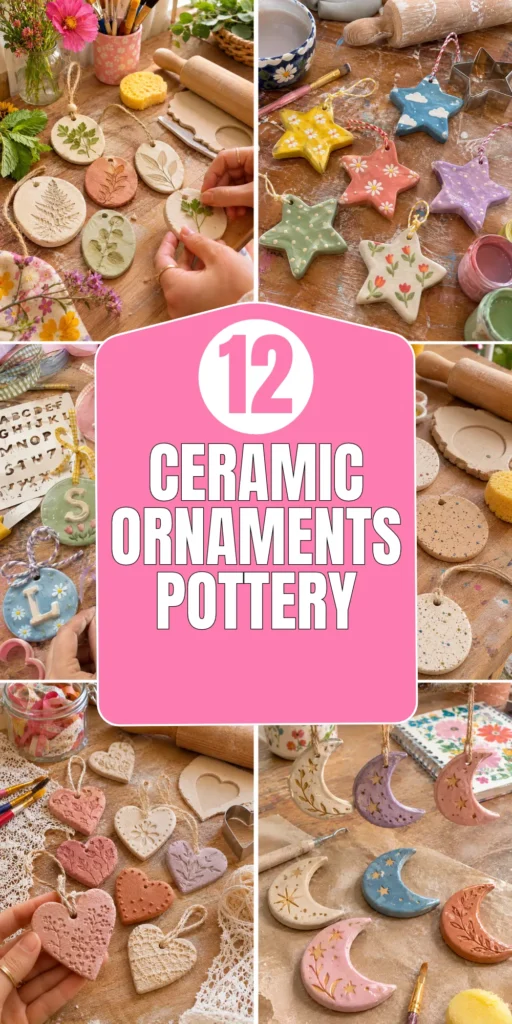
One of the best things about ceramic ornament projects is how easily you can customize them. You can experiment with colorful glazes, textured surfaces, botanical patterns, playful shapes, and simple hand-painted details. Some ideas are perfect for beginners using air-dry clay, while others are better suited to kiln-fired pottery. Below are 12 creative ceramic ornaments pottery ideas, with practical instructions and tips to help you achieve beautiful results without wasting materials.
1. Handmade Ceramic Star Ornaments
Description
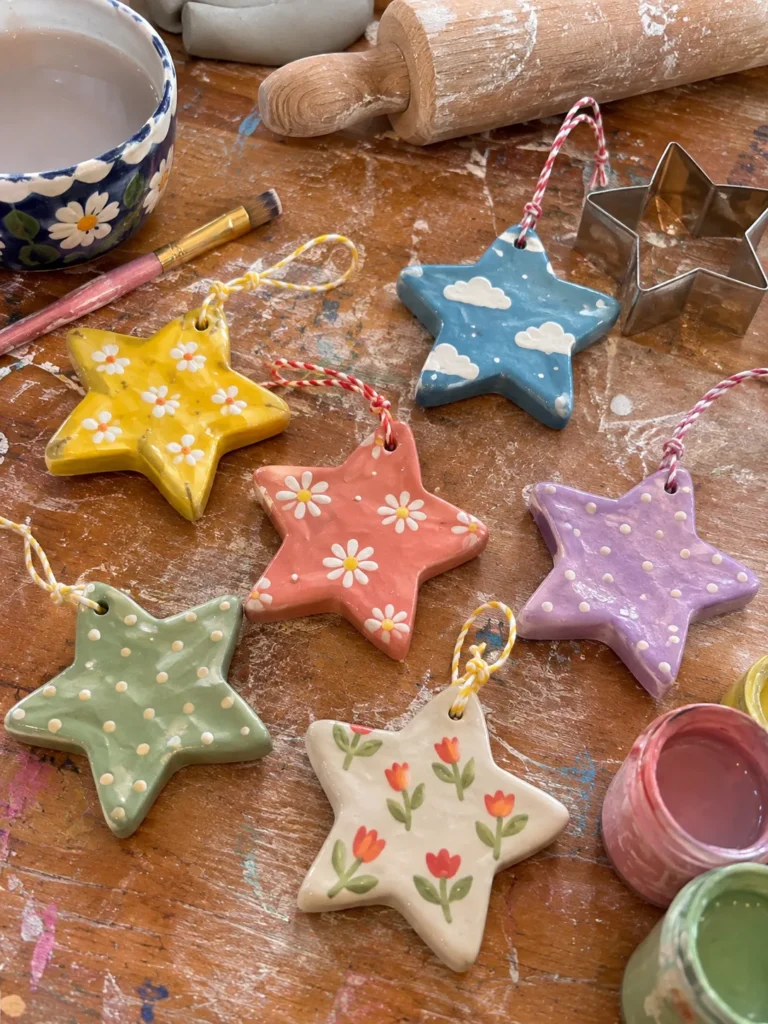
Ceramic star ornaments are simple, timeless decorations that work beautifully for holiday displays, handmade gifts, and everyday styling. Their clean shape makes them easy to personalize with textured surfaces, colorful glazes, or delicate painted details.
What It Is
These are small star-shaped clay decorations with a hanging hole near the top. You can leave them natural, paint them in cheerful colors, or finish them with a glossy ceramic glaze.
Supplies and Budget
- Air-dry clay or pottery clay
- Star-shaped cookie cutter
- Rolling pin
- Straw or small hole-making tool
- Acrylic paint or ceramic glaze
- Fine sandpaper
- Twine or ribbon
Estimated budget: $8–$18, depending on the clay and finishing materials.
Tutorial how to make:
- Roll your clay on a clean surface until it is approximately 5–7 mm thick. Keeping the thickness even helps prevent uneven drying and cracking.
- Press the star cutter firmly into the clay and carefully remove the surrounding material.
- Use a straw to make a hanging hole near the top, leaving enough clay around it to prevent breakage.
- Smooth rough edges with a slightly damp fingertip or soft sponge.
- Let air-dry clay dry according to the manufacturer’s instructions, turning the stars occasionally if needed.
- Once completely dry, lightly sand the edges and decorate with paint or an appropriate ceramic finish.
- Attach twine or ribbon after the ornament is fully dry.
DIY Tip
Avoid making the points too thin. They are the first areas likely to chip during handling, so slightly rounded star tips usually produce stronger ornaments.
2. Botanical Leaf-Imprint Ceramic Ornaments
Description
Botanical ornaments capture the delicate patterns of real leaves in clay. They bring a natural, handmade appearance to your decorations and look especially beautiful in earthy shades of green, cream, terracotta, and soft brown.

What It Is
These are flat clay ornaments decorated with impressions from real leaves, herbs, or small botanical cuttings. The natural veins create beautiful patterns without requiring advanced carving skills.
Supplies and Budget
- Pottery clay or air-dry clay
- Fresh leaves with visible veins
- Rolling pin
- Craft knife
- Small hole-making tool
- Sponge
- Paint or ceramic glaze
- Cotton string
Estimated budget: $8–$20.
Tutorial how to make:
- Roll the clay into an even sheet approximately 5–6 mm thick.
- Place a clean leaf on the surface, with its vein side facing down.
- Gently roll over the leaf to transfer its pattern without crushing the clay.
- Remove the leaf slowly using tweezers if necessary.
- Cut around the impression into an oval, circle, or natural leaf-inspired shape.
- Make a small hanging hole and smooth the edges.
- Allow the ornament to dry completely before applying your chosen finish.
DIY Tip
Choose leaves with strong, raised veins, such as fern, mint, or eucalyptus. Very delicate leaves may not transfer enough detail, especially when the clay is too firm.
3. Mini Ceramic Mushroom Ornaments
Description
Mini ceramic mushrooms add a playful woodland feeling to handmade decorations. Their rounded caps and tiny stems make them ideal for colorful collections, fairy-inspired displays, and charming handmade gifts.

What It Is
These are small three-dimensional mushroom decorations made by shaping separate clay pieces and joining them together. You can create realistic earthy mushrooms or imaginative versions with colorful spotted caps.
Supplies and Budget
- Pottery clay or air-dry clay
- Small sculpting tools
- Wooden skewer
- Water and soft sponge
- Acrylic paint or ceramic glaze
- Fine paintbrush
Estimated budget: $10–$22.
Tutorial how to make:
- Roll a small amount of clay into a ball for the mushroom cap.
- Shape another piece into a short, slightly tapered stem.
- Create a shallow opening underneath the cap so it sits naturally on the stem.
- Score both joining surfaces with a small tool, add a little clay slip if using pottery clay, and press them together securely.
- Smooth the connection carefully with a damp tool.
- Add tiny spots, lines, or texture to the cap using a skewer.
- Dry or fire the mushroom according to the clay type, then apply your chosen decoration.
DIY Tip
Don’t make the stem too narrow where it connects to the cap. A wider joining area creates a stronger ornament and reduces the chance of the pieces separating.
4. Personalized Ceramic Initial Ornaments
Description
Personalized ceramic initial ornaments make thoughtful gifts for birthdays, weddings, housewarmings, and seasonal celebrations. Each piece can feature a single letter, a name, or a small decorative detail that gives it a personal touch.

What It Is
These are small clay decorations shaped around individual letters. They can be simple flat initials or raised lettering attached to a rounded ceramic base.
Supplies and Budget
- Air-dry clay or pottery clay
- Letter cutters or alphabet templates
- Rolling pin
- Craft knife
- Small hole-making tool
- Paint or ceramic glaze
- Ribbon or twine
Estimated budget: $8–$18.
Tutorial how to make:
- Roll the clay into a sheet with an even thickness.
- Cut a circle, oval, or rounded rectangle to create the ornament base.
- Use a letter cutter or paper template to create the initial.
- If using raised lettering, score the back of the letter and the base, add slip when appropriate, and attach it carefully.
- Make a hanging hole before the clay dries.
- Smooth the edges and allow the piece to dry fully.
- Paint the initial in a contrasting color or use a simple decorative border.
DIY Tip
Keep raised letters relatively thick and avoid tiny decorative details. Small lettering can become difficult to attach securely and may lose its shape during drying.
5. Textured Ceramic Heart Ornaments
Description
Ceramic heart ornaments are lovely handmade decorations for Valentine’s Day, weddings, gifts, or year-round displays. Adding fabric, lace, or carved textures gives each heart a distinctive finish without making the project complicated.

What It Is
These are heart-shaped clay decorations featuring embossed patterns, carved lines, or simple painted details. They can be finished in soft pink, cream, terracotta, or muted red.
Supplies and Budget
- Pottery clay or air-dry clay
- Heart-shaped cutter
- Rolling pin
- Lace fabric or textured material
- Small straw
- Sponge
- Paint or ceramic glaze
- Twine
Estimated budget: $8–$17.
Tutorial how to make:
- Roll your clay into a sheet approximately 5–6 mm thick.
- Cut out several hearts using a cookie cutter.
- Press a piece of lace or textured fabric gently onto the clay to create an embossed pattern.
- Lift the material slowly to avoid pulling the clay.
- Use a straw to create a hanging hole and smooth the edges.
- Allow the hearts to dry or fire them according to your clay instructions.
- Finish with a soft color, leaving some areas natural if you want the texture to stand out.
DIY Tip
Test your lace pattern on a small leftover clay piece first. Some fabrics leave very deep impressions that can weaken thin sections of the ornament.
6. Mini Ceramic House Ornaments
Description
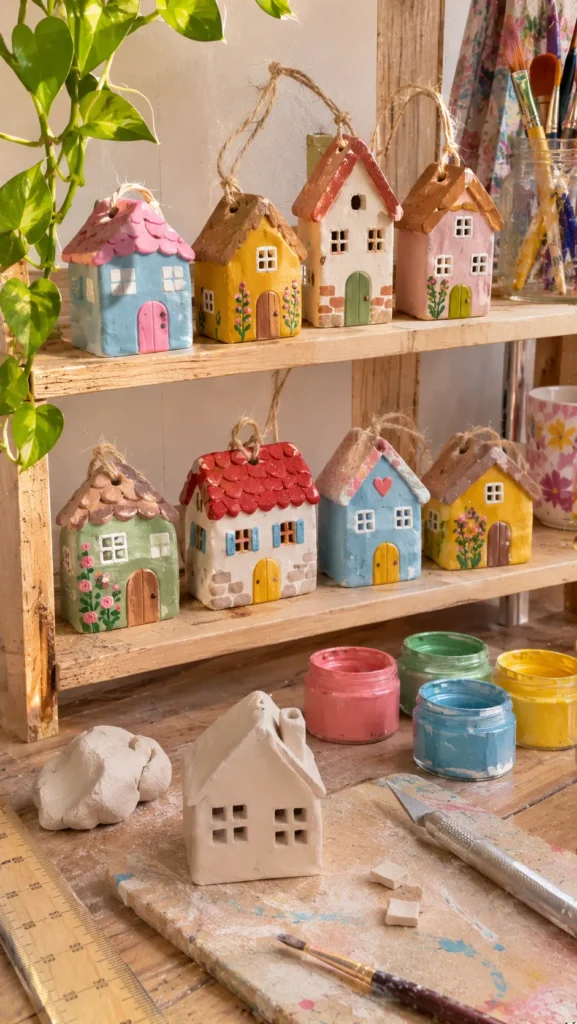
Mini ceramic house ornaments create a cozy village-inspired look that works beautifully on shelves, mantels, and seasonal displays. Small windows, doors, and roof details make each little house feel unique and full of character.
What It Is
These are miniature house-shaped clay decorations, either flat or slightly three-dimensional. Their simple architecture makes them easy to customize with painted doors, textured roofs, and tiny windows.
Supplies and Budget
- Pottery clay or air-dry clay
- Craft knife
- Small sculpting tools
- Ruler
- Wooden skewer
- Paint or ceramic glaze
- Twine
Estimated budget: $10–$22.
Tutorial how to make:
- Roll the clay into an even sheet and cut a simple house silhouette with a rectangular body and triangular roof.
- Use a ruler to keep the walls and roof balanced.
- Press small windows and a door into the surface using sculpting tools.
- Add roof lines, brick details, or a tiny chimney if desired.
- Make a hanging hole in the upper section.
- Smooth the edges and let the ornament dry completely.
- Paint the house with a simple combination of cream, brown, muted red, or pastel shades.
DIY Tip
Keep the roof and walls reasonably thick and balanced. Thin roof points can break easily, especially when you are sanding or handling the ornament.
7. Colorful Ceramic Rainbow Ornaments
Description
Rainbow ceramic ornaments bring a cheerful burst of color to craft collections and children’s rooms. Their layered curved shapes offer an easy way to experiment with color combinations while creating a playful handmade decoration.

What It Is
These are small rainbow-shaped clay ornaments with raised or painted bands. You can make them in traditional rainbow colors or choose a softer palette of pastel pink, yellow, blue, and green.
Supplies and Budget
- Air-dry clay or pottery clay
- Rolling pin
- Craft knife
- Paper rainbow template
- Small hole-making tool
- Paint or ceramic glaze
- Fine paintbrush
Estimated budget: $8–$18.
Tutorial how to make:
- Draw or print a simple rainbow template with broad, evenly spaced arches.
- Roll the clay to approximately 6 mm thick.
- Place the template on top and cut around the outer rainbow shape.
- Carefully mark the curved bands using a sculpting tool without cutting through the clay.
- Make a hanging hole near the top, leaving enough material around it.
- Smooth the edges and dry the piece slowly.
- Paint each band in a different color, allowing each layer to dry before adding the next.
DIY Tip
Use a limited palette of three or four complementary colors. Too many strong shades can make a small ornament look visually crowded.
8. Pressed Flower Ceramic Ornaments
Description
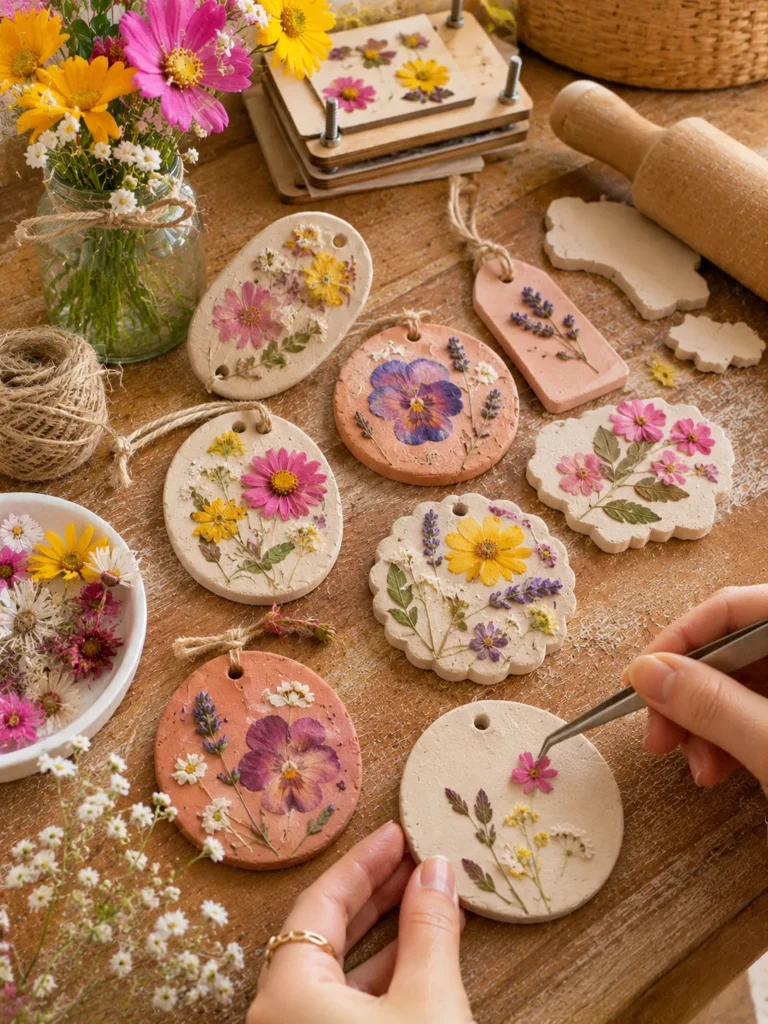
Pressed flower ceramic ornaments preserve the delicate beauty of natural botanicals in a handmade decoration. Their soft floral details look beautiful on gift packages, decorative branches, and small wall displays.
What It Is
These are clay ornaments decorated with pressed flowers or delicate botanical impressions. Depending on the technique, flowers can be embedded into the surface or used to create an imprint.
Supplies and Budget
- Pottery clay or air-dry clay
- Fully dried pressed flowers
- Rolling pin
- Tweezers
- Small hole-making tool
- Soft brush
- Suitable clear finish
Estimated budget: $10–$20.
Tutorial how to make:
- Roll the clay into an even sheet and cut out circles, ovals, or other simple shapes.
- Arrange small pressed flowers on the surface using tweezers.
- Gently press them into the clay without pushing them completely underneath.
- If using a botanical imprint instead, press a flower gently into the clay and lift it away.
- Make a hanging hole before the clay becomes too firm.
- Dry or fire the ornament according to the clay and decoration materials used.
- Apply a compatible finish only if the materials and intended firing process allow it.
DIY Tip
Natural flowers can change color or burn during kiln firing. For kiln-fired pieces, use suitable ceramic decals or approved ceramic decoration materials rather than ordinary dried flowers.
9. Minimalist Ceramic Moon Ornaments
Description
Ceramic moon ornaments are elegant, understated decorations that suit modern, bohemian, and celestial-inspired interiors. Their simple curved silhouettes look especially beautiful with matte finishes, subtle textures, and warm neutral colors.
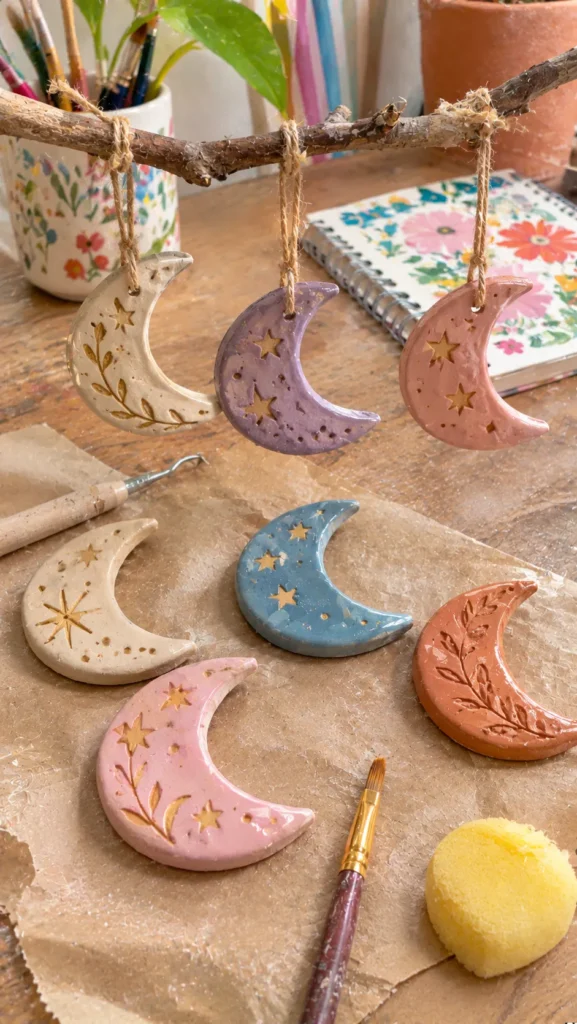
What It Is
These are crescent-shaped clay ornaments decorated with tiny stars, dots, or delicate carved lines. They can be left natural or finished in cream, sand, soft grey, or muted gold.
Supplies and Budget
- Pottery clay or air-dry clay
- Crescent moon template
- Craft knife
- Rolling pin
- Small sculpting tool
- Paint or ceramic glaze
- Twine
Estimated budget: $8–$17.
Tutorial how to make:
- Roll your clay evenly and place a crescent-shaped template on top.
- Cut carefully around the outline with a craft knife.
- Smooth the inner and outer curves with a damp sponge.
- Add tiny stars, dots, or shallow carved lines.
- Make a small hanging hole near one upper point, leaving enough material to support it.
- Let the ornament dry slowly and completely.
- Apply a matte or glossy finish depending on the style you prefer.
DIY Tip
Avoid making the crescent tips extremely sharp. Slightly rounded ends are stronger and less likely to chip while drying or hanging.
10. Ceramic Fruit-Shaped Ornaments
Description
Fruit-shaped ceramic ornaments add a playful, colorful touch to kitchens, craft displays, and seasonal decorations. Small strawberries, lemons, pears, and oranges are especially charming when made with simple shapes and realistic surface details.
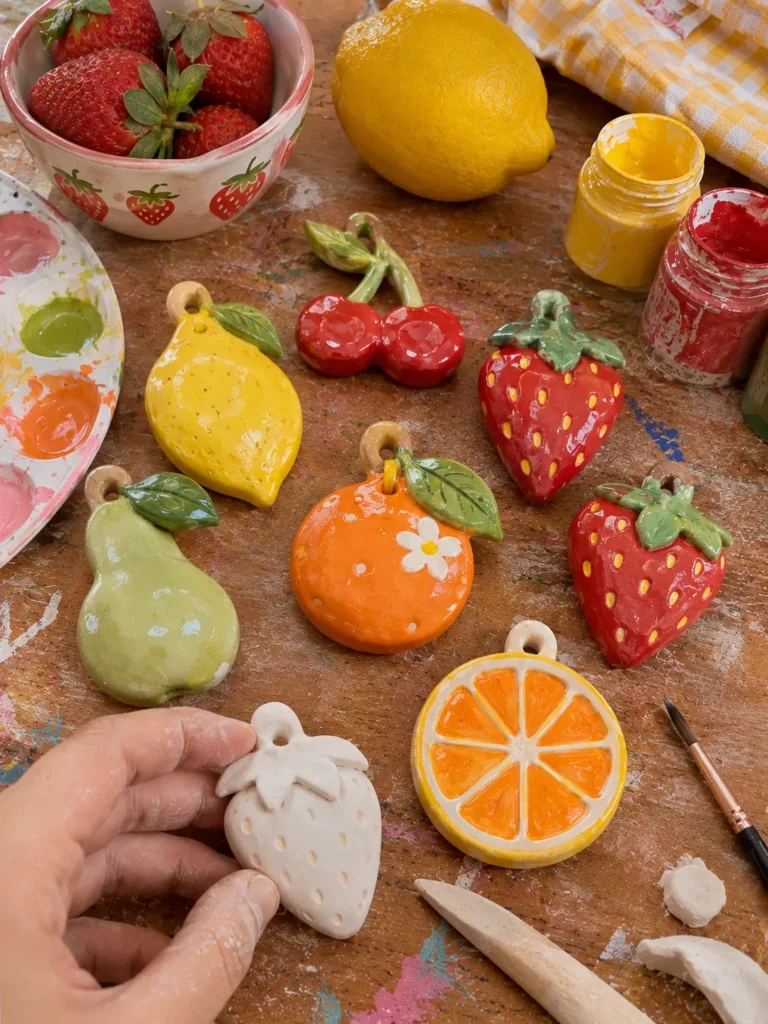
What It Is
These are small clay decorations sculpted into fruit shapes. Their appeal comes from rounded forms, tiny leaves, textured surfaces, and cheerful colors.
Supplies and Budget
- Pottery clay or air-dry clay
- Sculpting tools
- Wooden skewer
- Small leaf-shaped cutter
- Paint or ceramic glaze
- Fine paintbrush
- Twine
Estimated budget: $10–$22.
Tutorial how to make:
- Choose one fruit shape and form the main body by hand.
- Roll and smooth the clay until the shape looks balanced.
- Add small details, such as strawberry seeds, lemon dimples, or a pear stem.
- Create tiny leaves separately and attach them securely using suitable joining techniques.
- Add a hanging hole or a small attachment point before the clay dries.
- Dry or fire the ornament according to the clay instructions.
- Paint with natural fruit-inspired colors and add small highlights for dimension.
DIY Tip
Look at real fruit while shaping your ornaments. Natural fruit is rarely perfectly symmetrical, so small variations make handmade pieces more convincing.
11. Speckled Ceramic Circle Ornaments
Description
Speckled ceramic circle ornaments are a simple way to create a coordinated handmade collection. Their neutral surfaces and tiny contrasting marks make them easy to combine with colorful decorations, natural materials, and modern home accessories.

What It Is
These are round clay ornaments with a speckled surface created using ceramic materials or decorative techniques suitable for the clay type. They can be finished in cream, beige, soft grey, or warm terracotta.
Supplies and Budget
- Pottery clay or air-dry clay
- Round cutter
- Rolling pin
- Small hole-making tool
- Ceramic glaze or suitable paint
- Fine brush or approved speckling material
- Twine
Estimated budget: $8–$20.
Tutorial how to make:
- Roll your clay to an even thickness and cut several circles.
- Smooth the edges and make a hanging hole near the top.
- Allow the pieces to dry or complete the first firing if using pottery clay.
- Apply a suitable base glaze or paint in your chosen color.
- Add small speckles using a compatible ceramic decorating technique.
- Complete the final firing when working with kiln-fired clay, following the glaze manufacturer’s instructions.
- Let the pieces cool completely before attaching their hanging strings.
DIY Tip
Keep the speckles small and randomly distributed. Large, evenly spaced dots can make the finish look less natural and distract from the simple ceramic shape.
12. Hand-Painted Ceramic Sun Ornaments
Description
Hand-painted ceramic sun ornaments bring warmth and personality to handmade decor. Their cheerful faces, radiating lines, and bright colors make them lovely additions to craft collections, children’s spaces, and colorful seasonal displays.

What It Is
These are round or slightly irregular clay ornaments decorated with sun rays and optional smiling faces. You can create a simple modern sun or a more playful vintage-inspired design.
Supplies and Budget
- Pottery clay or air-dry clay
- Round cutter or circular template
- Sculpting tool
- Rolling pin
- Paint or ceramic glaze
- Fine paintbrush
- Twine
Estimated budget: $8–$20.
Tutorial how to make:
- Roll the clay into a sheet approximately 6 mm thick.
- Cut a circle or shape a slightly irregular sun by hand.
- Form small rays around the edge, attaching them carefully if they are made separately.
- Use a sculpting tool to add a simple face or carved sun details.
- Make a hanging hole before the clay dries.
- Once completely dry or fired, paint the sun with warm yellow, orange, coral, or soft cream.
- Add fine facial details with a small brush and finish using a compatible protective coating if needed.
DIY Tip
Use a fine brush for facial details and let the base color dry completely first. Painting too quickly can cause colors to mix and make small features look messy.
FAQ SECTION
Can beginners make ceramic ornaments at home?
Yes. Beginners can start with air-dry clay because it does not require a kiln. It is suitable for decorative ornaments, although it is not the same as kiln-fired ceramic pottery and generally needs protection from moisture.
What is the best clay for making ceramic ornaments?
Pottery clay is a good choice if you have access to a kiln and want durable fired pieces. Air-dry clay is more convenient for simple home projects. Always choose materials based on the intended finish and follow the manufacturer’s instructions.
How thick should ceramic ornaments be?
Most small flat ornaments work well at approximately 5–7 mm thick. Very thin pieces can break easily, while overly thick pieces take longer to dry and may develop cracks if they dry unevenly.
How do you prevent clay ornaments from cracking?
Use an even thickness, avoid adding too much water, smooth sharp edges, and allow pieces to dry gradually. For air-dry clay, follow the recommended drying time and turn flat pieces when appropriate. For pottery clay, follow the clay body’s drying and firing requirements.
Can ceramic ornaments be painted?
Yes. Air-dry clay can usually be painted with acrylic paint once fully dry. Kiln-fired pottery requires compatible ceramic underglazes, glazes, or other approved ceramic decorating materials and the correct firing process.
How do you attach strings to clay ornaments?
The easiest method is to make a hanging hole while the clay is still workable. Position it far enough from the edge to leave a strong section of clay around it. Add ribbon, twine, or cord after the ornament is completely dry and finished.
Are air-dry clay ornaments waterproof?
Not automatically. Most air-dry clay remains vulnerable to moisture, even when painted. A suitable sealant may improve protection, but it does not make every air-dry clay project fully waterproof or food-safe.
What can I do with leftover clay?
Store reusable clay according to its manufacturer’s instructions. You can also use small leftovers to make beads, miniature flowers, textured samples, tiny charms, or test pieces for experimenting with colors and finishes.
RELATED CONTENT
CLOSING
Making ceramic ornaments is a lovely way to slow down, experiment with different materials, and create decorations that reflect your own personality. You can start with one simple project, learn how the clay behaves, and gradually try more detailed shapes and finishes as your confidence grows.
Remember that handmade pottery doesn’t need to look perfectly identical to be beautiful. Small differences in shape, texture, and color are often what make each piece special. Take your time, enjoy the process, and don’t be afraid to experiment with your own ideas.
I hope these 12 ceramic ornaments pottery ideas inspire you to get creative and make something beautiful. Pick your favorite project, gather your supplies, and give it a try. I’d love to see which ornament you make first and how you personalize it!